Toshiba 72MX195 Owner's Manual - English
Toshiba 72MX195 - 72" Rear Projection TV Manual
 |
UPC - 022265251232
View all Toshiba 72MX195 manuals
Add to My Manuals
Save this manual to your list of manuals |
Toshiba 72MX195 manual content summary:
- Toshiba 72MX195 | Owner's Manual - English - Page 1
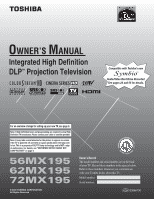
OWNER'S MANUAL Integrated High Definition DLP™ Projection Television HIGH-DEFINITION TELEVISION Compatible with Toshiba's new TM Audio/Video Hard Drive Recorder! See pages 26 and 55 for details. For an overview of steps for setting up your new TV, see page 9. Note: A high definition tuner and - Toshiba 72MX195 | Owner's Manual - English - Page 2
TV STAND INSTABILITY CAUTION: This television is for use only with the Toshiba stand listed below. Use with other carts or stands is capable of resulting in instability causing possible injury. Television Stand Model 56MX195 ST 5695 62MX195 ST 6295 72MX195 ST 7295 NOTE TO CATV INSTALLERS - Toshiba 72MX195 | Owner's Manual - English - Page 3
a lamp to project the picture, and requires special safety precautions: • See pages 128-130 for instructions on lamp unit replacement and care. • DO NOT attempt to service this product except as specified on pages 128-130. The only userserviceable item in this product is the lamp unit. Installation - Toshiba 72MX195 | Owner's Manual - English - Page 4
injury. Refer all servicing not specified in this manual to a Toshiba Authorized Service Center. 37) If you have the TV serviced: • Ask the service technician to use only replacement parts specified by the manufacturer. • Upon completion of service, ask the service technician to perform routine - Toshiba 72MX195 | Owner's Manual - English - Page 5
will blink (and the blue LED will be lit solid) until the TV is finished restarting the lamp and the normal picture appears. If BOTH yellow and blue LEDs are blinking at a one-second rate, you will need to turn the TV off and then on again to restart the lamp. Copyright © 2005 TOSHIBA CORPORATION - Toshiba 72MX195 | Owner's Manual - English - Page 6
, and service information 2-4 FCC Declaration of Conformity Compliance Statement (Part 15 5 Important notes about your DLP™ projection TV 5 Chapter 1: Introduction 8 Welcome to Toshiba 8 Features of your new TV 8 Overview of steps for installing, setting up, and using your new TV 9 Chapter - Toshiba 72MX195 | Owner's Manual - English - Page 7
119 Home network troubleshooting 122 LED indications 124 TV Guide On Screen™ FAQ 125-127 Chapter 13: Appendix 128 Lamp unit replacement 128-130 Specifications 131 Limited United States Warranty 132 Limited Canada Warranty 133 Index 135 Copyright © 2005 TOSHIBA CORPORATION. All rights - Toshiba 72MX195 | Owner's Manual - English - Page 8
of your new Toshiba widescreen, integrated HD, DLP™ projection TV: • Integrated digital tuning (8VSB ATSC and QAM) eliminates the need for a separate digital converter set-top box (in most cases). • TV Guide On Screen™ no-fee interactive program guide (Chapters 5 and 7). • Digital CableCARD™ slot - Toshiba 72MX195 | Owner's Manual - English - Page 9
see Chapter 11. 20. For help, refer to the Troubleshooting Guide (Chapter 12). 21. For lamp unit replacement instructions, see Chapter 13. 22. For technical specifications and warranty information, see Chapter 13. 23. Enjoy your new TV! Copyright © 2005 TOSHIBA CORPORATION. All rights reserved. 9 - Toshiba 72MX195 | Owner's Manual - English - Page 10
- Press to access the TV Guide On Screen™ program guide. (See Chapter 7 for details on using the program guide.) 0 Blue and Yellow LEDs When the blue LED lights solid (not blinking), it indicates that the TV power cord is plugged in. When the yellow LED lights solid (not blinking), it indicates that - Toshiba 72MX195 | Owner's Manual - English - Page 11
devices using the TV's IR pass-through or TheaterNet™ (on-screen device control) features optical audio input. See page 24. 9 CableCARD™ slot - For use with a digital security card and digital cable TV service CableCARD is a trademark of Cable Television Laboratories, Inc. Copyright © 2005 TOSHIBA - Toshiba 72MX195 | Owner's Manual - English - Page 12
the enclosed IR blaster/ G-LINK™ cables to enable the TV Guide On Screen™ recording features. See page 28. !£ IEEE1394 - Two bi TV to your home network. See boxed note below. *THINC™ system (Toshiba Home Interactive Network Connection) The RJ-45 (Ethernet) port allows your Toshiba Cinema Series TV - Toshiba 72MX195 | Owner's Manual - English - Page 13
cable or the picture performance will be unacceptable. ● Component video cables come in sets of three and are for use with video devices with component video output. (ColorStream® is Toshiba's brand of component video.) These cables are typically color-coded red, green, and blue. Separate audio - Toshiba 72MX195 | Owner's Manual - English - Page 14
devices, refer to each device's owner's manual. Connecting a digital CableCARD™ This digital television is capable of receiving analog basic TV Guide On Screen Audio Player Picture Viewer Digital CC/Audio Selector CableCARD IP Service Conditional Access CableCARD(tm) Status Network Setup CableCARD - Toshiba 72MX195 | Owner's Manual - English - Page 15
instructions on page 28. 2. Make sure the VCR is connected to the A/V OUT terminals on the TV (see illustration). 3. Set the VCR to the appropriate line input (refer to your VCR owner's manual for details), and then turn OFF the VCR. 4. See Chapter 5 for details on setting up the TV Guide On Screen - Toshiba 72MX195 | Owner's Manual - English - Page 16
VCR to the appropriate line input (refer to your VCR owner's manual for details), and then turn OFF the VCR. 4. See Chapter 5 for details on setting up the TV Guide On Screen™ system. 5. See Chapter 7 for details on using the TV Guide On Screen™ system. 16 Copyright © 2005 TOSHIBA CORPORATION. All - Toshiba 72MX195 | Owner's Manual - English - Page 17
instructions on page 28. 2. Make sure the VCR is connected to the A/V OUT terminals on the TV (see illustration). 3. Set the VCR to the appropriate line input (refer to your VCR owner's manual for details), and then turn OFF the VCR. 4. See Chapter 5 for details on setting up the TV Guide On Screen - Toshiba 72MX195 | Owner's Manual - English - Page 18
VCR to the appropriate line input (refer to your VCR owner's manual for details), and then turn OFF the VCR. 4. See Chapter 5 for details on setting up the TV Guide On Screen™ system. 5. See Chapter 7 for details on using the TV Guide On Screen™ system. 18 Copyright © 2005 TOSHIBA CORPORATION. All - Toshiba 72MX195 | Owner's Manual - English - Page 19
to the appropriate line input (refer to your VCR owner's manual for details), and then turn OFF the VCR. 4. See Chapter 5 for details on setting up the TV Guide On Screen™ system. 5. See Chapter 7 for details on using the TV Guide On Screen™ system. Copyright © 2005 TOSHIBA CORPORATION. All rights - Toshiba 72MX195 | Owner's Manual - English - Page 20
revision of television programs, line input (refer to your VCR owner's manual for details), and then turn OFF the VCR. 4. See Chapter 5 for details on setting up the TV Guide On Screen™ system. 5. See Chapter 7 for details on using the TV Guide On Screen™ system. 20 Copyright © 2005 TOSHIBA - Toshiba 72MX195 | Owner's Manual - English - Page 21
TV on page 55. HDMI device TV VIDEO AUDIO L R IN turning on your electronic components, turn on the TV first, and then the HDMI or DVI device. • When turning off your electronic components, turn off the HDMI or DVI device first, and then the TV IN L R OUT R TV ___________ HDMI, the HDMI - Toshiba 72MX195 | Owner's Manual - English - Page 22
operate the device, you also will need to use the TV's remote control to operate the TV. • For additional control options, see "TheaterNet on-screen device control" on the next page. *If you cannot locate the device's infrared sensor: 1. Turn OFF the device. 2. Starting at the lower left corner of - Toshiba 72MX195 | Owner's Manual - English - Page 23
device functions available when the icons are on-screen. To access other device functions, close the TheaterNet icon window. OUT IN Back of IR receiver/repeater or home theater control system* (not included) With this connection, point the Toshiba TV remote control at the front of the IR receiver - Toshiba 72MX195 | Owner's Manual - English - Page 24
or other digital audio system LINE IN LR Optical Audio IN TV Note: • Some audio systems may not be compatible with Dolby Digital bitstream signals. Older audio systems that are not compatible with standard optical out signals may not work properly, creating a high noise level that may damage - Toshiba 72MX195 | Owner's Manual - English - Page 25
). TV back panel Supported signals The IEEE1394 ports support only the signals listed below -screen device control You can use the TheaterNet feature to control some IEEE1394 devices using on-screen control TV's remote control (page 22). Copyright © 2005 TOSHIBA CORPORATION. All rights reserved. 25 - Toshiba 72MX195 | Owner's Manual - English - Page 26
Customer Service at 1-800-268-3404. IEEE1394 device initialization When you connect a new IEEE1394 device to the TV and turn it on, the device immediately announces its presence to the TV (and other networked IEEE1394 devices, if any), and the following device initialization screen automatically - Toshiba 72MX195 | Owner's Manual - English - Page 27
. If your device is not marked with an "S" number, look in the device's user manual or call the device manufacturer's technical support number. • If your IEEE1394 device has a two-position power switch, always place the device at the end of the chain and turn ON the power switch when any device is - Toshiba 72MX195 | Owner's Manual - English - Page 28
to the G-LINK™ terminal to receive the TV Guide On Screen™ program listings for your Cable service. • If you have a VCR, you turn on, move the remote control slightly to the right and press POWER again. 5. Repeat step 4 until you locate the device's infrared sensor. 28 Copyright © 2005 TOSHIBA - Toshiba 72MX195 | Owner's Manual - English - Page 29
PC) This connection allows you to view the image of a personal computer (PC) on the TV screen. When connecting a PC to the TV, use an analog RGB (15-pin) computer cable and a PC audio cable. - To use to pause during multi-angle scenes. Copyright © 2005 TOSHIBA CORPORATION. All rights reserved. 29 - Toshiba 72MX195 | Owner's Manual - English - Page 30
service. • See Chapter 2 for recording device connection instructions. See Chapters 10 and 11 for details on configuring and using e-mail scheduling, file sharing, the JPEG Picture Viewer, and the MP3 Audio Player. Note: • The TV [2] Your router/switch may be part of your DSL or cable modem. - Toshiba 72MX195 | Owner's Manual - English - Page 31
chart on pages 34-35. For a list of the buttons that operate the TV Guide On Screen™ system, see page 59. POWER turns the TV on and off. Press POWER to turn on the TV. The blue LED indicator on the TV front will be illuminated. Press POWER again to turn off the TV. Note: The Quick Restart™ setting - Toshiba 72MX195 | Owner's Manual - English - Page 32
). MUTE reduces or turns off the sound (page 89). TV/VCR selects TV mode to view one program while recording another. SKIP SS| and |TT jump forward and backward one day in the TV Guide On Screen™ listings (Chapter 7). LIST displays the Toshiba Symbio™ AVHD recorder play list (if available) (page - Toshiba 72MX195 | Owner's Manual - English - Page 33
control. 2. Install two "AA" TV Toshiba TV 2) CBL/SAT 3) VCR/PVR 4) DVD Multi-brand video/audio devices 5) AUDIO 1 6) AUDIO 2 You can directly select the device mode by pressing the corresponding number button (1-6) while pressing the MODE button. Number (1-6) MODE Note: Although your new TV - Toshiba 72MX195 | Owner's Manual - English - Page 34
/down*2 CH RTN/ Previous Previous Previous --- DVD --- --- --- DVD RTN channel channel channel return Live Live --- --- --- --- --- --- Live TV RECALL On-screen --- --- --- On-screen --- --- --- display display 34 Copyright © 2005 TOSHIBA CORPORATION. All rights reserved. - Toshiba 72MX195 | Owner's Manual - English - Page 35
--- SPLIT Split TV TV TV TV TV TV TV PIC MODE PIC MODE TV TV TV TV TV TV TV FAV SCAN FAV SCAN --- --- --- --- --- --- --- FREEZE Freeze TV TV TV TV TV TV TV Notes key does not send a signal in that remote control mode. •" TV" = key will affect the TV, even though - Toshiba 72MX195 | Owner's Manual - English - Page 36
the device (CBL/SAT, VCR/PVR, DVD, AUDIO 1, AUDIO 2) lights up. 3. While holding down the RECALL button, press the Channel Number buttons to enter the four-digit code for your brand of device. If a valid code is entered, the mode indicator will blink twice. If an invalid code is entered, the mode - Toshiba 72MX195 | Owner's Manual - English - Page 37
down RECALL, press 8 - 0 - 0 - 0. 2. Press VOL z. The mode light will blink four TV." To reset the features: While holding down the RECALL button, press 8 -9 -0 - 0. The Mode indicator will blink two times, and then pause and blink two more times. Numbers MODE VOL yz RECALL Copyright © 2005 TOSHIBA - Toshiba 72MX195 | Owner's Manual - English - Page 38
0174, 0176, 0183 REALISTIC 0124, 0105, 0136, 0109, 0140, 0127 Replay TV 7102 SAMSUNG 0137, 0102, 0104, 0133 SAMTRON 0163 SANSUI 0139, 0126, 0120 TEKNICA 0124, 0127, 0112 THOMSON 0179, 0183 Tivo 7100, 7101 TOSHIBA 0101, 0146, 0166, 0160 VECTOR RESEARCH 0111 WARDS 0135, 0136, - Toshiba 72MX195 | Owner's Manual - English - Page 39
, 4133 4101, 4102 Laser disks Brand DENON HITACHI KENWOOD MAGNAVOX MARANTZ MITSUBISHI NEC PANASONIC PHILIPS PIONEER PROSCAN QUASAR RCA SAMSUNG SANYO SHARP SONY TEAC TOSHIBA YAMAHA Code 5114 5100 5102, 5103 5101 5114 5114, 5118, 5119 5114 5104, 5105, 5106, 5115 5111 5114 5114 5104, 5105, 5106, 5115 - Toshiba 72MX195 | Owner's Manual - English - Page 40
remote control or TV control panel. Applications ➞ TV Guide On Screen™ ➞ Launch Gemstar / TV GUIDE ➞ Audio Player ➞ Launch MP3 audio player ➞ Picture Viewer ➞ Launch the picture viewer ➞ Digital CC / Audio Selector ➞ Launch the ATSC Digital CC Selector ➞ CableCARD™ ➞ Dynamic list of items provided - Toshiba 72MX195 | Owner's Manual - English - Page 41
"Installation" sub-menu ➔ Terrestrial ➞ Input Configuration ➞ [ Input Configuration Window ] } ➞ Channel Program ➞ ANT1 ➞ [ Scan for new channels mail Scheduling Setup ➞ Home File Server Setup TV Guide On Screen™ Setup ➞ Start ➞ [ Launches TV Guide On Screen™ system setup ] Time and Date ➞ - Toshiba 72MX195 | Owner's Manual - English - Page 42
for your area. The listings are automatically updated several times a day. Note: • You must first set up your TV according to the applicable connection instructions in Chapter 2. • If you connected a Toshiba AVHD Recorder, you must perform the following TV Guide On Screen™ system setup in - Toshiba 72MX195 | Owner's Manual - English - Page 43
Chapter 5: TV Guide On Screen™ setup Setting up the TV Guide On Screen™ system (continued) Screen 5: Which TV input is your cable box plugged into? If you select ANT 1, screen 6 appears. If you select Video 1, screen 7 appears. Screen 9: To allow the TV Guide On Screen™ system to find the correct - Toshiba 72MX195 | Owner's Manual - English - Page 44
: Congratulations! You have completed basic TV Guide On Screen™ system setup. Note: Read the on-screen information regarding the amount of time it may take for listing information to download from the TV Guide On Screen™ service. Press ENTER to display screen 15. Screen 18: Turn on your VCR, insert - Toshiba 72MX195 | Owner's Manual - English - Page 45
appears. TV Guide On Screen™ Reminder The TV Guide On Screen™ system receives program listing data through your Cable or over-the-air video signal. In order to receive regular program listing updates, remember to do the following: 1. Leave the TV in standby mode when it is not in use by turning it - Toshiba 72MX195 | Owner's Manual - English - Page 46
6 Setting up your TV For menu navigation instructions, see Chapter 4. Selecting the menu language You can choose from three different languages (English, French and Spanish) for the on-screen display of menus and messages. (The TV Guide On Screen™ menus are in English, regardless of the language - Toshiba 72MX195 | Owner's Manual - English - Page 47
the CableCARD™ automatically loads the Cable channel list into the TV's channel memory. To program channels automatically: 1. Make sure you have configured the antenna input sources. See page 46 for details. 2. Press MENU and open the Setup menu. 3. Highlight Installation and press ENTER. (A new set - Toshiba 72MX195 | Owner's Manual - English - Page 48
into the channel memory, you can manually add or delete individual channels. To add or delete channels in the channel memory: 1. Press MENU and open the Setup menu. 2. Highlight Installation and press ENTER. (A new set of Installation menu icons will appear on-screen, as shown in step 3). Setup - Toshiba 72MX195 | Owner's Manual - English - Page 49
only if you connected a cable box to your TV. Favorite Channels CH 6 Empty Empty Empty Empty Empty list: 1. Press 100 to display the favorite channel list. 2. Press the corresponding number Numbers 100 y x • z FAV CH yz FAV SCAN Copyright © 2005 TOSHIBA CORPORATION. All rights reserved. 49 - Toshiba 72MX195 | Owner's Manual - English - Page 50
3. Highlight Installation and press ENTER. (A new set of Installation menu icons will appear on-screen, as shown in step 4). Setup Installation Sleep Timer IR List IR Code Video 1 Cable General Instrum... 0000 0000 Test Reset Done Select device type, brand, and IR code from owners manual. - Toshiba 72MX195 | Owner's Manual - English - Page 51
Symbio™ AVHD Recorder control* * If you connected a Toshiba TM AVHD Recorder, you must set up the TV Guide On Screen™ system in order to use the Symbio's full functionality. See Chapter 5 for details on setting up the TV Guide On Screen™ system. See pages 26 and 55 for further details about - Toshiba 72MX195 | Owner's Manual - English - Page 52
Chapter 6: Setting up your TV TheaterNet™ IR device codes Amplifiers Brand Aiwa Bose Carver Curtis 1006 Starcom 0003, 0015 Stargate 0015 Starquest 0015 Supercable 0276 Tocom 0012 Torx 0003 Toshiba 0000 Tusa 0015 United Artists 0007 Zenith 0000, 0525, 0899 CD players Brand - Toshiba 72MX195 | Owner's Manual - English - Page 53
Chapter 6: Setting up your TV TheaterNet™ IR device codes (continued) Video accessory (HDTV 0392 RCA 0392, 0566, 0855, 0143 RadioShack 0869 SKY 0856 Samsung 1109 Sony 0639 Star Choice 0869 Toshiba 0749, 0790, 1052, 1053, 1054, 1285, 1286, 1287, 1289, 1749 Uniden 0724, 0722 - Toshiba 72MX195 | Owner's Manual - English - Page 54
Setting up your TV TheaterNet™ IR Semp 0045 Sharp 0048, 0807, 0848 Shintom 0072 Shogun 0240 Singer 0072 Sonic Blue 0614, 0616 Sony 0035, 0032, 0000, 0033, 0636, 1032, 1232 0035, 0037, 0000 Thomas 0000 Tivo 0618, 0636 Toshiba 0045, 0043, 0845 Totevision 0037, 0240 Unitech - Toshiba 72MX195 | Owner's Manual - English - Page 55
1 1 AM Cancel Done Note: • If you highlight TV Guide On Screen™ (above) to set the time and date through the TV Guide On Screen™ system and a power outage occurs, the time and date will be updated automatically when the power is restored. • If you highlight Manual (above) to set the time and date - Toshiba 72MX195 | Owner's Manual - English - Page 56
(and the blue LED will be lit solid) until the TV is finished restarting the lamp and the normal picture appears. If BOTH yellow and blue LEDs are blinking at a one-second rate, you will need to turn the TV off and then on again to restart the lamp. 56 Copyright © 2005 TOSHIBA CORPORATION. All - Toshiba 72MX195 | Owner's Manual - English - Page 57
GUID: Toshiba 62MX195 00003914-28343803 Software Version 0.3.0 Mar 9 2005 - 12:37:10 FW:0.12 Sub:47 Done Done To close the screen and return to the Installation and press ENTER. The TV will turn off automatically after a few seconds. After the TV turns off, unplug the TV power cord and then plug - Toshiba 72MX195 | Owner's Manual - English - Page 58
Note: After setting up the TV Guide On Screen™ system, the program guide opens automatically by default when you turn on the TV. To turn off this feature, see page 45. Setting up the TV Guide On Screen™ system Follow these instructions to set up the TV Guide On Screen™ system so it can receive - Toshiba 72MX195 | Owner's Manual - English - Page 59
when updates are downloaded from the TV Guide On Screen™ service to your TV. • The TV Guide On Screen™ interactive program guide supports cable-ready, cable box, and digital cable services, as well as over-the-air broadcasts. It does not provide listings for satellite services. TV Guide On Screen - Toshiba 72MX195 | Owner's Manual - English - Page 60
TV Guide On Screen™ interactive program guide Navigating the TV Guide On Screen™ system (continued) Video Window • When you open the TV Guide On Screen™ system, the current program appears in the Video Window. • As you scroll through the listings channel logo or the LISTINGS Service Bar Label and - Toshiba 72MX195 | Owner's Manual - English - Page 61
TV Guide On Screen™ interactive program guide Navigating the TV Guide On Screen™ system (continued) Info Box • An Info Box contains information about a show, Service, or Panel Ad, or provides general help (for example, for a panel menu). • An Info Box for a program in the LISTINGS screen (manual - Toshiba 72MX195 | Owner's Manual - English - Page 62
program schedule is available. Be sure to follow the instructions under "TV Guide On Screen™ Reminder" on page 45. LISTINGS screen • When you open the TV Guide On Screen™ system, LISTINGS is always the first service displayed. • Use the Number keys on the remote control to jump to a specific - Toshiba 72MX195 | Owner's Manual - English - Page 63
Chapter 7: Using the TV Guide On Screen™ interactive program guide TV Guide On Screen™ Services (continued) SEARCH screen • SEARCH allows you to find shows by keyword, alphabetically, or by category (HDTV, Movies, Sports, Children, Educational, News, Variety, Series). Example: Category search 1. - Toshiba 72MX195 | Owner's Manual - English - Page 64
guide TV Guide On Screen™ Services (continued) SEARCH screen (continued) Example: Keyword search Keyword search lets you enter a word(s) to find a particular show by category or for every show title that matches. 1. From the SEARCH screen, highlight KEYWORD, and then press ENTER. 2. Highlight NEW - Toshiba 72MX195 | Owner's Manual - English - Page 65
TV Guide On Screen™ interactive program guide TV Guide On Screen™ Services (continued) RECORDINGS screen The RECORDINGS service screen displays a list of previously recorded or currently recording shows on an IEEE1394 recording device connected to the TV revision of television programs, videotapes - Toshiba 72MX195 | Owner's Manual - English - Page 66
TV Guide On Screen™ interactive program guide TV Guide On Screen™ Services (continued) SCHEDULE screen The SCHEDULE service screen allows you to review, edit, or delete Record and Remind events you set previously. • With SCHEDULE highlighted in the Service TOSHIBA CORPORATION. All rights reserved. - Toshiba 72MX195 | Owner's Manual - English - Page 67
Using the TV Guide On Screen™ interactive program guide TV Guide On Screen™ Services (continued) Record features (continued) 3) Manually set a show to Record 1. Highlight SCHEDULE in the Service Bar, and press MENU to display the Schedule Options panel menu. 2. Highlight NEW MANUAL RECORDING and - Toshiba 72MX195 | Owner's Manual - English - Page 68
TV Guide On Screen™ interactive program guide TV Guide On Screen™ Services (continued) Remind features You can set a Reminder to perform the following functions: • Automatically turn on the TV (if off ) at the scheduled reminder time, and tune the TV Manual reminders are listed by channel number. - Toshiba 72MX195 | Owner's Manual - English - Page 69
Chapter 7: Using the TV Guide On Screen™ interactive program guide TV Guide On Screen™ Services (continued) Remind features (continued) Reminder notification banner Based on your option settings, a notification banner will appear on-screen, if your TV is on at the scheduled Reminder time. At that - Toshiba 72MX195 | Owner's Manual - English - Page 70
the initial TV Guide On Screen™ setup (as described in Chapter 5), you can change the following settings: • Change system settings • Change channel display • Change default options Highlight a choice, press ENTER, and follow the on-screen instructions. With SETUP highlighted in the Service Bar - Toshiba 72MX195 | Owner's Manual - English - Page 71
, and All (default). • AUTO GUIDE: Automatic entry into the TV Guide On Screen™ system when the TV is powered on. Choices are On (default) and Off. Note: Set the AUTO GUIDE to Off if you do not want the TV Guide On Screen™ system to open every time you turn on the TV. 4. When finished, press ENTER - Toshiba 72MX195 | Owner's Manual - English - Page 72
Input Selection screen is open, list; however, it will not display in the list TV (see "Labeling the video input sources" on the next page). • The source can be "hidden." See page 73 for details. Remote control TV control panel CHANNEL { Numbers INPUT y z TV/VIDEO 72 Copyright © 2005 TOSHIBA - Toshiba 72MX195 | Owner's Manual - English - Page 73
remove the device from the TV Guide On Screen™ setup. • You cannot that input to be "grayed out" in the input list and skipped over when you press the INPUT button on NOT AVAILABLE" will appear on-screen. 5. To save the new input labels, highlight Done and TOSHIBA CORPORATION. All rights reserved. 73 - Toshiba 72MX195 | Owner's Manual - English - Page 74
2, and Cable Box. *Note: Turning off the TV will clear the channel history for flash green. Note: The Channel Browser banner opens in Browse mode by default. To tune to a channel in Browse mode: 1. While watching TV number in the browser banner, it will be highlighted with a yellow outline and the TV - Toshiba 72MX195 | Owner's Manual - English - Page 75
TV Turning off the TV will clear all three channel histories (ANT 1, ANT 2, and Cable Box). • Removing the CableCARD : 1. Tune the TV to the channel you of the screen with the home icon flashing green. a cable box to your TV. 3. Use the y z TV will tune to the most recently tuned Home channel and input. x - Toshiba 72MX195 | Owner's Manual - English - Page 76
until the message "Channel Memorized" appears on the screen. The channel has been programmed into the CH RTN the memorized channel will be selected. The TV will return to the memorized channel one time Numbers - (dash) 76 CH RTN Copyright © 2005 TOSHIBA CORPORATION. All rights reserved. CHANNEL yz - Toshiba 72MX195 | Owner's Manual - English - Page 77
and press ENTER. Theater Settings Picture Size Picture Scroll Cinema Mode Auto Aspect Ratio Reset Natural -- Film On Done Conventional picture on a conventional TV screen Conventional picture in Natural size on your wide-screen TV Copyright © 2005 TOSHIBA CORPORATION. All rights reserved. 77 - Toshiba 72MX195 | Owner's Manual - English - Page 78
16:9 [480i, 480p] source programs only) • If receiving a squeezed 4:3 format program, the picture is stretched wider to fill the width of the screen, but not stretched taller. • None of the picture is hidden. 78 Full picture size example Copyright © 2005 TOSHIBA CORPORATION. All rights reserved. - Toshiba 72MX195 | Owner's Manual - English - Page 79
, the Freeze mode is active, or the TV Guide On Screen™ system is open. To turn on the new settings, highlight Done and press ENTER. To revert to the factory defaults, highlight Reset and press ENTER. To turn off the auto aspect ratio feature: Select Off in step 3 above. Copyright © 2005 TOSHIBA - Toshiba 72MX195 | Owner's Manual - English - Page 80
field, select High Bright or Low Power, whichever you prefer. Advanced Picture Settings Dynamic Contrast MPEG Noise Reduction CableClear Color Temperature Lamp Mode On Low Auto Cool Low Power ANT 1 Reset Done 4. To save the new settings, highlight Done and press ENTER. To revert to the factory - Toshiba 72MX195 | Owner's Manual - English - Page 81
FREEZE feature is not available when the POP double-window is open. If you press FREEZE screen. • It is recommended that you use the TV's remote control to start recording. If you use a device other than the TV Numbers INPUT • ENTER SPLIT Copyright © 2005 TOSHIBA CORPORATION. All rights reserved. 81 - Toshiba 72MX195 | Owner's Manual - English - Page 82
is open, press x or • to switch the sound (main or POP) that is output from the TV speakers (and from the VARIABLE AUDIO OUT terminals). The window with the active sound is outlined with a green ratio of width to height of the picture. 82 Copyright © 2005 TOSHIBA CORPORATION. All rights reserved. - Toshiba 72MX195 | Owner's Manual - English - Page 83
highlight the window. The highlighted window will display as a moving picture. 3. Press ENTER to tune the TV to the highlighted channel and close the multi-window. 2 4-1 4-2 6 11 13 18 31 36 Copyright © 2005 TOSHIBA CORPORATION. All rights reserved. y x • z ENTER EXIT FREEZE FAV SCAN 83 - Toshiba 72MX195 | Owner's Manual - English - Page 84
Settings 3. In the Mode field, select the mode you prefer. Picture Settings Mode Contrast Brightness Color Tint Sharpness Reset Sports 100 50 50 0 50 Done ANT 1 Picture Settings Mode Mode: Standard Standard 4. To save the new settings, highlight Done and press ENTER. To revert to the factory - Toshiba 72MX195 | Owner's Manual - English - Page 85
Temperature field, select the mode you prefer (Cool, Medium, or Warm). Advanced Picture Settings Dynamic Contrast MPEG Noise Reduction CableClear Color Temperature Lamp Mode Reset On Low Auto Cool Low Power Done ANT 1 4. To save the new settings, highlight Done and press ENTER. To revert to - Toshiba 72MX195 | Owner's Manual - English - Page 86
When dynamic contrast is set to "On," the TV will detect changes in the picture quality that affect the appearance of your contrast settings Picture Settings Dynamic Contrast MPEG Noise Reduction CableClear Color Temperature Lamp Mode Reset On Low Auto Cool Low Power Done ANT 1 4. To save the new - Toshiba 72MX195 | Owner's Manual - English - Page 87
Serif, Casual, Cursive, Small Capitals Auto, None, Raised, Depressed, Uniform, Left Drop Shadow, Right Drop shadow Auto, Black, White, Red, Green, Blue, Yellow, Magenta, Cyan Auto, Black, White, Red, Green, Blue, Yellow, Magenta, Cyan Copyright © 2005 TOSHIBA CORPORATION. All rights reserved. 87 - Toshiba 72MX195 | Owner's Manual - English - Page 88
Applications TV Guide On Screen Audio Player Picture Viewer Digital CC/Audio Selector CableCARD Navigate Select CH RTN Back EXIT Exit 3. Press y or z to select Closed Caption, and then press x or • to select the desired service. Audio Closed Caption CC 1 Service 1 88 Copyright © 2005 TOSHIBA - Toshiba 72MX195 | Owner's Manual - English - Page 89
more information on closed caption modes. VOL z RECALL MUTE Using the digital audio selector You can use service. Applications TV Guide On Screen Audio Player Picture Viewer Digital CC/Audio Selector CableCARD Optical Output Format Reset Stereo English On Dolby Digital Done 4. To save the new - Toshiba 72MX195 | Owner's Manual - English - Page 90
volume that often happens when a TV program switches to a commercial). To turn on the StableSound® feature: 1. 100 0 On 85 On Done 4. To save the new settings, highlight Done and press ENTER. To reset the turn off the StableSound feature: Select Off in step 3 above. 90 Copyright © 2005 TOSHIBA - Toshiba 72MX195 | Owner's Manual - English - Page 91
sources. Your TV's audio will sound fuller, richer, and wider. To adjust the WOW™ settings: 1. Put the TV in STEREO mode the new settings, highlight Done and press ENTER. To revert to the factory defaults, highlight Reset and press ENTER. To turn off TOSHIBA CORPORATION. All rights reserved. 91 - Toshiba 72MX195 | Owner's Manual - English - Page 92
field, select Off. Audio Setup MTS Language Speakers Optical Output Format Reset Stereo English On Dolby Digital Done 4. To save the new settings, highlight Done and press ENTER. To revert to the factory defaults, highlight Reset and press ENTER. To turn on the built-in speakers: Select On in - Toshiba 72MX195 | Owner's Manual - English - Page 93
. Setup Installation Sleep Timer On/Off Timer PC Settings HDMI 1 Audio HDMI 2 Audio Slide Show Interval Auto Auto 2 Sec Navigate Select CH RTN Back EXIT Exit 3. Press the Number buttons to enter the length of time in 10-minute increments. Sleep Timer Enter total minutes until the TV turns off - Toshiba 72MX195 | Owner's Manual - English - Page 94
connected to the TV (See " Setup Installation Sleep noise and sharpen the picture. The adjustment range is within ±15 from center. • Sampling Clock: This function is to minimize periodic vertical stripes on the screen. The adjustment range is within ±15 from center. 94 Copyright © 2005 TOSHIBA - Toshiba 72MX195 | Owner's Manual - English - Page 95
your recordings will not be affected by channel changes. • Video resolution • Lamp mode (appears only if the TV is in Hi Bright mode) To close TV setting information on-screen: Press RECALL again. The TV will automatically turn itself off after approximately 15 minutes if it is tuned to a vacant - Toshiba 72MX195 | Owner's Manual - English - Page 96
entry screen. • The Lock System screen (below) appears if a PIN code has not been stored. Press the Channel Number buttons to enter a new four-digit PIN code entering screen is displayed, press RECALL four times within five seconds. The PIN code will be cleared and you can enter a new PIN code. - Toshiba 72MX195 | Owner's Manual - English - Page 97
will be displayed in the RECALL screen and ratings blocking will not take effect. • To display the rating of the program you are watching, press RECALL on the remote control. If it is not rated, the word "NONE" appears. TV - PG L V NONE Copyright © 2005 TOSHIBA CORPORATION. All rights reserved - Toshiba 72MX195 | Owner's Manual - English - Page 98
screen New list press ENTER, which puts an "×" in the TV program that exceeds the rating limits you set, the TV picture appears. Locks Active Enter PIN code to temporaily unblock. **** All locking is disabled until the TV is turned Cancel Done off, and will be enabled when the TV is turned New - Toshiba 72MX195 | Owner's Manual - English - Page 99
Channels Block Input Lock Off Front Panel Lock Off Game Timer Off New PIN Code Off 30 min 60 min 90 min 120 min Navigate button on the TV control panel for about 10 seconds until the volume icon appears on-screen. TV control panel VOLUME - Copyright © 2005 TOSHIBA CORPORATION. All - Toshiba 72MX195 | Owner's Manual - English - Page 100
or turn off the TV while TV. SUCH DAMAGE IS NOT COVERED BY YOUR TOSHIBA WARRANTY. See "Memory card care and handling" on page 105. • The technical criteria set out in this owner's manual are meant as a guide only. • You must obtain any required permission from copyright owners to download Picture - Toshiba 72MX195 | Owner's Manual - English - Page 101
files may be in a format that is not compatible with the TV. - MP3 files must be in the following format: • MPEG1 the 200th in a shared folder will not play. Maximum number of nested folder levels: 10 levels • Files in folders more Picture Card is a trademark of Fuji Photo Film Co., Ltd. • Toshiba - Toshiba 72MX195 | Owner's Manual - English - Page 102
photos (JPEG files) on your TV's screen in thumbnail mode or as a slide show. Note: • You cannot use the Picture Viewer and Audio Player at the same time. • You must obtain any required permission from copyright owners to download or use copyrighted content. Toshiba cannot and does not grant such - Toshiba 72MX195 | Owner's Manual - English - Page 103
memory card is still inserted: 1. Press MENU and open the Applications menu. 2. Highlight Picture Viewer and press ENTER. Applications TV Guide On Screen Audio Player Picture Viewer Digital CC/Audio Selector CableCARD Navigate Select CH RTN Back EXIT Exit 3. Follow the steps under "Viewing JPEG - Toshiba 72MX195 | Owner's Manual - English - Page 104
to the TV's audio features (e.g., surround, bass, treble, balance) before starting the Audio Player. • You cannot use the Picture Viewer and Audio Player at the same time. • You must obtain any required permission from copyright owners to download or use copyrighted content. Toshiba cannot and - Toshiba 72MX195 | Owner's Manual - English - Page 105
Picture Viewer and Audio Player Using the Audio Player (continued) Playing MP3 audio files on the TV 1. After accessing your MP3 files from your memory card or networked PC (see previous page), the Audio Player will begin playing the first MP3 file in the list card from coming in contact with - Toshiba 72MX195 | Owner's Manual - English - Page 106
For home network troubleshooting tips, see pages 122-123. The unauthorized recording, use, distribution, or revision of television programs, videotapes, you think you might have router compatibility problems with your Toshiba TV, please contact Toshiba Consumer Solutions by calling 1-800-631-3811 - Toshiba 72MX195 | Owner's Manual - English - Page 107
is not successful, the following screen will appear: Manually setting up the network address 1. This setup requires the data listed below. You can get this is set up properly. See page 30 for TV connection information. Also consult the owner's manuals for your other components. c) Make sure the - Toshiba 72MX195 | Owner's Manual - English - Page 108
and then use the Number buttons on the Highlight Installation and press ENTER. The Installation menu Manually setting up the network address" at left. For home network troubleshooting tips, see pages 122-123. Note: • If you used an Ethernet crossover cable to connect your PC directly to the TV - Toshiba 72MX195 | Owner's Manual - English - Page 109
for file sharing with the TV: • Microsoft® Windows® XP Service Pack 2 (Home Edition and Professional) [Setup details at right] • Microsoft® Windows® XP Service Pack 1 (Home Edition and Go to section D, "Set up file sharing on the TV." Copyright © 2005 TOSHIBA CORPORATION. All rights reserved. 109 - Toshiba 72MX195 | Owner's Manual - English - Page 110
to check "Allow" next to "Full Control." c) Click "Apply." d) Click "OK" (which closes the Permissions window). 6. Go to section D, "Set up file sharing on the TV" on page 111. For home network troubleshooting tips, see pages 122-123. 110 Copyright © 2005 TOSHIBA CORPORATION. All rights reserved. - Toshiba 72MX195 | Owner's Manual - English - Page 111
sharing on the TV 1. Press MENU and open the Setup menu. 2. Highlight Installation and press ENTER. The Installation menu will MP3 files on the TV. USING THE ON-SCREEN KEYBOARD a. Press yzx • to highlight the desired letter, number, or character, and TOSHIBA CORPORATION. All rights reserved. 111 - Toshiba 72MX195 | Owner's Manual - English - Page 112
already done so, follow the instructions in sections A and B , pages 106-108, before proceeding. • Before you can schedule recordings, the time and date in the TV Guide On Screen feature must be set. See "Setting the time and date" on page 55. Required information and services Before you can set up - Toshiba 72MX195 | Owner's Manual - English - Page 113
. E-mail scheduling will not be available unless the TV Guide On Screen® system is fully operational. See Chapter 5 for details on setting up the TV Guide On Screen system. If you experience any issues with e-mail scheduling, please contact Toshiba Consumer Solutions by calling 1-800-631-3811 or by - Toshiba 72MX195 | Owner's Manual - English - Page 114
TV. Also see the "Security settings" table, below. ■"ID" field Use the on-screen keyboard to enter six to 16 numbers TV is set to record), it is recommended that you not change these settings unless you need to diagnose a problem or deal with a unique user situation. 114 Copyright © 2005 TOSHIBA - Toshiba 72MX195 | Owner's Manual - English - Page 115
incoming (POP3) mail server that hosts the TV's e-mail account. Note: The TV does not support encrypted e-mail. ■ "Outgoing Mail Server" field Use the on-screen keyboard to enter the outgoing (SMTP) mail server associated with the TV's e-mail account. (The TV will use this server for sending reply - Toshiba 72MX195 | Owner's Manual - English - Page 116
the TV will eventually be deleted. Note: • Toshiba television listed in the body of the request e-mail in the following order: ID* Your ID (required only if you set the "ID Required" field to On*) COMMAND ADD -or- DELETE -or- GET -or- HELP INPUT ANT-1 -or- ANT-2 -or- CABLE BOX CHANNEL Channel number - Toshiba 72MX195 | Owner's Manual - English - Page 117
schedule a new recording new recording: Sample ADD request e-mail to schedule a new [TV's email address] Subject To: [TV's email address TYPE RECORD To: [TV's email address] Subject TV, you will receive a reply e-mail that lists e-mail: To: [TV's email address] Subject line in your request e-mail. See - Toshiba 72MX195 | Owner's Manual - English - Page 118
the new one. • FAILED - COULD NOT UNDERSTAND "Line x" The e-mailed request has an error in the line of and then send the corrected e-mail to the TV. Modifying an existing recording or reminder If troubleshooting tips, see pages 122-123. 118 Copyright © 2005 TOSHIBA CORPORATION. All rights reserved - Toshiba 72MX195 | Owner's Manual - English - Page 119
off and then on again quickly when the lamp unit is hot. This is a property of DLP TV lamp technology and is NOT a sign of malfunction. For details, see "IMPORTANT NOTICE ABOUT HOT LAMP RESTART" on page 5. Picture problems General picture problems • Check the antenna/cable connections (Chapter - Toshiba 72MX195 | Owner's Manual - English - Page 120
cord in again the message "Now Booting..." will displayed on the screen until the picture appears or the yellow LED will blink until the TV enters standby mode. This is normal and is not a sign of malfunction. Sound problems • Check the antenna/cable connections (see Chapter 2). • The station may - Toshiba 72MX195 | Owner's Manual - English - Page 121
and 76. • If you connected a Symbio™ AVHD recorder, in order to use its full functionality, you must first set up the TV Guide On Screen® system (page 26 and Chapter 5). Memory card problems • Make sure you are using a supported or valid memory card format (page 101). • Make sure you have saved the - Toshiba 72MX195 | Owner's Manual - English - Page 122
the TV can display. • Picture does not have valid extension (e.g. ".jpg" or ".jpeg") • File is too large or is otherwise not compatible with TV for display. Please check Audio Player requirements for filesize and other restrictions. Home network troubleshooting Basic network setup problems Cannot - Toshiba 72MX195 | Owner's Manual - English - Page 123
network troubleshooting (continued) Home server setup problems PC (Home Server) name is not displayed • The Ethernet (RJ-45) cables are not connected properly. Connect all cables as shown on page 30. • Network setup on PC is incorrect. Ensure both PC and TV are using same network type (DHCP / manual - Toshiba 72MX195 | Owner's Manual - English - Page 124
BUS line. Turn OFF the TV and unplug the power cord. Plug the power cord in again and turn ON the TV. If the problem persists, contact a Toshiba Authorized Service Center. 7) Yellow is OFF; The color wheel has stopped. Blue blinks at 0.2-second intervals 3 times (repeat). Turn OFF the TV and - Toshiba 72MX195 | Owner's Manual - English - Page 125
the problem. After you set up the TV Guide On Screen™ system (Chapter 5), the program guide opens automatically by default when you turn on the TV. You can turn off the automatic program guide (see page 45) and instead press the TV GUIDE button on the remote control to manually open the TV Guide On - Toshiba 72MX195 | Owner's Manual - English - Page 126
VCR to television, the VCR must be ON. 18. Q: A show entry in the TV Guide On Screen™ system reads "No Listing." What does that mean? A: Show information for that entry was not available during the last TV Guide On Screen™ system information update (download). Show information is updated on a daily - Toshiba 72MX195 | Owner's Manual - English - Page 127
up incorrectly. Refer to your VCR owner's manual or contact your Cable TV company for proper wiring procedures. 32. Q: Is Help available in the TV Guide On Screen™ system? If so, how do I find it? A: Yes. Highlight any of the five main Services (Listings, Schedule, Recordings, Setup, Search) and - Toshiba 72MX195 | Owner's Manual - English - Page 128
; • if the screen (lamp) does not light (LED indication #3, page 124); or • if you hear a loud noise and the picture goes black, which may indicate a lamp rupture (LED indication #3, page 124). To obtain a replacement lamp unit: In warranty: In the U.S. Visit www.tacp.toshiba.com/service or call - Toshiba 72MX195 | Owner's Manual - English - Page 129
COOL FOR AT LEAST ONE (1) HOUR BEFORE REPLACING IT. 5. Grasp the lamp unit handle and gently pull the lamp unit straight out of the TV. Set the old lamp unit aside (see "Disposing of the used lamp unit" on page 130). 3. On the lamp unit door on the side of the TV, loosen the screw using a manual - Toshiba 72MX195 | Owner's Manual - English - Page 130
that the lamp unit and lamp unit door are installed correctly: • No picture • Dark picture • TV will not turn on If, after repeating steps 1-9, the problem still exists: • In the U.S., call TACP consumer solutions at 1-800-631-3811. • In Canada, locate the nearest Toshiba authorized service depot by - Toshiba 72MX195 | Owner's Manual - English - Page 131
Television System NTSC standard ATSC standard (8VSB) Digital Cable (64 QAM, 256 QAM; in-the-clear, unencrypted*) *Encrypted channels can be viewed on this TV using a CableCARD Owner's Manual (this book) Optional Stands 56MX195: ST 5695 62MX195: ST 6295 72MX195: ST 7295 Copyright © 2005 TOSHIBA - Toshiba 72MX195 | Owner's Manual - English - Page 132
WITH A NEW OR REFURBISHED PART WITHOUT CHARGE TO YOU. Owner's Manual and Product Registration Read this owner's manual thoroughly before operating this DLP™ television. Complete and mail the enclosed product registration card or register your DLP™ Television online at www.tacp.toshiba.com/service as - Toshiba 72MX195 | Owner's Manual - English - Page 133
REPAIR OR REPLACE A DEFECTIVE PART WITH A NEW OR REFURBISHED PART WITHOUT CHARGE TO YOU. ON-SITE SERVICE ONLY APPLIES WITHIN 100 KILOMETERS OF AN AUTHORIZED TCL SERVICE DEPOT. Owner's Manual and Product Registration Read this owner's manual thoroughly before operating this DLP™ television. Register - Toshiba 72MX195 | Owner's Manual - English - Page 134
, this list of conditions OF SUBSTITUTE GOODS OR SERVICES; LOSS OF USE, developed by the OpenSSL Project for use in the given attribution as the author of the parts of the library used. This can put under another distribution license (including the GNU Public License). 134 Copyright © 2005 TOSHIBA - Toshiba 72MX195 | Owner's Manual - English - Page 135
size 78 TheaterNet™ setup 50 THINC™ system 12 Time and date setting 55 Troubleshooting 119-123 TruBass 91 TV-Guide Email 112 TV Guide On Screen™ 9, 42, 58 TV/VIDEO button 72, 73 V V-Chip blocking (Locks menu) 96-99 VCR connection 15-20 Video cables 13 Video input labels 73 Video input lock 98 - Toshiba 72MX195 | Owner's Manual - English - Page 136
SERVICE DIVISION:1420-B TOSHIBA DRIVE, LEBANON, TN 37087, U.S.A. TOSHIBA OF CANADA LTD. HEAD OFFICE: 191 McNABB STREET, MARKHAM, ONTARIO, L3R 8H2, CANADA - TEL: (905) 470-5400 SERVICE trademarks of Toshiba America Consumer Products, L.L.C. Digital Light Processing, DLP™ and the DLP medallion are
-
 1
1 -
 2
2 -
 3
3 -
 4
4 -
 5
5 -
 6
6 -
 7
7 -
8
-
9
-
10
-
11
-
12
-
13
-
14
-
15
-
16
-
17
-
18
-
19
-
20
-
21
-
22
-
23
-
24
-
25
-
26
-
27
-
28
-
29
-
30
-
31
-
32
-
33
-
34
-
35
-
36
-
37
-
38
-
39
-
40
-
41
-
42
-
43
-
44
-
45
-
46
-
47
-
48
-
49
-
50
-
51
-
52
-
53
-
54
-
55
-
56
-
57
-
58
-
59
-
60
-
61
-
62
-
63
-
64
-
65
-
66
-
67
-
68
-
69
-
70
-
71
-
72
-
73
-
74
-
75
-
76
-
77
-
78
-
79
-
80
-
81
-
82
-
83
-
84
-
85
-
86
-
87
-
88
-
89
-
90
-
91
-
92
-
93
-
94
-
95
-
96
-
97
-
98
-
99
-
100
-
101
-
102
-
103
-
104
-
105
-
106
-
107
-
108
-
109
-
110
-
111
-
112
-
113
-
114
-
115
-
116
-
117
-
118
-
119
-
120
-
121
-
122
-
123
-
124
-
125
-
126
-
127
-
128
-
129
-
130
-
131
-
132
-
133
-
134
-
135
-
136
 |
 |
Integrated High Definition
DLP
™
Projection Television
O
WNER’S
M
ANUAL
© 2005 TOSHIBA CORPORATION
All Rights Reserved
56MX195
62MX195
72MX195
Owner’s Record
The model number and serial number are on the back
of your TV. Record these numbers in the spaces below.
Refer to these numbers whenever you communicate
with your Toshiba dealer about this TV.
Model number:
Serial number:
HIGH
-DEFINITION TELEVISION
I
S
O
1
4
0
0
1
F
I
L
E
N
o
.
A
9
6
4
5
T
O
S
H
I
B
A
A
M
E
R
I
C
A
C
O
N
S
U
M
E
R
P
R
O
D
U
C
T
S
,
L
.
L
.
C
.
YC/N
23566730
For an overview of steps for setting up your new TV, see page 9.
Note: It may take several minutes for the picture to appear on-screen
if the TV is powered off and then on again quickly when the lamp unit
is hot. This is a property of DLP TV lamp technology and is NOT a sign
of malfunction. For details, see
“
IMPORTANT NOTICE ABOUT HOT
LAMP RESTART
”
on page 5.
Note: A high definition tuner and programming are required to view High
Definition TV broadcasts. Please contact your cable or satellite provider.
Compatible with Toshiba’s new
Audio/Video Hard Drive Recorder!
See pages 26 and 55 for details.
TM