Toshiba Thrive AT100 Users Manual Canada; English
Toshiba Thrive AT100 Manual
 |
View all Toshiba Thrive AT100 manuals
Add to My Manuals
Save this manual to your list of manuals |
Toshiba Thrive AT100 manual content summary:
- Toshiba Thrive AT100 | Users Manual Canada; English - Page 1
User's Manual TOSHIBA AT100 computers.toshiba-europe.com - Toshiba Thrive AT100 | Users Manual Canada; English - Page 2
TOSHIBA AT100 Table of Contents Check the components iv Safety instructions iv Chapter 1 Getting Started & Grand Tour Getting Started 1-1 Grand Tour 1-6 Power 4 Applications & Widgets Analog clock 4-1 Browser 4-1 Calculator 4-3 Calendar 4-3 Camera 4-4 Clock 4-6 User's Manual ii - Toshiba Thrive AT100 | Users Manual Canada; English - Page 3
Service Station 4-12 TOSHIBA File Manager 4-14 Online Manual Troubleshooting Problem solving process 7-1 Hardware and system checklist 7-2 TOSHIBA Support 7-5 Appendix A Specifications Physical Dimensions A-1 Environmental Requirements A-1 Appendix B Regulatory information User's Manual - Toshiba Thrive AT100 | Users Manual Canada; English - Page 4
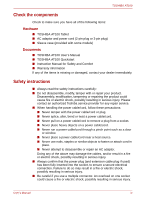
with some models) Documents ■ TOSHIBA AT100 User's Manual ■ TOSHIBA AT100 Quickstart ■ Instruction Manual for Safety and Comfort ■ Warranty information If in serious injury. Please contact an authorized Toshiba service provider for any repair service. ■ When handling the power cable/cord, follow - Toshiba Thrive AT100 | Users Manual Canada; English - Page 5
not turn on the power again, until you have taken the product to an authorized service center. Failure to follow these instructions could result in serious injury or permanent damage to the product. ■ Never place your may result in a system failure, malfunction or loss of data. User's Manual v - Toshiba Thrive AT100 | Users Manual Canada; English - Page 6
loss of data or hardware damage. ■ Always use the battery pack supplied as an accessory or an equivalent battery pack specified in the User's Manual. Other battery packs have different voltage and terminal polarities. Use of non-conforming battery packs could generate smoke or cause fire or rupture - Toshiba Thrive AT100 | Users Manual Canada; English - Page 7
to a frequency of either 50 or 60 hertz. The adaptor converts AC power to DC power and reduces the voltage supplied to your tablet. User's Manual 1-1 - Toshiba Thrive AT100 | Users Manual Canada; English - Page 8
is also the fastest way to get started, because the battery pack will need to be charged before you can operate from battery power. User's Manual 1-2 - Toshiba Thrive AT100 | Users Manual Canada; English - Page 9
pin conversion plug. ■ When you connect the AC adaptor to the tablet, always follow the steps in the exact order as described in the User's Manual. Connecting the power cable to a live electrical outlet should be the last step otherwise the adaptor DC output plug could hold an electrical charge and - Toshiba Thrive AT100 | Users Manual Canada; English - Page 10
option). You may also skip this section and turn Wi-Fi on later in the Settings screen. 3. Choose Google™ location service and tap Next to continue. 4. Set date and time, and tap Next to continue. 5. Register or log in with to the main screen when the next time it is turned on. User's Manual 1-4 - Toshiba Thrive AT100 | Users Manual Canada; English - Page 11
or password, the method of unlocking the screen will be different. See Location & security section for other ways to protect your tablet and privacy. User's Manual 1-5 - Toshiba Thrive AT100 | Users Manual Canada; English - Page 12
/Microphone combo jack 19. DC IN 19V jack 20. Docking interface 21. Speakers *Provided with some models. (Sample Illustration) Grand tour of the tablet User's Manual 1-6 - Toshiba Thrive AT100 | Users Manual Canada; English - Page 13
equipped with a Bluetooth antenna. Press this button to turn the tablet's power on and off. Press these buttons to increase or decrease the volume. User's Manual 1-7 - Toshiba Thrive AT100 | Users Manual Canada; English - Page 14
USB devices that are available. In view of this it may be noted that some functions associated with a specific device might not operate properly. User's Manual 1-8 - Toshiba Thrive AT100 | Users Manual Canada; English - Page 15
Operation chapter. The speakers emit sound generated by your software as well as audio alarms, such as low battery condition, generated by the system. User's Manual 1-9 - Toshiba Thrive AT100 | Users Manual Canada; English - Page 16
: off • LED: blink amber • LED: off • LED: white • LED: amber • LED: off Power off (no operation) • LED: off • LED: white • LED: amber • LED: off User's Manual 1-10 - Toshiba Thrive AT100 | Users Manual Canada; English - Page 17
and Gallery), you can zoom in/out by placing two fingers on the screen at once and pinching them together or spreading them apart. User's Manual 2-1 - Toshiba Thrive AT100 | Users Manual Canada; English - Page 18
applications. Tap these icons on the Home screen to open applications. Return to the previous screen. Return to the Home screen. See recent applications. User's Manual 2-2 - Toshiba Thrive AT100 | Users Manual Canada; English - Page 19
a recently used application You may switch to a recently used application by: ■ Tapping Recent apps icon ( ), and select the application that you want to switch. User's Manual 2-3 - Toshiba Thrive AT100 | Users Manual Canada; English - Page 20
the brightness automatically. ■ Notifications Turn on this option to show notifications on the system bar. ■ Settings Tap this option to open the Settings screen. User's Manual 2-4 - Toshiba Thrive AT100 | Users Manual Canada; English - Page 21
. What happens next depends on the notification. Closing the Notifications panel Tap the area out of the notifications panel to close the notifications panel. User's Manual 2-5 - Toshiba Thrive AT100 | Users Manual Canada; English - Page 22
an unlock pattern appears. Then you're prompted to draw and redraw your own pattern. Follow the onscreen instructions to finish the creation. The next time you turn on your tablet or wake up the screen, you Add shortcuts to bookmarks, contacts, Navigations playlists and so on. User's Manual 2-6 - Toshiba Thrive AT100 | Users Manual Canada; English - Page 23
for details. In Portrait mode, some drivers/utilities may not perform install and uninstall operations. If it occurs, switch to Landscape mode to proceed. User's Manual 2-7 - Toshiba Thrive AT100 | Users Manual Canada; English - Page 24
settings and application settings ■ User installed applications ■ Internal storage files, such as music or photos ■ Data on the removable media will not be erased. User's Manual 2-8 - Toshiba Thrive AT100 | Users Manual Canada; English - Page 25
tablet with a SIM card from your wireless service provider, your tablet is configured to use your or creating a new access point If you and your wireless service provider determine that you need to change the settings of your service provider by tapping each setting that you need to edit. User - Toshiba Thrive AT100 | Users Manual Canada; English - Page 26
connected to a network, tap on the network name in the Wi-Fi settings screen for details about the speed, security, address, and related settings. User's Manual 3-2 - Toshiba Thrive AT100 | Users Manual Canada; English - Page 27
are headphones for making calls or listening to music, hands-free kits for cars, and other portable devices, including cell phones. This tablet does not support Bluetooth connections via ad-hoc network. User's Manual 3-3 - Toshiba Thrive AT100 | Users Manual Canada; English - Page 28
that came with your device to learn how to make it discoverable by your tablet, and for other instructions for pairing. 5. If your tablet stops scanning before you make the other device discoverable, tap Scan for the pairing is successful, your tablet connects to the device. User's Manual 3-4 - Toshiba Thrive AT100 | Users Manual Canada; English - Page 29
related to a specific device. 1. Tap and hold the device in the Bluetooth settings screen. 2. Tap Unpair or Disconnect & unpair in the menu that opens. User's Manual 3-5 - Toshiba Thrive AT100 | Users Manual Canada; English - Page 30
chapter describes the applications & widgets and how to use them. Your tablet has some Google Mobile™ Services installed depending on the model you purchased. Analog clock Analog clock is a widget to display a or enter an address and tap Enter with the onscreen keyboard. User's Manual 4-1 - Toshiba Thrive AT100 | Users Manual Canada; English - Page 31
layout. This is dependent on the web page. ■ The Browser does not support file uploading function. ■ The Browser might connect to a "mobile" web site depending on the site. If you want to access the PC web site, please manually select the correct site. Zoom in or zoom out on a webpage You can zoom - Toshiba Thrive AT100 | Users Manual Canada; English - Page 32
General, Privacy & Security, Advanced and Labs. Calculator You can use Calculator to solve simple arithmetical problems or use its advanced operators to solve more complex equations. 1. Open Calculator as follows: Tap Apps icon ( ) on the top right corner of Calendar screen. User's Manual 4-3 - Toshiba Thrive AT100 | Users Manual Canada; English - Page 33
/out 4. Go to the gallery 2. Change photo options 5. Change camera (front or back) 3. Take a photo 6. Choose photo or video mode (Sample Illustration) Camera screen User's Manual 4-4 - Toshiba Thrive AT100 | Users Manual Canada; English - Page 34
. ■ Color effect: Pick a cool effect. ■ Video quality: Tap to select the quality of the videos you take. ■ Time lapse interval: Create a time lapse clip. User's Manual 4-5 - Toshiba Thrive AT100 | Users Manual Canada; English - Page 35
you have more than one account with contact information, Contacts merges duplicate contacts into a single entry. You can also manage that process manually. Open Contacts To open a contact, tap Apps -> Contacts. All of your contacts are displayed alphabetically in a scrolling list. Tap a contact to - Toshiba Thrive AT100 | Users Manual Canada; English - Page 36
to read and send emails. Email includes a wizard that makes it easy to configure it for several popular email service providers. To open the Email, tap Apps -> Email. After add an email account, Email will open to the view all emails sent to all accounts in your Combined Inbox. User's Manual 4-7 - Toshiba Thrive AT100 | Users Manual Canada; English - Page 37
. Manage email accounts The Email application enables you to add email accounts from popular web-based email service providers. You can also delete an email account or edit an email account settings. ■ To add changes to general, notification or server settings from this screen. User's Manual 4-8 - Toshiba Thrive AT100 | Users Manual Canada; English - Page 38
using Bluetooth, email, or post it online. 3. Delete photo: Tap . 4. Tap Menu to see details, rotate, crop, or set as a contact photo or wallpaper. User's Manual 4-9 - Toshiba Thrive AT100 | Users Manual Canada; English - Page 39
users can experience outstanding multimedia enjoyment. The TOSHIBA Media Player supports a number of multimedia content formats as follows: Video H.264 will cause music playback to stop. ■ DMP (Digital Media Player) function supports to connect Windows media player 12 on Windows® 7 only. ■ Some - Toshiba Thrive AT100 | Users Manual Canada; English - Page 40
you purchase from online stores, or you copy from your CD collection and so on. For the details of supported formats, please refer to TOSHIBA Media Player in this chapter. To open the Music screen, tap Apps -> for users to enjoy the pictures. You can select pictures directly. User's Manual 4-11 - Toshiba Thrive AT100 | Users Manual Canada; English - Page 41
tablet. While Service Station periodically checks for updates in the background, you can request it to check for updates immediately. Tap the Check for Updates button, and the application will refresh the list of available updates. ■ It is not normally necessary to check for updates manually, as the - Toshiba Thrive AT100 | Users Manual Canada; English - Page 42
you are not on the display showing the information for that item, go to the screen by launching the Service Station utility, or by tapping the download completion notice on the system status bar. Tap the Install button. . The user data area is kept after the system is updated. User's Manual 4-13 - Toshiba Thrive AT100 | Users Manual Canada; English - Page 43
to deselect all the folders and files in the current path. ■ Cancel Tap to cancel file operation and return to the file browsing window. User's Manual 4-14 - Toshiba Thrive AT100 | Users Manual Canada; English - Page 44
except the system files. SD card It shows all the contents on the SD card. USB storage It shows a menu of connected USB devices (totally support of a maximum of eight disk partitions). User's Manual 4-15 - Toshiba Thrive AT100 | Users Manual Canada; English - Page 45
TOSHIBA AT100 Online Manual Online Manual is an application to launch the pre-installed online user's manual (this manual) for this tablet. User's Manual 4-16 - Toshiba Thrive AT100 | Users Manual Canada; English - Page 46
to manage connections, set device name & discoverability. ■ Tethering & portable hotspot settings Tap to set up USB/Bluetooth tethering and portable hotspot. This function is only supported by 3G models. ■ VPN settings Tap to set up and manage Virtual Private Networks (VPNs). User - Toshiba Thrive AT100 | Users Manual Canada; English - Page 47
■ Mobile networks Tap to set options for roaming, networks and APNs. This function is only supported by 3G models. Sound You can use Sound settings to configure many aspects of notification ringtones, where you can set how long to wait before the screen automatically turns off. User's Manual 5-2 - Toshiba Thrive AT100 | Users Manual Canada; English - Page 48
tablet each time you power it on. A PIN or password must be set (using Configure lock screen option) before tapping the "Encrypt tablet" option. User's Manual 5-3 - Toshiba Thrive AT100 | Users Manual Canada; English - Page 49
the SIM PIN to use the tablet and where you can change the SIM PIN. This function is only supported by 3G models. ■ Visible passwords Check this option to briefly show each password character as you enter them tablet, along with their size. These are sorted in alphabetical order. User's Manual 5-4 - Toshiba Thrive AT100 | Users Manual Canada; English - Page 50
Above each service, one or more gray bars show which processes the running service needs and how much memory it's using. Depending on the service, when you ■ This tablet does not support other operating systems. ■ TOSHIBA cannot guarantee or support applications that are installed by 's Manual 5-5 - Toshiba Thrive AT100 | Users Manual Canada; English - Page 51
application. ■ Factory data reset Tap to erase all user data in the internal storage. Follow the on-screen instructions to reset it. Please note that data in the removable media won't be erased. See Factory Reset section USB7 Tap to unmount the USB memory device for safe removal. User's Manual 5-6 - Toshiba Thrive AT100 | Users Manual Canada; English - Page 52
Accessibility settings to enable accessibility functions, such as text-to-speech or enlarge text on screen. You should download accessibility scripts from Google first. User's Manual 5-7 - Toshiba Thrive AT100 | Users Manual Canada; English - Page 53
from the network. ■ Automatic time zone Uncheck this option to set the time znoe on your tablet manually rather than obtaining the local time zone from the network. This function is only supported by 3G models. ■ Set date If Automatic date & time is unchecked, tapping it will open a dialog where - Toshiba Thrive AT100 | Users Manual Canada; English - Page 54
tablet ■ Android version Displays the current version of the Android™ platform installed on your tablet. ■ Baseband version Displays the baseband version. This function is only supported by 3G models. ■ Kernel version Displays the kernel version. ■ Build number Displays the build number. User - Toshiba Thrive AT100 | Users Manual Canada; English - Page 55
Please handle your tablet carefully to avoid scratching or damaging the surface. ■ This tablet does not support CD/DVD/Blu-ray Disc™. ■ This tablet cannot be used as a mobile phone. ■ installed memory. This tablet does not support memory expansion. This tablet is equipped with a flash memory. User - Toshiba Thrive AT100 | Users Manual Canada; English - Page 56
different models. Using the wrong adaptor might damage your tablet. Display The tablet's internal display panel supports high-resolution video graphics and can be set to a wide range of viewing angles for maximum IEEE 802.11 Standard. Some models are equipped with a 3G module. User's Manual 6-2 - Toshiba Thrive AT100 | Users Manual Canada; English - Page 57
connection. If you experience any such problem, immediately turn off either of your htm In the United States visit http://www.pc.support.global.toshiba.com Battery pack This section explains enclosed Instruction Manual for Safety and Comfort for detailed precautions and handling instructions. - Toshiba Thrive AT100 | Users Manual Canada; English - Page 58
RTC battery is a lithium battery and should be replaced only by your dealer or by a TOSHIBA service representative. The battery can explode if not properly replaced, used, handled or disposed. Dispose of the tablet for a long time. ■ A cool battery is installed in a warm tablet. User's Manual 6-4 - Toshiba Thrive AT100 | Users Manual Canada; English - Page 59
. This section explains how to remove and install the battery pack, and begins with the removal process which is detailed through the following steps. User's Manual 6-5 - Toshiba Thrive AT100 | Users Manual Canada; English - Page 60
corner up first. 1 1. Cover lock (Sample Illustration) Removing the cover-1 7. Lift the cover up according to the following figure and then remove the cover. User's Manual (Sample Illustration) Removing the cover-2 6-6 - Toshiba Thrive AT100 | Users Manual Canada; English - Page 61
place and the battery lock is in its lock ( ) position. 3. Seat the cover in place and slide the cover lock to its lock ( ) position. User's Manual 6-7 - Toshiba Thrive AT100 | Users Manual Canada; English - Page 62
the connection, doing so can damage the connecting pins. ■ The mini USB port only supports slave mode. Optional devices Optional devices can expand your tablet's capabilities and its versatility. This slot Peripheral devices ■ USB device ■ HDMI device ■ TOSHIBA Tablet USB Cradle User's Manual 6-8 - Toshiba Thrive AT100 | Users Manual Canada; English - Page 63
properly. ■ Please note that Ultra High Speed (UHS-I) function is not supported. ■ The slot does not support Magic Gate functions. Memory media This section provides the important safety precautions in ■ The SDHC memory card logo is ( ). ■ The SDXC memory card logo is ( ). User's Manual 6-9 - Toshiba Thrive AT100 | Users Manual Canada; English - Page 64
the card into the slot. ■ Do not leave a card partially inserted in the slot. Press the card until you hear it click into place. User's Manual 6-10 - Toshiba Thrive AT100 | Users Manual Canada; English - Page 65
is in progress. For more details on using memory cards, see manuals accompanying the cards. About the write-protect The following memory media have to record data. Inserting a memory media The following instructions apply to all types of supported media devices. To insert a memory media, follow the - Toshiba Thrive AT100 | Users Manual Canada; English - Page 66
to be lost. Removing a memory media The following instructions apply to all types of supported media devices. To remove a memory media, follow the slot that allows you to assemble a SIM card from your wireless service provider to use your provider's mobile networks for transmitting data. Manual 6-12 - Toshiba Thrive AT100 | Users Manual Canada; English - Page 67
of all USB devices has not been confirmed, some USB devices may not function properly. 1 2 1. USB port 2. USB connector (Sample Illustration) Connecting a USB device User's Manual 6-13 - Toshiba Thrive AT100 | Users Manual Canada; English - Page 68
port that can send video by connecting with external devices. 720p, 576p and 480p signal formats are supported, but actually available signal format depends on each HDMI device. To connect external devices, follow the so when the tablet is in Sleep Mode or Hibernation Mode. User's Manual 6-14 - Toshiba Thrive AT100 | Users Manual Canada; English - Page 69
: DC IN 19V jack and HDMI port. 4. Turn on your TOSHIBA Tablet. 5. Align the docking mark on your tablet with that on the dock. User's Manual 6-15 - Toshiba Thrive AT100 | Users Manual Canada; English - Page 70
dock A notice of connecting will appear on the status bar of your tablet. To disconnect your tablet, remove your tablet following the connector's direction. User's Manual 6-16 - Toshiba Thrive AT100 | Users Manual Canada; English - Page 71
(Sample Illustration) Front of the dock 1 2 3 4 1. DC IN 19V jack 3. Universal Serial Bus 2.0 ports 2. Headphone jack 4. HDMI port (Sample Illustration) Back of the dock User's Manual 6-17 - Toshiba Thrive AT100 | Users Manual Canada; English - Page 72
remove the need to always carry the adaptor with you. An additional battery pack can be purchased for use as either a spare or replacement. User's Manual 6-18 - Toshiba Thrive AT100 | Users Manual Canada; English - Page 73
Chapter 7 Troubleshooting TOSHIBA have designed this tablet for durability, however, should problems occur you guide, they are not definitive problem solving techniques. In reality many problems can be solved simply, but a few may require help from your reseller, dealer or service User's Manual 7-1 - Toshiba Thrive AT100 | Users Manual Canada; English - Page 74
above remain unresolved or other problems occur You should initially refer to the documentation supplied with you software to determine if it is this that is causing the problems. If you are still unable to resolve the problem, contact your reseller, dealer or service provider. User's Manual 7-2 - Toshiba Thrive AT100 | Users Manual Canada; English - Page 75
connected. If the problem persists, then you problem, contact your reseller, dealer or service provider. USB device In addition to the information in this section, please also refer to the documentation supplied with your USB device. Problem audio device. Problem Procedure No sound - Toshiba Thrive AT100 | Users Manual Canada; English - Page 76
your monitor for further information. Problem Procedure Monitor does not turn on unable to resolve the problem, contact your reseller, dealer or service provider. Wireless LAN If Fi settings. If problems persist, contact your LAN administrator. Bluetooth Problem Cannot access Bluetooth device - Toshiba Thrive AT100 | Users Manual Canada; English - Page 77
problem occurs when you are running software applications, consult the software documentation for troubleshooting suggestions and consider calling the software company's technical support information and support. TOSHIBA technical support If you are still unable to solve the problem and suspect that - Toshiba Thrive AT100 | Users Manual Canada; English - Page 78
40,000 feet (12,192 meters) Power Requirements AC adaptor Tablet 100-240 volts AC 50 or 60 hertz (cycles per second) 19V DC User's Manual A-1 - Toshiba Thrive AT100 | Users Manual Canada; English - Page 79
liability is assumed, with respect to the use of the information contained herein. TOSHIBA AT100 User's Manual First edition June 2011 Disclaimer This manual has been validated and reviewed for accuracy. The instructions and descriptions it contains are accurate for this tablet at the time of this - Toshiba Thrive AT100 | Users Manual Canada; English - Page 80
code corresponding to the binaries for GPL-licensed file by sending a request to TOSHIBA customer service at [http://support.toshiba-tie.co.jp/android/index_e.htm], and TOSHIBA will send you a link to such and registered trademarks not listed above may be used in this manual. User's Manual B-2 - Toshiba Thrive AT100 | Users Manual Canada; English - Page 81
can radiate radio frequency energy and, if not installed and used in accordance with the instructions, may cause harmful interference to radio communications. However, there is no guarantee that interference by TOSHIBA could void the user's authority to operate the equipment. User's Manual B-3 - Toshiba Thrive AT100 | Users Manual Canada; English - Page 82
configuration, the distance between the antenna and the user should not be less than 20cm. Please refer to the "Grand Tour" section in this manual for the details regarding antenna location. The installer of this radio equipment must ensure that the antenna is located or pointed such that it does - Toshiba Thrive AT100 | Users Manual Canada; English - Page 83
and service supply problem if there is no restriction by the responsible administration. Automotive environment: Please search the owner instructions of the related vehicle for advices regarding the use of this product (category). Aviation environment: Please follow the instructions - Toshiba Thrive AT100 | Users Manual Canada; English - Page 84
battery can not be charged at all, then it is a defect or failure. The changes in battery time is not a defect or failure. GOST User's Manual B-6 - Toshiba Thrive AT100 | Users Manual Canada; English - Page 85
Department of Communications (DOC) regulations provide, that changes or modifications not expressly approved by TOSHIBA Corporation could void your authority to operate this equipment. User's Manual B-7 - Toshiba Thrive AT100 | Users Manual Canada; English - Page 86
on board of airplanes, or ■ In any other environment where the risk of interference to other devices or services is perceived or identified as harmful. If you are uncertain of the policy that applies on the use of to use the Wireless LAN device prior to turning on the equipment. User's Manual B-8
-
 1
1 -
 2
2 -
 3
3 -
 4
4 -
 5
5 -
 6
6 -
 7
7 -
8
-
9
-
10
-
11
-
12
-
13
-
14
-
15
-
16
-
17
-
18
-
19
-
20
-
21
-
22
-
23
-
24
-
25
-
26
-
27
-
28
-
29
-
30
-
31
-
32
-
33
-
34
-
35
-
36
-
37
-
38
-
39
-
40
-
41
-
42
-
43
-
44
-
45
-
46
-
47
-
48
-
49
-
50
-
51
-
52
-
53
-
54
-
55
-
56
-
57
-
58
-
59
-
60
-
61
-
62
-
63
-
64
-
65
-
66
-
67
-
68
-
69
-
70
-
71
-
72
-
73
-
74
-
75
-
76
-
77
-
78
-
79
-
80
-
81
-
82
-
83
-
84
-
85
-
86
 |
 |

computers.toshiba-europe.com
User’s Manual
TOSHIBA AT100