URC MRX-20 Owners Manual
URC MRX-20 Manual
 |
View all URC MRX-20 manuals
Add to My Manuals
Save this manual to your list of manuals |
URC MRX-20 manual content summary:
- URC MRX-20 | Owners Manual - Page 1
Owner's Manual MRX-20 Advanced Network System Controller - URC MRX-20 | Owners Manual - Page 2
, TECHNICAL OR EDITORIAL ERRORS/OMISSIONS MADE IN THIS MANUAL. The information in this Owner's Manual may be subject to change without prior notice. URC - Control the Experience is a registered trademark of Universal Remote Control, Inc. Total Control is a registered trademark of Universal Remote - URC MRX-20 | Owners Manual - Page 3
#1 brand in custom remote and whole-house control markets Need Help? If you are in need of assistance, please be sure to contact your URC Professional Installer. Installer's Name Contact Info Installation Date Serial MAC Address (if any URC Tech Support is also there for you. Contact us by - URC MRX-20 | Owners Manual - Page 4
Chapter 1: MRX-20 Overview Congratulations! 1 Features and Benefits 1 Parts Guide 1 Expanding your System 2 Front Panel Descriptions 5 Rear Panel Descriptions 6 Chapter 2: Using Your System Navigating the On-screen Menu 8 On-screen Menu Options Overview 9 Using the - URC MRX-20 | Owners Manual - Page 5
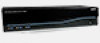
Congratulations! Thank you for purchasing URC's Total Control MRX-20 Advanced Network System Controller. The unit features an intuitive and interactive on-screen interface providing control of every connected device throughout the entire home. Now you can control your home theatre, lights, view - URC MRX-20 | Owners Manual - Page 6
of automation. Chapter 1: MRX-20 Overview In-Wall Controllers Keypads provide you with convenient access to anything your URC system can control. These are available as simple keypads or fully functional graphic displays. Music Listen to your favorite music services like Rhapsody, SiriusXM, Pandora - URC MRX-20 | Owners Manual - Page 7
source Reset Light Pipe When pressed, resets the unit. Resetting does not lose its programming. Attractive illumination signaling when the unit is ON. Chapter 1: MRX-20 Overview Reset Button WARNING!! Pressing and holding the Reset button for 15 seconds WILL erase all programming and return the - URC MRX-20 | Owners Manual - Page 8
MRX-20 Rear Panel Descriptions Power Network USB IR Outputs HDMI IN HDMI OUT Rear Panel Descriptions Power Connect power cable. Network Connect Three HDMI IN ports for transmission of digital HD video HDMI OUT One HDMI OUT port used to connect a display device. Chapter 1: MRX-20 Overview 4 - URC MRX-20 | Owners Manual - Page 9
RS-232 ports support TX (Transmit), RX (Receive) and GND (Ground) connections for oneway/two-way communication. Compatible with URC cables RS232F and RS232M. Trigger IN For future use! RFTX-1 Attach an optional RFTX-1 transmitter to work with compatible URC devices. Chapter 1: MRX-20 Overview 5 - URC MRX-20 | Owners Manual - Page 10
our URC User Interfaces such as the TRG-100/TRG-200 Umotion remotes, or URC's wide assortment of handheld, in-wall, Android and iOS controllers. press the Umotion button again to make a selection. Using other Total Control User Interfaces Use the interfaces navigational buttons (up, down, left - URC MRX-20 | Owners Manual - Page 11
Overview Main Menu The Main Menu allows control of any "connected device" in the Total Control System. Click the title to learn more the most needed commands for the device that is currently in use. Your URC Professional Installer programs these commands, so any changes to your current view will - URC MRX-20 | Owners Manual - Page 12
The Main Menu accesses any "connected device" in your Total Control System. Depending upon programming, most device /activities will be placed into subfolders (like Music, Entertainment, etc.). Accessing these subfolders will allow you to control any device that is available in the chosen room (see - URC MRX-20 | Owners Manual - Page 13
MRX-20 is controlling. Remember, in a Total Control system, the MRX-20 will default to control the room in which it is placed. Use the Rooms Menu to control and metadata information. This information is displayed since it is a URC media device. The metadata will change, every 5 seconds, rotating - URC MRX-20 | Owners Manual - Page 14
that category (submenus). Device List Submenus contain the devices/activities that were placed in the chosen category by the system programmer. With the Umotion control, use the device list's Up or Down arrows to move the list in the desired direction. Hover over a device/activity to select its icon - URC MRX-20 | Owners Manual - Page 15
bottom of the screen, provides valuable status and feedback of the Total Control system. The four sections of the Status Bar are determined by every day, this shows the sunset time for the next day. URC Thermostat Temperature Alarm Clock Displays the current temperature status based upon the - URC MRX-20 | Owners Manual - Page 16
the same audio source and join the volume commands into a single interface. • Monitor the status of other rooms in the Total Control project. • Control any other room in a Total Control project as if it were a remote in that room. This is dependent upon the programming done by the Custom Installer - URC MRX-20 | Owners Manual - Page 17
with all of the rooms in the Total Control project. Each room displays its status so the user can visually see what is "going on" in a specific location. Selecting a Room (Room Control) Selecting any room from the room list will allow the MRX-20 to control that room, as if it were physically - URC MRX-20 | Owners Manual - Page 18
the Room Options button causes the menu to expand and offers the user various options to control the room. Room Option Descriptions Lights Off Displays a light bulb icon when URC controlled lights are located in the selected room. Selecting this icon will issue a "lights off" command for - URC MRX-20 | Owners Manual - Page 19
Device Menu When the basic commands found in the Quick Bar do not include the action you need to perform, use the Device Menu to access all of that device's commands. For example, your custom programmer may not have included an EJECT command in the DVD's Quick Bar menu. Use the Device Menu to see - URC MRX-20 | Owners Manual - Page 20
These buttons vary based on the type of device (Cable, DVD, etc...) A maximum of ten buttons can be Buttons modified by your URC Professional Installer. Shortcuts Opens the Shortcuts menu with a list of user selected favorite devices. Favorites This option is only available when using - URC MRX-20 | Owners Manual - Page 21
Quick Bar Menu While watching or listening to a device, such as a Cable or CD, access the Quick Bar menu with a TRG-100/200 remote by pressing the Umotion button. The Quick Bar menu opens. Move the remote around the on-screen interface to reveal the on-screen cursor. Hover over a button and press - URC MRX-20 | Owners Manual - Page 22
These buttons vary based on the type of device (Cable, DVD, etc...) A maximum of ten buttons can be Buttons modified by your URC Professional Installer. Shortcuts Opens the Shortcuts menu with a list of user selected favorite devices. Favorites This option is only available when using - URC MRX-20 | Owners Manual - Page 23
Shortcuts Menu There are a maximum of six (6) shortcuts per room location. Remember, the MRX-20 can access any room in the Total Control system regardless of its physical location. Only items that appear in the currently selected room are available to be added to the Shortcuts menu. Using - URC MRX-20 | Owners Manual - Page 24
without making any changes. Selecting the Save option will make the requested changes and revert back to the Add/Edit screen. Chapter 2: Using your System 20 - URC MRX-20 | Owners Manual - Page 25
Favorites Menu While watching a device such as Cable or Satellite, press the Umotion button on the TRG-100/200 remote. Press the Favorites button, from either the Quick Bar or Device menu, to access the favorite channel list. Chapter 2: Using your System 21 - URC MRX-20 | Owners Manual - Page 26
+. Simply add the user credentials and select a folder for the MRX-20 to showcase your images. Configure Photo Viewer 1. Select the Photo Viewer icon from the Main Menu. The Photo Viewer menu opens. The URC Professional Installer MUST ENABLE this feature before proceeding. 2. Select Settings - URC MRX-20 | Owners Manual - Page 27
3. Select On-Line Service Username and Password. 4. Enter the Google+ user credentials by selecting Username and Password. Save the account credentials then press Validate Account. Press Go Back to - URC MRX-20 | Owners Manual - Page 28
). Choose a speed between 3 and 15 seconds. Turn the display effect OFF or ON. Select whether the photos are shown randomly or in order. 8. Follow the MRX-20 screen saver settings step on page 21 to turn ON Use Photo Slideshow as Screensaver. Then the photo slideshow will begin to work after the - URC MRX-20 | Owners Manual - Page 29
select the Date/Time area. Press the UMotion button on the TRG-100/200 then select the Date/Time on-screen area. Settings Menu The MRX-20 Settings Menu contains user adjustable configuration settings. Select an option by using the 5-way navigation buttons (up, down, left or right) or hover over an - URC MRX-20 | Owners Manual - Page 30
the user to the Main menu without incorporating any changes. Do Not Use Screen Saver: Turns off the screen saver. Use Generic Screen Saver: Uses URC's generic slide show after the time specified in Turn On After. Use Photo Slide Show as Screen Saver: Configure the Google+ photo slideshow to Turn - URC MRX-20 | Owners Manual - Page 31
General The General settings screen allows for setting the Date, Time and Temperature scale (Fahrenheit/Celsius). To view more of this settings menu, press the down arrow or use the Umotion capability of your TRG-100/200 remote to hover over the down arrow at the bottom of the screen. Using the - URC MRX-20 | Owners Manual - Page 32
This option will show important information about the current network, its settings and give the ability to edit the IP address of the MRX-20. The Network Information screen will display the status of the network connection (connected, not connected), Exit: Selecting Exit will return the user to - URC MRX-20 | Owners Manual - Page 33
of the information can be modified, these System Pages will show important information about your MRX-20. These pages should only be needed by a URC Professional Installer, or a technical support representative. Exit: Selecting Exit will return the user to the Main menu. Chapter 3: Settings and - URC MRX-20 | Owners Manual - Page 34
MRX-20 Physical Installation of the MRX-20 and Accessories The MRX-20 Advanced Network System Controller can be installed anywhere in the home with a Cat-5 cable. Up to eight MRX-20's can be installed, where the first unit is the master controller and the other seven units are auxiliary controllers - URC MRX-20 | Owners Manual - Page 35
cable or satellite on-screen guide and test the navigation arrows. Compare operation via RF to the original remote control. Operation should be identical. a Total Control remote and sent from the MRX-20 over the network connection. The signal is then sent to the device over proprietary URC RS-232 - URC MRX-20 | Owners Manual - Page 36
MRX-20 Applications The following diagrams depict several installation options showcasing a single source, multiple sources and more. Each diagram shows the MRX-20 as the last connected point before the television to gain optimum performance. Chapter 3: Settings and More... 32 - URC MRX-20 | Owners Manual - Page 37
Chapter 3: Settings and More... 33 - URC MRX-20 | Owners Manual - Page 38
Chapter 3: Settings and More... 34 - URC MRX-20 | Owners Manual - Page 39
output • USB : One (for future use) • Ethernet : One 10/100 RJ45 port (Indicator 2LED) • RS-232 : Four, supporting TX, RX and GND • Sensor : Four, supporting Video or Voltage sensing (requires URC sensors) • Relays : Four, NO, NC or COM • HDMI : Three Input , One Output RF: • Frequency : 2425-2475 - URC MRX-20 | Owners Manual - Page 40
Control, Inc. ("URC") warrants that the URC equipment shall be free from defects in material and workmanship under normal usage for two (2) years from purchase when such is purchased from URC . EXCEPT AS EXPRESSLY PROVIDED FOR HEREIN, TECHNICAL SERVICES ARE SUPPLIED "AS IS", WITHOUT ANY WARRANTY, - URC MRX-20 | Owners Manual - Page 41
will be lost during service and URC will not be Buying URC's PC programmable remotes or any of our Total Control® whole-house equipment online means buying equipment that does not have a URC's limited warranty. Such equipment is not eligible for URC tech support or software support, either. 2. URC - URC MRX-20 | Owners Manual - Page 42
OR IN PART, WHERE SUCH ARE RESTRICTED LIMITED OR EXCLUDED BY APPLICABLE LAW AND SUCH SHALL APPLY TO THE MAXIMUM EXTENT PERMITTED BY APPLICABLE LAW. URC SHALL NOT BE HELD RESPONSIBLE FOR THE STATEMENTS MADE BY OTHERS. SOME STATES OR JURISDICTIONS DO NOT ALLOW THE EXCLUSION OR LIMITATION OF INCIDENTAL - URC MRX-20 | Owners Manual - Page 43
energy and, if not installed and used in accordance with the instructions, may cause harmful interference to radio communications. However, there is this device must be installed to ensure a minimum separation distance of 20 cm or more form a person's body. Other operating configurations should be - URC MRX-20 | Owners Manual - Page 44
OF KOREA : Phone: +82-54-468-7281, Fax: +82-54-461-8368 Brand Name Product Name Model Name : UNIVERSAL remote control : Advanced Network System Controller : MRX-20 This product herewith complies with the requirements of EMC Directive (2004/108/EC) and R&TTE Directive(1995/5/EC) issued by the - URC MRX-20 | Owners Manual - Page 45
500 Mamaroneck Avenue, Harrison, NY 10528 Phone: (914) 835-4484 Fax: (914) 835-4532 www.universalremote.com OCE-0141A Rev 01
-
 1
1 -
 2
2 -
 3
3 -
 4
4 -
 5
5 -
 6
6 -
 7
7 -
8
-
9
-
10
-
11
-
12
-
13
-
14
-
15
-
16
-
17
-
18
-
19
-
20
-
21
-
22
-
23
-
24
-
25
-
26
-
27
-
28
-
29
-
30
-
31
-
32
-
33
-
34
-
35
-
36
-
37
-
38
-
39
-
40
-
41
-
42
-
43
-
44
-
45
 |
 |

Owner’s Manual
MRX-20
Advanced Network System Controller