Uniden CMX660 Owners Manual
Uniden CMX660 Manual
 |
View all Uniden CMX660 manuals
Add to My Manuals
Save this manual to your list of manuals |
Uniden CMX660 manual content summary:
- Uniden CMX660 | Owners Manual - Page 1
CMX660 PROFESSIONAL MOBILE CB RADIO Owner's Manual © 2017 Uniden America Corporation Irving, Texas U01UT418ZZZ(0) Printed in Vietnam - Uniden CMX660 | Owners Manual - Page 2
- Uniden CMX660 | Owners Manual - Page 3
Microphone Hanger 14 Connect Microphone 14 Disconnect the Microphone 15 INSTALL RADIO BRACKET/INSTALL RADIO 15 Attach Side Rails 15 Attach Bracket/Install Radio 16 EMERGENCY OPERATION 17 USING YOUR CMX660 17 LCD DISPLAY 17 BASIC OPERATIONS 19 Turn On/Off 19 Transmit/Receive 20 Adjust - Uniden CMX660 | Owners Manual - Page 4
25 Set Dimmer 25 Set Key Beep 26 Set Roger Beep 27 Set Battery Check 27 Set FLIP 28 PREVENTIVE MAINTENANCE 28 MAINTENANCE 28 TROUBLESHOOTING 29 SERVICING YOUR RADIO 30 SPECIFICATIONS 31 FCC PART 15 & IC COMPLIANCE 34 FCC PART 15 COMPLIANCE 34 IC COMPLIANCE 34 ONE-YEAR LIMITED WARRANTY - Uniden CMX660 | Owners Manual - Page 5
Your Uniden CMX660 represents the highest quality communications device designed for use in the Citizens Band Radio Service. It will operate on any of the 40 AM frequencies authorized by the Federal Communications Commission (FCC). The CMX660 is designed to provide years of trouble-free service. Its - Uniden CMX660 | Owners Manual - Page 6
Replacement or substitution of crystal, transistors, ICs, regulator diodes, or any other part of a unique nature, with parts other than those recommend by Uniden, may cause violations of the technical regulations in Part 95 of the FCC Rules or in violation of type acceptance requirements in Part 2 - Uniden CMX660 | Owners Manual - Page 7
WHAT'S IN THE BOX CMX660 Radio Microphone Microphone Hanger with Hardware CMX660 Slide Mount Bracket with Hardware CMX660 DC Power Cord with Fuse Not Shown: Printed Materials 7 - Uniden CMX660 | Owners Manual - Page 8
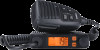
CONTROLS AND CONNECTORS Radio (Front and Back) FRONT 2 3 1 4 BACK 5 6 8 7 NUMBER 1 2 3 4 5 6 7 8 NAME MIC Jack LCD Menu VOL/SQ, POWER knob Local/DX External Speaker Jack Power Cables Antenna Connection 8 - Uniden CMX660 | Owners Manual - Page 9
Microphone 1 3 4 5 2 7 6 NO. NAME 1 Microphone Hanger 2 ANL / HI-CUT 3 Push to Talk 4 CH9/19|SCAN 5 WX / ALERT 6 Channel UP and DOWN 7 Microphone 9 - Uniden CMX660 | Owners Manual - Page 10
You can install the CMX660 either on top/ underneath a flat surface like a dashboard or under the driver installation. The basic steps to install this unit are: • Connect Power • Connect Antenna • Install Microphone Hanger/Connect Microphone • Install Radio Bracket/Install Radio CONNECT POWER Uniden - Uniden CMX660 | Owners Manual - Page 11
The CMX660 can operate on 12VDC power supply. Ground Information This radio may be installed and used in any 12volt DC negative ground system vehicle. With a negative ground system, the negative (-) battery terminal is usually connected to the vehicle motor - Uniden CMX660 | Owners Manual - Page 12
power output of the transmitter is limited by the FCC, the quality of your antenna is very important. To achieve the maximum transmission distance, Uniden strongly recommends that you install only a high quality antenna. You have just purchased a superior radio; don't diminish its performance by - Uniden CMX660 | Owners Manual - Page 13
transmitter. Never transmit if any person is closer than the specified distance to the antenna. Note that Uniden does not specify or supply any antenna with this radio. While a 0 dBi gain antenna is normal for a typical installation, the above limit applies to any antenna with up to 3 dBi gain. 13 - Uniden CMX660 | Owners Manual - Page 14
MICROPHONE HANGER/CONNECT MICROPHONE Install Microphone Hanger 1. Find a location to install the microphone hanger. When you install the hanger, take the same precautions as installing the radio (see page 10). Adjust wiring if necessary. 2. Hang the microphone onto the hanger. Connect Microphone - Uniden CMX660 | Owners Manual - Page 15
RADIO BRACKET/INSTALL RADIO The CMX660 uses a slide mount assembly to mount the unit onto a surface. It can be mounted either below or on top of a surface. Attach Side Rails 1. Align the guide rails along the sides of the radio and insert L-tabs into the L-tab slots. Be sure the slide mount latches - Uniden CMX660 | Owners Manual - Page 16
rail) L-Tab Slot (2 on each side) Slide Mount Latch (1 on each rail) 2. Use the screws provided to fasten the guide rails into position on the radio. Attach Bracket/Install Radio 1. Using the screws provided, screw the bracket into a stable, level surface. If mounting the radio in a vehicle, for - Uniden CMX660 | Owners Manual - Page 17
protection of property. Use Channel 9 to render assistance to a motorist. This is an FCC rule and applies to all CB radio operators. USING YOUR CMX660 LCD DISPLAY This LCD layout is for reference only. Different icons display depending on scanner status. Dimensions and layout may vary slightly. 17 - Uniden CMX660 | Owners Manual - Page 18
ITEM T TX ANL Status Indicator S Channel, Setting Indicator OFF Receiving • ANL off • WX mode is on. ON Transmitting (see page 20) • ANL on (see page 22) • CB mode is on. BLINKING Transmit error NA Channel Scan is off. In Menus, FLIP setting. Channel Scan NA is on (see page 23) • In Menus, - Uniden CMX660 | Owners Manual - Page 19
Beep sound is on (see page 27). • CB mode is on. • WX mode is off. Blinks during ON/OFF selection in menus. BASIC OPERATIONS The CMX660 uses both the knob on the radio and the ▲/▼ keys on the microphone to adjust settings. Turn On/Off The - Uniden CMX660 | Owners Manual - Page 20
the unit, when you reconnect power it remembers that it was on and returns to the ON state. You do not have to press POWER again. 1. On the radio, press and hold the knob until the LCD lights and the radio beeps. Power is on. 2. Press and hold the knob again until the LCD goes out and the radio - Uniden CMX660 | Owners Manual - Page 21
If Key Beep is active, the microphone beeps each time the channel changes. Adjust Squelch 1. Press the knob on the radio until SQL displays. 2. Turn the konb to increase and decrease the squelch level. There are 8 squelch levels, from 0 to 7. Set Squelch to 0 to have the radio monitor the current - Uniden CMX660 | Owners Manual - Page 22
moment on the LCD and the on. icon stays 4. Press and hold ANL/HI-CUT again; the icon goes away and HI-CUT is turned off Adjust Radio Sensitivity (LO/DX) Noise caused by strong signals from nearby channels may be heard. The LO/DX settings (LOCAL 1 and LOCAL 2) will reduce this noise by reducing - Uniden CMX660 | Owners Manual - Page 23
Occasionally, you may want to listen to weaker signals (for example: receiving a distant signal). In that case, do not reduce sensitivity levels. CHANNEL SCAN When Channel Scan is on, the radio scans channels until it receives a signal. It will move to the next channel if no signal is received after - Uniden CMX660 | Owners Manual - Page 24
2. Press ▲ or ▼ to select weather channels 01 - 07. If you select a weather channel that is broadcasting, displays. Set Weather Scan Weather Scan mode allows the radio to move to the next weather channel if no signal is detected. 1. Press WX/ALERT on the microphone to enter Weather mode. WX XX - Uniden CMX660 | Owners Manual - Page 25
and displays. 2. Press and hold WX/ALERT to turn Weather Alert off. The icon goes away. MENU OPERATION Press on the radio to access the 5 CMX660 menus. ƒƒ Dimmer ƒƒ Key Beep ƒƒ Roger Beep ƒƒ Battery Check ƒƒ Flip Press ▲ or ▼ on the microphone or turn the knob on the radio to change the menu - Uniden CMX660 | Owners Manual - Page 26
1. On the radio, press on the radio until DIM displays and the dimmer level displays and blinks. 2. Turn the knob on the radio or press ▲ or ▼ on the microphone to scroll through the options [oF (OFF), 1, 2, or 3]. 3. When you have selected a dimmer level, press again to move to the next menu item - Uniden CMX660 | Owners Manual - Page 27
Set Roger Beep Turn Roger Beep on to transmit a Roger Beep tone when you finish transmitting. 1. On the radio, press until ROG, the icon, and the Roger Beep status display. Turn the knob on the radio or press ▲ or ▼ on the microphone to select on (on) or off (oF). 2. When you have turned the Roger - Uniden CMX660 | Owners Manual - Page 28
electrical connections are tight. 3. Inspect antenna coaxial cable for wear or breaks in shielding. 4. Be sure all screws and mounting hardware are tight. MAINTENANCE The CMX660 is designed to give you years of trouble-free service. There are no user- 28 - Uniden CMX660 | Owners Manual - Page 29
serviceable parts inside. Except for the fuse in the DC power cord, no maintenance is Use only the fuse specified for your CMX660. Failure to do so may void your warranty. TROUBLESHOOTING In the event of system malfunction, perform the following procedures: PROBLEM Unit does not power up No - Uniden CMX660 | Owners Manual - Page 30
PROBLEM SUGGESTION No Transmission Check microphone connection. Be sure radio is do not get satisfactory results after performing these checks, visit the Uniden website (www.uniden.com) for troubleshooting and FAQ information. SERVICING YOUR RADIO It is the user's responsibility to see that this - Uniden CMX660 | Owners Manual - Page 31
: 400mA (max) -22°F to 140°F -30°C to 60°C DC Power Cord with Built-In Fuse Microphone Microphone Hanger with Screws Mounting Bracket with Screws Owner's Manual Part 95 Subpart D (FCC Rules) 31 - Uniden CMX660 | Owners Manual - Page 32
Size (W x D x H): Weight: Antenna Connector TRANSMITTER Output Power: Hum and Noise: Frequency Tolerance: Spurious Rejection: RECEIVER Sensitivity at 10 dB S/N Maximum Sensitivity Squelch Sensitivity Signal Meter S-9: 4 in. W x 0.97 in. H x 3.86 in. D (without knobs and jacks) (102 mm W x 24.6 mm H - Uniden CMX660 | Owners Manual - Page 33
Audio Output Power (max.): Adjacent Channel Rejection: Image Rejection: External Speaker Impedance: WEATHER RADIO Usable Sensitivity for 12dB SINAD Distortion (0.5W output) @ 1KHz ± 3KHz DEV. Maximum Audio Output Power Alert Sense Alert Frequency Squelch Sensitivity (Threshold) Watts dB dB ohms - Uniden CMX660 | Owners Manual - Page 34
FCC). Ce dispositif est soumis aux conditions suivantes: 1) Ce dispositif ne doit pas causer d'interférences nuisibles et; 2) Il doit pouvoir supporter les parasites qu'il reçoit, incluant les parasites pouvant nuire à son fonctionnement. Tout changement ou modification non approuvé expressément par - Uniden CMX660 | Owners Manual - Page 35
droit à l'utilisateur de faire fonctionner cet équipement. ONE-YEAR LIMITED WARRANTY Important: Evidence of original purchase is required for warranty service. WARRANTOR: UNIDEN AMERICA CORPORATION ("Uniden") ELEMENTS OF WARRANTY: Uniden warrants, for one year, to the original retail owner, this 35 - Uniden CMX660 | Owners Manual - Page 36
an authorized Uniden service center for a defect or malfunction covered by this warranty, (E) used in any conjunction with equipment or parts or as part of any system not manufactured by Uniden, or (F) installed or programmed by anyone other than as detailed by the owner's manual for this product - Uniden CMX660 | Owners Manual - Page 37
vary from state to state. This warranty is void outside the United States of America. PROCEDURE FOR OBTAINING PERFORMANCE OF WARRANTY: If, after following the instructions in the owner's manual you are certain that the Product is defective, pack the Product carefully (preferably in its original 37 - Uniden CMX660 | Owners Manual - Page 38
and a note describing the defect that has caused you to return it. The Product should be shipped freight prepaid, by traceable means, to warrantor at: Uniden America Service C/O Saddle Creek 743 Henrietta Creek Rd., Suite 100 Roanoke, TX 76262 38 - Uniden CMX660 | Owners Manual - Page 39
Receiving well Stop transmitting OK, message received Relay message Busy, stand by Out of service, leaving air In service, subject to call Repeat message Transmission completed, standing by CODE MEANING 10-34 Trouble at this station 10-35 Confidential information 10-36 Correct time is 10-37 10 - Uniden CMX660 | Owners Manual - Page 40
CODE 10-11 10-12 10-13 10-16 10-17 10-18 10-19 10-20 10-21 10-22 10-23 10-24 MEANING CODE MEANING Talking too rapidly 10-45 All units within range please report Visitors present 10-50 Break channel Advise Weather/ 10-60 What is next Road conditions message number Make pickup at 10-62 - Uniden CMX660 | Owners Manual - Page 41
CODE 10-25 10-26 10-27 10-28 10-29 10-30 10-32 10-33 MEANING Can you contact Disregard last information I am moving to channel Identify your station Time is up for contact Does not conform to FCC rules I will give you a radio check EMERGENCY TRAFFIC CODE MEANING 10-82 Reserve room for 10-84 My - Uniden CMX660 | Owners Manual - Page 42
- Uniden CMX660 | Owners Manual - Page 43
- Uniden CMX660 | Owners Manual - Page 44
-
 1
1 -
 2
2 -
 3
3 -
 4
4 -
 5
5 -
 6
6 -
 7
7 -
8
-
9
-
10
-
11
-
12
-
13
-
14
-
15
-
16
-
17
-
18
-
19
-
20
-
21
-
22
-
23
-
24
-
25
-
26
-
27
-
28
-
29
-
30
-
31
-
32
-
33
-
34
-
35
-
36
-
37
-
38
-
39
-
40
-
41
-
42
-
43
-
44
 |
 |

© 2017 Uniden America Corporation
U01UT418ZZZ(0)
Irving, Texas
Printed in Vietnam
CMX660
PROFESSIONAL MOBILE CB RADIO
Owner’s Manual