Vaddio AutoPresenter AutoPresenter w/AutoTrak FAQs
Vaddio AutoPresenter Manual
 |
View all Vaddio AutoPresenter manuals
Add to My Manuals
Save this manual to your list of manuals |
Vaddio AutoPresenter manual content summary:
- Vaddio AutoPresenter | AutoPresenter w/AutoTrak FAQs - Page 1
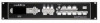
AutoPresenter use PresenterPOD. Vaddio part number 999-1111-000. Connect the AutoPresenter there are no triggers present before switching back to manual of the AT describes the process to set the AT presets. http://www.vaddio.com/images/document-library/342-0382_revd_autotrak_2.0_manual.pdf Vaddio
-
 1
1
 |
 |

Vaddio • 131 Cheshire Lane Minnetonka,MN 55305 • 800-572-2011 • 763-971-4400 • FAX: 763-971-4464 • vaddio.com
TechNote 205
Using AutoPresenter with AutoTrak
NOTE: AutoPresenter and AutoTrak POD cannot be connected at the same time! If you require similar triggers
with the AutoPresenter use PresenterPOD. Vaddio part number 999-1111-000.
Connect the AutoPresenter (AP) to the AutoTrak (AT) using a 998-1001-232 adapter connected to Com3 of the
AT through a straight through (568B) CAT5 cable and a 998-7200-232 adapter connected to the RS232 THRU
port of the AP. Both of these adapters are supplied with the AT system.
Connect the Video of the AT system to one of the 6 video inputs of the AP.
In the menus of the AP arrow down until you see AutoTrak Input. Press Select. Arrow up or down until the Video
port of the AT is highlighted. Press Select. This selection determines when triggers are sent to the AT via the
RS232 connection.
If the AT is to be the default video when there are no triggers active also set the Default Camera in the AP menu
to be the AT video input number. Note that the default timer must also be greater than 0. The default timer is the
number of seconds the switcher waits when there are no triggers present before switching back to the AT vide
source.
Connect ALL triggers to the AP. With all triggers in the idle state go to the system menu of the AP and select the
Init Triggers prompt. Select Start. This reads the current status of all of the triggers connected to the AP and
assumes this is the idle condition. Any change in state will be considered a trigger.
Reboot the AP. This is necessary for the AP to recognize the AT.
Determine which trigger (1-72) will be used in the AP to send preset commands to the AT. When programming
the AT these trigger numbers will be used to set the presets (1-6) in the AT.
Note that ANY change of the AP not involving these triggers will result in the AT to resume tracking.
Page 22 of the installation manual of the AT describes the process to set the AT presets.