Vantec NST-DP100S3 User Guide
Vantec NST-DP100S3 - NexStar HDD Duplicator Manual
 |
View all Vantec NST-DP100S3 manuals
Add to My Manuals
Save this manual to your list of manuals |
Vantec NST-DP100S3 manual content summary:
- Vantec NST-DP100S3 | User Guide - Page 1
User Manual Model: NST-DP100S3 www.vantecusa.com All Registerd Trademarks Belong To Their Respective Companies. Copyright © 2013 Vantec Thermal Technologies. - Vantec NST-DP100S3 | User Guide - Page 2
CONTENTS 2 INTRODUCTION 3 SYSTEM REQUIREMENTS AND FEATURES 4 SPECIFICATIONS AND PACKAGE CONTENTS 5 HDD DUPLICATOR 6 HARD DRIVE INSERTION AND REMOVAL 8 USING THE HDD DUPLICATOR FOR HARD DRIVE DUPLICATION 9 USING THE HDD DUPLICATOR AS A HARD DRIVE DOCK 12 WARRANTY 15 CONTACT 15 2 - Vantec NST-DP100S3 | User Guide - Page 3
-by-sector as a standalone device without even connecting to a computer. When connected to a computer, the device transforms into a SuperSpeed USB 3.0 storage device for up to 2 high capacity hard drives. Whether your need is storage or duplication, the Vantec NexStar HDD Duplicator is the perfect - Vantec NST-DP100S3 | User Guide - Page 4
Features: Standalone Hard Drive Duplicator Dock One Button Sector-by-Sector Cloning LED Display Lights For Duplication Status and Progress Hard Drive Dock Design For Quick and Easy Access Multi-Function: Duplication or Storage Mode Supports Two 2.5" or 3.5" SATA I/II/III Hard Drives USB 3.0 Transfer - Vantec NST-DP100S3 | User Guide - Page 5
Model: NST-DP100S3 Device Support: SATA I/II/III Hard Drive Device Size: 2.5" or 3.5" Hard Drive Internal Support: Windows® Vista, 7, 8, Mac OS X 10.4 & Greater *Check our website www.vantecusa for any updates. Package Contents: NexStar HDD Duplicator USB 3.0 Cable Power Adapter User's Manual - Vantec NST-DP100S3 | User Guide - Page 6
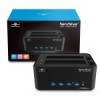
HDD Duplicator: 1 2 3 4 5 Front View 1. Link 2. Power 3. HDD1 4. HDD2 5. Duplicator Button 6 7 8 Rear View 6. USB 3.0 port 7. Power Connector 8. Power Switch 6 - Vantec NST-DP100S3 | User Guide - Page 7
10 9 12 11 Top View 9. HDD1 Eject Button 10. HDD1 Slot 11. HDD2 Eject Button 12. HDD2 Slot 7 - Vantec NST-DP100S3 | User Guide - Page 8
the Eject button slowly while holding the drive as it disconnect from the SATA connector. Align SATA Connector Master Drive Slave Drive Insert HDD Remove HDD NOTE: FOR DUPLICATION: Make sure your Main Drive is in HDD1 and slave in HDD2. DO NOT remove or insert any drive while the power is ON. You - Vantec NST-DP100S3 | User Guide - Page 9
USING THE HDD DUPLICATOR FOR HARD DRIVE DUPLICATION: 1. Following the instructions for inserting the drives on page 8 IMPORTANT: DUPLICATION IS FROM HDD1 TO HDD2. 2. Connect the power adapter to wall outlet and to the HDD Duplicator 3. Make sure there are no connection on the USB 4. Turn on the - Vantec NST-DP100S3 | User Guide - Page 10
HDD DUPLICATION LED STATUS: LED Status LINK POWER HDD1 HDD2 Both HDD inserted Duplication started Duplication in progress Duplication complete Duplication Failure 25% 50% 75% 100% Solid Orange LED for every 25% done incrementally Orange LED moving back and forth Orange LED blinking RED 10 - Vantec NST-DP100S3 | User Guide - Page 11
HDD1, the capacity remaining in HDD2 upon completion of the duplication can be formulated to a new partition. Follow the HDD formatting guide in this manual for further instructions. 3. If the original drive was initialized using MBR, the copied drive will be MBR upon completion. If the original - Vantec NST-DP100S3 | User Guide - Page 12
USING THE HDD DUPLICATOR AS A HARD DRIVE DOCK: 1. Turn on your computer 2. Following the instructions for Inserting the drive(s) on page 8 3. Connect the power adapter to wall outlet and to the HDD Duplicator 4. Connect the USB 3.0 cable to the duplicator and the other end to a USB 3.0/2.0 port on - Vantec NST-DP100S3 | User Guide - Page 13
HDD DOCK LED STATUS: LED Status LINK POWER HDD1 HDD2 Connected to PC/Mac Power On HDD1 Flash during R/W activity BLUE BLUE Flash BLUE Flash during R/W during R/W activity activity POWER SAVING MODE STATUS: Hard Drive Dock will be in standby when System enters into Sleep or Hibernation mode. 13 - Vantec NST-DP100S3 | User Guide - Page 14
DOCK: 1. If you are using hard drives over 2TB, make sure the OS you are using can support GUID Partition Table (GPT) and the drive is formatted correctly. 2. This device is designed to support 2.5" and 3.5" using standard SATA HDD/ SSDs. Other hard drives using non-standard placement of the SATA - Vantec NST-DP100S3 | User Guide - Page 15
Warranty: The NexStar comes with a 1 year limited warranty (90 day parts). If your unit should become defective within that time defects, please contact the retailer from which you purchased the unit immediately and ask for a replacement. CONTACT: Vantec Thermal Technologies www.vantecusa.com 15 - Vantec NST-DP100S3 | User Guide - Page 16
目錄: 目錄 16 產品介紹 17 18 19 操作介面 20 22 23 26 產品保固 29 聯絡我們 29 16 - Vantec NST-DP100S3 | User Guide - Page 17
Clone USB 3.0 USB 3.0 2 Clone 17 - Vantec NST-DP100S3 | User Guide - Page 18
LED 2.5" 或3.5" SATA I/II/III USB 3.0傳輸速度 Microsoft Windows® Vista/7/8 (32/64-bit) Mac OS X 10.4 或以上 For USB 3.0 speeds, the system must support USB 3.0 specifications 18 - Vantec NST-DP100S3 | User Guide - Page 19
NST-DP100S3 SATA I/II/III 硬碟 2.5" 或 3.5" 硬碟 SATA USB 3.0 USB 2.0 & 1.1 8.0 TB 150mm(L) x 108mm(W) x 61.5mm (H) Windows® Vista, 7, 8, Mac OS X 10.4 或以上 www.vantecusa Clone USB 3.0 19 - Vantec NST-DP100S3 | User Guide - Page 20
1 2 3 4 5 前視圖 1 2 3. HDD1 4. HDD2 5 6 7 8 後視圖 6. USB 3.0 埠 7 8 20 - Vantec NST-DP100S3 | User Guide - Page 21
10 9 12 11 上視圖 9. HDD1 退出鈕 10. HDD1 插槽 11. HDD2 退出鈕 12. HDD2 插槽 21 - Vantec NST-DP100S3 | User Guide - Page 22
1 SATA 2. 將2.5" 或 3.5" HDD/SSD SATA 2.5" HDD/ SSD 3 SATA 4 SATA 對齊 SATA 連接埠 母硬碟 (HDD1) 子硬碟 (HDD2) 移除硬碟 HDD1 HDD2 22 - Vantec NST-DP100S3 | User Guide - Page 23
1 8 HDD1 HDD2)。 2 Clone。 3 USB 4 LED 5. 請等待15-20 6 5 7. 每格LED代表25 25% 的 HDD1 HDD2 LED LED HDD2 HDD1 HDD2 的LED 23 - Vantec NST-DP100S3 | User Guide - Page 24
LED 指示燈 LINK POWER HDD1 HDD2 複製完成 複製失敗 25% 50% 75% 100% 每25 LED LED LED 24 - Vantec NST-DP100S3 | User Guide - Page 25
1 HDD2 2. HDD2 HDD1。若HDD2容量大於HDD1 3 HDD1)格式為 MBR HDD2)亦將為 MBR HDD1)為 GUID Partition Table (GPT HDD2)亦 將為 GUID Partition Table (GPT) 格式。 4 Off Line Off Line On Line HDD1 HDD2 HDD1 25 - Vantec NST-DP100S3 | User Guide - Page 26
1 2 8 3 Clone。 4. 將USB 3.0 Clone USB 3.0/2.0 5 HDD(s), Power 和 Link LED 6 7 www.vantecusa.com Support F&Q 26 - Vantec NST-DP100S3 | User Guide - Page 27
PC/Mac時 LED 指示燈 LINK POWER HDD1 HDD2 HDD1 亮藍燈 亮紅燈 亮藍燈 閃爍 插入 HDD2 亮藍燈 亮藍燈 閃爍 同時插入HDD1與HDD2 亮藍燈 亮藍燈 閃爍 閃爍 27 - Vantec NST-DP100S3 | User Guide - Page 28
1 2TB GUID Partition Table (GPT 2 2.5" 或 3.5" SATA HDD/SSDs SATA 3 LED 4 5 6 USB3.0 USB 2.0 7 512byte sectors 4KB sector 4KB sector 28 - Vantec NST-DP100S3 | User Guide - Page 29
傳輸方塊Clone 90 www.vantecusa.com www.vantecusa.com 29
-
 1
1 -
 2
2 -
 3
3 -
 4
4 -
 5
5 -
 6
6 -
 7
7 -
8
-
9
-
10
-
11
-
12
-
13
-
14
-
15
-
16
-
17
-
18
-
19
-
20
-
21
-
22
-
23
-
24
-
25
-
26
-
27
-
28
-
29
 |
 |

www.vantecusa.com
All Registerd Trademarks Belong To Their Respective Companies. Copyright © 2013 Vantec Thermal Technologies.
User Manual
Model: NST-DP100S3