ViewSonic N6 User Guide
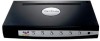
ViewSonic N6 - NextVision N6 Video Processor Manual
 |
UPC - 766907611816
View all ViewSonic N6 manuals
Add to My Manuals
Save this manual to your list of manuals |
ViewSonic N6 manual content summary:
- ViewSonic N6 | User Guide - Page 1
ViewSonic® NEXTVISION N6 ViewSeale User Guide - ViewSonic N6 | User Guide - Page 2
of this product is on the rear of the video processor. Write the serial number in the space below and keep this guide as a permanent record of your purchase to aid in identification in the event of theft or loss. Model Name: ViewSonic NEXTVISION N6 Model Number: VSVBX24402-1M Serial Number: Purchase - ViewSonic N6 | User Guide - Page 3
ViewSonic. • If your NEXTVISION N6 BOX will not be used for a long period of time, unplug and remove the batteries from the remote control. ANTENNA INSTALLATION INSTRUCTIONS information with regard to proper grounding of the mast and supporting structure, grounding of the lead-in wire to an antenna - ViewSonic N6 | User Guide - Page 4
purchase of ViewSonic NEXTVISION N6. With NEXTVISION N6 video processor, you can use your computer monitor to view TV, CATV, VCR, DVD or play video games. The system set up is easy and there are no additional requirements for software. Product Features • With advanced video processing technology - ViewSonic N6 | User Guide - Page 5
10 Chapter 3 Operation Instruction 3.1 Initial Setting 13 3.2 Remote Control 13 3.3 OSD Description 14 3.3.1 PICTURE settings 14 3.3.2 VIDEO tab 15 3.3.3 TV tab 16 3.3.4 AUDIO SETUP 17 3.3.5 Parental Control 18 3.3.6 OSD 19 Chapter 4 Troubleshooting Troubleshooting 20 Appendix - ViewSonic N6 | User Guide - Page 6
As you unpack the NEXTVISION N6, you will find the following items: If any items are missing, contact ViewSonic. 1. NEXTVISION N6 2. Power supply 3. VGA cable 4. Audio cable 5. AN cable 6. Stand 7. Remote control 0 0000 2 9 7)' 000 O TT® 7 0 8 0 @ 0 0 O 0 O MewSoric 8. User manual ViewSonie - ViewSonic N6 | User Guide - Page 7
POWER : Use to turn unit on or off. The NEXTVISION N6 is in standby mode when power is off. C3 INPUT : Select C-VIDEO, S-VIDEO, CABLE/TV, or PC. Press the "INPUT" button to switch the signals between CABLE/TV, Composite, S-VIDEO, Component or RGB. CD VOLUME - : Decrease the sound volume. (D VOLUME - ViewSonic N6 | User Guide - Page 8
the other side to the RGB INPUT of your NEXTVISION N6. 02 RGB OUTPUT Connect your 15 pin monitor connector to the RGB output. S-VIDEO INPUT Connect the external S-video to this S-VIDEO INPUT port (S-Video typically provides a better quality video signal.) ▪ RF IN (VHF/UHF) Connect to antenna or - ViewSonic N6 | User Guide - Page 9
component output Antenna DVD with component output RGB output from PC The NEXTVISION N6 must be located within 1.0M of your PC. PC connection not O O O O Adapter RCA A/V cable S-VIDEO cable O DVDNCR/LD/IRD 00000 Camera I 0-1V --- Video game WARNING: Turn off all devices before you - ViewSonic N6 | User Guide - Page 10
WARNING: Turn off all devices before you begin. Audio/Video connection: For audio connection, use RCA audio(L+R) connector. For video connection, use an RCA video connector or an S-Video connector. K< The NEXTVISION N6 must be located within 1.0M of your PC. PC connection not required. Introduction - ViewSonic N6 | User Guide - Page 11
Extended wiring If your setup is not located close to a signal source, it is recommended to install a indoor video amplifier. This will significantly improve the signal quality. Indoor video amplifiers are available at your local electronics store. The best location of an indoor amplifier is near - ViewSonic N6 | User Guide - Page 12
Instruction 3.1 Initial Settings All the function settings for the NEXTVISION N6 0 O0 O SEL MUTE VOLUME O on ZOOM EWER • FAME ViewSonic 8 POP/MultiView Display nine channels with one active. 9 PIP PIP. 1 INPUT Select input sources of : C-VIDEO, S-VIDEO, Component, CABLE/TV, PC 11 CHANNEL+ / - ViewSonic N6 | User Guide - Page 13
3.2.1 PIP, POP and ZOOM Description For PIP:works in RGB mode. PIP can support the following resolutions and refresh rates. Resolution Refresh Rate 640x480 60Hz/75Hz 800x600 60Hz/75Hz times. Using arrow keys will move the zoomed area. Press "ZOOM" key again to quit. 12 Operation Instruction - ViewSonic N6 | User Guide - Page 14
3.3.1 OSD Description: PICTURE tab The PICTURE tab allows adjustment of picture related items. PICTURIE VIDEO TV AUDIO OSD PARENTALCONTROL CONTRAST 77 k IGHTNESS 50 MATI0N 51 -3 I SHARPNESS 9 kP TRACKING PIP mode to adjust SMOOTH for the vertical edge of video. Operation Instruction 13 - ViewSonic N6 | User Guide - Page 15
MIN 0 60 MIN ROURCE 9D ENHANCE • OFF 0 CO 0 CC2 0 TEXT1 0 TEXT2 • TUNER 0 C-VIDEO 0 8-VIDEO 0 COMPONENT OFF ON DEFAULT The VIDEO TAB has two pages: TIMING and SETTINGS. To select a page: CI Press " MENU " to call the OSD /REFRESH RATE your monitor will support. . 14 Operation Instruction - ViewSonic N6 | User Guide - Page 16
two pages; SETUP and CHANNEL LABEL. This tab may only be adjusted, when the current selected video source is RF IN. AUDIO PARENTAL CONTROL OS. SETUP CHANNEL LABEL CHANNEL: TUNER INPUT CHANNEL SETUP AINNERASE . Use BACKSPACEMto remove/edit, and press" ADD" to finalize. Operation Instruction 15 - ViewSonic N6 | User Guide - Page 17
PIP for its related audio source. MTS may not be available in all regions. Check with your CABLE/TV provider for more info. 16 Operation Instruction - ViewSonic N6 | User Guide - Page 18
more information about Parental Control, please contact your content provider. PICTURE VIDEO TV AUDIO PARENTAL CONTROL OSD PASSWORD PARENTAL CONTROL PASSWORD OOFNF PARENT CONTROL OOO your area. Contact your content provider for programs/schedules/ratings of content. Operation Instruction 17 - ViewSonic N6 | User Guide - Page 19
PICTURE VIDEO TV AUDIO PARENTAL CONTROL OSD PARENTAL CONTROL PASSWORD OLD PASSWORD (4 TO 8 DIGITS) ****I___ NEW PASSWORD • 4ENTER V CONFIRM PASSWORD To set or of numeric characters only entered via the Remote Control only. (There is no password preset by default) 18 Operation Instruction - ViewSonic N6 | User Guide - Page 20
availability varies.Compatibility and availability may vary by region,channel,or program. .4 K For definitions of each rating please see http://www.fcc.gov/vchip Operation Instruction 19 - ViewSonic N6 | User Guide - Page 21
. Adjusts the vertical position of the OSD. Adjusts the transparency of the OSD. Allows all info presented to the user in a selected language. 20 Operation Instruction - ViewSonic N6 | User Guide - Page 22
, IRC) • Run Auto scan process.(see Page 15) Customer Support Country/Region United States Canada Other T=Telephone, F=Fax T:(800)688-6688 F:(909)468-1202 T:(800)688-6688 F:(909)468-1202 T:(909)869-7976 Email [email protected] [email protected] [email protected] Troubleshooting 21 - ViewSonic N6 | User Guide - Page 23
RF IN RGB INPUT RGB OUTPUT POWER CONSUMPTION OPERATING TEMPERATURE OPERATING HUMIDITY DIMENSIONS WEIGHT REMOTE CONTROL 12VDC 1.2A Composite video RCA connector S-VIDEO 4-pin mini DIN Y, Pb,Pr RCA connectors Stereo L+R RCA connectors Phone Jack 3.5 co Phone Jack 3.5 0 F-Female connector (NTSC) D-Sub - ViewSonic N6 | User Guide - Page 24
under warranty, contact ViewSonic Customer Support. You will need to provide your product's serial number. 2. To obtain service under warranty, you will be required to provide (a) the original dated sales slip, (b)your name, (c) your address, (d) a description of the problem, and (e) the serial - ViewSonic N6 | User Guide - Page 25
, and if not installed and used in accordance with the instruction, may cause harmful interference to radio communications. However, there compliance, the user must use grounded power supply cord and the provided shielded video interface cable with bonded ferrite cores. If a BNC cable is going to be - ViewSonic N6 | User Guide - Page 26
ViewSonic Corporation
-
 1
1 -
 2
2 -
 3
3 -
 4
4 -
 5
5 -
 6
6 -
 7
7 -
8
-
9
-
10
-
11
-
12
-
13
-
14
-
15
-
16
-
17
-
18
-
19
-
20
-
21
-
22
-
23
-
24
-
25
-
26
 |
 |

ViewSonic®
ViewSeale
NEXTVISION
N6
User
Guide