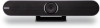
ViewSonic VB-CAM-201 User Guide English
ViewSonic VB-CAM-201 Manual
 |
View all ViewSonic VB-CAM-201 manuals
Add to My Manuals
Save this manual to your list of manuals |
ViewSonic VB-CAM-201 manual content summary:
- ViewSonic VB-CAM-201 | User Guide English - Page 1
in this User Guide will describe your limited coverage from ViewSonic® Corporation, which is also found on our web site at http://www.viewsonic.com in English, or in specific languages using the Regional selection box in the upper right corner of our website. Model No. VS18518 P/N: VB-CAM-201 - ViewSonic VB-CAM-201 | User Guide English - Page 2
exceeding the world's expectations for technological evolution, innovation, and simplicity. At ViewSonic®, we believe that our products have the potential to make a positive impact in the world, and we are confident that the ViewSonic® product you have chosen will serve you well. Once again, thank - ViewSonic VB-CAM-201 | User Guide English - Page 3
Please read the following Safety Precautions before you start using the device. • Keep this user guide in a safe place for later reference. • Read all warnings and follow all instructions. • To prevent damage, avoid any physical pressure, vibration, or immersion during transportation, possession, or - ViewSonic VB-CAM-201 | User Guide English - Page 4
Contents Safety Precautions 3 Introduction 6 Package Contents...6 Product Overview...7 VB-CAM-201...7 I/O Ports ...7 Remote Control...8 Initial Setup 10 Installing the Camera 10 Making Connections 11 Connecting to Power 11 Connecting External Devices 12 HDMI Connection 12 USB - ViewSonic VB-CAM-201 | User Guide English - Page 5
LED Indicators...36 LED Indicators - Host 1 and Host 2 Mode 37 Troubleshooting...38 Maintenance...39 General Precautions 39 Cleaning the Camera Lens 39 Cleaning the Case 39 Firmware Update 40 Regulatory and Service Information 45 Compliance Information 45 FCC Compliance Statement 45 - ViewSonic VB-CAM-201 | User Guide English - Page 6
Introduction Package Contents VB-CAM-201 Conference Camera Quick Start Guide 1 Package Contents VB-CAM-201 Conference Camera Quick Start Guide 1 Package Contents TQruibicek Start Guide ComPpouPwtoeewrr,eATrdVCa, apMbtWeoDlDWerbaCC(ilallS1e1laul22nPpaVTMVchnphIroclINyoNahon)TQVP12BUDH2roC - ViewSonic VB-CAM-201 | User Guide English - Page 7
Product Overview VB-CAM-201 DC 12V USB 3.0 HDMI USB 2.0 LAN I/O Ports 3 DC 12V 1 USB 3.0 2 HDMI USB 2.0 LAN 4 5 6 1. DC IN 4. HDMI 2. USB 3.0 5. USB 2.0 3. Reset Button 6. RJ45 NOTE: • The HDMI port only supports video output. • The RJ45 port only supports parameters management. • - ViewSonic VB-CAM-201 | User Guide English - Page 8
Remote Control 1 9 2 10 11 3 12 4 13 14 5 15 6 16 7 8 17 Number 1 2 3 4 5 6 7 8 Key Camera Disable Call Control Key Volume Up/Down Exit Tracking Speaker Tracking Preset 1 Preset 2 9 Standby 10 Hang Up 11 OK (Confirm) 12 Microphone Mute 13 Zoom 14 Speaker Mute 15 Participant - ViewSonic VB-CAM-201 | User Guide English - Page 9
Remote Control & Batteries • Avoid leaving the remote control or batteries in excessive heat or humidity. • Always dispose of old batteries in an environmentally friendly way. Contact your local government for more information on how to dispose of batteries safely. • Remove the batteries if the - ViewSonic VB-CAM-201 | User Guide English - Page 10
4 5 6 Initial Setup Installing the Camera 1 2 3 4 5 6 1. Pre-drill six (6) holes into the wall. 2. Install the six (6) wall anchors. 3. Align the wall bracket with the six (6) anchors. 4. Install the wall bracket with the six (6) bracket screws. 5. Attach the camera to the wall bracket. - ViewSonic VB-CAM-201 | User Guide English - Page 11
Making Connections Connecting to Power 1. Connect the power cord to the DC IN jack at the rear of the camera. 2. Connect the power cord plug to a power outlet. DC 12V USB 3.0 HDMI USB 2.0 LAN 1 2 NOTE: The power adapter includes four different plug faces. 11 - ViewSonic VB-CAM-201 | User Guide English - Page 12
camera (VB-CAM-201) is the default video and audio output device when being used. HDMI Connection Connect one end of an HDMI cable to the HDMI port of the camera. Then connect the other end of the cable to the HDMI port of your device. NOTE: The HDMI port only supports video output - ViewSonic VB-CAM-201 | User Guide English - Page 13
In Voice Out Mic In Voice Out Host 2: Under Host 2, the audio will output from both VB-CAM-201 and VB-AUD-201 speakers. To avoid any negative influence from a stereo effect, the voice volume of the VB-AUD-201 is limited to a minimum level and cannot be adjusted. Mic In Voice Out Mic In NOTE: The - ViewSonic VB-CAM-201 | User Guide English - Page 14
Client Mode Open the Bluetooth client mode and search for the device as an external speaker. If the connection is successful, the LED light will be blue. 14 - ViewSonic VB-CAM-201 | User Guide English - Page 15
will be flashing blue. ͫ If the pairing fails, please repeat steps 2~4 until the pairing is successful. NOTE: The remote control has been paired with the VB-CAM-201 at the factory, and it can be used normally without any special operation. 15 - ViewSonic VB-CAM-201 | User Guide English - Page 16
Using the Device Configuring the Settings General Operations 1. Press the Menu button to display the On-Screen Display (OSD) Menu. MENU Setting Information Restore Default Exit 2. Use the Directional buttons to navigate the menu, and press OK to enter the selected menu. SETTING Language Video - ViewSonic VB-CAM-201 | User Guide English - Page 17
3. Return to the previous menu by selecting "Return" and pressing the OK button. INFORMATION Version Model Date IP Gateway Netmask MacAddress Return 1.0.0 VB-CAM-201 2021-12-31 192.168.000.22 192.168.000.1 355.355.355.0 9C:1F:32:8E:20:03 4. To restore the menu settings to - ViewSonic VB-CAM-201 | User Guide English - Page 18
1~5) Auto Close (-/+, 1~8) (-/+, 0~14) (-/+, 0~14) (-/+, 0~14) (-/+, 60~200) WB Mode WDR Enable WB Mode R Gain B Gain Return On Off Auto Indoor Outdoor One Push Manual (-/+, 0~250) (-/+, 0~250) 1 The languages will be available after a software update; please check the software information. 18 - ViewSonic VB-CAM-201 | User Guide English - Page 19
Main Menu Sub-menu Menu Option On Flip-H Off Flip Setting On Flip-V Off Video Setting Return On OSD Mirroring Off Return Setting On 3A Enable Off On Mic Equalizer Off Audio Setting Bluetooth Setting Bluetooth Mode BT Host Mode Return Return 19 - ViewSonic VB-CAM-201 | User Guide English - Page 20
Main Menu Sub-menu EPTZ Zoom Limit¹ HDMI Format¹ Tracking Mode¹ Setting Tracking Effect² Tracking Speed² Information Restore Default Exit ¹ Hidden when EPTZ is Off. ² Hidden when EPTZ or Tracking Mode are Off. Menu Option On Off 1.5x 2x 3x 4x 5x 4K@30 1080P30 1080P60 1080P50 Off - ViewSonic VB-CAM-201 | User Guide English - Page 21
Network NOTE: The Camera IP address, by default, is set as Fixed IP address. Once you follow the below steps to connect to the camera, you can adjust the setting to Dynamic IP address and let your Router/DHCP server assign the network setting to the camera automatically. Get the Camera's IP Address - ViewSonic VB-CAM-201 | User Guide English - Page 22
Connect to the Router 1 LAN 3 LAN 2 LAN 4 Connect the camera and computer to the same router via a network cable. 1. Connect one end of a CAT5/5e/6 network cable to the camera. 2. Connect the other end of the network cable to the Ethernet interface of the router (LAN port). 3. Connect the camera - ViewSonic VB-CAM-201 | User Guide English - Page 23
Setup Camera Open your web browser and enter: http://192.168.100.88 You will see the login web page as below if your cables are connected and network settings are correct. There are two accounts built into the camera system: • Administrator - The default username is admin, password is test. This - ViewSonic VB-CAM-201 | User Guide English - Page 24
There are three main functions in this menu: • Zoom adjust • Set and call presets • Pan, Tilt, and On-Screen Display (OSD) menu control Zoom Manually adjust the zoom of the camera. NOTE: The larger the number, the faster the in/out "zoom speed". Preset Preset positions are the camera's memorized - ViewSonic VB-CAM-201 | User Guide English - Page 25
Up/Down/Left/Right/Home Button These buttons can control the Pan and Tilt movement and the On-Screen Display (OSD) menu. To adjust the OSD menu: 1. If there is no OSD menu displayed on the screen, click the Menu button via mouse curser to open the OSD menu. 2. Click the Up/Down/Left/Right/Home - ViewSonic VB-CAM-201 | User Guide English - Page 26
ratio. • High: A complex profile with a high compression ratio. First Stream Encode protocol • Default: H264 • Video stream compress format, this camera supports two types of format: H.264 and MJPEG. • H264 format needs more performance to decode and encode, but less bandwidth requirement. • MJPEG - ViewSonic VB-CAM-201 | User Guide English - Page 27
Frame rate • Default: 30 FPS • Select the number of images to be transmitted per second. I Key frame interval • Default: 30 • Select how often an I frame should be sent (H.264 only). The more often an I frame (full image) is sent, the better the video quality is; however, more bandwidth is required. - ViewSonic VB-CAM-201 | User Guide English - Page 28
Image Menu Brightness Brightness of the video image. Adjust these values to suit the ambient conditions. Saturation Saturation of the video image. Adjust these values to suit the ambient conditions. Contrast Contrast of the video image. Adjust these values to suit the ambient conditions. Sharpness - ViewSonic VB-CAM-201 | User Guide English - Page 29
. NOTE: • An activated DHCP server must be present in the network. • If a DHCP server is not enabled or does not exist in the network, then manually setting the network parameter is required (or just use the default setting). • Fixed IP address - ViewSonic VB-CAM-201 | User Guide English - Page 30
, but make sure that IP address is not occupied by another device. Subnet mask Manually insert the subnet mask. Gateway Manually insert the gateway address (or known Router IP address). DNS address Manually insert the DNS server's IP address. MAC address Display of the MAC address Port Settings - ViewSonic VB-CAM-201 | User Guide English - Page 31
Settings Menu Initialize Reboot Click the Reboot button to restart the camera. Factory Default Click the Apply button to set all settings back to default. 31 - ViewSonic VB-CAM-201 | User Guide English - Page 32
User There are two accounts built into the camera system: • Administrator - The default username is admin, password is test. This account can access all functions on the web page. • Guest - The default username is guest, password is test. This account only can access the basic functions on the web - ViewSonic VB-CAM-201 | User Guide English - Page 33
Information Page This page shows the below information: • Device ID • Software version • Device type • Webware version 33 - ViewSonic VB-CAM-201 | User Guide English - Page 34
inch, CMOS, 8.51M pixel 121° (DFOV), 110° (HFOV), 5x Digital Zoom, Pan/Tilt ± 15° MPT + EPTZ 2D & 3D Digital Noise Reduction ≥ 55dB Support Audio Item Full Frequency Speaker Microphone Array Specifications 96 dB SPL in the case of 0.5 meters Beamforming microphone, pick up distance up to 6 meters - ViewSonic VB-CAM-201 | User Guide English - Page 35
General Item Control Method Installation Method Operating Temperature Storage Temperature Dimensions (W x H x D) Net Weight Specifications 2.4G Remote Control Desktop, Wall, TV and other display devices. 0° C ~ 40° C (32° F~104° F) -40° C ~ 60° C (-40°F~140° F) 601 x 116 x 142 mm (bracket included) - ViewSonic VB-CAM-201 | User Guide English - Page 36
LED Indicators Light Amber Amber (Breathing) (breathing) Blue Blue (Chasing) (chasing) Blue Blue (Flashing) (flashing) Blue Blue (Steady, Breathing) (breathing) Blue Blue (Flashing) (flashing) Flashing) Blue Blue (Steady, Breathing) (steady) White White (Steady) (steady) Purple Purple (Steady - ViewSonic VB-CAM-201 | User Guide English - Page 37
Light Solid Red Red (Steady) (steady) Solid Red Red (Steady) (steady) Description Microphone muted 3A function prohibited LED Indicators - Host 1 and Host 2 Mode (Flashing) Light Blue (Steady, Breathing) Blue Description White (Steady) Host 1 mode Blue (Steady, Breathing) Blue White (Steady) - ViewSonic VB-CAM-201 | User Guide English - Page 38
Troubleshooting Problem or Issue No power The video image displayed by the camera is shaking Possible Solutions • Make sure you have turned on the device by pressing - ViewSonic VB-CAM-201 | User Guide English - Page 39
camera lens with a clean, soft, lint-free cloth. This removes dust and other particles. Cleaning the Case • Use a soft, dry cloth to clean. Disclaimer • ViewSonic® does not recommend the use of any ammonia or alcohol-based cleaners on the device or case. Some chemical cleaners have been reported to - ViewSonic VB-CAM-201 | User Guide English - Page 40
Update Visit the ViewSonic website or VB-CAM-201 web page to get latest firmware and upgrade VB-CAM-201. 1. Download the firmware upgrade tool (zip file) and the latest firmware version (pkg file). 2. Extract the upgrade tool file and open USB_Upgrade.exe. 3. Connect the VB-CAM-201 to your computer - ViewSonic VB-CAM-201 | User Guide English - Page 41
4. Once the connection is successful, the tool will show the message "Camera connected successfully". 5. Choose PKG in Type before loading the firmware file. 41 - ViewSonic VB-CAM-201 | User Guide English - Page 42
6. Click on the "Load File" button to load the latest firmware file you downloaded from the ViewSonic website. NOTE: Do not rename the file name before the upgrade process. This may cause the upgrade to fail. 7. Click on the "Upgrade" button, then - ViewSonic VB-CAM-201 | User Guide English - Page 43
8. Wait for the upgrade to finish. 9. Once the update is finished, the SOC Version will show your latest firmware version. 43 - ViewSonic VB-CAM-201 | User Guide English - Page 44
10. If the tool doesn't show your SOC version, you may click on "Version Search". 11. If the tool cannot detect your camera, click on "Reconnect USB" or reconnect your USB cable again. 44 - ViewSonic VB-CAM-201 | User Guide English - Page 45
Regulatory and Service Information Compliance Information This section addresses all connected requirements radiate radio frequency energy, and if not installed and used in accordance with the instructions, may cause harmful interference to radio communications. However, there is no guarantee that - ViewSonic VB-CAM-201 | User Guide English - Page 46
FCC Radiation Exposure Statement This equipment complies with FCC radiation exposure limits set forth for an uncontrolled environment. This equipment should be installed and operated with a minimum distance of 20 cm between the radiator & your body. Validity of using the module certification: In the - ViewSonic VB-CAM-201 | User Guide English - Page 47
IC Radiation Exposure Statement This equipment complied with IC RSS-102 radiation exposure limits set forth for an uncontrolled environment. This equipment should be installed and operated with minimum distance 20cm between the radiator & your body. The device for the band 5150-5825 MHz is only for - ViewSonic VB-CAM-201 | User Guide English - Page 48
Declaration of RoHS2 Compliance This product has been designed and manufactured in compliance with Directive 2011/65/EU of the European Parliament and the Council on restriction of the use of certain hazardous substances in electrical and electronic equipment (RoHS2 Directive) and is deemed to - ViewSonic VB-CAM-201 | User Guide English - Page 49
you for being part of Smarter, Greener Computing. Please visit the ViewSonic® website to learn more. USA & Canada: https://www.viewsonic.com/us/company/green/go-green-with-viewsonic/#recycleprogram Europe: https://www.viewsoniceurope.com/eu/support/call-desk/ Taiwan: https://recycle.epa.gov.tw/ 49 - ViewSonic VB-CAM-201 | User Guide English - Page 50
or use of this product. In the interest of continuing product improvement, ViewSonic® Corporation reserves the right to change product specifications without notice. Information in means, for any purpose without prior written permission from ViewSonic® Corporation. VB-CAM-201_UG_ENG_1d_20220504 50 - ViewSonic VB-CAM-201 | User Guide English - Page 51
Customer Service For technical support or product service, see the table below or contact your reseller. NOTE: You will need the product's serial number. Country/ Region Website Country/ Region Website Asia Pacific & Africa Australia www.viewsonic.com/au/ Bangladesh www.viewsonic.com/bd/ - ViewSonic VB-CAM-201 | User Guide English - Page 52
, fire, water, lightning, or other acts of nature, unauthorized product modification, or failure to follow instructions supplied with the product. ͫ Repair or attempted repair by anyone not authorized by ViewSonic® ͫ Damage to or loss of any programs, data, or removable storage media. ͫ Normal wear - ViewSonic VB-CAM-201 | User Guide English - Page 53
in the product User Guide. • Removal, installation, and set-up service charges, including wall-mounting of the product. How to get service: • For information about receiving service under warranty, contact ViewSonic® Customer Support (Please refer to the "Customer Service" page). You will need - ViewSonic VB-CAM-201 | User Guide English - Page 54
Canada: For warranty information and service on ViewSonic® products sold outside of the U.S.A. and Canada, contact ViewSonic® or your local ViewSonic® dealer. The warranty period : http://www.viewsonic.com/eu/ under "Support/Warranty Information". Display Warranty Term Template In UG VSC_TEMP_2007 54 - ViewSonic VB-CAM-201 | User Guide English - Page 55
components & accessories. How long the warranty is effective: ViewSonic® LCD displays are warranted for between 1 and 3 years product modification, unauthorized attempted repair, or failure to follow instructions supplied with the product. ͫ Causes external to the product set-up service charges. 55 - ViewSonic VB-CAM-201 | User Guide English - Page 56
service: For information about receiving service under warranty, contact ViewSonic® Customer Support (Please refer to the attached "Customer Service problem, and (e) the serial number of the product. • Take or ship the product, in the original container packaging, to an authorized ViewSonic® service - ViewSonic VB-CAM-201 | User Guide English - Page 57
Colo Centro 39300 Acapulco, Guerrero Tel: 744-48-32627 Monterrey: Global Product Services Mar Caribe # 1987, Esquina con Golfo Pérsico Fracc. Bernardo Reyes, 20 de Noviembr Tijuana, Mexico FOR USA SUPPORT: ViewSonic® Corporation 381 Brea Canyon Road, Walnut, CA. 91789 USA Tel: 800-688-6688 E-Mail - ViewSonic VB-CAM-201 | User Guide English - Page 58
Process Color C0 M91 Y72 K24 Process Color C0 M0 Y0 K100 Process Color C0 M91 Y72 K24 Spot Color Spot Color Pantone Black C Pantone 187 C
-
 1
1 -
 2
2 -
 3
3 -
 4
4 -
 5
5 -
 6
6 -
 7
7 -
8
-
9
-
10
-
11
-
12
-
13
-
14
-
15
-
16
-
17
-
18
-
19
-
20
-
21
-
22
-
23
-
24
-
25
-
26
-
27
-
28
-
29
-
30
-
31
-
32
-
33
-
34
-
35
-
36
-
37
-
38
-
39
-
40
-
41
-
42
-
43
-
44
-
45
-
46
-
47
-
48
-
49
-
50
-
51
-
52
-
53
-
54
-
55
-
56
-
57
-
58
 |
 |

VB-CAM-201
User Guide
Model No. VS18518
P/N: VB-CAM-201
IMPORTANT:
Please read this User Guide to obtain important information on installing and using your product in
a safe manner, as well as registering your product for future service.
Warranty information contained in this User
Guide will describe your limited coverage from ViewSonic
®
Corporation, which is also found on our web site at
http://www.viewsonic.com in English, or in specific languages using the Regional selection box in the upper right
corner of our website.