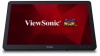
ViewSonic VSD242 User Guide
ViewSonic VSD242 Manual
 |
View all ViewSonic VSD242 manuals
Add to My Manuals
Save this manual to your list of manuals |
ViewSonic VSD242 manual content summary:
- ViewSonic VSD242 | User Guide - Page 1
VSD242 Smart Display User Guide Model No. VS16340 - ViewSonic VSD242 | User Guide - Page 2
exceeding the world's expectations for technological evolution, innovation, and simplicity. At ViewSonic, we believe that our products have the potential to make a positive impact in the world, and we are confident that the ViewSonic product you have chosen will serve you well. Once again, thank you - ViewSonic VSD242 | User Guide - Page 3
meets the following conformance standards: EN301489-1, EN301489-17, EN55022/24, EN60950-1, EN300328. We, hereby, declare that this Wi- local law. If the batteries, accumulators and button cells included with this equipment, display the chemical symbol Hg, Cd, or Pb, then it means that the battery - ViewSonic VSD242 | User Guide - Page 4
Declaration of RoHS2 Compliance This product has been designed and manufactured in compliance with Directive 2011/65/ EU of the European Parliament and the Council on restriction of the use of certain hazardous substances in electrical and electronic equipment (RoHS2 Directive) and is deemed to - ViewSonic VSD242 | User Guide - Page 5
Safety Instructions 1. DO the device to install or remove external devices that do not support hot-plug. 14. Disconnect the device from an electrical outlet device. 15. DO NOT disassemble the device. Only a certified service technician should perform repair. 16. The device has apertures to disperse - ViewSonic VSD242 | User Guide - Page 6
Copyright Information Copyright © ViewSonic Corporation, 2016. All rights reserved. Android, Google, Google Play, the Google by any means, for any purpose without prior written permission from ViewSonic Corporation. Intellectual Property Right Information Right to all technologies and products - ViewSonic VSD242 | User Guide - Page 7
Date: VSD242 ViewSonic Smart Display VS16340 VSD242_UG_ENG Rev. 1A 02-03-16 Product disposal at end of product life ViewSonic respects the ViewSonic website to learn more. USA & Canada: http://www.viewsonic.com/company/green/recycle-program/ Europe: http://www.viewsoniceurope.com/uk/support - ViewSonic VSD242 | User Guide - Page 8
of Contents Table of Contents 1 VSD242 Smart Display Features 2 Set Up Your VSD242 Smart Display 2.1 Connection 2 2.2 Get Your Smart Display Ready for Use 2 2.3 Power on Your Device 3 2.4 Power Off Your Device 4 3 About Your VSD242 Smart Display 3.1 Touch Screen 5 3.2 Applications, Widgets - ViewSonic VSD242 | User Guide - Page 9
on Android 5.1 (Lollipop) Comes with 1920x1080p HD resolution, allow you to work with HDMI, full-sized USB connectivity as well. 1 VSD242 Smart Display Features This section introduces you to the features of your Smart Display. NOTE • The features or applications described in this User's manual may - ViewSonic VSD242 | User Guide - Page 10
0.5 seconds to power on the power. - Lock the smart display when the display is on. - Recall the unlock display when the smart display is locked. - When the display is on, press this button and hold for about 3 seconds to shut down the smart display (under Android mode). - LED in blue when power on - ViewSonic VSD242 | User Guide - Page 11
Back View VSD242 Smart Display Features LEFT SIDE RIGHT SIDE 1 2 3 1 4 5 6 2 7 8 LEFT SIDE No. driver) 8 DC in Port Connect to power adaptor. RIGHT SIDE 1 USB type-A x4 (2.0) 2 USB type-B Used for keyboard, mouse, flash disk (supports FAT32 format only) or printer connections. External display - ViewSonic VSD242 | User Guide - Page 12
Set Up Your VSD242 Smart Display 2 Set Up Your VSD242 Smart Display 2.1 Connection LAN HDMI OUT HDMI IN Headset Microphone SD Outlet USB Type-A USB Type-A USB Type-A USB Type-A USB Type-B 2.2 Get Your Smart Display Ready for Use Insert the SD card 1 Insert a SD card if desired and / or available on - ViewSonic VSD242 | User Guide - Page 13
Set Up Your VSD242 Smart Display Connect the Power Cord 1 Connect the included power cord to the power jack. 2 Connect the your device. 2 Once powered-up, the LED indicator will show solid Blue. 3 The unlock display will appear after a short boot-up period. (If the lock screen function is enabled). 5 - ViewSonic VSD242 | User Guide - Page 14
Set Up Your VSD242 Smart Display 4 Touch and slide the lock icon to unlock the screen if necessary. 5 The device is ready for use when the Home screen is displayed. 2.4 Power Off Your Device 1 Press and hold the power button for about 3 seconds. 2 When the power off menu appears, touch OK. 6 - ViewSonic VSD242 | User Guide - Page 15
About Your VSD242 Smart Display 3 About Your VSD242 Smart Display 3.1 Touch Screen The main way to NOTE • You can connect the dots three to zoom the entire display frequency, also with two fingers to rotate and zoom the display for ex. Google MapsTM, as well as voice output designed specifically - ViewSonic VSD242 | User Guide - Page 16
VSD242 Smart Display 3.2 Applications, Widgets and Shortcuts The soft buttons or icons offer a variety of functions and shortcuts. On the Home screen, it is your starting point to access all the features on your device. It displays , the central Home screen will display firstly. You can also touch - ViewSonic VSD242 | User Guide - Page 17
2 About Your VSD242 Smart Display 10 8 9 11 7 6 345 No. Items Descriptions 1 Google Search Use the Google Search application to search the web faster and easier from Google. 2 Navigation Area Flick and drag the screen horizontally until the desired Home screen is displayed. 3 Back - ViewSonic VSD242 | User Guide - Page 18
About Your VSD242 Smart Display No. Items Descriptions You can add an application shortcut to the Touch this button to go back to the previous screen or option. - If the on-screen keyboard is displayed, the button changes to keyboard. . Touch it to close the on-screen - Touch this button to go - ViewSonic VSD242 | User Guide - Page 19
saved on your system. • Touch SETTINGS item to enter Settings menu that allows you to change the display settings. For more information, please Refer to 6 Customizing Your VSD242 Smart Display. • Touch WI-FI item to enter WIRELESS & NETWORKS configuration menu that allows you to enable/disable and - ViewSonic VSD242 | User Guide - Page 20
About Your VSD242 Smart Display 3.6 Customizing Your Home Screen 3.6.1 Add an Item (Shortcut) • hold the item that you want to delete such as a widget or shortcut. • An "X Remove" will soon be displayed at the top of the Home screen. • Drag the item over the "X Remove". • Then release your finger - ViewSonic VSD242 | User Guide - Page 21
About Your VSD242 Smart Display • Some wallpaper allows you to change the wallpaper color, ex. Magic Smoke. If "Settings..." displays during the changing wallpaper. Touch it , and on the top of screen will display "Tap to change", touch the screen to configure the wallpaper color. Tap the screen to - ViewSonic VSD242 | User Guide - Page 22
About Your VSD242 Smart Display 3.7.2 Application Shortcuts To quickly launch applications on the Home application 1 Touch the Home button on the system bar. 2 If the desired application shortcut displays on the Home screen, touch the shortcut to launch the application. 3.7.3 Recent Applications Open - ViewSonic VSD242 | User Guide - Page 23
About Your VSD242 Smart Display 3.7.4 Screen Lock Wallpaper You can set the display to turn off automatically after a timeout period of inactivity, or power it off manually by touching Power button. When you touch the Power button to wake up the display, the screen lock wallpaper appears to avoid - ViewSonic VSD242 | User Guide - Page 24
VSD242 Smart Display 3.8 Connecting to HDMI-compliant Devices via HDMI Input HDMI (High-Definition Multimedia Interface) is a compact audio/video interface for transferring uncompressed digital audio/video data. You can obtain the best user experience for video playback and gaming via HDMI. VSD242 - ViewSonic VSD242 | User Guide - Page 25
S 8 0 Select the Menu/Exit button on side of your VSD242 to launch OSD configuration screen. The OSD configuration screen can be used to configure the Contrast/Brightness, Input Select, Audio Adjust, Color Adjust, Information, Manual Image Adjust, Setup Menu and Memory Recall. 4.1 Adjustment Bars - ViewSonic VSD242 | User Guide - Page 26
the input source comes from HDMI or Android. Remember to check the HDMI connection your VSD242 including the Resolution, H.Frequency, V.Frequency, Pixel Clock, Model Number and Website. Manual Image to factory settings. NOTE • OSD language supports English, Deutsch (German), Francais (French), - ViewSonic VSD242 | User Guide - Page 27
menu is idling that reached to the OSD time out value. No signal: • The HDMI connection is not ready. • The HDMI connection device and your smart display is not normalization. 4.4 OSD and Hot keys setting OSD Lock: Press and hold [ ] and the up arrow [▲] for 10 seconds. If any buttons are pressed - ViewSonic VSD242 | User Guide - Page 28
settings from "duplicate these displays"to "show desktop only on 2"(VSD242) 5.2 Other Problems Problems No power No display Lock-up App doesn't then contact ViewSonic support or the Reseller from whom the device was purchased Check external HDMI device and connections. Restart VSD242 device. - ViewSonic VSD242 | User Guide - Page 29
screen 60cm (23.6" viewable) 1920x1080 250 cd/m2 LED 47 mm PCT 10 points touch supported Hardware Buttons Power button *1 Control keys *4 Power LED Indicator Blue (on) / Amber (saving) I/O ports LAN RJ45, supports 10/100/1000 Mbps HDMI-OUT HDMI-IN Headset Microphone-IN SD card Mini USB - ViewSonic VSD242 | User Guide - Page 30
& Humidity Altitude Accessories Input: 110V~230V Output: 12V, 4A (48W) 593mm x365x47(mm) 23.35x14.37x1.85(inches) 5.62Kg (Net) 8.12Kg (Gross) Android 5.1 (Lollipop) Rockchip RK3288 1.8GHz Quad-core Embedded DDR3 2GB, Speed to 800Mbps eMMC (NAND), 16GB 802.11 b/g/n Operation: 20%~90% @ 35oC Non - ViewSonic VSD242 | User Guide - Page 31
-233-2533 Email [email protected] [email protected] www.viewsoniceurope.com www.viewsoniceurope.com/uk/support/call-desk/ Hong Kong www.hk.viewsonic.com T= 852 3102 2900 [email protected] India www.in.viewsonic.com T= 1800 419 0959 [email protected] Korea ap - ViewSonic VSD242 | User Guide - Page 32
Smart Display products are warranted for between 1~3 years, depending on your country of purchase, for all parts including the light source and for all labor from the date of the first consumer purchase. User is responsible for the backup of any data before returning the unit for service. ViewSonic - ViewSonic VSD242 | User Guide - Page 33
or attempted repair by anyone not authorized by ViewSonic. OTA update disclaimer: ViewSonic Corporation assumes no liability for any errors or omissions in the information displayed. This firmware update is intended for ViewSonic® smart display. ViewSonic assumes no liability for data loss or any - ViewSonic VSD242 | User Guide - Page 34
-
 1
1 -
 2
2 -
 3
3 -
 4
4 -
 5
5 -
 6
6 -
 7
7 -
8
-
9
-
10
-
11
-
12
-
13
-
14
-
15
-
16
-
17
-
18
-
19
-
20
-
21
-
22
-
23
-
24
-
25
-
26
-
27
-
28
-
29
-
30
-
31
-
32
-
33
-
34
 |
 |

VSD242
Smart Display
User Guide
Model No. VS16340