Viking RVDR330 Installation Instructions
Viking RVDR330 Manual
 |
View all Viking RVDR330 manuals
Add to My Manuals
Save this manual to your list of manuals |
Viking RVDR330 manual content summary:
- Viking RVDR330 | Installation Instructions - Page 1
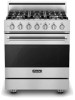
Installation ® Viking Range, LLC 111 Front Street Greenwood, Mississippi 38930 USA (662) 455-1200 For product information, call 1-888-845-4641 or visit the Viking Website at vikingrange.com F21189 EN (053113) Freestanding 30" Dual Fuel Self-Clean Sealed Burner Range - Viking RVDR330 | Installation Instructions - Page 2
Checklist 25 Service & Registration 26 2 IMPORTANT-Read and Follow! • Before beginning, please read these instructions completely and very important. We have provided many important safety messages in this manual and on your appliance. ALWAYS read and obey all safety messages. This is the safety - Viking RVDR330 | Installation Instructions - Page 3
use of a GFI is normally related to the location of a receptacle with respect to any significant sources of water or moisture. • Viking Range, LLC will NOT warranty any problems resulting from GFI outlets which are not installed properly or do not meet the requirements below. If the use of a GFI is - Viking RVDR330 | Installation Instructions - Page 4
shown with standard 6" backguard. 6 Specifications Dual Fuel 30" W. Range Description RVDR Overall width 29-7/8" (75.9 cm) service line • Sides - 0" • Top grate support - 36" (91.4 cm) Above cooking .7 cm) above cooking surface • Wall cabinets directly above product must be a minimum of 42" - Viking RVDR330 | Installation Instructions - Page 5
cabinet countertop. This can be accomplished by raising the unit using the adjustment spindles on the legs. • The range CANNOT be installed directly adjacent to sidewalls, tall cabinets, tall appliances, or other side vertical surfaces above 36" (91.4 cm) high. There must be a minimum of 6" (15.2 cm - Viking RVDR330 | Installation Instructions - Page 6
to LP gas. The range is designed specifically for natural or LP gas. Before beginning installation verify that the model is compatible with the intended gas supply. Manual shut-off valve: This installer-supplied valve must be installed in the gas service line before the appliance in the gas stream - Viking RVDR330 | Installation Instructions - Page 7
APPLIANCE. • All openings in the wall behind the appliance and in the floor under the appliance from the cooling fan, contact a Viking Authorized Service Center before continuing operation. Failure top of the range. DO NOT discard the anti-tip metal brackets (2) supplied with the range. These are the - Viking RVDR330 | Installation Instructions - Page 8
following section for 4-wire connection instructions. WARNING ELECTRICAL SHOCK HAZARD To personal injury or death; verify your appliance has been properly grounded in accordance with closed loop terminals and marked for use with ranges. Where local codes do not permit grounding through neutral, - Viking RVDR330 | Installation Instructions - Page 9
made at the terminal block, which is located behind the access door on the back of the range. WARNING ELECTRICAL SHOCK HAZARD To avoid risk of electrical shock, personal injury or death; verify your appliance has been properly grounded in accordance with local codes or in absence of codes, with the - Viking RVDR330 | Installation Instructions - Page 10
block. To connect eyelet style wires, use holes on right side of terminal. 5 Feed supply cord up through hole in bottom of range back. 6 1 2 Attach ground lead (green) with ground screw that was removed. 7 1 1 2 Attach line #1 (red) and line #2 (black) leads to outside terminal. Attach - Viking RVDR330 | Installation Instructions - Page 11
IS MOVED THEN THE ANTI-TIP DEVICE MUST BE RE-ENGAGED. Your range is shipped standard with two types of anti-tip devices. WARNING TIPPING HAZARD To reduce the risk of the appliance tipping, it must be secured by a properly installed anti-tip bracket(s). To make sure the bracket has been installed - Viking RVDR330 | Installation Instructions - Page 12
1 2 Attach bracket to back of range using two screws. Connecting Gas & Electric DANGER GAS LEAK HAZARD To avoid risk of personal injury or death; leak testing of the appliance must be conducted according to the manufacturer's instructions. Before placing appliance in operation, always check for gas - Viking RVDR330 | Installation Instructions - Page 13
Door Replacement and Adjustment 1 2 Reattach door to range. 3 2 1 2 3 Open door completely. Reattach hinge trim on both with convection fan on. □ Check self-clean function-door will lock in approximately 30 seconds, the center and outside broil elements will turn on and the bake element - Viking RVDR330 | Installation Instructions - Page 14
may be used in performing service on the appliance. All servicing should be referred to a qualified technician. Contact Viking Range, LLC, 1-888-845-4641, for the nearest service parts distributor in your area or write to: VIKING RANGE, LLC PREFERRED SERVICE 111 Front Street Greenwood, Mississippi
-
 1
1 -
 2
2 -
 3
3 -
 4
4 -
 5
5 -
 6
6 -
 7
7 -
8
-
9
-
10
-
11
-
12
-
13
-
14
 |
 |

®
Viking Range, LLC
111 Front Street
Greenwood, Mississippi 38930 USA
(662) 455-1200
For product information, call 1-888-845-4641
or visit the Viking Website at vikingrange.com
F21189 EN
(053113)
Freestanding 30” Dual Fuel
Self-Clean Sealed Burner Range
Installation