Viking VGSB5153 Installation Instructions
Viking VGSB5153 Manual
 |
View all Viking VGSB5153 manuals
Add to My Manuals
Save this manual to your list of manuals |
Viking VGSB5153 manual content summary:
- Viking VGSB5153 | Installation Instructions - Page 1
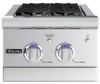
Use / Installation 15" Outdoor Side Burners VGSB5153 CVGSB5153 - Viking VGSB5153 | Installation Instructions - Page 2
shall not be stored in the vicinity of this or any other appliance. If not installed, operated and maintained in accordance with the manufacturer's instructions, this product could expose you to substances in fuel or fuel combustion which can cause death or serious illness and which are known to - Viking VGSB5153 | Installation Instructions - Page 3
ports. This may BASIC SPECIFICATIONS Description Overall Width VGSB5153 15-5/16" (38.9 cm) Overall Depth connection or standard residential 1/2" (1.3 cm) ID gas service line. 12 V - (8 AA batteries) Side supply piping system by closing its individual manual shut-off valve during any pressure - Viking VGSB5153 | Installation Instructions - Page 4
service line - 1/2" NPT male. 4.0" W.C.P. Nat. 6" to 10" W.C.P. Nat. If in excess of 10" W.C.P., a step-down regulator is required. Check with your local gas utility company or with local codes for instructions accessible location. NOTE: If using a Viking GSH12 flexible hose, remove the 1/2" flare - Viking VGSB5153 | Installation Instructions - Page 5
Standard Residential 1/2" ID gas service line - 1/2" NPT male with 3/8" flare adapter. 10.0" W.C.P. LP 11" to 14" W.C.P. LP. If in excess of 14" W.C.P., a step-down regulator is required. Check with your local gas utility company or with local codes for instructions on installing gas supply lines - Viking VGSB5153 | Installation Instructions - Page 6
a built-in construction where an LP/Propane tank is going to be used, there MUST be some type of support (braces, cut-out, etc.) to prevent tank from moving within the installation. The support must also allow the LP/Propane tank to withstand a horizontal tipping force equal to the weight of the - Viking VGSB5153 | Installation Instructions - Page 7
Leak Testing Although all gas connections on the grill are leak tested at the factory prior to shipment, a complete gas tightness check must be performed at the installation due to possible mishandling in shipment or excessive pressure unknowingly being applied to the unit. Periodically check the - Viking VGSB5153 | Installation Instructions - Page 8
you are unable to stop a leak, shut off the gas at the cylinder valve. Remove the cylinder from the grill. 9 Call an authorized gas appliance service technician or LP/Propane gas dealer. Do not use the grill until the leak is corrected. 1 2 After checking for leaks, push in and turn any - Viking VGSB5153 | Installation Instructions - Page 9
a built-in construction where an LP/Propane tank is going to be used, there MUST be some type of support (braces, cutout, etc.) to prevent tank from moving within the installation. The support must also allow the LP/Propane tank to withstand a horizontal tipping force equal to the weight of the tank - Viking VGSB5153 | Installation Instructions - Page 10
Built-In Clearance Dimensions - VGSB5153 Front View Min. 6" (15.2 cm) to combustible surfaces 15 5/16" (38.9 cm) Side View 10 - Viking VGSB5153 | Installation Instructions - Page 11
Ventilation for Built-In Installations Vents 5.00 inch maximum All vents no more than 5.00 inches above the floor of the installation. Not more than 5.00 inches from inside bottom of countertop. 5.00 inch maximum 1.00 inch maximum Bottom Vent not more than 1.00 inch from inside floor of - Viking VGSB5153 | Installation Instructions - Page 12
be loosened prior to lighting the burner for adjustments. To access the air shutter on the side burners, remove the grates, burner bowls, and grate support. With a screw driver, loosen the lock-screw on the face of the air shutter. Light the burner and adjust according to the directions below. 1. If - Viking VGSB5153 | Installation Instructions - Page 13
to combustible materials. 3. Pressure regulator connected and set. 4. Manual shut-off valve installed and accessible. 5. Check air shutter adjustment adjustments necessary that are the result of the installer not following instructions will be responsibility of the installer, dealer or the end user - Viking VGSB5153 | Installation Instructions - Page 14
Replacing Batttery Pack: Remove the grates, burner bowls. Remove the top pan by lifting upwards to disengage. The battery pack will be located on the front right side interior of the unit. Loosen the head screws to remove the lid which is connected to 8 AA batteries. After replacing the - Viking VGSB5153 | Installation Instructions - Page 15
Replace the pan, burner bowls and grates. Note: Please be environmentally-conscious & dispose of old batteries properly. 15 - Viking VGSB5153 | Installation Instructions - Page 16
Cleaning and Maintenance Removing Side Burners for Cleaning 1 2 Remove the grates, burner bowls, and grate support. Remove bolts from side burners. 3 Lift side burners and separate air shutter from orifice. WARNING Do not use flammable cleaning materials. Use a flashlight to inspect - Viking VGSB5153 | Installation Instructions - Page 17
on the side burners. Do not repair or replace any part of the outdoor side burners unless specifically recommended in the manual. All other servicing should be referred to a qualified technician. Stainless Steel* Parts Some stainless steel parts may have a plastic protective wrap which must be - Viking VGSB5153 | Installation Instructions - Page 18
an authorized service agency, or if you continue to have service problems, contact Viking Range, LLC at (888) 845-4641 or write to: VIKING RANGE, LLC PREFERRED SERVICE 111 indicated below. You will need it if service is ever required. Model Number Serial Number Date of Purchase Date Installed Dealer's - Viking VGSB5153 | Installation Instructions - Page 19
how long an implied warranty lasts, so the above limitation may not apply to you. WARRANTY SERVICE To obtain warranty service, contact an authorized Viking Range, LLC service agent, or Viking Range, LLC, 111 Front Street, Greenwood, Mississippi 38930, (888) 845-4641. Provide model and serial number - Viking VGSB5153 | Installation Instructions - Page 20
Viking Range, LLC 111 Front Street Greenwood, Mississippi 38930 USA (662) 455-1200 For product information, call 1-888-(845-4641), or visit our website at vikingrange.com in the US or brigade.ca in Canada F21363A EN (101515)
-
 1
1 -
 2
2 -
 3
3 -
 4
4 -
 5
5 -
 6
6 -
 7
7 -
8
-
9
-
10
-
11
-
12
-
13
-
14
-
15
-
16
-
17
-
18
-
19
-
20
 |
 |

Use / Installation
15” Outdoor Side Burners
VGSB5153
CVGSB5153