Westinghouse W4207 User Manual
Westinghouse W4207 - 42" LCD Flat Panel Display Manual
 |
UPC - 882777042076
View all Westinghouse W4207 manuals
Add to My Manuals
Save this manual to your list of manuals |
Westinghouse W4207 manual content summary:
- Westinghouse W4207 | User Manual - Page 1
www.westinghousedigital.com USER'S MANUAL MANUEL DE L'UTILISATEUR W4207 HD Video Monitor Moniteur HD Westinghouse Digital Electronics Santa Fe Springs, CA SE-UM-4204-0601 - Westinghouse W4207 | User Manual - Page 2
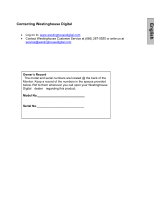
Digital • Log on to: www.westinghousedigital.com • Contact Westinghouse Customer Service at (866) 287-5555 or write us at [email protected] Owner's Record The model and serial numbers are located @ the back of the Monitor. Keep a record of the numbers in the spaces provided - Westinghouse W4207 | User Manual - Page 3
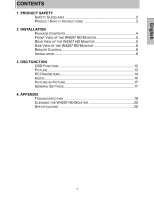
HD MONITOR 5 REAR VIEW OF THE W4207 HD MONITOR 5 SIDE VIEW OF THE W4207 HD MONITOR 6 REMOTE CONTROL 8 INSTALLATION 9 3. OSD FUNCTION OSD FUNCTION 12 PICTURE 13 PC PARAMETERS 14 AUDIO 15 PICTURE-IN-PICTURE 17 GENERAL SETTINGS 17 4. APPENDIX TROUBLESHOOTING 18 CLEANING THE W4207 HD MONITOR - Westinghouse W4207 | User Manual - Page 4
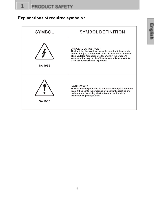
English 1 PRODUCT SAFETY 1 - Westinghouse W4207 | User Manual - Page 5
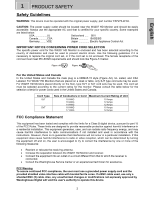
that to which the receiver is connected. • Consult the Westinghouse Service Center or an experienced technician for assistance. FCC Warning To assure continued FCC compliance, the user must use a grounded power supply cord and the provided shielded video interface cable with bonded ferrite cores - Westinghouse W4207 | User Manual - Page 6
cover. Your W4207 HD Monitor contains high-voltage parts. You may be seriously injured if you touch them. • Always handle your LCD display with care when moving it. • If the monitor emits smoke, abnormal noise, or a strange odor, immediately turn it off and contact the Westinghouse Service Center. 3 - Westinghouse W4207 | User Manual - Page 7
English 2 INSTALLATION Package Contents Your product package includes: • 42" Westinghouse LCD W4207 HD Monitor • Remote Control (with batteries) • Power Cord • User's Manual • Quick Connect Guide • Warranty Card 4 - Westinghouse W4207 | User Manual - Page 8
Front View of the W4207 HD Monitor Use the buttons on the right side of the W4207 HD Monitor or the buttons on the remote control to display the On Screen Display (OSD) menu and adjust the options. The OSD controls are defined in "OSD Functions" on page 16. Power Indicator Speakers Rear View - Westinghouse W4207 | User Manual - Page 9
Side View of the W4207 HD Monitor 1. Menu Turn OSD Menu On or Off 2. Volume + / - 3. T/S ( OSD Selection) Increase/Decrease sound volume or adjust a highlighted control while in the OSD Menu. Highlight a control while in the OSD Menu. 4. Input Select active video input or choose a selection - Westinghouse W4207 | User Manual - Page 10
external audio source to this jack. This connection supports either S-Video or AV input. 9 6. Audio Out (Left / Right) Connect this output to an external audio amplifier. 7. Service Port For Factory Use only. 8. VGA Using a 15-pin VGA cable, connect to a computer 9. VGA Audio-In Using a 3.5mm - Westinghouse W4207 | User Manual - Page 11
the Remote Control to adjust your Westinghouse W4207 HD Monitor. English 1. POWER: Switch the power on/off 2. MUTE: Turn the sound on/off 3. PIP: Display Picture-In-Picture 4. SWAP: Switch PIP between main and sub-screen pictures 5. BACKLIGHT: Shortcut to backlight adjustment 6. SLEEP: Set sleep - Westinghouse W4207 | User Manual - Page 12
English 2 INSTALLATION Installation 1. Insert Remote Control Batteries 1) Remove the battery cover. 2) Insert the batteries corresponding to the (+) and (−) marks on the battery compartment. 3) Re-attach the battery cover. CAUTION: • Only use AAA batteries. • - Westinghouse W4207 | User Manual - Page 13
the back of the W4207 HD Monitor. For Component Video input used the from manufacturer supplied Video cable. 4. Connect power cable and power on the W4207 HD Monitor Connect the power cord to the back of the W4207 HD Monitor then to a properly grounded AC outlet and press the Power button to turn on - Westinghouse W4207 | User Manual - Page 14
set this timing mode. 6. Turn on the cable box or satellite receiver If using a DVI or HDMI connection, the cable box or satellite receiver will need to be restarted to complete HDCP authentication to view the picture. 7. Select an input source for the W4207 HD Monitor using the OSD menu or remote - Westinghouse W4207 | User Manual - Page 15
key to select the desired OSD sub-menu. Main Menu Using the main menu, you can adjust the Picture, PC, Audio, PIP, and General Setting parameters. To select a sub-menu option, use the ▲ /▼ arrow keys on the right side of the W4207 HD Monitor or on the remote control. Then use the 3/4arrow keys to - Westinghouse W4207 | User Manual - Page 16
format that horizontally stretches 4:3 pictures to the edge of the screen (some programs will be broadcasted with black or gray bars on the top and bottom or sides of the picture). Adjust the intensity of the lamp that illuminates the W4207 HD Monitor. Reset the video settings to the factory default - Westinghouse W4207 | User Manual - Page 17
re-centers the image to the middle of the screen by synchronizing both vertical and horizontal refresh rate and resolution. Clock adjustment Adjust the Phase control to eliminate horizontal streaking. Adjust the horizontal and vertical position of the screen image. 14 - Westinghouse W4207 | User Manual - Page 18
English 3 OSD FUNCTION Audio Function Name Function 1. Volume Volume adjustment 2. Bass Bass adjustment 3. Treble Treble adjustment 4. Balance Balance adjustment 5. Mute Turn audio On or Off 6. Speaker Select internal or external speakers 7. Reset Reset audio settings 15 - Westinghouse W4207 | User Manual - Page 19
3 OSD FUNCTION Picture-in-Picture English Function Name 1. Display Mode 2. Main Source 3. Sub Source 4. Swap 5. PIP Position 6. PIP Size 7. Audio Selection Function Select display options: Off, PIP, PBP, POP Select main screen source: VGA, HDMI, DVI, Video, S-Video, YPbPr1, YPbPr2 Select Sub- - Westinghouse W4207 | User Manual - Page 20
source to the connection of the new source's device. Power saving mode. Backlight will turn off automatically after "No Signal" is detected for 1, 5 or 10 minutes. Displays the system information Turns the LED power indicator On or Off Resets all OSD menu settings of the W4207 HD Monitor back to the - Westinghouse W4207 | User Manual - Page 21
sure the aspect ratio is set correctly. Wrong or Abnormal Colors • If any colors (red, green, or blue) are missing, check the video cable to make sure it is connected securely. Loose or broken pins in the cable connector could cause an improper connection. • Connect the W4207 HD Monitor to another - Westinghouse W4207 | User Manual - Page 22
. No Sound • Check the audio connection. • Press MUTE on the remote control, so that MUTE disappears from the screen. • Press the Volume + (Up) key on the remote control. . How Can I Find More Help? • Log on to: www.westinghousedigital.com • Contact Westinghouse Customer Service at (866) 287-5555 or - Westinghouse W4207 | User Manual - Page 23
THE W4207 HD Monitor IS TURNED OFF • NEVER SPRAY OR POUR ANY LIQUID DIRECTLY ONTO THE SCREEN OR CASE To clean the screen: 1. Wipe the screen with a clean, soft, lint-free cloth. This removes dust and other particles. 2. If still not clean, apply a small amount of non-ammonia, non-alcohol based glass - Westinghouse W4207 | User Manual - Page 24
with base 62.83 lbs / 72.75 lbs Regulations UL/C-UL, FCC-B Power saving On
-
 1
1 -
 2
2 -
 3
3 -
 4
4 -
 5
5 -
 6
6 -
 7
7 -
8
-
9
-
10
-
11
-
12
-
13
-
14
-
15
-
16
-
17
-
18
-
19
-
20
-
21
-
22
-
23
-
24
 |
 |
www.westinghousedigital.com
USER’S MANUAL
MANUEL DE L’UTILISATEUR
W4207
HD Video Monitor
Moniteur HD
Westinghouse Digital Electronics
Santa Fe Springs, CA
SE-UM-4204-0601