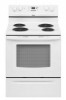
Whirlpool RF264LXSB Owners Manual
Whirlpool RF264LXSB - 30 Electric Range Manual
 |
UPC - 883049013244
View all Whirlpool RF264LXSB manuals
Add to My Manuals
Save this manual to your list of manuals |
Whirlpool RF264LXSB manual content summary:
- Whirlpool RF264LXSB | Owners Manual - Page 1
GUIDE 4 COOKTOP USE 5 OVEN USE 6 Electronic Oven Controls 6 Aluminum Foil 6 Positioning Racks and Bakeware 6 Oven Vent 7 Baking and Roasting 7 Broiling 7 Timed Cooking (on some models 7 RANGE CARE 8 Self-Cleaning Cycle (on some models 8 General Cleaning 9 Oven Light 10 TROUBLESHOOTING - Whirlpool RF264LXSB | Owners Manual - Page 2
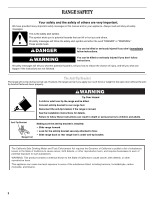
force or weight to the open door without the antitip bracket fastened down properly. WARNING Tip Over Hazard A child or adult can tip the range and be killed. Connect anti-tip bracket to rear range foot. Reconnect the anti-tip bracket, if the range is moved. See the installation instructions for - Whirlpool RF264LXSB | Owners Manual - Page 3
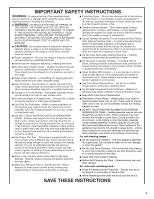
or oven bottoms, except as suggested in the manual. Improper installation of these liners may result in a risk of electric shock, or fire. ■ Glazed Cooking Utensils - Only certain types of glass, glass/ceramic, ceramic, earthenware, or other glazed utensils are suitable for range-top service without - Whirlpool RF264LXSB | Owners Manual - Page 4
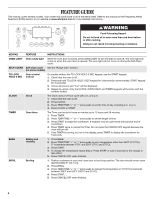
FEATURE GUIDE This manual covers several models. Your model may have some or all of the items listed. Refer to this manual or the Frequently Asked Questions (FAQs) section of our website at www.whirlpool.com for more detailed instructions. WARNING Food Poisoning Hazard Do not let food sit in oven - Whirlpool RF264LXSB | Owners Manual - Page 5
WARM FEATURE Hold warm COOK TIME (on some models) Timed cooking START TIME Delayed start START Cooking start CANCEL/OFF Range function TEMP/TIME Temperature and time adjust INSTRUCTIONS Food must be at serving temperature before placing it in the warmed oven. 1. Press WARM. 2. Temperature is - Whirlpool RF264LXSB | Owners Manual - Page 6
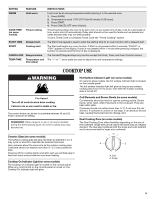
Repeat to change back. To exit mode, press CANCEL/OFF. Oven Temperature Control IMPORTANT: Do not use a thermometer to measure oven temperature because opening the oven door may cause element cycling to give incorrect readings. The oven provides accurate temperatures; however, it may cook faster or - Whirlpool RF264LXSB | Owners Manual - Page 7
If you would like to purchase a broiler pan, one may be ordered. Please refer to the cover for contact information. Ask for Part Number 4396923. Timed Cooking (on some models) WARNING Food Poisoning Hazard Do not let food sit in oven more than one hour before or after cooking. 4. Press the TEMP - Whirlpool RF264LXSB | Owners Manual - Page 8
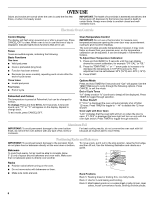
locked and "cool" and "locked" will be displayed. The oven light will not function during the self-cleaning cycle. Style 1 - Electronic Oven Control with Adjustable Clean Time (on some models) The SELF CLEAN self-cleaning cycle is time adjustable between 2 hours 30 minutes and 4 hours 30 minutes - Whirlpool RF264LXSB | Owners Manual - Page 9
Gently clean around the model and serial number plate because scrubbing may remove numbers. ■ All-Purpose Appliance Cleaner Part Number 31682 (not included): See cover for contact information. Metal marks from aluminum and copper ■ Clean with Cooktop Cleaner as soon as cooktop has cooled down. The - Whirlpool RF264LXSB | Owners Manual - Page 10
See "Cooktop Use" section. ■ Is the range level? Level the range. See the Installation Instructions. Oven will not operate ■ Is the electronic oven control set correctly? See "Electronic Oven Controls" section. ■ Has a delay start been set? See "Timed Cooking" section. ■ On some models, is the oven - Whirlpool RF264LXSB | Owners Manual - Page 11
cooking times. ■ Are baked items too brown on the bottom? Move rack to higher position in the oven. ■ Are pie crust edges browning early? Use aluminum foil to cover the edge of the crust and/or reduce baking temperature. Canning Unit Kit (coil element models) Order Part Number 242905 Cooktop Care - Whirlpool RF264LXSB | Owners Manual - Page 12
service by an authorized Whirlpool servicer is not available. 10. The removal and reinstallation of your major appliance if it is installed in an inaccessible location or is not installed in accordance with published installation instructions. 11. Major appliances with original model/serial numbers
-
 1
1 -
 2
2 -
 3
3 -
 4
4 -
 5
5 -
 6
6 -
 7
7 -
8
-
9
-
10
-
11
-
12
 |
 |
THANK YOU for purchasing this high-quality product. If you should experience a problem not covered in TROUBLESHOOTING,
please visit our website at
www.whirlpool.com
for additional information. If you still need assistance, call us at 1-800-253-1301.
You will need your model and serial number located on the oven frame behind the storage drawer panel.
Para obtener acceso a “Instrucciones para el usuario de la estufa eléctrica” en español, o para obtener información adicional acerca
de su producto, visite:
www.whirlpool.com
Tenga listo su número de modelo completo. Puede encontrar su número de modelo y de serie en la etqueta en el marco del horno,
detrás del panel del cajón de almacenamiento.
®
ELECTRIC RANGE
USER INSTRUCTIONS
Table of Contents
RANGE SAFETY
.......................................................................................
2
The Anti-Tip Bracket
.............................................................................
2
FEATURE GUIDE
.....................................................................................
4
COOKTOP USE
........................................................................................
5
OVEN USE
................................................................................................
6
Electronic Oven Controls
......................................................................
6
Aluminum Foil
........................................................................................
6
Positioning Racks and Bakeware
.........................................................
6
Oven Vent
..............................................................................................
7
Baking and Roasting
.............................................................................
7
Broiling
..................................................................................................
7
Timed Cooking (on some models)
........................................................
7
RANGE CARE
...........................................................................................
8
Self-Cleaning Cycle (on some models)
................................................
8
General Cleaning
...................................................................................
9
Oven Light
...........................................................................................
10
TROUBLESHOOTING
............................................................................
10
ACCESSORIES
......................................................................................
11
WARRANTY
............................................................................................
12
W10200356B