Whirlpool WDE350LVB Installation Instructions
Whirlpool WDE350LVB Manual
 |
View all Whirlpool WDE350LVB manuals
Add to My Manuals
Save this manual to your list of manuals |
Whirlpool WDE350LVB manual content summary:
- Whirlpool WDE350LVB | Installation Instructions - Page 1
INSTALLATION INSTRUCTIONS DROP-IN ELECTRIC RANGE Table of Contents RANGE SAFETY 2 INSTALLATION REQUIREMENTS 3 Tools and Parts 3 Location Requirements 3 Electrical Requirements 4 Countertop Preparation 5 INSTALLATION INSTRUCTIONS 5 Unpack Range 5 Install Anti-Tip Bracket 5 Adjust Leveling - Whirlpool WDE350LVB | Installation Instructions - Page 2
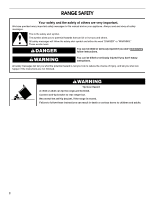
RANGE SAFETY Your safety and the safety of others are very important. We have provided many important safety messages in this manual and on your appliance don't immediately follow instructions. WARNING You can be killed or seriously injured if you don't follow instructions. All safety messages - Whirlpool WDE350LVB | Installation Instructions - Page 3
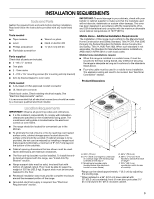
dimensions are minimum clearances. ■ The floor anti-tip bracket must be installed. To install the antitip bracket shipped with the range, see "Install Anti-Tip Bracket" section. ■ Range support slats must be solid, level and flush with bottom of cabinet cutout. Floor must be able to support a weight - Whirlpool WDE350LVB | Installation Instructions - Page 4
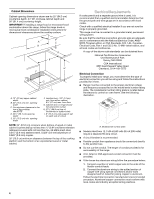
opening dimensions shown are for 25" (64.0 cm) countertop depth, 24" (61 cm) base cabinet depth and 36" (91.4 cm) countertop height. IMPORTANT: If installing a range hood or microwave hood combination above the range, follow the range hood or microwave hood combination installation instructions for - Whirlpool WDE350LVB | Installation Instructions - Page 5
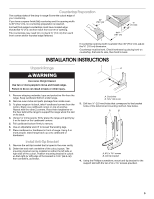
opening width is greater than 30" (76.2 cm), adjust the ³⁄₈" (1.0 cm) dimension. Countertop must be level. Check levelness by placing level on countertop, first side to side, then front to back. INSTALLATION INSTRUCTIONS Unpack Range A WARNING Excessive Weight Hazard B Use two or more - Whirlpool WDE350LVB | Installation Instructions - Page 6
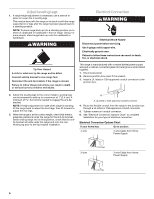
WARNING Electrical Shock Hazard Disconnect power before servicing. Use 8 gauge solid copper wire. Electrically ground oven. Failure to follow these instructions can result in death, fire, or electrical shock. Tip Over Hazard A child or adult can tip the range and be killed. Connect anti-tip bracket - Whirlpool WDE350LVB | Installation Instructions - Page 7
home power supply where local codes do not allow grounding through neutral, New Branch circuit installations (1996 NEC), mobile homes installed: ■ Look for the anti-tip bracket securely attached to slats under range. ■ Slide range back so rear range foot is engaged with anti-tip bracket. Level Range - Whirlpool WDE350LVB | Installation Instructions - Page 8
Use and Care Guide for specific instruction on range operation. If range does not operate, check the following: ■ Household fuse is intact and tight; or circuit breaker has not tripped. ■ Electrical supply is connected. ■ See "Troubleshooting" in the Use and Care Guide. When the range has been on
-
 1
1 -
 2
2 -
 3
3 -
 4
4 -
 5
5 -
 6
6 -
 7
7 -
8
 |
 |

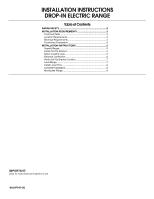
INSTALLATION INSTRUCTIONS
DROP-IN ELECTRIC RANGE
Table of Contents
RANGE SAFETY
.............................................................................
2
INSTALLATION REQUIREMENTS
................................................
3
Tools and Parts
............................................................................
3
Location Requirements
................................................................
3
Electrical Requirements
...............................................................
4
Countertop Preparation
...............................................................
5
INSTALLATION INSTRUCTIONS
..................................................
5
Unpack Range
..............................................................................
5
Install Anti-Tip Bracket
.................................................................
5
Adjust Leveling Legs
....................................................................
6
Electrical Connection
...................................................................
6
Verify Anti-Tip Bracket Location
..................................................
7
Level Range
..................................................................................
7
Install Lower Trim
.........................................................................
8
Complete Installation
....................................................................
8
Moving the Range
........................................................................
8
IMPORTANT:
Save for local electrical inspector's use.
8101P747-60