Zenith SL-6287 User Guide
Zenith SL-6287 - Heath - Wireless Door Chime Manual
 |
UPC - 016963628700
View all Zenith SL-6287 manuals
Add to My Manuals
Save this manual to your list of manuals |
Zenith SL-6287 manual content summary:
- Zenith SL-6287 | User Guide - Page 1
and push button where you want them mounted. Press push button to verify chime and push button work properly. If chime does not + sound, see Troubleshooting. - + Figure 2 © 2007 HeathCo LLC 595-5506-11 - Zenith SL-6287 | User Guide - Page 2
mount the chime depending upon the model of chime purchased. Determine which model you purchased below. Mount the chime according to the instructions for your chime. Chime with sawtooth hanger attached to back: 1. Drill 1/4" diameter pilot hole for wall anchor (provided) and insert anchor. 2. Screw - Zenith SL-6287 | User Guide - Page 3
16" gap between screw head and wall. 4. Using arrow on template as a guide, mount chime with arrow pointing up. 5. Replace batteries (see Figure 2). Place may cause interference and the system may not function properly. Follow the instructions below for setting a new code. 1. Open the cases and - Zenith SL-6287 | User Guide - Page 4
Ding-Dong (two note), or Westminster (eight note) (Available on selected Heath®/Zenith chimes). The factory setting is for the Ding-Dong tune (or Westminster, when available). This tune can be changed by following the instructions below. • Ding (one note tune) Push Button: Add a jumper to location - Zenith SL-6287 | User Guide - Page 5
Troubleshooting Chime does not sound: • Make sure push button and chime codes are the same ( and battery condition. Technical Service Please call 1-800-858-8501 (English speaking only) for assistance before returning product to store. If you experience a problem, follow this guide. You may also want - Zenith SL-6287 | User Guide - Page 6
date of purchase, any malfunction caused by factory defective parts or workmanship will be corrected at no charge to you. Not Covered - Repair service, adjustment and calibration due to misuse, abuse or negligence, light bulbs, batteries, and other expendable items are not covered by this warranty - Zenith SL-6287 | User Guide - Page 7
Campanilla Decorativa Inalámbrica Serie 6180, Serie 6270 y Serie 6280 Este paquete tiene (El estilo del pulsador y de la campana puede variar de la ilustración): • Campana Inalámbrica • Pulsador inalámbrico con batería • Paquete de ferretería Usted deberá comprar 3 pilas alcalinas "D" para el timbre - Zenith SL-6287 | User Guide - Page 8
4. Instale el pulsador y el timbre. Use ya sean tornillos o cinta adhesiva por ambas caras para instalar el pulsador. Para montar con tornillos, quite la parte de atrás de la caja empujando hacia adentro la lengüeta de abajo con un destornillador pequeño y girando la cuchilla. Figura 3 Coloque la - Zenith SL-6287 | User Guide - Page 9
Campana con tapa y base separadas La base de la campana puede montarse de dos formas diferentes. Puede montarse usando los agujeros bocallaves o bien los tres orificios de montaje. La base puede montarse horizontal o verticalmente dependiendo del modelo específico comprado. 1. Retire las baterías ( - Zenith SL-6287 | User Guide - Page 10
que la puerta posterior use el tono Tilín y la puerta frontal el tono Tilín-Talán ( o el tono Westminster, disponible en los timbres Heath®/Zenith seleccionados). Los modelos que incluyen dos pulsadores vendrán con la calibración de fábrica para las puertas frontal y posterior. Las calcomanías en la - Zenith SL-6287 | User Guide - Page 11
inglés), de 7:30 AM a 4:30 PM CST (L-V). Usted puede también escribir a: HeathCo LLC, P.O. Box 90004, Bowling Green, KY 42102-9004 ATTN: Technical Service (Servicio Técnic) * Si se llama al Servicio Técnico, por favor tener lista la siguiente información: Número de Modelo, Fecha de compra y Lugar de - Zenith SL-6287 | User Guide - Page 12
GARANTÍA LIMITADA Esta es una "Garantía Limitada" que le da a Ud. derechos legales específicos. Usted puede también tener otros derechos que varían de estado a estado o de provincia a provincia. Por un período específico desde la fecha de compra y dependiendo del modelo (vea el cuadro de abajo) - Zenith SL-6287 | User Guide - Page 13
Carillon décoratif sans fil Série 6180, Série 6270 et série 6280 Cet emballage contient (Le style de l'unité de bouton-poussoir et du carillon peut varier par rapport à l'illustration): • Carillon dans fil • Unité de bouton-poussoir sans fil, avec pile • un ensemble de ferrures Vous aurez besoin de - Zenith SL-6287 | User Guide - Page 14
modèle de carillon acheté, comme indiqué plus loin. Installez ensuite le carillon conformément aux directives fournies pour ce modèle. Carillon doté du support dentelé : 1. Percez un trou d'un diamètre de 6,4 mm (1/4 po) pour l'ancrage mural (fourni), puis insérez-y ces ancrages. 2. Insérez la vis - Zenith SL-6287 | User Guide - Page 15
Carillon avec socle et couvercle distinct Le socle du carillon peut être installé de deux manières distinctes, soit au moyen des trous piriformes ou des trois orifices d'installation. Il peut en outre être monté à l'horizontale ou à la verticale selon le modèle acheté. 1. Retirez les piles du - Zenith SL-6287 | User Guide - Page 16
èles sont dotés de fonctions d'air distinctes pour porte avant et porte arrière.Vous pouvez vous procurer toute unité de bouton-poussoir sans fil Heath®/Zenith pour une deuxième entrée. Nous recommandons que la porte arrière utilise le timbre Ding et la porte avant, le timbre Ding-Dong (ou - Zenith SL-6287 | User Guide - Page 17
de l'aide avant de retourner l'article au magasin. En cas de problème, suivez ce guide. Vous pouvez aussi visiter notre site Web à www.hzsupport.com. Si le problème persiste, composez* le 1 800 8588501 (service en anglais seulement), entre 7 h 30 et 16 h 30, HNC, du lundi au vendredi. Vous pouvez - Zenith SL-6287 | User Guide - Page 18
un mauvais traitement ou à la négligence. Les ampoules, les piles et des autres articles non durables ne sont pas couverts par cette garantie. Le service non autorisé ou la modification du produit ou d'un ou l'autre de ses composants fournis invalidera totalement la présente garantie.Cette garantie - Zenith SL-6287 | User Guide - Page 19
NOTES / NOTAS / REMARQUES 595-5506-11 -19- - Zenith SL-6287 | User Guide - Page 20
NOTES / NOTAS / REMARQUES -20- 595-5506-11 - Zenith SL-6287 | User Guide - Page 21
NOTES / NOTAS / REMARQUES 595-5506-11 -21- - Zenith SL-6287 | User Guide - Page 22
Chime Purchase Information Información de la compra de la campana Renseignements d'achat du carillon Model Date of Purchase Nº de modelo / N° de modèle Fecha de compra / Date d'achat Staple Purchase Receipt Here Engrape aquí el recibo de compra Agrafez le reçu d'achat ici Please keep your - Zenith SL-6287 | User Guide - Page 23
NOTES / NOTAS / REMARQUES 595-5506-11 -23- - Zenith SL-6287 | User Guide - Page 24
Keyhole Mounting (Vertical) Montaje método orificio bocallave (vertical) Installation au moyen des trous piriformes (à la verticale) UP (Vertical) ARRIBA (vertical) HAUT (à la verticale) Mounting Holes Orificios de montaje Orifices d'installation Keyhole Mounting (Horizontal) Montaje método
-
 1
1 -
 2
2 -
 3
3 -
 4
4 -
 5
5 -
 6
6 -
 7
7 -
8
-
9
-
10
-
11
-
12
-
13
-
14
-
15
-
16
-
17
-
18
-
19
-
20
-
21
-
22
-
23
-
24
 |
 |

-
+
-
+
-
+
Battery
Battery
Battery
© 2007 HeathCo LLC
595-5506-11
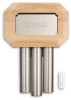
This package includes (Style of push button and chime may vary from illustra-
tions):
• Wireless chime
•
Wireless push button w/battery
• Hardware pack
You'll need to buy 3 "D" alkaline batteries for the chime.
In typical use,
alkaline batteries will last up to three years.
6180 Series, 6270 Series, and 6280 Series
Decorative Wireless Chime
Cover
Mounting
Tabs
1.
Install alkaline type A23 12
volt push button battery.
Re-
move back of case by pushing
in tab on bottom with a small
screwdriver (see Figure 1).
Make sure battery is oriented
properly (See page 4).
2.
Install 3 alkaline “D” batteries.
Make sure batteries are oriented
properly (see Figure 2).
3.
Test range.
Temporarily posi-
tion chime and push button
where you want them mounted.
Press push button to verify
chime and push button work
properly. If chime does not
sound, see
Troubleshooting
.
Chime
Volume
Jumpers
Figure 2
Figure 1