eMachines E191HQ Service Guide
eMachines E191HQ Manual
 |
View all eMachines E191HQ manuals
Add to My Manuals
Save this manual to your list of manuals |
eMachines E191HQ manual content summary:
- eMachines E191HQ | Service Guide - Page 1
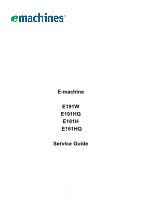
E-machine E191W E191HQ E181H E161HQ Service Guide 1 - eMachines E191HQ | Service Guide - Page 2
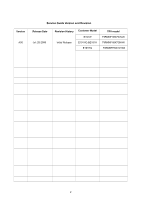
Version A00 Service Guide Version and Revision Release Date Jul.-25-2008 Revision History Initial Release Customer Model E191W E191HQ &E181H E161HQ TPV model T9RMNFH8X7GYAN T9RMNFH8X7GKAN T6RMNFH8X7GYAN 2 - eMachines E191HQ | Service Guide - Page 3
manual or otherwise, without the prior written permission of Emachine Incorporated. Disclaimer The information in this guide is subject to change without notice. Emachine measures to avoid possible hardware or software problems. Remind you to do specific actions relevant to the accomplishment of procedures - eMachines E191HQ | Service Guide - Page 4
Preface Before using this information and the product it supports, please read the following general information. 1. This Service Guide provides you with all technical information relating to the BASIC CONFIGURATION decided for Emachine's "global" product offering. To better fit local market - eMachines E191HQ | Service Guide - Page 5
monitor. If you mount the monitor on a wall or shelf, uses a mounting kit approved by the manufacturer and follow the kit instructions grounded power outlet as a safety feature. If your outlet does not LCD Monitors The following symptoms are normal with LCD monitor and do not indicate a problem - eMachines E191HQ | Service Guide - Page 6
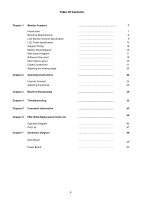
LCD Panel Specification Support Timing Monitor Block Diagram Main Board Diagram Software Flow chart Main Board Layout Cable Connections Adjusting the viewing angle Chapter 2 Operating Instructions External Controls Adjusting the picture Chapter 3 Machine Disassembly Chapter 4 Troubleshooting - eMachines E191HQ | Service Guide - Page 7
Monitor Features Chapter 1 Introduction Scope This specification defines the requirements for the 19" MICROPROCESSOR based Multi-mode supported high resolution color LCD monitor. This monitor can be directly connected to general 15-pin D-sub VGA connector and 24-pin DVI connector, also supports - eMachines E191HQ | Service Guide - Page 8
temperature Analog input mode : Dark room ( - eMachines E191HQ | Service Guide - Page 9
LCD Monitor General Specification 9 - eMachines E191HQ | Service Guide - Page 10
Panel Specification 1.M19PW01(E191W) This specification applies to the 19 inch-wide clor TFT-LCD Module M19PW01. The display supports the WXGA+(1440(H)X 900(V)screen format and 16.7 colors。All input signals are 2 Channel LVDS interface comlatible。 This module does not contain an inverter card - eMachines E191HQ | Service Guide - Page 11
Specifications 2.M185B1-L01(E191HQ/E181H) M185B1-L01 is a 18.5" TFT Liquid Crystal Display module with 4 CCFL Backlight unit and 30pin1ch-LVDS interface. This module supports 1366 x 768 WXGA mode and can display up to 16.7M colors.The inverter module for Backlight is not built in。 LCD Panel Model 11 - eMachines E191HQ | Service Guide - Page 12
Specifications 3. M156B1-L01 (E161HQ) M156B1-L01 is a 15.6" TFT Liquid Crystal Display module with 2 CCFL Backlight unit and 30pin 1ch-LVDS interface. This module supports 1366 x 768 WXGA mode and can display up to 16.7M colors. The inverter module for Backlight is not built in. LCD Panel Model 12 - eMachines E191HQ | Service Guide - Page 13
Optical Specifications 13 - eMachines E191HQ | Service Guide - Page 14
Supported Timing 14 - eMachines E191HQ | Service Guide - Page 15
15 - eMachines E191HQ | Service Guide - Page 16
Block Diagram The LCD MONITOR will contain a main board, a power board and a key board which house the flat panel control logic, brightness control logic and DDC. The Inverter board will - eMachines E191HQ | Service Guide - Page 17
E161HQ Main Board Diagram U402 PM25LV010A LCD Interface CN403(E191W) CN405(E161HQ&E181H/E191HQ) U401 Scalar : NT68167FG QFP64 (Include: MCU, ADC, OSD etc) Crystal 14.318MHZ X401 OSD Control Interface (Key board) CN401 D-SUB Connector (CN101) 17 - eMachines E191HQ | Service Guide - Page 18
Software Flow Chart 1 Y 2 3 N 4 N 5 Y 6 N 7 8 Y 9 N 10 11 Y N 12 N 13 Y Y N 14 15 16 Y 17 N 18 19 Y 18 - eMachines E191HQ | Service Guide - Page 19
light. 12) Check the analog port, are there any signals coming? 13) Does the scalar send out an interrupt request? 14) Wake up the scalar. 15) Are there any signals coming from analog port? 16) Display "No connection Check Signal Cable" message. And go into standby mode after the message disappears - eMachines E191HQ | Service Guide - Page 20
IC AZC099-04S SOT23-6L IC PM25LV010A-100SCE SOIC-8 Symbol CN404 CN101 CN401 CN403 CN405 Description WAFER 2*6P 2.0MM R/A D-SUB 15PIN WAFER WAFER(E191W) WAFER(E161HQ&E181H/E191HQ) 20 - eMachines E191HQ | Service Guide - Page 21
Cable Connections 21 - eMachines E191HQ | Service Guide - Page 22
22 - eMachines E191HQ | Service Guide - Page 23
the stand so you do not topple the monitor when you change the monitor's angle. 3、 You are able to adjust the monitor's angle from -5° to 15°. NOTES 1、 Do not touch the LCD screen when you change the angle. It may cause damage or break the LCD screen. 2、 Careful attention is required not to catch - eMachines E191HQ | Service Guide - Page 24
Operating Instructions Chapter 2 Press the power button to turn the monitor on or off. The other control buttons are located at front panel of the monitor. By changing these settings, the picture can be adjusted to your personal preferences. • The power cord should be connected. • Connect the - eMachines E191HQ | Service Guide - Page 25
Adjusting the Picture 25 - eMachines E191HQ | Service Guide - Page 26
26 - eMachines E191HQ | Service Guide - Page 27
User Press Hot-Key "Auto", will show this message, and the Please Wait monitor do the auto config function. Input Not Supported When the Hsync Frequency, Vsync Frequency or Resolution is out of the monitor support range, will show this message. This message will be flying. Cable Not Analog-Only - eMachines E191HQ | Service Guide - Page 28
How To Optimize The DOS-Mode Plug And Play Plug & Play DDC2B Feature This monitor is equipped with VESA DDC2B capabilities according to the VESA DDC STANDARD. It allows the monitor to inform the host system of its identity and, depending on the level of DDC used, communicate additional information - eMachines E191HQ | Service Guide - Page 29
Machine Disassembly Chapter 3 This chapter contains step-by-step procedures on how to assemble the monitor for maintenance. Disassembly Procedure 1. Remove hinge cover, then remove two screws marked A-C to remove base. (Fig 1) A C B 2. Remove the back cover. (Fig 2-3) Fig 1 Fig 2 29 - eMachines E191HQ | Service Guide - Page 30
Fig 3 1. Remove the front bezel,disconnect the connector remarked in green (Fig 4,5) Key board Fig 4 Fig 5 2. 30 - eMachines E191HQ | Service Guide - Page 31
3. Remove the screws marked in red and disconnect lamp connections to remove shield. (Fig 6-9) A Fig 6 C Fig 7 E Fig 8 B D F Fig 9 31 - eMachines E191HQ | Service Guide - Page 32
4. Remove the screws marked in red and the wire connect with power board to remove the boards. (Fig 10,11) Fig 10 6. The monitor disassembly completely. (Fig 12) Fig 11 Fig 12 32 - eMachines E191HQ | Service Guide - Page 33
This chapter provides troubleshooting information for the E191W: 1. No Power Chapter 4 No power Press power key and look if the picture is normal NG Please reinsert and make sure - eMachines E191HQ | Service Guide - Page 34
2. No Picture (LED is orange) No picture The button if under NG X401 oscillate NG control waveform is normal Replace X401 OK Measure U404 PIN2=3.3V OK OK Check reset circuit of U401 is normal OK Replace U401 NG Check Correspondent component X401 oscillate waveform is normal NG OK NG - eMachines E191HQ | Service Guide - Page 35
Power Circuit White screen NG Measure Q404 base X401 oscillate is high level? waveform is normal OK NG OK Check CN403(CN405: E191HQ/ E181H&E161HQ) is broken or Q405 is solder? Check reset circuit of U401 is normal REPLACE X401 Check Correspondent component. NG OK Replace PANEL NG - eMachines E191HQ | Service Guide - Page 36
4. Key Board OSD is unstable or not working Is Key Pad Board connecting normally? Y Is Button Switch normally? Y Is Key Pad Board normally? Y Check Main Board N Connect Key Pad Board N Replace Button Switch N Replace Key Board 36 - eMachines E191HQ | Service Guide - Page 37
5. Power board 715G2824 1C 2(E191W) 1. No Power No power Check to CN902 Pin3, 4 = 5 V OK NG Check AC line volt 120V or 220V OK NG Check the voltage of C905(+) OK NG Check Interface board Change F901, Check BD901, IC901 Check bridge retified circuit Check start voltage for the Pin3 of IC901 - eMachines E191HQ | Service Guide - Page 38
(L) 2. W/LED No Backlight Check R805 =16V OK Check ON/OFF signal NG NG OK Check IC801 PIN12=5V Check adapter circuit Check Interface board Change ON/OFF NG Check IC801 PIN9O,K10 have the output of square wave at short time NG OK Check Q804,Q809 have the output of square wave at short time. - eMachines E191HQ | Service Guide - Page 39
715G2510 1 AO(E191HQ&E181H) 1) No power Check L904 = 12V NG Check AC line volt 110V or 220V NG OK Check the voltage of C905 (+) Check AC input NG OK Check start voltage for the pin3 of IC901 NG OK Check the auxiliary voltage is bigger than 10V and smaller than 20V Change F901, Check BD901, - eMachines E191HQ | Service Guide - Page 40
2.) No Backlight Check F801=12V NG OK Check ON/OFF signal NG OK Check IC801 PIN12=15V NG OK Check adapter and F801 Check Interface board or main board Change on/off circuit Check IC801 PIN5 have triangle wave NG OK Change IC801 Check IC801 PIN9/PIN10 PWM wave NG OK Check IC801 Check Q802, - eMachines E191HQ | Service Guide - Page 41
715G2852 2(E161HQ) 1) No power Check CN902 PIN4,5 = 5V NG Check AC line volt 110V or 220V NG OK Check the voltage of C907 (+) Check AC input NG - eMachines E191HQ | Service Guide - Page 42
2.) No Backlight Check F801=12V NG OK Check ON/OFF signal NG OK Check IC801 PIN12=15V NG OK Check adapter and F801 Check Interface board or main board Change on/off circuit Check IC801 PIN5 have triangle wave NG OK Check IC801 PIN9/PIN10 PWM wave NG OK Change IC801 Check IC801 Check Q802 Drain - eMachines E191HQ | Service Guide - Page 43
Connector Information The following figure shows the connector locations on the monitor: Chapter 5 Pin No. 1. 2. 3. 4. 5. 6. 7. 8. 1 5 6 10 11 15 15 - Pin Color Display Signal Cable (D-sub) Description Red Green Blue RS232 DDC-Return R-Ground G-Ground B-Ground Pin No. 9. 10. 11. 12. 13. - eMachines E191HQ | Service Guide - Page 44
number change is made, it will not be noted in the printed Se rvice Guide. For EMACHINE AUTHORIZED SERVICE PROVIDERS, your Emachine office may have a DIFFERENT part number code from those given in the FRU list of this printed Service Guide. You MUST use the local FRU list provided by your regional - eMachines E191HQ | Service Guide - Page 45
Exploded Diagram 45 - eMachines E191HQ | Service Guide - Page 46
Item 1 2 3 4 5 6 7 8 9 10 Descripiton BEZEL L19WA-8GEM-1 POWER LOGO POWER-LENS FUNCTION-BUTTON-R FUNCTION-BUTTON-L KEPC PANEL PWPC CBPC SPK Item 11 12 13 14 15 16 17 18 19 20 Descripiton SCREW SCREW MAIN FRAME REAR COVER HINGE ASS'Y SCREW SCREW STAND BASE FOOT 46 - eMachines E191HQ | Service Guide - Page 47
Part List Above picture show the description of the following component. Item Picture 1 Description Hinge&base 2 Back Cover 3 bezel 47 - eMachines E191HQ | Service Guide - Page 48
4 Shield 5 Panel 6 Power Board 7 Main board 48 - eMachines E191HQ | Service Guide - Page 49
100R 1/16W 5% Mute# 2 +5V VCC3.3 R425 NC C_PANEL_INDEX R443 NC R438 NC Panel_ID# 2 U406 3 VIN NC/AP1117E33LA VOUT 2 U406 U404 ノ Layout 2007/11/15 1 VSS 44 5VCC + C426 100UF25V C428 0.1uF/16V VIN VOUT 3 2 1 ADJ(GND) U404 AP1117D33LA VCC3.3 C422 0.1uF/16V + C427 100UF25V Chapter - eMachines E191HQ | Service Guide - Page 50
16W 5% HSIN 2 VSIN 2 C103 22pF 2 DDC_SCL 2 DDC_SDA R110 100R 1/16W 5% DSUB_SCL R113 100R 1/16W 5% DSUB_SDA CN101 16 10 15 5 9 14 4 8 13 3 7 12 2 6 11 1 DB15 VGA_PLUG DSUB_5V VGA_BVGA_B+ VGA_GVGA_G+ VGA_RVGA_R+ 1 1 DSUB_5V R118 10K 1/16W 5% VGA_DET 2 2 2 ZD103 UDZSNP5.6B - eMachines E191HQ | Service Guide - Page 51
5VCC R450 R451 100R 1/16W 5% 100R 1/16W 5% SPI _C K SPI _SI 1 1 DDC_SDA DDC_SCL 4 5 6 7 8 9 10 BI N 1+ BI N 1SOG1I GI N 1+ GI N 1RIN1+ RIN1- 14 15 HSY NCI1 VSY NCI1 17 16 PB5* / D D C _SD A* / TX PB4* / D D C _SC L* / R X NT68167FG NT68167 49 T0M T0P T1M T1P T2M T2P TCLK1M TCLK1P 48 - eMachines E191HQ | Service Guide - Page 52
LVDS E161Q and E181H CN405 PANEL_VCC CN403 23 24 21 22 19 20 17 18 15 16 13 14 PANEL_VCC 11 12 R434 C420 9 10 7 8 220 OHM 1/4W T0P 2 T0M channel LVDS E191W CN403 1 2 3 4 5 6 7 8 9 10 11 12 13 14 15 16 17 18 19 20 21 22 23 24 25 26 27 28 29 30 CONN 2 PANEL_EN R415 10K 1/ - eMachines E191HQ | Service Guide - Page 53
Power board 715G2824 1C 2(E191W) D909 NC/31DQ10FC ! 2 BD901 NC/GBU408 4- +1 ! 33 4 1 - + FB904 BEAD 1 2 BD901A 2A 800V 2 C905 + 100uF/450V FB902 1206 0 ohm 80OHM 1 2 C938 NC/1500pF2KV R904 300K OHM 1/4W R905 300K OHM 1/4W C906 1500pF2KV R906 300K OHM 1/4W D901 FR103 4 1 L901 - eMachines E191HQ | Service Guide - Page 54
1/10W 1% Q810 PMBS3904 C823 0.1uF/25V Q811 PMBS3904 U801 TL494IDR 1 16 2 3 4 5 6 7 1IN+ 2I N + 1IN- 2IN- FEEDBACK REF DTC OUTPUT CTRL CT VCC RT C2 15 14 13 12 11 10 8 GND C1 E2 E1 9 C810 0. 1uF / 25V R852 10K 1/10W 1% Q805 PMBS3906 R845 68R 1/10W 5% R844 22R 1/10W 5% R848 1K - eMachines E191HQ | Service Guide - Page 55
0.47uF/16V 10K 1/10W 5% R609 IC601 APA2069JITUL 8 7 6 SE/BTL VOLUME LOUTVDD 9 10 11 5 4 3 2 LINGND GND RIN- LOUT+ GND GND ROUT+ 12 13 14 15 1 BY PASS VDD 16 SHUTDOWN ROUT- R601 10K 1/10W 5% R610 27KOHM +-5% 1/10W R611 4.7KOHM +-5% 1/10W Q607 PMBS3906 MUTE C613 0.1uF/16V Q608 PMBS3904 - eMachines E191HQ | Service Guide - Page 56
715G2510 1 AO(E191HQ&E181H) 2 NC SG901 ! 4- BD901 +1 2KBP08M 3 ! L902 1 2 4 3 ! 7.0mH C902 0.001uF/250V C901 0.001uF/250V ! ! 2 L901 3 ! 1 4 4.0mH C903 ! 0.47uF/275V NC SG902 + C905 100uF/450V R904 300K 1/4W C938 1500pF/1KV R932 300K 1/4W R905 NC R906 NC C906 - eMachines E191HQ | Service Guide - Page 57
+-1% 1/8W R810 51K 1% 1/8W R861 220 KOHM +-1% 1/10W C820 220pF Q807 PMBS3904 IC801 1 2 3 4 5 6 IN1+ IN1FB DTC CT 7 8 RT GND C1 IN2+ IN2VREF CONT VCC 16 15 14 13 12 11 C2 E2 E1 10 9 TL494IDR R854 68KΩ 1/10W R826 1K 1/8W C817 NC R807 10 KOHM +-1% 1/10W R824 1K 1/10W 1% R808 - eMachines E191HQ | Service Guide - Page 58
10 LOUT- C106 0.47uF/16V C107 0.47uF/16V 4 RIN+ 5 RIN- ROUT+ 20 2 ROUT- +5V R101 10K 1/10W +5V R102 10K 1/10W BY PASS 16 14 15 SHUTDOWN# FADE# SE/BTL# 19 18 VOLUME 13 NC 1 PGND 11 PGND 17 AGND R103 10K 1/10W C109 1uF/25V LOUT+ LOUT- ROUT+ ROUT- + C108 - eMachines E191HQ | Service Guide - Page 59
715G2852 2(E161HQ ) +1 ! 2 3 BD901 KBP208G ! C902 1000pF 4- ! C901 1000pF + C907 100uF450V ! C938 NC R904 300K OHM 1/4W R905 NC R932 300K OHM 1/4W R906 NC R908 C906 1500pF2KV - eMachines E191HQ | Service Guide - Page 60
51K OHM 1% 1/8W R863 10K 1/10W 1% R831 1K 1/8W C820 220pF50V IC801 TL494IDR 1 16 2 3 4 5 6 1IN+ 2IN+ 1IN- 2IN- FEEDBACK REF DTC OUTPUT CTRL CT VCC 15 14 13 12 11 7 8 RT GND C1 C2 E2 E1 10 9 R807 10K 1/10W 1% R861 R865 NC NC Q807 N.C 新增 R864 NC 穝糤 C817 NC R854 NC - eMachines E191HQ | Service Guide - Page 61
IC601 8 7 SE/BTL LOUT- 9 10 6 5 4 3 VOLUME LINGND GND VDD LOUT+ GND GND 11 12 13 14 2 1 RIN- ROUT+ BY PASS VDD SHUTDOWN ROUT- 15 16 APA2069JITUL C612 0.1uF/16V C613 0.1uF/16V C608 1uF/25V IC with Heat-sink(90G6295-3) FB602 1 2 BEAD T P V ( Top Victory Electronics Co . , Ltd
-
 1
1 -
 2
2 -
 3
3 -
 4
4 -
 5
5 -
 6
6 -
 7
7 -
8
-
9
-
10
-
11
-
12
-
13
-
14
-
15
-
16
-
17
-
18
-
19
-
20
-
21
-
22
-
23
-
24
-
25
-
26
-
27
-
28
-
29
-
30
-
31
-
32
-
33
-
34
-
35
-
36
-
37
-
38
-
39
-
40
-
41
-
42
-
43
-
44
-
45
-
46
-
47
-
48
-
49
-
50
-
51
-
52
-
53
-
54
-
55
-
56
-
57
-
58
-
59
-
60
-
61
 |
 |

1
E-machine
E191W
E191HQ
E181H
E161HQ
Service Guide