1998 Ford Ranger Owner Guide 1st Printing - Page 141
1998 Ford Ranger Manual
Page 141 highlights
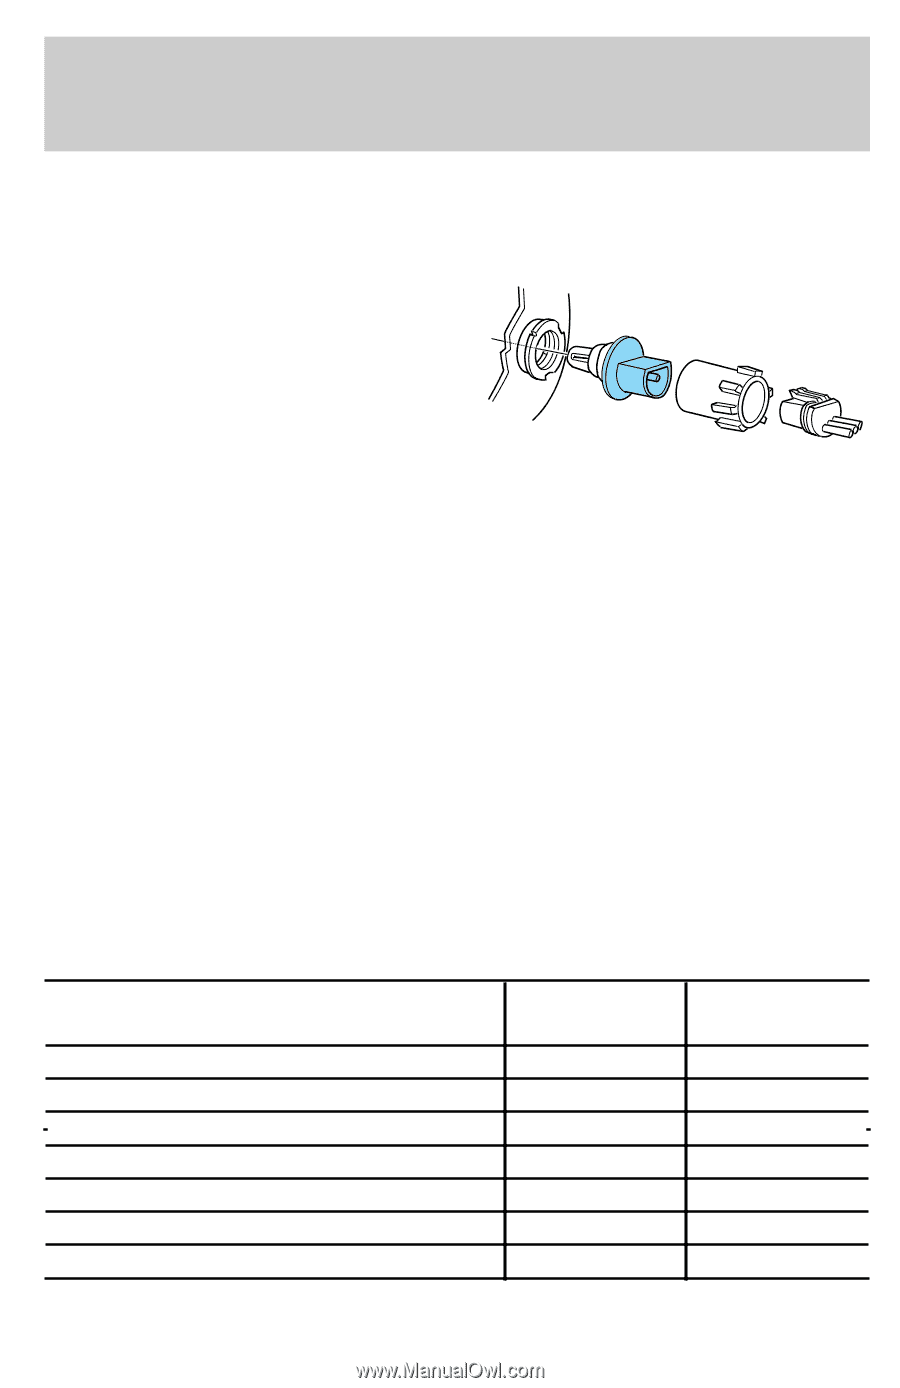
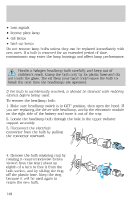
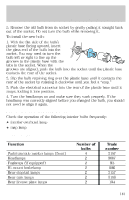
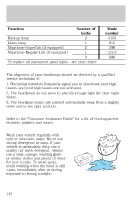
Maintenance and care 5. Remove the old bulb from its socket by gently pulling it straight back out of the socket. Do not turn the bulb while removing it. To install the new bulb: 1. With the flat side of the bulb's plastic base facing upward, insert the glass end of the bulb into the socket. You may need to turn the bulb left or right to line up the grooves in the plastic base with the tabs in the socket. When the grooves are aligned, push the bulb into the socket until the plastic base contacts the rear of the socket. 2. Slip the bulb retaining ring over the plastic base until it contacts the rear of the socket by rotating it clockwise until you feel a "stop." 3. Push the electrical connector into the rear of the plastic base until it snaps, locking it into position. 4. Turn the headlamps on and make sure they work properly. If the headlamp was correctly aligned before you changed the bulb, you should not need to align it again. REPLACING THE INTERIOR BULBS Check the operation of the following interior bulbs frequently: • interior overhead lamp • map lamp Using the right bulbs Function Park/turn/side marker lamps (front) Headlamps Foglamps (if equipped) Hi-mount brakelamp Rear stop/tail lamps Rear turn lamps Rear license plate lamps Number of bulbs 4 2 2 2 2 2 2 Trade number 3157 9007 H3 906 3157 3156 194 141
-
 1
1 -
2
-
3
-
4
-
5
-
6
-
7
-
8
-
9
-
10
-
11
-
12
-
13
-
14
-
15
-
16
-
17
-
18
-
19
-
20
-
21
-
22
-
23
-
24
-
25
-
26
-
27
-
28
-
29
-
30
-
31
-
32
-
33
-
34
-
35
-
36
-
37
-
38
-
39
-
40
-
41
-
42
-
43
-
44
-
45
-
46
-
47
-
48
-
49
-
50
-
51
-
52
-
53
-
54
-
55
-
56
-
57
-
58
-
59
-
60
-
61
-
62
-
63
-
64
-
65
-
66
-
67
-
68
-
69
-
70
-
71
-
72
-
73
-
74
-
75
-
76
-
77
-
78
-
79
-
80
-
81
-
82
-
83
-
84
-
85
-
86
-
87
-
88
-
89
-
90
-
91
-
92
-
93
-
94
-
95
-
96
-
97
-
98
-
99
-
100
-
101
-
102
-
103
-
104
-
105
-
106
-
107
-
108
-
109
-
110
-
111
-
112
-
113
-
114
-
115
-
116
-
117
-
118
-
119
-
120
-
121
-
122
-
123
-
124
-
125
-
126
-
127
-
128
-
129
-
130
-
131
-
132
-
133
-
134
-
135
-
 136
136 -
 137
137 -
 138
138 -
 139
139 -
 140
140 -
 141
141 -
 142
142 -
 143
143 -
 144
144 -
 145
145 -
 146
146 -
147
-
148
-
149
-
150
-
151
-
152
-
153
-
154
-
155
-
156
-
157
-
158
-
159
-
160
 |
 |