2009 Nissan Rogue Owner's Manual
2009 Nissan Rogue Manual
2009 Nissan Rogue manual content summary:
- 2009 Nissan Rogue | Owner's Manual - Page 1
so that you may enjoy many miles of driving pleasure. Please read through this manual before operating your vehicle. A separate Warranty Information Booklet explains details about the warranties covering your vehicle. The NISSAN Service and Maintenance Guide explains details about maintaining and - 2009 Nissan Rogue | Owner's Manual - Page 2
illustrations in this manual are those in effect at the time of printing. NISSAN reserves the right to change specifications or design at front of the vehicle. CALIFORNIA PERCHLORATE ADVISORY Some vehicle parts, such as lithium batteries, may contain perchlorate material. The following advisory is - 2009 Nissan Rogue | Owner's Manual - Page 3
Alaska, Hawaii or Guam. For more information, visit www.xmradio.com. C * 2008 NISSAN MOTOR CO., LTD. All rights reserved. No part of this Owner's Manual may be reproduced or stored in a retrieval system, or transmitted in any form, or by any means, electronic, mechanical, photocopying, recording - 2009 Nissan Rogue | Owner's Manual - Page 4
service needs. However, if there is something that your NISSAN dealer cannot assist you with or you would like to provide NISSAN directly with comments or questions, please contact the NISSAN Nissan Canada Inc. 5290 Orbitor Drive Mississauga, Ontario L4W 4Z5 For U.S. customers 1-800-NISSAN-1 - 2009 Nissan Rogue | Owner's Manual - Page 5
Illustrated table of contents Safety - Seats, seat belts and supplemental restraint system Instruments and controls Pre-driving checks and adjustments Heater, air conditioner, audio and phone systems Starting and driving In case of emergency Appearance and care Maintenance and do-it-yourself - 2009 Nissan Rogue | Owner's Manual - Page 6
0 Illustrated table of contents Seats, seat belts and Supplemental Restraint System (SRS) ...0-2 Exterior front ...0-3 Exterior rear ...0-4 Passenger compartment ...0-5 Instrument panel ...0-6 Meters and gauges...0-7 Engine compartment ...0-8 QR25DE engine ...0-8 - 2009 Nissan Rogue | Owner's Manual - Page 7
(P.1-8) 5. 6. 7. 8. 9. Roof-mounted curtain side-impact and rollover supplemental air bags (P.1-38) Rear center seat belt (P.1-16) Occupant classification sensor (pattern sensor) - Advanced air bag system (P.1-44) Front seats (P.1-3) Seat belt pretensioner (P.1-50) 0-2 Illustrated table of - 2009 Nissan Rogue | Owner's Manual - Page 8
windows (P.2-40) Recovery hook (P.6-15) License plate installation (P.9-11) Fog lights* - Switch operation (P.2-29) - Bulb replacement (P.8-26) 11. Tires - Wheel and tires (P.8-29, P.9-7) - Flat tire (6-2) - Tire Pressure Monitoring System (TPMS) (P.2-14, P.5-3) 12. Doors - Keys (P.3-2) - Door locks - 2009 Nissan Rogue | Owner's Manual - Page 9
Key system* (P.3-8) Rear window wiper and washer - Switch operation (P.2-23) - Window washer fluid (P.8-12) Rear window defroster (P.2-24) 4. 5. 6. High-mounted stop light - Bulb replacement (P.8-26) Antenna (P.4-24) - Satellite radio antenna* (P.4-7) Back-up light - Bulb replacement (P.8-26 - 2009 Nissan Rogue | Owner's Manual - Page 10
PASSENGER COMPARTMENT 10. Cargo area - Storages (P.2-36) - Luggage hooks (P.2-38) - Cargo light* (P.2-46) - Spare tire (P.6-3) 11. Rear cup holders (P.2-33) 12. Console box (P.2-35) - Power outlet* (P.2-32) 13. Front cup holders (P.2-33) *: if so equipped SSI0351 1. 2. 3. 4. 5. Cargo cover* - 2009 Nissan Rogue | Owner's Manual - Page 11
, fog light* and turn signal switch (P.2-25) Paddle shifter* (P.5-15) 4. 5. Steering-wheel-mounted controls (left side)* - Audio control* (P.4-23) - Bluetooth® Hands-Free Phone System control* (P.4-25) Steering wheel - Horn (P.2-30) - Driver supplemental air bag (P.1-38) - Electric power steering - 2009 Nissan Rogue | Owner's Manual - Page 12
(P.2-5) Fuel gauge (P.2-6) Vehicle information display (P.2-6) - Odometer/twin trip odometer (P.2-4) - Trip computer* (P.2-7) - Outside air temperature* (P.2-6) - Continuously Variable Transmission (CVT) 4. 5. 6. 7. position indicator (P.2-7) Engine coolant temperature gauge (P.2-5) Speedometer - 2009 Nissan Rogue | Owner's Manual - Page 13
filler cap (P.8-8) Brake fluid reservoir (P.8-11) Air cleaner (P.8-16) Engine coolant reservoir (P.8-8) Window washer fluid reservoir (P.8-12) 6. 7. 8. Engine drive belt location (P.8-14) Engine oil dipstick (P.8-8) Radiator filler cap (P.8-7) - Vehicle overheat (P.6-11) 9. Battery (P.8-13) - Jump - 2009 Nissan Rogue | Owner's Manual - Page 14
and roof-mounted curtain side-impact and rollover supplemental air bag systems ...Seat belts with pretensioners (front seats) ...Supplemental air bag warning labels...Supplemental air bag warning light...Repair and replacement procedure...1-22 1-24 1-28 1-34 1-34 1-36 1-38 1-38 1-44 1-48 1-50 1-51 - 2009 Nissan Rogue | Owner's Manual - Page 15
in motion, the seat should be upright. Always sit well back in the seat with both feet on the floor and adjust the seat properly. See "PRECAUTIONS ON SEAT BELT adjusting the seat positions, be sure not to contact any moving parts to avoid possible injuries and/ or damages. Avoid contact with the - 2009 Nissan Rogue | Owner's Manual - Page 16
desired position is achieved. Reclining: 2 To recline the seatback, pull the lever * up and lean back. To bring the seatback forward, pull the lever up and lean your body forward. Release the lever to lock the seatback in position. Safety - Seats, seat belts and supplemental restraint system 1-3 - 2009 Nissan Rogue | Owner's Manual - Page 17
when the engine is off. This will discharge the battery. . SSS0661 Forward and backward: 1 Moving the the P (Park) position with the parking brake fully applied. Reclining: 2 Move the recline adjustment of the seatback for occupants of different sizes for added comfort and to help obtain proper - 2009 Nissan Rogue | Owner's Manual - Page 18
provides lower back support to the driver. 1 2 Push the front * or back * end of the switch to adjust the seat lumbar area. Folding front passenger's seat (if so equipped) The front passenger's seatback can be folded down. Some long objects may be loaded in the vehicle when the rear seats are - 2009 Nissan Rogue | Owner's Manual - Page 19
Secure objects away from the area in which an air bag would inflate. See "PRECAUTIONS ON SUPPLEMENTAL RESTRAINT SYSTEM" later in this section. Never allow anyone to . Never allow anyone to ride in the cargo area or on the rear seats when they are in the fold-down position. In a collision, people - 2009 Nissan Rogue | Owner's Manual - Page 20
the seatbacks are completely secured in the latched position and the rear center seat belt connector is completely secured. If the rear center seat belt connector and the seatbacks are not secured in head restraint down. 1 * and . Safety - Seats, seat belts and supplemental restraint system 1-7 - 2009 Nissan Rogue | Owner's Manual - Page 21
seatback receives from the occupant in a rear-end collision. The movement of the head restraint helps support the occupant's head by reducing its Active Head Restraints are designed to supplement other safety systems. Always wear seat belts. No system can prevent all injuries in any accident. . - 2009 Nissan Rogue | Owner's Manual - Page 22
feet on the floor, your chances of being injured or killed in an accident and/or the severity of injury may be greatly reduced. NISSAN strongly encourages you and all of your passengers to buckle up every time you drive, even if your seating position includes a supplemental air bag. Most U.S. states - 2009 Nissan Rogue | Owner's Manual - Page 23
vehicle than there are seat belts. If the seat belt warning light glows continuously while the ignition is turned ON with all doors closed and all seat belts fastened, it may indicate a malfunction in the system. Have the system checked by a NISSAN dealer. No changes should be made to the seat belt - 2009 Nissan Rogue | Owner's Manual - Page 24
in the rear seat than in the front seat. This is especially important because your vehicle has a supplemental restraint system (air bag system) for the front passenger. (See "SUPPLEMENTAL RESTRAINT SYSTEM" later in this section.) . The proper restraint depends on the child's size. Generally - 2009 Nissan Rogue | Owner's Manual - Page 25
restraint that fits your vehicle and always follow the manufacturer's instructions for installation and use. Small children Children that are over abdominal area. Contact your doctor for specific recommendations. INJURED PERSONS NISSAN recommends that injured persons use seat belts, depending system - 2009 Nissan Rogue | Owner's Manual - Page 26
drives or rides in this vehicle should use a seat belt at all times. Do not ride in a moving vehicle when the seatback is reclined. This can be dangerous. The shoulder belt will not be against your body back in the seat with both feet on the floor seat and the rear seating positions three system 1-13 - 2009 Nissan Rogue | Owner's Manual - Page 27
does not lock during this check or if you have any question about seat belt operation, see a NISSAN dealer. SSS0326 Unfastening the seat belts To unfasten the seat belt, push the button on the buckle. The retractor should lock and 1-14 Safety - Seats, seat belts and supplemental restraint system - 2009 Nissan Rogue | Owner's Manual - Page 28
be adjusted to the position best for you. Failure to do so may reduce the effectiveness of the entire restraint system and increase the chance or position. Seat belt hooks When the rear seat belts are not in use and when folding down the rear seats, hook the rear outer seat belts on the seat belt - 2009 Nissan Rogue | Owner's Manual - Page 29
SSS0391 SSS0241 SSS0703 Rear center seat belt The rear center seat belt has a connector tongue 1 2 * and a seat belt tongue * . Both the connector tongue and the seat belt can be fastened only into the center seat belt buckle. 1-16 Safety - Seats, seat belts and supplemental restraint system - 2009 Nissan Rogue | Owner's Manual - Page 30
, be certain that the seatbacks are completely secured in the latched position and the rear center seat belt connector is completely secured. If the rear center seat belt connector and the seatbacks are not secured Safety - Seats, seat belts and supplemental restraint system 1-17 . SSS0799 . - 2009 Nissan Rogue | Owner's Manual - Page 31
can be attached only into the rear center seat belt connector buckle. To body size or driving position, it is not possible to properly fit the lap-shoulder belt and fasten it, an extender is available that is compatible NISSAN dealer for assistance if an extender is required. WARNING . Only NISSAN - 2009 Nissan Rogue | Owner's Manual - Page 32
and parts of the vehicle. Also, do not put the same seat belt around both your child and yourself. Even with the NISSAN Advanced Air Bag System, never builds up in the shoulder belt guide of the seat belt anchors, the seat belts may retract slowly. Wipe the shoulder belt guide with a clean, dry cloth - 2009 Nissan Rogue | Owner's Manual - Page 33
in the rear seat than Follow all of the child restraint manufacturer's instructions for installation and use. When purchasing a child CHildren SYSTEM (LATCH)" later in this section. If you do not have a LATCH compatible infants and small children of various sizes. When selecting any child restraint, - 2009 Nissan Rogue | Owner's Manual - Page 34
location Lower Anchors and Tethers for CHildren SYSTEM (LATCH) Your vehicle is equipped with special anchor points that are used with Lower Anchors and Tethers for CHildren System (LATCH) compatible child restraints. This system may also be referred to as the ISOFIX or ISOFIX compatible system - 2009 Nissan Rogue | Owner's Manual - Page 35
anchors located at certain seating positions in your vehicle. With this system, you do not have to use a vehicle seat belt to secure the child restraint. Check your child restraint for a label stating that it is compatible with LATCH system. This information may also be in the instructions provided - 2009 Nissan Rogue | Owner's Manual - Page 36
strap is damaged. . SSS0802 Top tether anchor point locations Anchor points are located on the floor behind the outboard and center seating positions. Installing top tether strap First secure the child restraint with the LATCH system (rear outboard seating positions only) or the seat belt as - 2009 Nissan Rogue | Owner's Manual - Page 37
on the seat. Always follow the child restraint manufacturer's instructions. SSS0645 Front-facing (webbing-mounted) - step 2 WARNING . Attach LATCH system compatible child restraints only at the locations shown. For the LATCH lower anchor locations, see "Lower Anchors and Tethers for CHildren - 2009 Nissan Rogue | Owner's Manual - Page 38
. You may need to try a different child restraint. Not all child restraints fit in all types of vehicles. Safety - Seats, seat belts and supplemental restraint system 1-25 - 2009 Nissan Rogue | Owner's Manual - Page 39
-facing Follow these steps to install a rear-facing child restraint using LATCH system: 1. Position the child restraint on the seat. Always follow the child restraint manufacturer's instructions. SSS0648 Rear-facing (webbing-mounted) - step 2 SSS0649 Rear-facing (rigid-mounted) - step 2 2. Secure - 2009 Nissan Rogue | Owner's Manual - Page 40
to each use. If the child restraint is loose, repeat steps 3 through 4. SSS0639 Rear-facing - step 3 Rear-facing - step 4 SSS0650 3. For child restraints that are equipped with webbing-mounted attachments in all types of vehicles. Safety - Seats, seat belts and supplemental restraint system 1-27 - 2009 Nissan Rogue | Owner's Manual - Page 41
or sudden stop. . WARNING . Even with the NISSAN Advanced Air Bag System, never install a rearfacing child restraint in the front passenger seat. Front air bags inflate with great force. A rear-facing child restraint could be struck by the front air bag in a crash and could seriously injure or - 2009 Nissan Rogue | Owner's Manual - Page 42
back facing child restraint using the vehicle seat belt in the rear seat or in the front passenger seat: 1. If for infants must be used in the rear-facing direction and therefore must not be used Always follow the child restraint manufacturer's instructions. 3. Route the seat belt tongue - 2009 Nissan Rogue | Owner's Manual - Page 43
If the child restraint is equipped with a top tether strap, route the top tether strap and secure the tether strap to the tether anchor point (rear seat installation only). (See "TOP TETHER STRAP CHILD RESTRAINT" earlier in this section.) Do not install child restraints that require the use of a top - 2009 Nissan Rogue | Owner's Manual - Page 44
ON position. The front passenger air bag status light should illuminate. If this light is not illuminated, see "Front passenger air bag and status light" later in this section. Move the child restraint to another seating position. Have the system checked by a NISSAN dealer. After the child restraint - 2009 Nissan Rogue | Owner's Manual - Page 45
must be used in the rear-facing direction and therefore must not be used in the front seat. Position the child restraint on the seat. Always follow the restraint manufacturer's instructions. 2. Route the seat belt is fully retracted. 1-32 Safety - Seats, seat belts and supplemental restraint system - 2009 Nissan Rogue | Owner's Manual - Page 46
SSS0656 Rear-facing - step 4 Rear-facing - step 5 SSS0657 Rear-facing - step 6 SSS0658 4. Allow the seat belt to retract. Pull up on the shoulder belt to remove any restraint. Not all child restraints fit in all types of vehicles. Safety - Seats, seat belts and supplemental restraint system 1-33 - 2009 Nissan Rogue | Owner's Manual - Page 47
parts of the vehicle. Also, do not put the same seat belt around both your child and yourself. . NISSAN recommends that the booster seat be installed in the rear serious injury or death in an accident. Do not use towels, books, pillows or other items in place of a booster seat. Items restraint system - 2009 Nissan Rogue | Owner's Manual - Page 48
body to provide the maximum protection during a collision. . Follow all of the booster seat manufacturer's instructions the booster seat. Booster seats of various sizes are offered by several manufacturers. When compatible with the vehicle's seat and seat belt system. . . . - 2009 Nissan Rogue | Owner's Manual - Page 49
INSTALLATION WARNING NISSAN recommends that booster seats be installed in the rear seat. However, if you must install a booster seat in the front passenger seat, move the passenger's seat to the rearmost position. CAUTION LRS0453 LRS0464 . Make sure the child's head will be properly supported by - 2009 Nissan Rogue | Owner's Manual - Page 50
Rear outboard position LRS0452 1. If you must install a booster seat in the front seat, move the seat to the rearmost position. 2. Position the booster seat on the seat. Only place it in a front-facing direction. Always follow the booster seat manufacturer's instructions 's instructions for - 2009 Nissan Rogue | Owner's Manual - Page 51
may or may not be illuminated depending on the size of the child and the type of booster seat used. (See "Front passenger air bag and status light" later in this section.) . Supplemental front-impact air bag system: The NISSAN Advanced Air Bag System can help cushion the impact force to the head - 2009 Nissan Rogue | Owner's Manual - Page 52
section for instructions and precautions on seat belt usage.) The supplemental air bags operate only when the ignition switch is in the ON position. After turning the ignition switch to the ON position, the supplemental air bag warning light illuminates. The supplemental air bag warning light will - 2009 Nissan Rogue | Owner's Manual - Page 53
in this section. The seat belts and the front air bags are most effective when you are sitting well back and upright in the seat with both feet on the floor. The front air bags inflate with great force. Even with the NISSAN Advanced Air Bag System, if you are unrestrained, leaning forward, sitting - 2009 Nissan Rogue | Owner's Manual - Page 54
SSS0007 SSS0008 SSS0099 SSS0006 SSS0009 SSS0100 Safety - Seats, seat belts and supplemental restraint system 1-41 - 2009 Nissan Rogue | Owner's Manual - Page 55
or killed when the front air bags, side air bags or curtain and rollover air bags inflate if they are not properly restrained. Pre-teens and children should be properly restrained in the rear seat, if possible. Even with the NISSAN Advanced Air Bag System, never install a rearfacing child restraint - 2009 Nissan Rogue | Owner's Manual - Page 56
frontal impact, rear impact or lower severity side collision. Always wear your seat belts to help reduce the risk or severity of injury in various kinds of accidents. . The seat belts, the side air bags and curtain and rollover air bags are most effective when you are sitting well back and upright - 2009 Nissan Rogue | Owner's Manual - Page 57
However, all of the information, cautions and warnings in this manual still apply and must be followed. The driver supplemental front-impact air bag is located in the center of the steering wheel; the passenger supplemental front-impact air bag is mounted in the instrument panel above the glove box - 2009 Nissan Rogue | Owner's Manual - Page 58
, but the air bag will be off). (See "Front passenger air bag and status light" later in this section for further details.) One front air bag inflating does not indicate improper performance of the system. If you have any questions about your air bag system, contact NISSAN or a NISSAN dealer. If - 2009 Nissan Rogue | Owner's Manual - Page 59
: is The front passenger air bag status light located on the instrument panel below the air conditioner controls. The light operates as follows: . Unoccupied passenger seat: The light is OFF and the front passenger air bag is OFF and will not inflate in a crash. Passenger's seat occupied by a small - 2009 Nissan Rogue | Owner's Manual - Page 60
off. If a malfunction occurs in the front passenger air bag system, the supplemental air bag warning light , located in the meter and gauges area, will blink. Have the system checked by a NISSAN dealer. Other supplemental front-impact air bag precautions (hot steam cleaners) on the seat. This - 2009 Nissan Rogue | Owner's Manual - Page 61
the buyer about the front air bag system and guide the buyer to the appropriate sections in this Owner's Manual. FRONT SEAT-MOUNTED SIDE-IMPACT SUPPLEMENTAL AIR BAG AND ROOF-MOUNTED CURTAIN SIDE-IMPACT AND ROLLOVER SUPPLEMENTAL AIR BAG SYSTEMS The side air bags are located in the outside of the - 2009 Nissan Rogue | Owner's Manual - Page 62
side air bag and curtain and rollover air bag systems. This is to prevent accidental inflation of the side air bag and curtain and rollover air bag or damage to the side air bag and curtain and rollover air bag systems. Do not make unauthorized changes to your vehicle's electrical system, suspension - 2009 Nissan Rogue | Owner's Manual - Page 63
trim material, such as seat covers, around the side air bag. . Work around and on the side air bag and curtain and rollover air bag systems should be done by a NISSAN dealer. Installation of electrical equipment should also be done by a NISSAN dealer. The SRS wiring harnesses* should not be modified - 2009 Nissan Rogue | Owner's Manual - Page 64
. Take your vehicle to the nearest NISSAN dealer. When selling your vehicle, we request that you inform the buyer about the pretensioner system and guide the buyer to the appropriate sections in this Owner's Manual. SSS0362 SPA1097 SUPPLEMENTAL AIR BAG WARNING LABELS Warning labels about the - 2009 Nissan Rogue | Owner's Manual - Page 65
warning light will remain illuminated after inflation has occurred. Repair and replacement of these systems should be done only by a NISSAN dealer. When maintenance work is required on the vehicle, the front air bags, side air bags, curtain and rollover air bags and pretensioners and related parts - 2009 Nissan Rogue | Owner's Manual - Page 66
If you need to dispose of a supplemental air bag or pretensioner systems, or scrap the vehicle, contact a NISSAN dealer. Correct supplemental air bag and pretensioner system disposal procedures are set forth in the appropriate NISSAN Service Manual. Incorrect disposal procedures could cause personal - 2009 Nissan Rogue | Owner's Manual - Page 67
MEMO 1-54 Safety - Seats, seat belts and supplemental restraint system - 2009 Nissan Rogue | Owner's Manual - Page 68
display...2-6 Outside air temperature (if lights ...2-12 Indicator lights...2-16 Audible reminders ...2-18 Security systems...2-19 Vehicle security system...2-19 NISSAN Vehicle Immobilizer System ...2-20 Windshield wiper and washer switch ...2-22 Rear window wiper and washer switch...2-23 Rear - 2009 Nissan Rogue | Owner's Manual - Page 69
so equipped) ...Cargo light (if so equipped) ...HomeLink® Universal Transceiver (if so equipped) ...Programming HomeLink® ... 2-44 2-44 2-45 2-46 2-46 2-47 2-47 Programming HomeLink® for Canadian customers ...Operating the HomeLink® Universal Transceiver ...Programming trouble-diagnosis ...Clearing - 2009 Nissan Rogue | Owner's Manual - Page 70
18. Hood release handle 19. Tilting steering wheel lever 20. Parking brake 21. Ignition switch 22. Heated seat switch (if so equipped) 23. Power outlet 24. Heater/air conditioner control 25. Selector lever 26. Front passenger air bag status light 27. Rear window and outside mirror (if so equipped - 2009 Nissan Rogue | Owner's Manual - Page 71
display - Odometer/twin trip odometer - Trip computer* - Outside air temperature* - Continuously Variable Transmission (CVT) 4. 5. 6. 7. 8. position indicator Engine coolant temperature gauge Speedometer Warning/indicator lights Instrument brightness control knob RESET switch for trip odometer - 2009 Nissan Rogue | Owner's Manual - Page 72
the vehicle has been driven. The twin trip odometer records the distance of individual trips. Changing the display: 3 Pushing the reset switch * located on the meter panel changes the display as follows: TRIP A ? TRIP B ? Trip computer mode (if so equipped) ? TRIP A 2-4 Instruments and controls - 2009 Nissan Rogue | Owner's Manual - Page 73
temperature is within the normal range when the gauge is within the zone 2 * shown in the illustration. The engine coolant temperature varies with the outside air temperature and driving conditions. Instruments and controls 2-5 - 2009 Nissan Rogue | Owner's Manual - Page 74
trip odometer/Trip computer (if so equipped) The gauge may move slightly during braking, turning, acceleration, or going up or down hills. Refill the fuel tank before the gauge registers E (Empty). The low fuel warning light illuminates when the fuel tank is getting low. Refuel as soon as it is - 2009 Nissan Rogue | Owner's Manual - Page 75
minute or when the outside air temperature becomes 398F (48C) or to be displayed. When driving uphill or rounding curves, the The switch for the trip computer is located on the meter panel. When the Elapsed time ( ? TRIP A) Average fuel consumption (mpg or l (liter)/100 km) The average fuel - 2009 Nissan Rogue | Owner's Manual - Page 76
circles at less than 5 MPH (8 km/h). You can also calibrate the compass by driving your vehicle on your everyday route. The compass will be calibrated once it has tracked 3 complete circles. To turn on and off the compass manually, push A the switch * while the ignition switch is in the ON position - 2009 Nissan Rogue | Owner's Manual - Page 77
enough to cause false compass readings. Follow these instructions to set the variance for your particular location if this happens: 1. Push the switch for the compass checked at a NISSAN dealer. The compass may not indicate the correct compass point in tunnels or while driving up or down a steep - 2009 Nissan Rogue | Owner's Manual - Page 78
compass point when the vehicle moves to an area where the geomagnetism is stabilized.) CAUTION . Do not install a ski rack, antenna, etc., which are attached to the vehicle by means of a magnet. They affect the operation of the compass. When cleaning the mirror, use a paper towel - 2009 Nissan Rogue | Owner's Manual - Page 79
light* Brake warning light Seat belt warning light Charge warning light Door open warning light Electric power steering warning light Engine oil pressure warning light Intelligent Key system warning light* Supplemental air bag warning light Front passenger air bag status light All-Wheel Drive (AWD - 2009 Nissan Rogue | Owner's Manual - Page 80
"ALL-WHEEL DRIVE (AWD)" in the "5. Starting and driving" section.) prevent the AWD system from malfunctioning. If the warning light turns off, you can drive again. - blinks slowly (about once every 2 seconds): Pull off the road in a safe area, and idle the engine. Check that all tire sizes are the - 2009 Nissan Rogue | Owner's Manual - Page 81
-lock Braking System (ABS) warning light" earlier in this section.) minimum or MIN mark on the brake fluid reservoir, do not drive until the brake system has been checked at a NISSAN dealer. power steering warning light turns off. This indicates the electric power steering system is operational - 2009 Nissan Rogue | Owner's Manual - Page 82
will remain on after 1 minute. Have the system checked by a NISSAN dealer. For additional information, see "TIRE PRESSURE MONITORING SYSTEM (TPMS)" in the "5. Starting and driving" section. Intelligent Key system warning light (if so equipped) This light illuminates in green when it is possible to - 2009 Nissan Rogue | Owner's Manual - Page 83
pressure warning light OFF. If the light stays on after adjusting the tire pressure and driving over 16 MPH (25 km/h), have the system checked by a NISSAN dealer. If you have a flat tire, replace it with a spare tire as soon as possible. When a spare tire is mounted or a wheel is replaced, the TPMS - 2009 Nissan Rogue | Owner's Manual - Page 84
may indicate the cruise control system is not functioning properly. Have the system checked by a NISSAN dealer. (See "CRUISE CONTROL" in the "5. Starting and driving" section.) INDICATOR LIGHTS All-Wheel Drive (AWD) LOCK indicator light (AWD models) This light illuminates when the ignition switch - 2009 Nissan Rogue | Owner's Manual - Page 85
to the dealer. Malfunction indicator light blinking - An engine misfire has been detected which may damage the emission control system. To reduce or avoid emission control system damage: a) Do not drive at speeds above 45 MPH (72 km/h). b) Avoid hard acceleration or deceleration. c) Avoid steep - 2009 Nissan Rogue | Owner's Manual - Page 86
CONTROL (VDC) SYSTEM" in the "5. Starting and driving" section of this manual. switch is in the ACC, OFF or LOCK position. Turn the light switch off when you leave the vehicle. Brake pad wear warning The disc brake pads have audible wear warnings. When a brake pad requires replacement, it will - 2009 Nissan Rogue | Owner's Manual - Page 87
KEY SYSTEM" in the "3. Pre-driving checks and adjustments" section. SIC2133 Your vehicle has two types of security systems, as follows: . . Vehicle security system NISSAN Vehicle Immobilizer System The security condition will be shown by the security indicator light. VEHICLE SECURITY SYSTEM The - 2009 Nissan Rogue | Owner's Manual - Page 88
that the security indicator light illuminates. The security indicator light stays on for about 30 seconds. The vehicle security system is now pre-armed after approximately 50 seconds. However, the NISSAN VEHICLE IMMOBILIZER SYSTEM The NISSAN Vehicle Immobilizer System will not allow the engine to - 2009 Nissan Rogue | Owner's Manual - Page 89
section 15 of FCC rules for NISSAN Vehicle Immobilizer System (CONT ASSY-BCM. ANT ASSYIMMOBILISER) This device complies with part 15 of the FCC Rules and light The security indicator light is located on the meter panel. It indicates the status of the NISSAN Vehicle Immobilizer System. The light - 2009 Nissan Rogue | Owner's Manual - Page 90
WINDSHIELD WIPER AND WASHER SWITCH service as soon as possible. Please bring all registered keys that you have when visiting a NISSAN dealer for service. WARNING In freezing temperatures the washer solution may freeze on the windshield and obscure your vision which may lead to an accident. Warm - 2009 Nissan Rogue | Owner's Manual - Page 91
REAR WINDOW WIPER AND WASHER SWITCH times. WARNING In freezing temperatures the washer solution may freeze on the rear window glass and obscure your vision. Warm the rear window with the defroster before you wash the rear window. CAUTION . SIC2821 Do not operate the washer continuously for more - 2009 Nissan Rogue | Owner's Manual - Page 92
position. Turn the switch clockwise from the OFF position to operate the wiper. 1 * 2 * To defog/defrost the rear window glass and outside mirrors (if so equipped), start the engine 1 and push the switch on. The indicator light * will illuminate. Push the switch again to turn the defroster off. It - 2009 Nissan Rogue | Owner's Manual - Page 93
headlights are on, they produce a high voltage. To prevent an electric shock, never attempt to modify or disassemble. Always have your xenon headlights replaced at a NISSAN dealer. Xenon headlights provide considerably more light than conventional headlights. If they are not correctly aimed, they - 2009 Nissan Rogue | Owner's Manual - Page 94
switch is in the OFF position. When the headlight switch is in the or position while the ignition switch is in the ON position, the lights will automatically turn off 5 minutes after the ignition switch . 3 * Battery saver system . 2-26 Instruments and controls - 2009 Nissan Rogue | Owner's Manual - Page 95
no heavy load or on a flat road, select position 0. Daytime running light system (Canada only) The daytime running lights automatically illuminate when the engine is started with the parking brake released. The daytime running lights operate with the headlight switch in the OFF position or in the - 2009 Nissan Rogue | Owner's Manual - Page 96
control operates when the headlight switch is in the or position. A Turn the control * to adjust the brightness of the instrument panel lights. The brightness B indicator * will be shown briefly in the vehicle information display when the control is turned. When the brightness level reaches - 2009 Nissan Rogue | Owner's Manual - Page 97
ignition switch in any position. Some state laws may prohibit the use of the hazard warning flasher switch while driving. SIC3020 SIC2574 FOG LIGHT SWITCH (if so equipped) To turn the fog lights on, turn the headlight switch to the position, then turn the switch to the position. To turn them off - 2009 Nissan Rogue | Owner's Manual - Page 98
not operate, turn the switch off and have the system checked by a NISSAN dealer. . . SIC3404 SIC3355 To sound the horn, push the center pad area of the steering wheel. . The front seats are warmed by built-in heaters. The switches located on the center console can be operated independently of - 2009 Nissan Rogue | Owner's Manual - Page 99
with the Vehicle Dynamic Control (VDC) system on for most driving conditions. If the vehicle is stuck in mud or snow, the VDC system reduces the engine output to reduce wheel spin. The engine speed will be reduced even if the accelerator is depressed to the floor. If maximum engine power is needed - 2009 Nissan Rogue | Owner's Manual - Page 100
) power draw. Do not use double adapters or more than one electrical accessory. Use power outlet with the engine running to avoid discharging the vehicle battery. Avoid using power outlet when the air conditioner, headlights or rear window defroster is on. This power outlet is not designed for use - 2009 Nissan Rogue | Owner's Manual - Page 101
STORAGE contact the outlet. CUP HOLDERS CAUTION . Avoid abrupt starting and braking when the cup holder is being used to prevent spilling the drink. If the liquid is hot, it can scald you or your passenger. Use - 2009 Nissan Rogue | Owner's Manual - Page 102
direct sunlight. The heat may damage the glasses. SIC3495 Rear SIC3496 To open the cup holder, pull the lid. SUNGLASSES HOLDER WARNING Keep the sunglasses holder closed while driving to prevent an accident. To open the sunglasses holder, push 1 *. CAUTION . . Do not use for anything other than - 2009 Nissan Rogue | Owner's Manual - Page 103
GLOVE BOX WARNING Keep glove box lid closed while driving to help prevent injury in an accident or a sudden stop. To open the glove box, pull the handle. To close, push the lid in until the lock latches. The glove box light illuminates when the headlight switch is turned on. SIC3497 A * B * C * - 2009 Nissan Rogue | Owner's Manual - Page 104
, pull the B handle * on the lid. To close, push the lid until the lock latches. The luggage floor box needs to be removed when you need a spare tire. (See "FLAT TIRE" in the "6. In case of emergency" section.) SIC3502 LUGGAGE SIDE BOX To open the luggage side box, pull up the strap. SIC3514 - 2009 Nissan Rogue | Owner's Manual - Page 105
in an accident or sudden stop. Close the cargo cover when folding the rear seat. Do not leave the cargo cover in the vehicle with it disengaged the cargo cover from the vehicle or secure it on the cargo floor below . its attachment location. If the cargo cover is not removed, it may damage the - 2009 Nissan Rogue | Owner's Manual - Page 106
more than A B 22 lb (10 kg) * or 7 lb (3 kg) * to a single hook. SIC3505 COAT HOOKS (if so equipped) The coat hooks are equipped above the rear window. CAUTION SIC3504 Do not apply a total load of more than 2 lb (1 kg) to a single hook. LUGGAGE HOOKS (if so equipped) WARNING . Always make sure - 2009 Nissan Rogue | Owner's Manual - Page 107
Drive the crossbars to the roof rail before loading. The crossbars are available from a NISSAN dealer. Always distribute the luggage evenly on the roof rack. Do not load (GAWR front and rear). The GVWR and GAWR are located on the F.M.V.S.S. or C.V.M.S.S. certification label (located on the driver's - 2009 Nissan Rogue | Owner's Manual - Page 108
in serious accidents. . SIC3507 Main power window switch (driver's side) 1. 2. 3. 4. 5. Window lock button Driver side window Rear left passenger side window Front passenger side window Rear right passenger side window The power windows operate when the ignition switch is in the ON position, or - 2009 Nissan Rogue | Owner's Manual - Page 109
Push it in again to cancel. SIC3508 SIC3509 Passenger side power window switch The passenger side switch will open or close only the corresponding window. To open or close the window, push down or pull up the switch and hold it. Automatic operation (if so equipped) The automatic operation is - 2009 Nissan Rogue | Owner's Manual - Page 110
light push or pull on the switch will cause the window to open or close until the switch is released. only) does not operate properly, perform the following procedure to initialize the power window system by a NISSAN dealer. portion of their body out of the the environment or driving conditions, the - 2009 Nissan Rogue | Owner's Manual - Page 111
when the moonroof is opened. However, it must be closed manually. WARNING There are some small distances immediately before the closed position push and hold the switch toward 2 *. Depending on the environment or driving conditions, the auto reverse function may be activated if an impact or load - 2009 Nissan Rogue | Owner's Manual - Page 112
. 1 * SIC3511 5. Check if the moonroof switch operates normally. If the moonroof does not operate properly after performing the procedure above, have your vehicle checked by a NISSAN dealer. MAP LIGHTS Push the light lens to turn the map light on or off. 2-44 Instruments and controls - 2009 Nissan Rogue | Owner's Manual - Page 113
(on the keyfob or Intelligent Key) or the request switch (Intelligent Key system equipped model), with the ignition switch in the LOCK position - remain on map lights will illuminate. 1 * , the The lights will turn off after 30 minutes when the lights remain illuminated to prevent the battery from - 2009 Nissan Rogue | Owner's Manual - Page 114
remain on while the door is opened. When the door is closed, the lights go off. The light will turn off after 30 minutes when the lights remain illuminated to prevent the battery from becoming discharged. SIC2064 CARGO LIGHT (if so equipped) SIC2131A 1 When the switch is in the ON position * , the - 2009 Nissan Rogue | Owner's Manual - Page 115
lighting, entry door locks and security systems. Is powered by your vehicle's battery. No separate batteries are required. If the vehicle's battery is gate, or entry door opener, home or office lighting, you need to be at the same location as the device. Note: Garage door openers (manufactured - 2009 Nissan Rogue | Owner's Manual - Page 116
on the garage door opener's motor to activate the "training mode". This button is usually located near the antenna wire that hangs down from the motor. If the wire originates from under a light lens, you will need to remove the lens to access the training button. NOTE: Once you have pushed and - 2009 Nissan Rogue | Owner's Manual - Page 117
buttons and release when the indicator light begins to flash (in approximately 20 seconds). PROGRAMMING TROUBLE-DIAGNOSIS If HomeLink® does not quickly learn the handheld transmitter information: . . replace the hand-held transmitter batteries with new batteries. position the hand-held transmitter - 2009 Nissan Rogue | Owner's Manual - Page 118
rapidly. When the indicator light begins to flash rapidly device that has been programmed into HomeLink®. Consult the Owner's Manual of each device or call the manufacturer or dealer of those FCC Notice: This device complies with FCC rules part 15. Operation is subject to the following two conditions - 2009 Nissan Rogue | Owner's Manual - Page 119
How to use remote keyless entry system ...3-7 Intelligent Key system (if so equipped) ...3-8 Intelligent Key operating range ...3-10 Door locks/unlocks precaution ...3-11 Intelligent Key operation...3-11 Warning lights and audible reminders ...Troubleshooting guide ...How to use remote keyless entry - 2009 Nissan Rogue | Owner's Manual - Page 120
allow the NISSAN Vehicle Immobilizer System key, which contains an electrical transponder, to come in contact with salt NISSAN Vehicle Immobilizer System components in your vehicle. These keys have a transponder chip in the key head. Never leave these keys in the vehicle. Additional or replacement - 2009 Nissan Rogue | Owner's Manual - Page 121
NISSAN dealer. CAUTION . Do not allow the Intelligent Key, which contains electrical components, to come into contact with water or salt water. This could affect the system To remove the mechanical key, release the lock knob at the back of the Intelligent Key. To install the mechanical key, firmly - 2009 Nissan Rogue | Owner's Manual - Page 122
the doors locked while driving. Along with the SPA1814 . . LOCKING WITH KEY The power door lock system allows you to lock or unlock all doors simultaneously...Turning the Turning the driver's door key cylinder once 2 to the rear of the vehicle * will unlock the driver's door. After returning the key - 2009 Nissan Rogue | Owner's Manual - Page 123
power door lock switch will lock or unlock all the doors. The switches are located on the driver's and front passenger's door armrests. To lock the doors, push each other. To deactivate or activate the automatic lock or unlock system, perform the following procedure. 1. Close all doors. 2. Turn the - 2009 Nissan Rogue | Owner's Manual - Page 124
regarding the erasing procedure, please contact a NISSAN dealer. If the indicator light on the keyfob does not illuminate when pushing the buttons, the keyfob battery may be discharged. For information regarding the replacement of a battery, see "BATTERY REPLACEMENT" in the "8. Maintenance and do-it - 2009 Nissan Rogue | Owner's Manual - Page 125
illuminates and the light timer activates for 15 seconds when the switch is in the DOOR position. button again within HOW TO USE REMOTE KEYLESS ENTRY SYSTEM Locking doors 1. Remove the key from the ignition switch. 2. 1 minute of pushing the UNLOCK button. Pre-driving checks and adjustments 3-7 - 2009 Nissan Rogue | Owner's Manual - Page 126
electric medical equipment manufacturer for the possible influences before use. The Intelligent Key transmits radio waves when the buttons are pushed. The FAA advises that the radio waves may affect aircraft navigation and communication systems once. The Intelligent Key system can operate all the - 2009 Nissan Rogue | Owner's Manual - Page 127
information regarding replacement of a battery, see "BATTERY REPLACEMENT" in the "8. Maintenance and do-it-yourself" section. As many as 4 Intelligent Keys can be registered and used with one vehicle. For information about the purchase and use of additional Intelligent Keys, contact a NISSAN dealer - 2009 Nissan Rogue | Owner's Manual - Page 128
the operating location, the Intelligent Key system's operating range becomes narrower, and the Intelligent Key may not function properly. The operating range is within 31.50 in (80 cm) 1 from each request switch * . If the Intelligent Key is too close to the door glass, handle or rear bumper the - 2009 Nissan Rogue | Owner's Manual - Page 129
hand as illustrated. The close distance to the door handle will cause the Intelligent Key system to have difficulty recognizing that the Intelligent Key is outside the vehicle. After locking with the without taking the key out from your pocket or bag. . . Pre-driving checks and adjustments 3-11 - 2009 Nissan Rogue | Owner's Manual - Page 130
any doors. Pushing the ignition switch. Inserting the mechanical key into the ignition switch. SPA2410 *2: Doors will not lock with the request switch 3-12 Pre-driving checks and adjustments - 2009 Nissan Rogue | Owner's Manual - Page 131
REMINDERS The Intelligent Key system is equipped with a function that is designed to minimize improper operations and to help prevent the vehicle from being stolen. The warning buzzer sounds and the warning light illuminates when improper operations are detected. Pre-driving checks and adjustments - 2009 Nissan Rogue | Owner's Manual - Page 132
TROUBLESHOOTING GUIDE Symptom Possible cause Action to take Take out the Intelligent Key the LOCK position. Replace the battery with a new one. (See "BATTERY REPLACEMENT" in the "8. Maintenance and do-it-yourself" section.) The Intelligent Key system warning light in the The battery charge is low. - 2009 Nissan Rogue | Owner's Manual - Page 133
are carrying the Intelligent Key, the battery is completely discharged. Replace the battery with a new one. (See "BATTERY REPLACEMENT" in the "8. Maintenance and do-it-yourself" section.) When pushing the ignition switch The Intelligent Key system warning light in the The Intelligent Key is not - 2009 Nissan Rogue | Owner's Manual - Page 134
battery is discharged. WARNING . Radio waves could adversely affect electric medical equipment. Those who use a pacemaker should contact the electric contains electrical components, to come into contact with water or salt water. This could affect the system function. driving checks and adjustments - 2009 Nissan Rogue | Owner's Manual - Page 135
indicator and horn mode when you first receive the vehicle. In hazard indicator and horn mode, when the 1 LOCK button * is pushed, the hazard Pre-driving checks and adjustments 3-17 - 2009 Nissan Rogue | Owner's Manual - Page 136
the UNLOCK button * is pushed, the hazard indicator flashes once. If horns are not necessary, the system can be switched to the hazard indicator mode. In hazard indicator mode, when the LOCK button is pushed - twice DOOR UNLOCK HAZARD - none HAZARD - none 3-18 Pre-driving checks and adjustments - 2009 Nissan Rogue | Owner's Manual - Page 137
, the hazard indicator flashes 3 times. When the hazard indicator and horn mode is set, the hazard indicator flashes once and the horn chirps once. Pre-driving checks and adjustments 3-19 - 2009 Nissan Rogue | Owner's Manual - Page 138
before driving. the hood: 1 1. Pull the hood release handle * located below the instrument panel; the hood will then spring up support rod from the hood and 3 insert it into the slot * . A Hold the coated part * when removing or resetting the support rod. Avoid direct contact with the metal parts - 2009 Nissan Rogue | Owner's Manual - Page 139
exhaust gases to be drawn into the vehicle. See "EXHAUST GAS (carbon monoxide)" in the "5. Starting and driving" section of this manual. Make sure that all passengers have their hands, etc. 's door key cylinder and turning it to the rear of the vehicle twice. Pre-driving checks and adjustments 3-21 - 2009 Nissan Rogue | Owner's Manual - Page 140
RELEASE If the lift gate cannot be opened due to a discharged battery, follow the these steps. 1. Remove the cover inside of the cap holder while refueling. A * as Have the vehicle checked by a NISSAN dealer. . WARNING Gasoline is extremely flammable and highly explosive under certain conditions - 2009 Nissan Rogue | Owner's Manual - Page 141
could also cause the malfunction indicator light to come on. Never pour fuel into the throttle body to attempt to start your vehicle. Do not fill a portable fuel container in the vehicle or trailer. Static electricity can cause an explosion of flammable liquid, vapor or gas in any vehicle or trailer - 2009 Nissan Rogue | Owner's Manual - Page 142
. 3 Push the lock lever up * securely to lock the steering wheel in place. A clicking noise may be heard when the lever is moved to the lock position. SIC2872 1. To block out glare from the front, swing 1 down the sun visor * . 2. To block glare from the side, remove the sun visor from the center - 2009 Nissan Rogue | Owner's Manual - Page 143
light A * will illuminate and excessive glare from the headlights of the vehicle behind you will be reduced. B Push the switch * to make the inside rearview mirror operate normally and the indi- WARNING Use the night position only when necessary, because it reduces rear view clarity. Pre-driving - 2009 Nissan Rogue | Owner's Manual - Page 144
cator light will turn off. Push the again to turn the system on. switch (if so equipped) The outside mirrors will be heated when the rear window defroster switch is operated. SPA1390 OUTSIDE MIRRORS WARNING Objects viewed switch is located on the left side of the instrument panel. 3-26 Pre - 2009 Nissan Rogue | Owner's Manual - Page 145
SPA1829 Foldable outside mirrors Fold the outside mirror by pushing it toward the rear of the vehicle. Pre-driving checks and adjustments 3-27 - 2009 Nissan Rogue | Owner's Manual - Page 146
MEMO 3-28 Pre-driving checks and adjustments - 2009 Nissan Rogue | Owner's Manual - Page 147
17 CD care and cleaning ...Steering wheel switch for audio control (if so equipped) ...Antenna ...Car phone or CB radio...Bluetooth® Hands-Free Phone System with NISSAN voice recognition (if so equipped) ...Using system ...Speaker Adaptation (SA) mode ...Troubleshooting guide ...4-22 4-23 4-24 4-24 - 2009 Nissan Rogue | Owner's Manual - Page 148
mode for long periods as it may cause the interior air to become stale and the windows to fog up. . SAA1775 Open or close, and adjust the air flow direction of ventilators as illustrated. . Start the engine and operate the air conditioner. 4-2 Heater, air conditioner, audio and phone systems - 2009 Nissan Rogue | Owner's Manual - Page 149
MANUAL AIR CONDITIONER 1. 2. 3. 4. 5. 6. Fan speed control dial Temperature control dial Air flow control dial Air recirculation button A/C (Air Conditioner) button Rear window defroster button (See "REAR . dial clockwise To turn off the heater and air conditioner, turn the fan speed control dial to - 2009 Nissan Rogue | Owner's Manual - Page 150
mode directs outside air to the side and center ventilators. 1. Push the air recirculation button to the OFF position. (The indicator light turns off.) 2. Turn the air flow control dial Turn the temperature control dial to the desired position. 4-4 Heater, air conditioner, audio and phone systems - 2009 Nissan Rogue | Owner's Manual - Page 151
the NISSAN Service and Maintenance Guide. To replace the filter, contact a NISSAN dealer. The filter should be replaced if the air flow decreases significantly or if windows fog up easily when operating the heater or air conditioning system. 4. Push the A/C button on. (The A/C indicator light will - 2009 Nissan Rogue | Owner's Manual - Page 152
Your NISSAN radio system is location may reduce or eliminate the noise. WARNING The system contains refrigerant under high pressure. To avoid personal injury, any air conditioner service should be done only by an experienced technician with the proper equipment. 4-6 Heater, air conditioner - 2009 Nissan Rogue | Owner's Manual - Page 153
equipped) is first installed or the battery has been replaced, the satellite radio may not work receiver and antenna are installed and an XM® satellite radio service subscription electrical power lines, electric signs and even traffic lights. Heater, air conditioner, audio and phone systems 4-7 - 2009 Nissan Rogue | Owner's Manual - Page 154
cold weather or rainy days, the player may malfunction due to the humidity. If this occurs, remove the CD and dehumidify or ventilate the player completely. The player may skip while driving on CD door closed could damage the CD and/or CD . . 4-8 Heater, air conditioner, audio and phone systems - 2009 Nissan Rogue | Owner's Manual - Page 155
used by a digital music files. The size and quality of a compressed digital audio file parts of a sound signal that the human ear doesn't hear. WMA - Windows Media Audio (WMA) is a compressed audio format created by Microsoft as an alternative Heater, air conditioner, audio and phone systems 4-9 - 2009 Nissan Rogue | Owner's Manual - Page 156
. . If there is a file in the top level of the disc, "Root Folder" is displayed. The playback order is the order in which the files were written by the writing software. Therefore, the files might not play in the desired order. 4-10 Heater, air conditioner, audio and phone systems - 2009 Nissan Rogue | Owner's Manual - Page 157
Specification chart: Supported media Supported file systems Version MP3 Supported versions*1 WMA*2 Sampling frequency Bit rate Version Sampling frequency Bit rate Tag on what kind of media, versions and information are going to be displayed. Heater, air conditioner, audio and phone systems 4-11 - 2009 Nissan Rogue | Owner's Manual - Page 158
Troubleshooting guide in compliance with the specifications. Check if the back in the desired order. The playback order is the order in which the files were written by the writing software. Therefore, the files might not play in the desired order. 4-12 Heater, air conditioner, audio and phone systems - 2009 Nissan Rogue | Owner's Manual - Page 159
·REW button PRESET A·B·C button DISP (display) button CD PLAY button RADIO button AUX (auxiliary) button Push the AUDIO button to change the selecting mode as follows. BASS ? TREBLE ? FADER ? BALANCE ? BEEP ? off Push the TUNE ( , ) or SEEK ( , Heater, air conditioner, audio and phone systems 4-13 - 2009 Nissan Rogue | Owner's Manual - Page 160
modes. Fader adjusts the sound level between the front and rear speakers and Balance adjusts the sound between the right and from stereo to monaural reception. TUNE (Tuning): or for manual Push the TUNE button tuning. To move quickly through the 4-14 Heater, air conditioner, audio and phone systems - 2009 Nissan Rogue | Owner's Manual - Page 161
tuning button is pushed while the CD is being played, the beginning of all the tracks of CD will be played for 10 seconds in Heater, air conditioner, audio and phone systems 4-15 - 2009 Nissan Rogue | Owner's Manual - Page 162
will be ejected. When this button is pushed while the compact disc is being played, the compact disc will come out and the system will turn off. If the compact disc comes out and is not removed, it will be pulled back into the slot to protect it. 4-16 Heater, air conditioner, audio and phone - 2009 Nissan Rogue | Owner's Manual - Page 163
optional satellite receiver and antenna are installed, and there is an active XM® satellite radio service subscription. It may take CD PLAY button RADIO button AUX (auxiliary) button ON·OFF/VOLUME control knob RDM (random)/RPT (repeat) button Heater, air conditioner, audio and phone systems 4-17 - 2009 Nissan Rogue | Owner's Manual - Page 164
and rear antenna are installed and an XM® satellite radio service subscription is active. Satellite radio is not available in Alaska, Hawaii and Guam. If another audio source is playing when the RADIO button is pushed, the compact disc will 4-18 Heater, air conditioner, audio and phone systems - 2009 Nissan Rogue | Owner's Manual - Page 165
or for manual Push the battery cable is disconnected, or if the fuse opens, the radio memory will be erased. In that case, reset the desired stations. Radio Data System (RDS): RDS stands for Radio Data System, and is a data information service Heater, air conditioner, audio and phone systems 4-19 - 2009 Nissan Rogue | Owner's Manual - Page 166
compact disc into the slot with the label side facing up. The compact disc will be guided automatically into the slot and start playing. If the radio is already operating, it will automatically disc information display will change as follows: 4-20 Heater, air conditioner, audio and phone systems - 2009 Nissan Rogue | Owner's Manual - Page 167
analog audio input such as from a portable cassette tape/CD player, MP3 player or laptop computers. Push the AUX button to play a compatible device when it is plugged into the AUX IN jack. CD EJECT: When the CD EJECT button is pushed with the Heater, air conditioner, audio and phone systems 4-21 - 2009 Nissan Rogue | Owner's Manual - Page 168
cleaner or alcohol intended for industrial use. . A new disc may be rough on the inner and 1. 2. 3. Tuning switch VOLUME control switch SOURCE select switch 4-22 Heater, air conditioner, audio and phone systems - 2009 Nissan Rogue | Owner's Manual - Page 169
B) With the ignition switch turned to the ACC or ON position, push the POWER on/off switch to turn the audio system on or off. Tuning switch Memory change (radio): Push up or down the tuning switch for less than 1.5 seconds to change the next or previous Heater, air conditioner, audio and phone - 2009 Nissan Rogue | Owner's Manual - Page 170
counterclockwise. To install the antenna, turn the antenna clockwise and tighten. . CAUTION . To avoid damaging or deforming the antenna, be sure to remove the antenna under the following conditions. - The vehicle enters an automatic car wash. 4-24 Heater, air conditioner, audio and phone systems - 2009 Nissan Rogue | Owner's Manual - Page 171
full attention to vehicle operation while talking on the phone, pull off the road to a safe location and stop your vehicle before doing so. . . . . . CAUTION To avoid discharging the vehicle battery, use a phone after starting the engine. Heater, air conditioner, audio and phone systems 4-25 - 2009 Nissan Rogue | Owner's Manual - Page 172
: - Your vehicle is outside of the cellular service area. - Your vehicle is in an area NISSAN is equipped with the Bluetooth® Hands-Free Phone System. If you are an owner of a compatible Bluetooth Bluetooth® wireless connection, the . . . . 4-26 Heater, air conditioner, audio and phone systems - 2009 Nissan Rogue | Owner's Manual - Page 173
battery power of the cellular phone may discharge quicker than usual. . If the Bluetooth® Hands-Free Phone System seems to be malfunctioning, please refer to "Troubleshooting guide" later in this section. You can also visit www.nissanusa.com/bluetooth for troubleshooting help. Some cellular phones - 2009 Nissan Rogue | Owner's Manual - Page 174
steering wheel at any time. Whenever the VR session is canceled, a double beep sounds to indicate you have exited the system. three" NOTE: For best results, say phone numbers as single digits. How to say numbers: NISSAN Voice Recognition requires a Heater, air conditioner, audio and phone systems - 2009 Nissan Rogue | Owner's Manual - Page 175
started using the Bluetooth® Hands-Free Phone System with NISSAN Voice Recognition. For control buttons for the Bluetooth HandsFree Phone System are located on the steering wheel. TALK/PHONE SEND system announces the current language and gives you the option to change the Heater, air conditioner, - 2009 Nissan Rogue | Owner's Manual - Page 176
varies according to each cellular phone. See the cellular phone Owner's Manual for details. You can also visit www.nissanusa. com/bluetooth for instructions on pairing NISSAN recommended cellular phones. 5. The system asks you to say a name for the E phone * . If the name is too long or too short, - 2009 Nissan Rogue | Owner's Manual - Page 177
each sub-menu. Remember to wait for the tone before speaking. You can say "Help" to hear the list of commands When prompted by the system, say the number you wish to call. (See "How to say numbers" Heater, air conditioner, audio and phone - 2009 Nissan Rogue | Owner's Manual - Page 178
when the vehicle is moving. Use the Call Back command to dial the number of the last incoming call within the vehicle. The system acknowledges the command, repeats the number and begins dialing. If a call back number does not exist, the system 4-32 Heater, air conditioner, audio and phone - 2009 Nissan Rogue | Owner's Manual - Page 179
according to each cellular phone. See the cellular phone Owner's Manual for details. You can also visit www. nissanusa.com/bluetooth for instructions on transferring phone numbers from NISSAN re- Use the Edit command to alter an existing phone book entry or to add a 2nd, 3rd or 4th phone number - 2009 Nissan Rogue | Owner's Manual - Page 180
. Use the Delete command to erase one entry from the phone book, all entries from the phone book, the current redial number or the current call back number. To delete entries from the phone book, say a name or "All entries" when prompted by the system. 4-34 Heater, air conditioner, audio and phone - 2009 Nissan Rogue | Owner's Manual - Page 181
® phone is in the vehicle. The system states the priority level of the active Use the Pair Phone command to pair a phone to the Bluetooth® Hands-Free Phone System. When you are asked to enter a PIN code for pairing your Bluetooth® cellular phone, operate it Heater, air conditioner, audio and phone - 2009 Nissan Rogue | Owner's Manual - Page 182
System. When Bluetooth® Hands-Free Phone System is off, you will not be able to make or receive calls using NISSAN Voice Recognition. Also, you will not have access to the Phone Book. You can still use the Memo Pad and access 4. The system announces: "Press the PHONE 4-36 Heater, air conditioner - 2009 Nissan Rogue | Owner's Manual - Page 183
six six Training phrases During the SA mode, the system instructs you to say the following phrases. (The system will prompt you for each phrase.) ...phone book new entry dial three oh four two nine delete call back number setup pair phone memo pad play eight pause nine three two pause seven delete - 2009 Nissan Rogue | Owner's Manual - Page 184
... memo pad delete call seven six three oh one go back call five six two eight zero dial six six four three seven 4-38 Heater, air conditioner, audio and phone systems - 2009 Nissan Rogue | Owner's Manual - Page 185
Ensure that the phone book entry name requested matches what was originally stored. This can be confirmed by using the "List Names" command. (See "Phone book" earlier in this section.) 2. Replace one of the names being confused with a new name. Heater, air conditioner, audio and phone systems 4-39 - 2009 Nissan Rogue | Owner's Manual - Page 186
MEMO 4-40 Heater, air conditioner, audio and phone systems - 2009 Nissan Rogue | Owner's Manual - Page 187
...AWD warning light ...Parking/parking on hills...Electric power steering system ...Brake system ...Braking precautions ...Parking brake break-in...Anti-lock Braking System (ABS) ...Vehicle Dynamic Control (VDC) system ...Cold weather driving ...Freeing a frozen door lock...Anti-freeze...Battery - 2009 Nissan Rogue | Owner's Manual - Page 188
. (Some recreational vehicle appliances such as stoves, refrigerators, heaters, etc. may also generate carbon monoxide.) The exhaust system and body should be inspected by a qualified mechanic whenever: - The vehicle is raised for service. - You suspect that exhaust fumes are entering into the - 2009 Nissan Rogue | Owner's Manual - Page 189
exists. When the malfunction indicator is illuminated, the system may not be able to detect or signal low tire pressure as intended. TPMS malfunctions may occur for a variety of reasons, including the installation of replacement or alternate tires or wheels on the vehicle that prevent the TPMS from - 2009 Nissan Rogue | Owner's Manual - Page 190
tire is mounted or a wheel is replaced, the TPMS will not function and the low tire pressure warning light will flash for approximately 1 minute. The light will remain on after 1 minute. Contact your NISSAN dealer as soon as possible for tire replacement and/ or system resetting. Replacing tires - 2009 Nissan Rogue | Owner's Manual - Page 191
tired. Never drive when under the influence of alcohol or drugs (including prescription or over-the-counter drugs which may cause drowsiness). Always wear your seat belt as outlined in the "SEAT BELTS" in the "1. Safety - Seats, seat belts and supplemental restraint system" section of this manual - 2009 Nissan Rogue | Owner's Manual - Page 192
damage. See "WHEELS AND TIRES" in the "8. Maintenance and do-it-yourself" section of this manual. If a tire rapidly loses air pressure or "blows-out" while driving maintain control of the vehicle by following the procedure below. Please note that this procedure is only a general guide. The vehicle - 2009 Nissan Rogue | Owner's Manual - Page 193
off-road use. However, avoid driving in deep water or mud as your NISSAN is mainly designed for leisure use, unlike a conventional off-road vehicle. Remember that Two-Wheel Drive (2WD) models are less capable than All-Wheel Drive (AWD) models for rough road driving and extrication when stuck in deep - 2009 Nissan Rogue | Owner's Manual - Page 194
higher Starting and driving center of gravity, your NISSAN is more affected by strong side winds. Slower speeds ensure better vehicle control. . Do not drive beyond the performance capability of the tires, even with AWD engaged. For AWD equipped vehicles, do not attempt to raise two wheels off the - 2009 Nissan Rogue | Owner's Manual - Page 195
maintenance information in the "NISSAN Service and Maintenance Guide". Spinning the front wheels on slippery surfaces may cause the AWD warning light to flash and the AWD system to automatically switch from the AWD mode to the 2WD mode. This could reduce traction. Be especially careful when towing - 2009 Nissan Rogue | Owner's Manual - Page 196
range * . When the Intelligent Key battery is almost discharged or strong radio waves are present near the operating location, the Intelligent Key system's operating range becomes narrower and may not cargo area is not included in the SSD0437A With Intelligent Key system 5-10 Starting and driving - 2009 Nissan Rogue | Owner's Manual - Page 197
Gently turn the ignition switch while rotating the steering wheel slightly right and left. ON (3) The ignition system and the electrical accessory power activate without the engine turned on. KEY POSITIONS the engine has started, release the ignition switch immediately. Starting and driving 5-11 - 2009 Nissan Rogue | Owner's Manual - Page 198
procedure. . If the engine is very hard to start in extremely cold weather or when restarting, depress the accelerator pedal a little (approximately 1/3 to the floor) and hold it and then crank the engine. Release the accelerator pedal when the engine starts. If the engine is very hard to start - 2009 Nissan Rogue | Owner's Manual - Page 199
slippery roads. This may cause a loss of control. WARNING . Do not depress the accelerator pedal while shifting from P (Park) or N (Neutral) to R (Reverse), D (Drive), L (Low) or manual shift mode. Always depress the brake pedal until shifting is completed. Failure to do so could cause you to lose - 2009 Nissan Rogue | Owner's Manual - Page 200
the desired shift positions. SSD0664 With manual shift mode CAUTION To prevent transmission drive position to P (Park). Apply the parking brake. When parking on a hill, apply the parking brake back up. Make sure the vehicle is completely stopped before selecting WARNING Apply the parking brake - 2009 Nissan Rogue | Owner's Manual - Page 201
a short period of time. If you want to return to the D (Drive) position manually, pull and hold the paddle shifter for about 1.5 seconds. . L (Low) (if so equipped): Use this position for maximum engine braking on steep downhill gradients/climbing steep slopes and whenever approaching sharp bends - 2009 Nissan Rogue | Owner's Manual - Page 202
accelerating again, it is necessary to shift up to the desired range. . When the CVT fluid temperature is extremely low, the manual shift mode may not work and automatically shift as a drive engine braking. To turn off the overdrive off mode, push the O/D OFF switch again. The indicator light will - 2009 Nissan Rogue | Owner's Manual - Page 203
battery is discharged. To release the shift lock, perform the following procedure: 1. Turn the ignition switch to the LOCK Starting and driving 5-17 Fail-safe If the vehicle is driven under extreme conditions, such as excessive wheel spinning and subsequent hard braking, the fail-safe system may - 2009 Nissan Rogue | Owner's Manual - Page 204
ON position to unlock the steering wheel. The vehicle may be moved to the desired location. Replace the removed shift lock release cover after the operation. If the selector lever cannot be moved out of the P (Park) position, have a NISSAN dealer check the CVT system as soon as possible. . WARNING - 2009 Nissan Rogue | Owner's Manual - Page 205
will cancel automatically. If the SET indicator light blinks, turn the cruise control main switch off and have the system checked by a NISSAN dealer. The SET indicator light may blink when the cruise control main switch is turned ON while pushing the RESUME/ACCELERATE, SET/COAST or CANCEL switch. To - 2009 Nissan Rogue | Owner's Manual - Page 206
. Both the CRUISE and SET indicator lights will turn off. . If you depress the brake pedal while pushing the RESUME/ACCELERATE or SET/ COAST switch and reset The cruise control allows driving at a speed between 25 to 89 MPH (40 to 144 km/h) without keeping your foot on the accelerator pedal. To turn - 2009 Nissan Rogue | Owner's Manual - Page 207
to the correct pressure. Low tire pressure increases tire wear and lowers fuel economy. Keep the wheels in correct alignment. Improper alignment increases tire wear and lowers fuel economy. Air conditioner operation lowers fuel economy. Use the air conditioner only when necessary. When cruising - 2009 Nissan Rogue | Owner's Manual - Page 208
. ALL-WHEEL DRIVE (AWD) LOCK SWITCH OPERATIONS The AWD LOCK switch located on the lower side of the instrument panel. This switch is used to select the AUTO or LOCK mode depending on the driving conditions. Each time you push the lower part of the switch A * , the AWD - 2009 Nissan Rogue | Owner's Manual - Page 209
the front and rear wheels is large (wheel slip), such as when driving the vehicle on rough roads through sand, mud or freeing a stuck vehicle. In these cases, the AWD warning light blinks rapidly and the AWD mode changes to 2WD to protect the powertrain parts. If you stop driving with the engine - 2009 Nissan Rogue | Owner's Manual - Page 210
diameters of front and rear wheels will make the warning light blink slowly (about once per two seconds). Pull off the road in a safe area, and idle the engine. Check that all tire sizes are the same, tire pressure is correct and tires are not worn. checked by a NISSAN dealer as soon as possible - 2009 Nissan Rogue | Owner's Manual - Page 211
the curb side wheel gently touches the curb. 2 HEADED UPHILL WITH CURB: * Turn the wheels away from the curb and move the vehicle back until the curb side wheel gently touches the . . 1. Firmly apply the parking brake. 2. Move the selector lever to the P (Park) position. Starting and driving 5-25 - 2009 Nissan Rogue | Owner's Manual - Page 212
operations that could cause the electric power steering system to overheat. Using the brakes Avoid resting your foot on the brake pedal while driving. This will cause overheating of the brakes, wearing out the brake and pads faster and reduce gas mileage. To help reduce brake wear and to prevent - 2009 Nissan Rogue | Owner's Manual - Page 213
off while driving, the power assist for the brakes will not work. Braking will be harder. best braking performance. This procedure is described in the vehicle service manual and can be performed by a NISSAN dealer. ANTI-LOCK BRAKING SYSTEM (ABS) WARNING . The Anti-lock Braking System (ABS) is - 2009 Nissan Rogue | Owner's Manual - Page 214
ABS off and illuminates the ABS warning light on the instrument panel. The brake system then operates normally, but without anti-lock assistance. If the ABS warning light illuminates during the self-test or while driving, have the vehicle checked by a NISSAN dealer. . . Normal operation The ABS - 2009 Nissan Rogue | Owner's Manual - Page 215
are not NISSAN approved or are extremely deteriorated the VDC system may not operate properly. This could adversely affect vehicle handling performance, and the "VDC OFF" indicator or "SLIP" indicator or both indicator lights may illuminate. If brake related parts such as brake pads, rotors and - 2009 Nissan Rogue | Owner's Manual - Page 216
without antifreeze, drain the cooling system, including the engine block. Refill before operating the vehicle. For details, see "ENGINE COOLING SYSTEM" in the "8. Maintenance and do-it-yourself" section. All-Wheel Drive (AWD) model If you install snow tires, they must also be the same size, brand - 2009 Nissan Rogue | Owner's Manual - Page 217
system or a 2-pronged adapter. You can be seriously injured by an electrical shock if you use an ungrounded connection. Disconnect and properly store the engine block heater cord before Starting and driving 5-31 ENGINE BLOCK HEATER (if so equipped) Engine block heaters are available through NISSAN - 2009 Nissan Rogue | Owner's Manual - Page 218
MEMO 5-32 Starting and driving - 2009 Nissan Rogue | Owner's Manual - Page 219
6 In case of emergency Flat tire ...6-2 Tire Pressure Monitoring System (TPMS)...6-2 Changing a flat tire ...6-2 Jump starting ...6-9 Push starting...6-10 If your vehicle overheats...Towing your vehicle ...Towing recommended by NISSAN ...Vehicle recovery (freeing a stuck vehicle) ...6-11 6-12 6-13 - 2009 Nissan Rogue | Owner's Manual - Page 220
tire is mounted or a wheel is replaced, the TPMS will not function and the low tire pressure warning light will flash for approximately 1 minute. The light will remain on after 1 minute. Contact your NISSAN dealer as soon as possible for tire replacement and/ or system resetting. Replacing tires - 2009 Nissan Rogue | Owner's Manual - Page 221
SCE0721 Blocking wheels 1 Place suitable blocks * at both the front and back of the wheel diagonally opposite the flat tire to floor board * (foldable or separate type). WARNING Be sure to block the wheel as the vehicle may move and result in personal injury. 4. Remove the strap from the back - 2009 Nissan Rogue | Owner's Manual - Page 222
tools 5. Remove the lids of the luggage side boxes. 7. Remove the jacking tools and the spare tire. Jacking tools: Remove the jack by turning it, then remove the other tools. SCE0723 6. Remove the luggage floor box (Type A or B) by turning the clips counterclockwise. 6-4 In case of emergency - 2009 Nissan Rogue | Owner's Manual - Page 223
tire change. Use the correct jack-up points. Never use any other part of the vehicle for jack support. Never jack up the vehicle more than necessary. Never use blocks . SCE0700 Spare tire SCE0630 Spare tire: Turn the clamp to remove the tire. Removing wheel cover (if so equipped) . WARNING Never - 2009 Nissan Rogue | Owner's Manual - Page 224
Carefully read the caution label attached to the jack body and the following instructions. SCE0572 Jack-up point 1. Place the jack directly under the jack-up point as illustrated so the top of the jack contacts the vehicle at the jack-up point. Align the jack head between the two notches in the - 2009 Nissan Rogue | Owner's Manual - Page 225
above. Carefully raise the vehicle until the tire clears the ground. Remove the wheel nuts, and then remove the tire. Installing the spare tire The spare tire is designed for emergency use. (See specific instructions under the heading "WHEELS AND TIRES" in the "8. Maintenance and do-it-yourself - 2009 Nissan Rogue | Owner's Manual - Page 226
items can become dangerous projectiles in an accident or sudden stop. The T-type spare tire and small size spare tire are designed for emergency use. See specific instructions under the heading "WHEELS AND TIRES" in the "8. Maintenance and do-it-yourself" section. COLD pressure: After the vehicle - 2009 Nissan Rogue | Owner's Manual - Page 227
STARTING To start your engine with a booster battery, the instructions and precautions below must be followed. protectors (for example, goggles or industrial safety spectacles) and remove rings, metal bands, or any other jewelry. Do not lean over the battery when jump starting. . Do not attempt to - 2009 Nissan Rogue | Owner's Manual - Page 228
electrical systems (lights, heater, air conditioner, etc.). 3. Remove vent caps on the battery (if so equipped). Cover the battery 4 3 2 1 cable 8. Replace the vent caps (if so body ground (for example, as illustrated), not to the battery. Make sure the jumper cables do not touch moving parts - 2009 Nissan Rogue | Owner's Manual - Page 229
. Have your vehicle repaired at a NISSAN dealer. CAUTION . Do not continue to drive if your vehicle overheats. Doing so brake and move the selector lever to the P (Park) position. Do not stop the engine. 2. Turn off the air conditioner. Open all the windows, move the heater or air conditioner - 2009 Nissan Rogue | Owner's Manual - Page 230
. Towing instructions are available from a NISSAN dealer. Local service operators are manual. WARNING . . Never ride in a vehicle that is being towed. Never get under your vehicle after it has been lifted by a tow truck. CAUTION . When towing, make sure that the transmission, axles, steering system - 2009 Nissan Rogue | Owner's Manual - Page 231
(Neutral) position. When towing a CVT model with the rear wheels on the ground (if you do not use towing dollies): Always release the parking brake. SCE0438 Two-Wheel Drive (2WD) models TOWING RECOMMENDED BY NISSAN Two-Wheel Drive (2WD) models NISSAN recommends that your vehicle be towed with the - 2009 Nissan Rogue | Owner's Manual - Page 232
-Wheel Drive (AWD) models NISSAN recommends that towing dollies be used when towing your vehicle or place the vehicle on a flatbed truck as illustrated. CAUTION Never tow AWD models with any of the wheels on the ground as this may cause serious and expensive damage to the powertrain. SCE0678 Rear - 2009 Nissan Rogue | Owner's Manual - Page 233
brake or cooling systems. Pulling devices such as ropes or canvas straps are not recommended for use in vehicle towing or recovery. an area around the front tires. 4. Slowly rock the vehicle forward and backward...Shift back and forth between R (Reverse) and D (Drive). Apply the accelerator service - 2009 Nissan Rogue | Owner's Manual - Page 234
MEMO 6-16 In case of emergency - 2009 Nissan Rogue | Owner's Manual - Page 235
Cleaning exterior ...7-2 Washing ...7-2 Waxing ...7-2 Removing spots ...7-3 Underbody ...7-3 Glass ...7-3 Aluminum alloy wheels ...7-3 Chrome parts ...7-3 Tire dressing ...7-3 Cleaning interior ...7-4 Floor mats ...7-4 Seat belts ...7-5 Corrosion protection ...7-5 Most common factors contributing to - 2009 Nissan Rogue | Owner's Manual - Page 236
damage from acid rain after driving on coastal roads when contaminants under the body and in the wheel wells to loosen weathered appearance before reapplying wax. A NISSAN dealer can assist you in choosing the proper product. . Wax your vehicle only after a thorough washing. Follow the instructions - 2009 Nissan Rogue | Owner's Manual - Page 237
. Special cleaning products are available at a NISSAN dealer or any automotive accessory stores. mage the electrical conductors, radio antenna elements or rear window defroster elements. TIRE DRESSING NISSAN does not recommend the use of tire dressings. Tire manufacturers apply a coating to the - 2009 Nissan Rogue | Owner's Manual - Page 238
. This can also affect the operation of the air bag system and result in serious personal injury. Floor mat positioning aid (driver's side only) This vehicle includes front floor mat brackets to act as floor mat positioning aid. NISSAN floor mats have been specially designed for your vehicle model - 2009 Nissan Rogue | Owner's Manual - Page 239
restraint system" section. MOST COMMON FACTORS CONTRIBUTING TO VEHICLE CORROSION . The accumulation of moisture-retaining dirt and debris in body panel sections , dirt and water on the vehicle body underside can accelerate corrosion. Wet floor coverings will not dry completely inside the - 2009 Nissan Rogue | Owner's Manual - Page 240
this may damage them. Chemicals used for road surface deicing are extremely corrosive. They accelerate corrosion and deterioration of underbody components such as the exhaust system, fuel and brake lines, brake cables, floor pan and fenders. In winter, the underbody must be cleaned periodically. For - 2009 Nissan Rogue | Owner's Manual - Page 241
...Rear window wiper blade...Brakes...Self-adjusting brakes ...Brake pad wear indicators...Fuses ...Engine compartment ...Passenger compartment ...Battery replacement...Keyfob...Intelligent Key battery ...Lights...Headlights ...Exterior and interior lights...Wheels and tires...Tire pressure...Tire - 2009 Nissan Rogue | Owner's Manual - Page 242
service information through technical bulletins, service tips, and in-dealership information systems. They are completely qualified to work on NISSAN vehicles before work begins. You can be confident that a NISSAN dealer's service department performs the best is released. When driving in areas using - 2009 Nissan Rogue | Owner's Manual - Page 243
. Check carefully for damage, cuts or excessive wear. Tire Pressure Monitoring System (TPMS) transmitter components: Replace the TPMS transmitter grommet seal, valve core and cap when the tires are replaced due to wear or age. Wheel alignment and balance: If the vehicle should pull to either - 2009 Nissan Rogue | Owner's Manual - Page 244
outlets properly and in sufficient quantity when operating the heater or air conditioner. Windshield wiper and washer*: Check that the wipers and washer operate properly and that the wipers do not streak. Exhaust system: Make sure there are no loose supports, cracks or holes. If the sound of the - 2009 Nissan Rogue | Owner's Manual - Page 245
only by a jack. If it is necessary to work under the vehicle, support it with safety stands. Keep smoking materials, flame and sparks away from fuel tank and the battery. The fuel filter or fuel lines should be serviced by a NISSAN dealer because the fuel lines are under high pressure even when the - 2009 Nissan Rogue | Owner's Manual - Page 246
CHECK LOCATIONS done by a NISSAN dealer. SDI2127 QR25DE ENGINE 1. 2. 3. 4. 5. Engine oil filler cap Brake fluid reservoir Air cleaner Engine coolant reservoir Window washer fluid reservoir 6. 7. 8. 9. 10. Drive belt location Engine oil dipstick Radiator filler cap Battery Fuse/fusible - 2009 Nissan Rogue | Owner's Manual - Page 247
use of other types of coolant solutions may damage the engine cooling system. Outside temperature down to 8C −35 8F −30 50% air duct securely after any inspection or maintenance work is performed. CAUTION When adding or replacing coolant, be sure to use only a Genuine NISSAN Long Life Antifreeze - 2009 Nissan Rogue | Owner's Manual - Page 248
ENGINE OIL CHANGING ENGINE COOLANT Major cooling system repairs should be performed by a NISSAN dealer. The service procedures can be found in the appropriate NISSAN Service Manual. Improper servicing can result in reduced heater performance and engine overheating. WARNING . SDI2100 To avoid the - 2009 Nissan Rogue | Owner's Manual - Page 249
conditions. 4. Raise and support the vehicle using a suitable floor jack and safety jack stands support points are used to avoid vehicle damage. SDI2120 CHANGING ENGINE OIL AND FILTER Change the engine oil and filter according to the maintenance log shown in the NISSAN Service and Maintenance Guide - 2009 Nissan Rogue | Owner's Manual - Page 250
refill capacity depends on the oil temperature and drain time. Use these specifications for reference only. Always use the dipstick to determine the proper the engine and check for leakage around the drain plug and the oil filter. Correct as required. 13. Turn the engine off and wait more than - 2009 Nissan Rogue | Owner's Manual - Page 251
the brake system and affect the vehicle's stopping ability. Clean the filler cap before removing. Brake fluid is poisonous and should be stored carefully in marked containers out of the reach of children. SDI2130 When checking or replacement is required, we recommend a NISSAN dealer for servicing - 2009 Nissan Rogue | Owner's Manual - Page 252
low window washer fluid warning light illuminates (if so equipped). instructions for the mixture ratio. Refill the reservoir more frequently when driving conditions require an increased amount of window washer fluid. Recommended fluid: Genuine NISSAN Windshield Washer Concentrate Cleaner & Antifreeze - 2009 Nissan Rogue | Owner's Manual - Page 253
all jewelry. Battery posts, terminals and related accessories contain lead and lead compounds. Wash hands after handling. Keep the battery out of the reach of children. . . . . WARNING . Do not expose the battery to flames or electrical sparks. Hydrogen gas generated by the battery is explosive - 2009 Nissan Rogue | Owner's Manual - Page 254
of the battery is not clear, check the distilled water level by looking directly 1 above the cell; the condition * indicates 2 OK and the conditions * needs more to be added. 3. Tighten cell plugs A *. 1. 2. 3. 4. 5. Alternator Water pump Drive belt auto-tensioner Crankshaft pulley Air conditioner - 2009 Nissan Rogue | Owner's Manual - Page 255
the conventional type spark plugs since they will last much longer. Follow the maintenance log shown in the "NISSAN Service and Maintenance Guide". Do not reuse spark plugs by cleaning or regapping. Always replace spark plugs with recommended or equivalent ones. Maintenance and do-it-yourself 8-15 - 2009 Nissan Rogue | Owner's Manual - Page 256
2 *. CAUTION Worn windshield wiper blades can damage the windshield and impair driver vision. The air cleaner filter should not be cleaned and reused. Replace it according to the maintenance log shown in the "NISSAN Service and Maintenance Guide". When replacing the filter, wipe the inside of the - 2009 Nissan Rogue | Owner's Manual - Page 257
A 2. Push and hold the release tab * , and move the wiper blade down the wiper arm 1 *. CAUTION . After wiper blade replacement, return the wiper arm to its original position; otherwise it may be damaged when the hood is opened. Make sure the wiper blades contact the glass; otherwise the arm may be - 2009 Nissan Rogue | Owner's Manual - Page 258
Service and Maintenance Guide". SELF-ADJUSTING BRAKES Your vehicle is equipped with self-adjusting brakes. The disc-type brakes self-adjust every time the brake pedal is applied. WARNING See a NISSAN dealer for a brake system check if the brake pedal height does not return to normal. BRAKE PAD - 2009 Nissan Rogue | Owner's Manual - Page 259
also opens, have the electrical system checked and repaired by a NISSAN dealer. Fusible links If any electrical equipment does not operate and fuses are in good condition, check the fusible links. If any of these fusible links are melted, replace only with genuine NISSAN parts. Maintenance and do - 2009 Nissan Rogue | Owner's Manual - Page 260
sure the ignition switch and the headlight switch are turned off. 2. Pull to remove the fuse box cover 1 *. 5. If a new fuse also opens, have the electrical system checked and repaired by a NISSAN dealer. 8-20 Maintenance and do-it-yourself - 2009 Nissan Rogue | Owner's Manual - Page 261
BATTERY REPLACEMENT from the lower part. Use a cloth to protect the casing. 3. Replace the battery with a new one. Recommended battery: CR1620 or equivalent . Do not touch the internal circuit and electric terminals as doing so could cause a malfunction. Hold the battery by the edges. Holding the - 2009 Nissan Rogue | Owner's Manual - Page 262
of the corner and twist it to separate the upper part from the lower part. Use a cloth to protect the casing. 3. Replace the battery with a new one. Recommended battery: CR2025 or equivalent . Do not touch the internal circuit and electric terminals as doing so could cause a malfunction. Hold the - 2009 Nissan Rogue | Owner's Manual - Page 263
the instructions, or relocate the receiving antenna. - Increase the separation Align the tips of the upper and lower parts 1 2 * , and then push them together * until it is securely closed. 5. Operate the buttons to check its operation. See a NISSAN dealer if you need any assistance for replacement - 2009 Nissan Rogue | Owner's Manual - Page 264
-beam) Front turn signal/park/side marker light Front map light Ceiling light Front fog light Headlight (low-beam) High-mounted stop light Cargo light License plate light Back-up light Rear combination light (stop/tail/side marker light) Rear turn signal light SDI2136 8-24 Maintenance and do-it - 2009 Nissan Rogue | Owner's Manual - Page 265
HIGH VOLTAGE . When xenon headlights are on, they produce a high voltage. To prevent an electric shock, never attempt to modify or disassemble. Always have your xenon headlights replaced at a NISSAN dealer. For additional information, see "HEADLIGHT AND TURN SIGNAL SWITCH" in the "2. Instruments and - 2009 Nissan Rogue | Owner's Manual - Page 266
stop light* Ceiling light (if so equipped) Cargo light (if so equipped) Glove box light* Disconnect the battery negative cable before replacing bulbs. A * B * High-beam bulb Low-beam bulb *: See a NISSAN dealer for replacement. NOTE: Always check with the Parts Department at a NISSAN dealer - 2009 Nissan Rogue | Owner's Manual - Page 267
model) Xenon headlight model: See a NISSAN dealer for replacement. Halogen headlight model: Remove the bulb as illustrated. SDI2306 Front fog light SDI2170 : : REMOVE INSTALL Replacement procedures All other lights are either type A, B, C, D or E. When replacing a bulb, first remove the lens - 2009 Nissan Rogue | Owner's Manual - Page 268
/side marker/turn) Back-up light SDI2139 License plate light SDI2140 Open the lift gate to remove the rear combination light assembly. A * : Clip Open the lift gate to remove the back-up light assembly. One screw is located behind the cover on the lift gate. The license plate light bulb can be - 2009 Nissan Rogue | Owner's Manual - Page 269
pressure (for example a flat tire while driving). For more details, see "Low tire pressure warning light" in the "2. Instruments and controls" section, "TIRE PRESSURE MONITORING SYSTEM (TPMS)" in the "5. Starting and driving" section and "TIRE PRESSURE MONITORING SYSTEM (TPMS)" in the "6. In case - 2009 Nissan Rogue | Owner's Manual - Page 270
center pillar. Tire pressures should be checked regularly because: . . Most tires naturally lose air over time. Tires can lose air suddenly when driven (GVWR) is located on the F.M.V. S.S./C.M.V.S.S. certification label. The vehicle weight capacity is indicated on the Tire and Loading Information - 2009 Nissan Rogue | Owner's Manual - Page 271
to provide the best balance of tire wear, vehicle handling, driveability, tire noise, etc., up to the vehicle's GVWR. LABELING" 5 * Tire size - see "TIRE later in this section. 6 * Spare tire size or compact spare tire size (if so equipped) SDI2340 Tire and Loading Information label - 2009 Nissan Rogue | Owner's Manual - Page 272
98H 33 PSI P215/70230 kPa, REAR R16 99H 33 PSI ORIGINAL P225/60230 kPa, TIRE R17 98H 33 PSI 230 kPa, Original tire 33 PSI SPARE TIRE 420 kPa, T155/9060 PSI D16 SIZE the valve stem. Do not press too hard or force the valve stem sideways, or air will escape. If the hissing - 2009 Nissan Rogue | Owner's Manual - Page 273
weight each tire can support. You may not find this information on all tires because it is not required by law. 7. H: Tire speed rating. You should not drive the vehicle faster than the tire speed rating. SDI1575 Example Example SDI1606 1 * Tire size (example: P215/60R16 TIRE LABELING Federal - 2009 Nissan Rogue | Owner's Manual - Page 274
". The symbol can be placed above, below or to the left or right of the Tire Identification Number. cation mark 3. Two-digit code: Tire size 2. Two-digit code: Manufacturer's identifi- 4. Three-digit code: Tire type code (Op- tional) 8-34 Maintenance and do-it-yourself The number of layers or - 2009 Nissan Rogue | Owner's Manual - Page 275
you plan to operate your vehicle in snowy or icy conditions, NISSAN recommends the use of SNOW tires or ALL SEASON tires on all four wheels. . All-Wheel Drive (AWD) models CAUTION . Always use tires of the same type, size, brand, construction (bias, biasbelted or radial), and tread pattern on all - 2009 Nissan Rogue | Owner's Manual - Page 276
for the AWD model. If excessive tire wear is found, it is recommended that all four tires be replaced with tires of the same size, brand, construction and tread pattern. The tire pressure and wheel alignment should also be checked and corrected as necessary. Contact a NISSAN dealer. Company - 2009 Nissan Rogue | Owner's Manual - Page 277
be tightened to the specification at each tire rotation interval. WARNING . SDI1662 . CHANGING WHEELS AND TIRES Tire rotation NISSAN recommends rotating the tires every 7,500 miles (12,000 km). (See "FLAT TIRE" in the "6. In case of emergency" section for tire replacing procedures.) As soon as - 2009 Nissan Rogue | Owner's Manual - Page 278
tire is mounted or a wheel is replaced, the TPMS will not function and the low tire pressure warning light will flash for approximately 1 minute. The light will remain on after 1 minute. Contact your NISSAN dealer as soon as possible for tire replacement and/ or system resetting. Replacing tires - 2009 Nissan Rogue | Owner's Manual - Page 279
covered with snow or ice, the TEMPORARY USE ONLY spare tire should be used on the rear wheels and original tire used on the front wheels (drive wheels). Use tire chains only on the front (original) tires. Tire tread of the TEMPORARY USE ONLY spare tire will wear at a faster rate than the standard - 2009 Nissan Rogue | Owner's Manual - Page 280
and may cause damage to the vehicle. Because the TEMPORARY USE ONLY spare tire is smaller than the original tire, ground clearance is reduced. To avoid damage to the vehicle, do not drive over obstacles. Also do not drive the vehicle through an automatic car wash since it may get caught. . 8-40 - 2009 Nissan Rogue | Owner's Manual - Page 281
fuel/lubricants ...9-2 Fuel recommendation ...9-3 Engine oil and oil filter recommendation...9-5 Air conditioning system refrigerant and lubricant recommendations ...9-6 Specifications...9-7 Engine...9-7 Wheels and tires...9-7 Dimensions and weights ...9-8 When traveling or registering your vehicle - 2009 Nissan Rogue | Owner's Manual - Page 282
Differential gear oil Transfer oil Brake fluid Multi-purpose grease Air conditioning system refrigerant Air conditioning system lubricants Window washer fluid *1: *2: *3: *4: 7-3/4 qt 3/4 qt 6-3/8 qt 5/8 qt 7.3 0.75 50% Genuine NISSAN Long Life Antifreeze/Coolant or equivalent 50% Demineralized - 2009 Nissan Rogue | Owner's Manual - Page 283
and the fuel compatibility for your NISSAN cannot be readily determined. If in doubt, ask your service station manager. If you use oxygenate-blend gasoline, please take the following precautions as the usage of such fuels may cause vehicle performance problems and/or fuel system damage. . The fuel - 2009 Nissan Rogue | Owner's Manual - Page 284
black label with the common abbreviation or the appropriate percentage for that region. damage. If any of the above symptoms are encountered, have your vehicle checked at a NISSAN dealer. However, now and then you may notice light spark knock for a short time while accelerating or driving system - 2009 Nissan Rogue | Owner's Manual - Page 285
Selecting the correct oil filter Your new NISSAN vehicle is equipped with a high-quality genuine NISSAN oil filter. When replacing, use a genuine NISSAN oil filter or its equivalent for the reason described in "Change intervals". STI0505 1. 2. API certification mark API service symbol ENGINE OIL - 2009 Nissan Rogue | Owner's Manual - Page 286
air conditioning system refrigerant. Contact a NISSAN dealer when servicing your air conditioning system. Refer to the "NISSAN Service and Maintenance Guide" for the maintenance schedule. AIR CONDITIONING SYSTEM REFRIGERANT AND LUBRICANT RECOMMENDATIONS The air conditioning system in your NISSAN - 2009 Nissan Rogue | Owner's Manual - Page 287
SPECIFICATIONS ENGINE Model Type Cylinder WHEELS AND TIRES Road wheel Type Steel Aluminum T-type Size 16 6 6-1/2JJ 17 6 7J 16 6 4T Offset in (mm) 1.57 (40) 1.57 (40) 1.18 (30) Tire Type Size P215/70R16 99H P225/60R17 98H T155/90D16 Pressure PSI (kPa) [Cold] 33 (230) This spark ignition system - 2009 Nissan Rogue | Owner's Manual - Page 288
Front tread Rear tread Wheelbase Gross Vehicle Weight Rating (GVWR) Gross Axle Weight Rating (GAWR) Front Rear *: or district; therefore, vehicle specifications may differ. When any and registration are the responsibility of the user. NISSAN is not responsible for any inconvenience that may result. - 2009 Nissan Rogue | Owner's Manual - Page 289
STI0553 SDI2121 STI0448 VEHICLE IDENTIFICATION NUMBER (chassis number) The vehicle identification number is located as shown. Remove the cover to access the number. ENGINE SERIAL NUMBER The number is stamped on the engine as shown. F.M.V.S.S./C.M.V.S.S. CERTIFICATION LABEL The Federal/ - 2009 Nissan Rogue | Owner's Manual - Page 290
the underside of the hood as shown. TIRE AND LOADING INFORMATION LABEL The cold tire pressure is shown on the Tire and Loading Information label affixed to the pillar as illustrated. AIR CONDITIONER SPECIFICATION LABEL The air conditioner specification label is attached as shown. 9-10 Technical - 2009 Nissan Rogue | Owner's Manual - Page 291
the license plate, confirm that the following parts are enclosed in the plastic bag...License plate bracket J-nut 6 2 Screw 6 2 Screw grommet 6 2 1. Temporarily place the license plate bracket A by aligning the lower part * of it with the B lines * on the bumper. 2. Mark the pilot hole points with - 2009 Nissan Rogue | Owner's Manual - Page 292
weight (load) limit specified for the front or rear axle. This information is located on the F.M.V.S.S./C.M.V. S.S. label. GCWR (Gross Combined the trailer tongue weight must be included as part of the cargo load. This information is located on the Tire and Loading Information label. . . TERMS It - 2009 Nissan Rogue | Owner's Manual - Page 293
load limit of your vehicle shown as "The combined weight of occupants and cargo" on the Tire and Loading Information label. Do not exceed the number of occupants shown as "Seating Capacity" on the Tire and Loading Information label. To get "the combined weight of occupants and cargo", add the weight - 2009 Nissan Rogue | Owner's Manual - Page 294
Steps for determining correct load limit 1. Locate the statement "The combined weight of occupants and cargo should never exceed XXX kg or XXX lbs" on your vehicle's placard. 2. Determine the combined weight - 2009 Nissan Rogue | Owner's Manual - Page 295
vehicle. Consult this manual to determine how this reduces the available cargo and luggage load capacity of your vehicle. Before driving a loaded vehicle, than the GVWR or the maximum front and rear GAWRs. If you do, parts of your vehicle can break, tire damage could occur, or it can change the - 2009 Nissan Rogue | Owner's Manual - Page 296
maximum front and rear GAWRs. If you do, parts of your vehicle can break, tire damage could occur is loaded, drive to a scale and weigh the front and the rear wheels separately to braking and other systems. A NISSAN Towing Guide (U.S. only) is available on the website at www.nissanusa.com. This guide - 2009 Nissan Rogue | Owner's Manual - Page 297
load to exceed the value specified in the "Towing Load/Specification" chart. The total trailer load equals trailer weight plus its cargo weight. . When towing a trailer load of 1,000 lbs (454 kg) or more, trailers with a brake system MUST be used. STI0541 outside temperatures on graded roads can - 2009 Nissan Rogue | Owner's Manual - Page 298
NISSAN warranties. STI0542 TI1012M Tongue load When using a weight carrying or a weight distributing hitch, keep the tongue load between 10 to 15% of the total trailer load within the maximum tongue load limits shown in the following "Towing Load/Specification addition, front or rear GAW must not - 2009 Nissan Rogue | Owner's Manual - Page 299
the vehicle is within the GVWR, Front GAWR, Rear GAWR, Gross Combined Weight Rating (GCWR) and Towing load, use the following procedure. 1. Locate the GVWR on the F.M.V.S.S./C.M.V. S.S. certification label GCWR for your vehicle on the "Towing Load/Specification" chart found later in this section. 2. - 2009 Nissan Rogue | Owner's Manual - Page 300
load. Do not exceed the 10 to 15% tongue weight specification even if the calculated available tongue weight is greater than manual mode 1,000 (453) Sway Control Device (SCD) 1: All towing above 1,000 lb (454 kg) requires the use of trailer brakes. 2: Sway control devices are not offered by NISSAN - 2009 Nissan Rogue | Owner's Manual - Page 301
's brake system. Follow the instructions provided tires to the recommended cold tire pressure indicated on the Tire and Loading Information label. Trailer tire condition, size, load rating and proper inflation pressure should be in accordance with the trailer and tire manufacturers' specifications - 2009 Nissan Rogue | Owner's Manual - Page 302
starts, acceleration or stops. Avoid sharp turns or lane changes. Always drive your vehicle at a moderate speed. Some states or provinces have specific speed limits for vehicles that are towing trailers. Obey the local speed limits. When backing up, hold the bottom of the steering wheel with one - 2009 Nissan Rogue | Owner's Manual - Page 303
If possible, have someone guide you when you are backing up. Always block the wheels on both vehicle and trailer when parking. Parking on a slope is not recommended; however, if you must do so: 3. Shift the transmission into gear. 4. Release the parking brake. 5. Drive slowly until the vehicle and - 2009 Nissan Rogue | Owner's Manual - Page 304
tow an All-Wheel Drive (AWD) vehicle with any of the wheels on the ground. Doing so may cause serious and expensive damage to the powertrain. For emergency towing procedures refer to "TOWING RECOMMENDED BY NISSAN" in the "6. In case of emergency" section of this manual. . . When towing a trailer - 2009 Nissan Rogue | Owner's Manual - Page 305
section width. For example: Treadwear 200 Traction AA Temperature A WARNING The traction grade assigned to this tire is based on straight-ahead braking traction tests, and does not include acceleration, cornering, hydroplaning, or peak traction characteristics. TREADWEAR The treadwear grade is - 2009 Nissan Rogue | Owner's Manual - Page 306
. However, NHTSA cannot become involved in individual problems between you, your dealer, or NISSAN. To contact NHTSA, you may call the replacement by writing to: . Nissan North America, Inc. Consumer Affairs Department P.O. Box 685003 Franklin, TN 37068-5003 For Canada: Emission Control System - 2009 Nissan Rogue | Owner's Manual - Page 307
TEST A vehicle equipped with All-Wheel Drive (AWD) should never be tested using a two wheel dynamometer (such as the dynamometers or do not want to perform the driving pattern, a NISSAN dealer can conduct it for you. 6. Repeat steps 4 and 5 at least 10 times. 7. Accelerate the vehicle to 55 MPH (88 - 2009 Nissan Rogue | Owner's Manual - Page 308
situations, such as an air bag deployment or hitting a road obstacle, data that will assist in understanding how a vehicle's systems performed. The EDR is law. OWNER'S MANUAL/SERVICE MANUAL ORDER INFORMATION A genuine NISSAN Service Manual is the best source of service and repair information - 2009 Nissan Rogue | Owner's Manual - Page 309
and location of a NISSAN dealer in your area call the NISSAN Information Center at 1-800-3870122 and a bilingual NISSAN representative will assist you. Also available are genuine NISSAN Service and Owner's Manuals for older NISSAN models. Genuine NISSAN Parts may prevent or limit unnecessary excess - 2009 Nissan Rogue | Owner's Manual - Page 310
Air conditioner service...4-5 Air conditioner specification label ...9-10 Air conditioning system refrigerant and lubricant recommendations ...4-5, 9-6 In-cabin microfilter ...4-5 Alarm, How to stop alarm (see vehicle security system) ...2-20 Alcohol, drugs and driving ...5-7 All-wheel drive (AWD - 2009 Nissan Rogue | Owner's Manual - Page 311
11, 5-13 D Daytime running light system ...2-27 Defroster switch, Rear window and outside mirror defroster switch ...2-24 Dimensions and weights ...9-8 Door open warning light...2-13 Drive belts ...8-14 Driving All-wheel drive (AWD)...5-22 Cold weather driving ...5-30 Driving with CVT (Continuously - 2009 Nissan Rogue | Owner's Manual - Page 312
-free phone system, Bluetooth® ...4-25 Hazard warning flasher switch ...2-29 Head restraints...1-7 Headlights Aiming control...2-27 Bulb replacement ...8-25 Headlight switch ...2-26 Xenon headlights ...2-25 Heated seats ...2-30 Heater Engine block heater ...5-31 Heater and air conditioner operation - 2009 Nissan Rogue | Owner's Manual - Page 313
...6-11 Owner's Manual/Service Manual order information...9-28 P Panic alarm ...3-17 Parking Brake break-in...5-27 Parking brake operation ...5-18 Parking on hills...5-25 Phone Bluetooth® Hands-Free Phone System ...4-25 Car phone or CB radio...4-24 Power Electric power steering system ...5-26 Front - 2009 Nissan Rogue | Owner's Manual - Page 314
12 Jump starting ...6-9 Precautions when starting and driving ...5-2 Push starting ...6-10 Starting the engine ...5-12 Status light, Front passenger air bag ...1-45 Steering Electric power steering system ...5-26 Steering lock ...5-11 Steering wheel switch for audio controls ...4-23 Tilting steering - 2009 Nissan Rogue | Owner's Manual - Page 315
Bluetooth® Hands-Free Phone System) ...4-31 W Warning labels, Air bag warning labels ...Warning light Air bag warning light ...1-51, All-wheel drive (AWD) warning light ...Anti-lock braking system (ABS) warning light ...AWD warning light ...Brake warning light ...Door open warning light...Electric - 2009 Nissan Rogue | Owner's Manual - Page 316
is not designed to run on E-85 fuel. Using E-85 fuel can damage the fuel system components and is not covered by the NISSAN new vehicle limited warranty. COLD TIRE PRESSURES: The label is typically located on the driver side center pillar or on the driver's door. For additional information, see
-
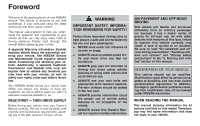 1
1 -
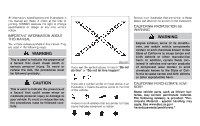 2
2 -
 3
3 -
 4
4 -
 5
5 -
 6
6 -
 7
7 -
8
-
9
-
10
-
11
-
12
-
13
-
14
-
15
-
16
-
17
-
18
-
19
-
20
-
21
-
22
-
23
-
24
-
25
-
26
-
27
-
28
-
29
-
30
-
31
-
32
-
33
-
34
-
35
-
36
-
37
-
38
-
39
-
40
-
41
-
42
-
43
-
44
-
45
-
46
-
47
-
48
-
49
-
50
-
51
-
52
-
53
-
54
-
55
-
56
-
57
-
58
-
59
-
60
-
61
-
62
-
63
-
64
-
65
-
66
-
67
-
68
-
69
-
70
-
71
-
72
-
73
-
74
-
75
-
76
-
77
-
78
-
79
-
80
-
81
-
82
-
83
-
84
-
85
-
86
-
87
-
88
-
89
-
90
-
91
-
92
-
93
-
94
-
95
-
96
-
97
-
98
-
99
-
100
-
101
-
102
-
103
-
104
-
105
-
106
-
107
-
108
-
109
-
110
-
111
-
112
-
113
-
114
-
115
-
116
-
117
-
118
-
119
-
120
-
121
-
122
-
123
-
124
-
125
-
126
-
127
-
128
-
129
-
130
-
131
-
132
-
133
-
134
-
135
-
136
-
137
-
138
-
139
-
140
-
141
-
142
-
143
-
144
-
145
-
146
-
147
-
148
-
149
-
150
-
151
-
152
-
153
-
154
-
155
-
156
-
157
-
158
-
159
-
160
-
161
-
162
-
163
-
164
-
165
-
166
-
167
-
168
-
169
-
170
-
171
-
172
-
173
-
174
-
175
-
176
-
177
-
178
-
179
-
180
-
181
-
182
-
183
-
184
-
185
-
186
-
187
-
188
-
189
-
190
-
191
-
192
-
193
-
194
-
195
-
196
-
197
-
198
-
199
-
200
-
201
-
202
-
203
-
204
-
205
-
206
-
207
-
208
-
209
-
210
-
211
-
212
-
213
-
214
-
215
-
216
-
217
-
218
-
219
-
220
-
221
-
222
-
223
-
224
-
225
-
226
-
227
-
228
-
229
-
230
-
231
-
232
-
233
-
234
-
235
-
236
-
237
-
238
-
239
-
240
-
241
-
242
-
243
-
244
-
245
-
246
-
247
-
248
-
249
-
250
-
251
-
252
-
253
-
254
-
255
-
256
-
257
-
258
-
259
-
260
-
261
-
262
-
263
-
264
-
265
-
266
-
267
-
268
-
269
-
270
-
271
-
272
-
273
-
274
-
275
-
276
-
277
-
278
-
279
-
280
-
281
-
282
-
283
-
284
-
285
-
286
-
287
-
288
-
289
-
290
-
291
-
292
-
293
-
294
-
295
-
296
-
297
-
298
-
299
-
300
-
301
-
302
-
303
-
304
-
305
-
306
-
307
-
308
-
309
-
310
-
311
-
312
-
313
-
314
-
315
-
316
 |
 |
Welcome to the growing family of new NISSAN
owners. This vehicle is delivered to you with
confidence. It was produced using the latest
techniques and strict quality control.
This manual was prepared to help you under-
stand the operation and maintenance of your
vehicle so that you may enjoy many miles of
driving
pleasure.
Please
read
through
this
manual before operating your vehicle.
A separate Warranty Information Booklet
explains details about the warranties cov-
ering your vehicle. The NISSAN Service
and Maintenance Guide explains details
about maintaining and servicing your ve-
hicle. Additionally, a separate Customer
Care/Lemon Law Booklet (U.S. only) will
explain how to resolve any concerns you
may have with your vehicle, as well as
clarify your rights under your state’s lemon
law.
Your NISSAN dealer knows your vehicle best.
When
you
require
any
service
or
have
any
questions, we will be glad to assist you with the
extensive resources available to us.
READ FIRST — THEN DRIVE SAFELY
Before driving your vehicle, read your Owner’s
Manual carefully. This will ensure familiarity with
controls and maintenance requirements, assist-
ing you in the safe operation of your vehicle.
WARNING
IMPORTANT SAFETY INFORMA-
TION REMINDERS FOR SAFETY!
Follow these important driving rules to
help ensure a safe and comfortable trip
for you and your passengers!
.
NEVER drive under the influence of
alcohol or drugs.
.
ALWAYS observe posted speed lim-
its
and
never
drive
too
fast
for
conditions.
.
ALWAYS give your full attention to
driving
and
avoid
using
vehicle
features or taking other actions that
could distract you.
.
ALWAYS use your seat belts and
appropriate child restraint systems.
Pre-teen children should be seated
in the rear seat.
.
ALWAYS provide information about
the
proper
use
of
vehicle
safety
features
to
all
occupants
of
the
vehicle.
.
ALWAYS review this Owner’s Man-
ual for important safety information.
ON-PAVEMENT AND OFF-ROAD
DRIVING
This vehicle will handle and maneuver
differently
from
an
ordinary
passenger
car because it has a higher center of
gravity for off-road use. As with other
vehicles with features of this type, failure
to
operate
this
vehicle
correctly
may
result in loss of control or an accident.
Be sure to read “On-pavement and off-
road driving precautions”, “Avoiding colli-
sion
and
rollover”
and
“Driving
safety
precautions” in the “5. Starting and driv-
ing” section of this manual.
MODIFICATION OF YOUR VEHICLE
This
vehicle
should
not
be
modified.
Modification could affect its performance,
safety or durability, and may even violate
governmental
regulations.
In
addition,
damage or performance problems result-
ing from modification may not be covered
under NISSAN warranties.
WHEN READING THE MANUAL
This manual includes information for all
options available on this model. Therefore,
you may find some information that does
not apply to your vehicle.
Foreword