3Com 3CRWDR100A-72 User Guide - Page 40
LAN Setup
 |
UPC - 662705484891
View all 3Com 3CRWDR100A-72 manuals
Add to My Manuals
Save this manual to your list of manuals |
Page 40 highlights
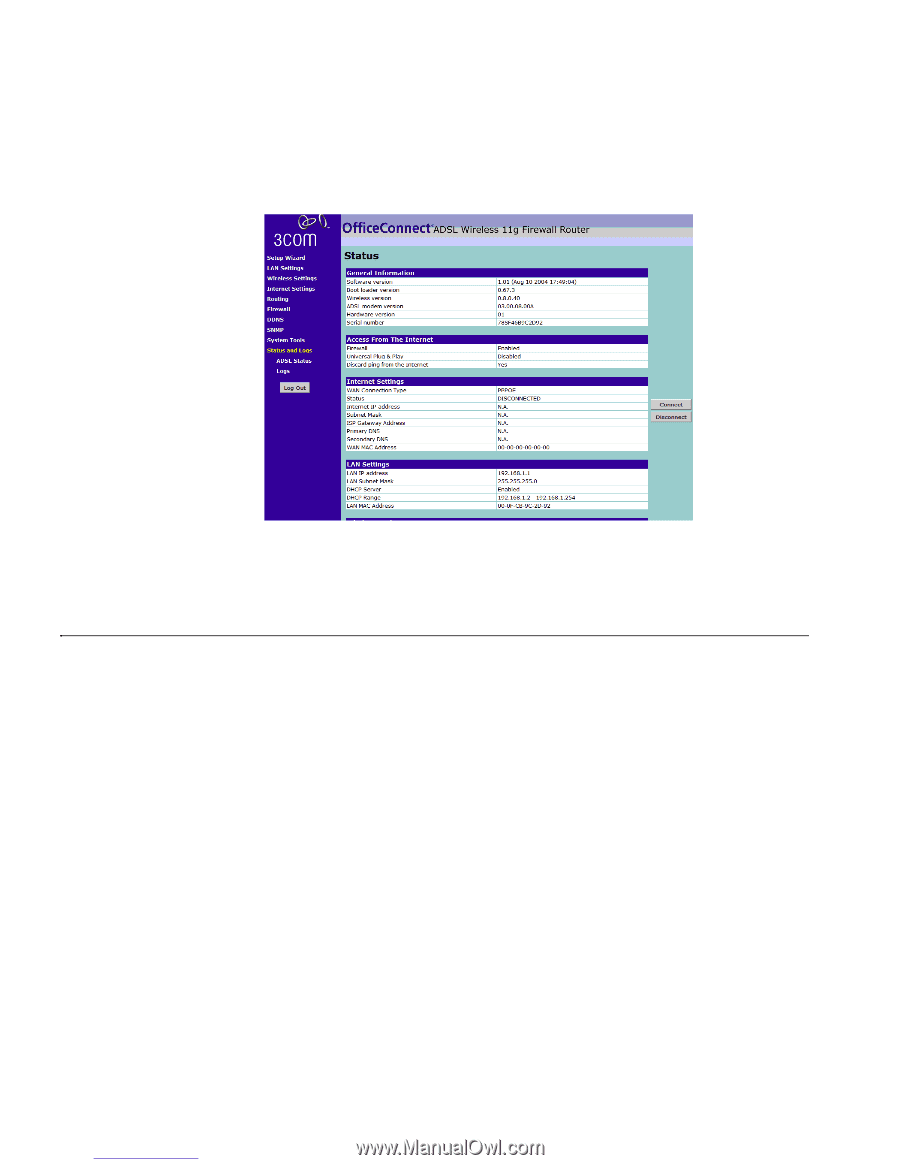
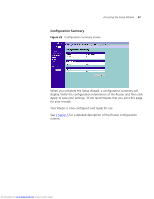
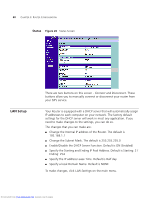
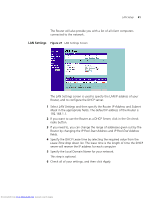
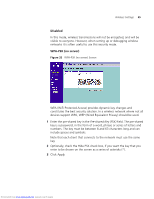
40 CHAPTER 5: ROUTER CONFIGURATION Status Figure 26 Status Screen LAN Setup There are two buttons on this screen - Connect and Disconnect. These buttons allow you to manually connect or disconnect your router from your ISP's service. Your Router is equipped with a DHCP server that will automatically assign IP addresses to each computer on your network. The factory default settings for the DHCP server will work in most any application. If you need to make changes to the settings, you can do so. The changes that you can make are: ■ Change the Internal IP address of the Router. The default is 192.168.1.1 ■ Change the Subnet Mask. The default is 255.255.255.0 ■ Enable/Disable the DHCP Server Function. Default is ON (Enabled) ■ Specify the Starting and Ending IP Pool Address. Default is Starting: 2 / Ending: 254 ■ Specify the IP address Lease Time. Default is Half day ■ Specify a local Domain Name. Default is NONE To make changes, click LAN Settings on the main menu. Downloaded from www.Manualslib.com manuals search engine
-
 1
1 -
2
-
3
-
4
-
5
-
6
-
7
-
8
-
9
-
10
-
11
-
12
-
13
-
14
-
15
-
16
-
17
-
18
-
19
-
20
-
21
-
22
-
23
-
24
-
25
-
26
-
27
-
28
-
29
-
30
-
31
-
32
-
33
-
34
-
 35
35 -
 36
36 -
 37
37 -
 38
38 -
 39
39 -
 40
40 -
 41
41 -
 42
42 -
 43
43 -
 44
44 -
 45
45 -
46
-
47
-
48
-
49
-
50
-
51
-
52
-
53
-
54
-
55
-
56
-
57
-
58
-
59
-
60
-
61
-
62
-
63
-
64
-
65
-
66
-
67
-
68
-
69
-
70
-
71
-
72
-
73
-
74
-
75
-
76
-
77
-
78
-
79
-
80
-
81
-
82
-
83
-
84
-
85
-
86
-
87
-
88
-
89
-
90
-
91
-
92
-
93
-
94
-
95
-
96
-
97
-
98
-
99
-
100
-
101
-
102
-
103
-
104
-
105
-
106
-
107
-
108
-
109
-
110
-
111
-
112
-
113
-
114
-
115
-
116
-
117
-
118
 |
 |