3Com 4800G Getting Started Guide
3Com 4800G - Switch Manual
 |
UPC - 662705534183
View all 3Com 4800G manuals
Add to My Manuals
Save this manual to your list of manuals |
3Com 4800G manual content summary:
- 3Com 4800G | Getting Started Guide - Page 1
3Com® Switch 4800G Family Getting Started Guide Switch 4800G 24-Port Switch 4800G PWR 24-Port Switch 4800G 48-Port Switch 4800G PWR 48-Port Switch 4800G 24-Port SFP www.3Com.com Part Number: 10016617 Rev AA Published: April 2008 - 3Com 4800G | Getting Started Guide - Page 2
this User Guide. Unless otherwise indicated, 3Com registered trademarks are , licensed exclusively through X/Open Company, Ltd. IEEE End of Life Statement 3Com processes allow for the recovery, reclamation and safe disposal of all end-of-life electronic components. Regulated Materials Statement 3Com - 3Com 4800G | Getting Started Guide - Page 3
CONTENTS ABOUT THIS GUIDE Conventions 5 Related Documentation 5 1 PRODUCT OVERVIEW Introduction 7 Switch 4800G 24-Port 8 Switch 4800G PWR 48-Port 11 Switch 4800G PWR 24-Port 13 Switch 4800G 24-Port SFP 17 Switch 4800G 48-Port 18 System Specifications of the Switch 4800G Series 22 Pluggable Modules - 3Com 4800G | Getting Started Guide - Page 4
73 Password Loss 73 Power Supply Failure 74 Configuration System Failure 74 A LIGHTNING PROTECTION FOR THE SWITCH Installating the Lightning Arrester for AC Power (Socket Strip with Lightning Protection) 75 Installation of Lightning Arrester for Network Port 76 B 3COM NETWORK MANAGEMENT 3Com Network - 3Com 4800G | Getting Started Guide - Page 5
for managing your Switch Switch 4800G: ■ Switch 4800G Command Reference Guide - Provides detailed descriptions of command line interface (CLI) commands, that you require to manage your Switch 4800G. ■ Switch 4800G Configuration Guide- Describes how to configure your Switch 4800G using the supported - 3Com 4800G | Getting Started Guide - Page 6
information in this guide differs from information in the release notes, use the information in the Release Notes. These documents are available in Adobe Acrobat Reader Portable Document Format (PDF) on the CD-ROM that accompanies your router or on the 3Com World Wide Web site: http://www.3com.com/ - 3Com 4800G | Getting Started Guide - Page 7
support the IPv4/IPv6 dual stack and can also be used for connecting server groups in data centers. Table 2 lists the models of the Switch 4800G. Table 2 Models of the Switch 4800G Model Switch 4800G 24-Port Switch 4800G PWR 48-Port Switch 4800G PWR 24-Port Switch 4800G 24-Port SFP Switch 4800G 48 - 3Com 4800G | Getting Started Guide - Page 8
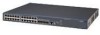
of monitoring the running of the Switch 4800G, LEDs are also equipped on their front panel. Switch 4800G 24-Port Appearance The Switch 4800G 24-Port provides twenty-four auto-sensing 10/100/1000BASE-T Ethernet ports, four 1000Base-X SFP ports, and one console port on the front panel, and one - 3Com 4800G | Getting Started Guide - Page 9
Switch 4800G 24-Port 9 (3) Console port (5) Power LED (7) LED for extended module slot 1 (9) Mode LED (4) 7-segment digital LED (6) RPS LED (8) LED for extended module slot 2 (10) Mode button Rear Panel Figure 3 Rear panel of the Switch 4800G 24-Port (1) (2) (3) (4) (5) (1) AC power socket - 3Com 4800G | Getting Started Guide - Page 10
panel of the Switch 4800G 24-Port LED Redundant power The module is in position and works normally. The switch does not support the module or a module failure occurs. No module green. For a command switch, the LED displays C. For a member switch, the LED displays S. For a candidate switch, the LED - 3Com 4800G | Getting Started Guide - Page 11
Switch 4800G PWR 48-Port 11 Table 4 LEDs on the front panel of the Switch 4800G 24-Port LED 10/100/1000Base-T port status LED Mark Status - Speed Green Yellow Duplex Flashing yellow (3 Hz) OFF Green Yellow SFP port status LED (1000 Mbps) SFP port status LED (100 Mbps) The Mode button has - 3Com 4800G | Getting Started Guide - Page 12
-T Ethernet port status LEDs (2) Console port (3) 7-segment digital LED (4) Mode button (5) Mode LED (6) Power LED (7) RPS LED (8) LED for extended module slot 1 (9) LED for extended module slot 2 (10) SFP port status LED Rear Panel Figure 6 Rear panel of the Switch 4800G PWR 48-Port - 3Com 4800G | Getting Started Guide - Page 13
of the Switch 4800G PWR 48-Port are the same as those of the Switch 4800G 24-Port. For details, see Table 4. Switch 4800G PWR 24-Port Appearance The Switch 4800G PWR 24-Port provides twenty-four auto-sensing 10/100/1000Base-T Ethernet ports, four 1000Base-X SFP ports, one console port on the - 3Com 4800G | Getting Started Guide - Page 14
Hz or 60 Hz Rated voltage range: 90 VAC to 264 VAC, 47 Hz to 63 Hz Only the RPS recommended by 3Com can be used for the Switch 4800G PWR 24-Port. The -48 VDC power supply in the equipment room cannot be used directly. Otherwise, the device may be damaged. ■ DC power input Rated voltage - 3Com 4800G | Getting Started Guide - Page 15
panel of Switch 4800G PWR 24-Port LED The module is in position and works normally. The switch does not support the module or a module failure occurs. No PoE mode The power LED is solid green. For a command switch, the LED displays C. For a member switch, the LED displays S. For a candidate switch - 3Com 4800G | Getting Started Guide - Page 16
panel of Switch 4800G PWR 24-Port LED Mark Status 10/100/1000Base-T Ethernet port status LED Speed Duplex PoE Green Yellow Flashing yellow (3 Hz) OFF Green Yellow Flashing yellow (3 Hz) OFF Solid green Flashing green (1 Hz) Solid yellow SFP port status LED (1000 Mbps) SFP port status LED - 3Com 4800G | Getting Started Guide - Page 17
Switch 4800G 24-Port SFP 17 Switch 4800G 24-Port SFP Appearance The Switch 4800G 24-Port SFP provides forty-eight auto-sensing 10/100/1000Base-T Ethernet ports, four 1000Base-X SFP ports and one console port on the front panel, and one AC power socket, one RPS port, and two 10 GE interface module - 3Com 4800G | Getting Started Guide - Page 18
of the Switch 4800G 24-Port SFP are the same as those of the Switch 4800G PWR 24-Port. For details, see Table 5. Switch 4800G 48-Port Appearance The Switch 4800G 48-Port provides twenty-four 1000Base-X SFP ports, eight auto-sensing 10/100/1000Base-T Ethernet ports, and one console port on the - 3Com 4800G | Getting Started Guide - Page 19
19 Front Panel Figure 14 Front panel of the Switch 4800G 48-Port (1) (2) (3) (4) (5) (6) (7) (8) (1) 100/1000Base-X SFP port status LED (3) Console port (5) System status LED (7) LED for power module slot 1 (9) LED for extended module slot 2 (11) Mode button (11) (10) (9) (2) Auto-sensing 10 - 3Com 4800G | Getting Started Guide - Page 20
PRODUCT OVERVIEW Table 6 Description of LEDs on the front panel of the Switch 4800G 48-Port LED Mode LED System power LED Mark Status Mode Speed Solid green Duplex module is in position and works normally. The switch does not support the module or a module failure occurs. No module is installed. - 3Com 4800G | Getting Started Guide - Page 21
panel of the Switch 4800G 48-Port LED 7-segment digital SFP port status LED (1000 Mbps) Flashing yellow (3 Hz) OFF The Mode button has no Green effect on the LED. Flashing yellow (3 Hz) OFF For a command switch, the LED displays C. For a member switch, the LED displays S. For a candidate switch - 3Com 4800G | Getting Started Guide - Page 22
. No link is present. System Specifications of the Switch 4800G Series Table 7 System specifications of the Switch 4800G Item Switch 4800G 24-Port Switch 4800G PWR 48-Port Switch 4800G PWR 24-Port Switch 4800G 24-Port SFP Switch 4800G 48-Port Physical dimensions (H × W × D) 43.6 × 440 × 300 - 3Com 4800G | Getting Started Guide - Page 23
3Com marketing personnel or technical support personnel to obtain the latest information about SFP modules. ■ For specifications of pluggable modules, refer to 3Com Low End Series Ethernet Switches Pluggable Modules Manual. Optional Interface Modules The Switch 4800G provide two 10 GE interface - 3Com 4800G | Getting Started Guide - Page 24
connected. You can use a CX4 cable to connect the CX4 port on the rear panel of the Switch 4800G to another CX4 port. Figure 16 CX4 cable The following three types of CX4 cables are available: ■ 50 cm (19.7 in.): The connectors at both ends of the cable are bayonet connectors. ■ 100 cm (39.4 in - 3Com 4800G | Getting Started Guide - Page 25
rack or workbench has a good ventilation system. ■ The rack is sturdy enough to support the device and its accessories. ■ The rack or workbench is well earthed. To ensure normal operation and long service life of your switch, install it in an environment that meets the requirements described in the - 3Com 4800G | Getting Started Guide - Page 26
, refer to section "System Specifications of the Switch 4800G Series can not only shorten the service life of your device but also Switch 4800G are Class 1 laser devices. c CAUTION: When an optional interface module or SFP module on the Switch 4800G is operating, do not stare into the optical port - 3Com 4800G | Getting Started Guide - Page 27
Installation Tools 27 Installation Tools ■ Flat-module screwdriver ■ Phillips screwdriver ■ ESD-preventive wrist strap c CAUTION: The installation tools are not shipped with the Switch 4800G. - 3Com 4800G | Getting Started Guide - Page 28
28 CHAPTER 2: PREPARATING TO INSTALL THE SWITCH - 3Com 4800G | Getting Started Guide - Page 29
seal on a mounting screw of the 3Com switch chassis is intact. If you want to open the chassis, you should contact the agent switch rather than bear its weight. ■ Guide rails purchased from 3Com apply only to standard cabinets 1,000 mm (39.4 in) deep. Use other supports to substitute for guide - 3Com 4800G | Getting Started Guide - Page 30
4800G 24-Port-DC Switch 4800G PWR 48-Port Switch 4800G 48-Port Switch 4800G PWR 24-Port Switch 4800G 24-Port SFP Physical dimensions (H × W × D) 43.6 × 440 × 300 mm (1.72 × 17.3 × 11.8 in.) 43.6 × 440 × 360 mm (1.72 × 17.3 × 14.2 in.) 43.6 × 440 × 420 mm (1.72 × 17.3 × 16.5 in.) Configuration - 3Com 4800G | Getting Started Guide - Page 31
of the switch. Cooling hole: Used for heat dissipation between switch and cabinet Slotted hole 2: Used to fix the guide rail to the front bracket n Guide rails are with the front mounting ears, and fix one end of mounting ears to the switch, as shown in Figure 20. Figure 20 Fix front mounting ears (1) - 3Com 4800G | Getting Started Guide - Page 32
the grounding and stability of the cabinet. 2 Take out the screws which are packed together with the front mounting ears, and fix one end of mounting ears to the switch, as shown in Figure 20. 3 Take out the load-bearing screws (packed together with the rear mounting ears) and place them in - 3Com 4800G | Getting Started Guide - Page 33
to mount a load-bearing screw on both sides of a switch (only two positions on both sides of the Switch 4800G 48-Port). You should select a proper position according to the actual requirements. The rear mounting ears support the switch by tightly contacting with the load-bearing screws. 4 Select - 3Com 4800G | Getting Started Guide - Page 34
INSTALLING THE SWITCH Figure 24 Fix front and rear mounting ears Front square-holed bracket Rear panel Screw 1 Front mounting ear Rear mounting ear Screw 2 Rear square-holed bracket Screw 1: Used to bear the weight Screw 2: Used to fix rear mounting ears to rear brackets After the switch is pushed - 3Com 4800G | Getting Started Guide - Page 35
panel Rear square-holed bracket Screw 1 Rear mounting ear Screw 1: Load-bearing screw 6 Fix the other end of the front mounting ears to the front brackets with screws and captive nuts and ensure that front and rear mounting ears have fixed the switch in the cabinet securely, as shown in Figure 26. - 3Com 4800G | Getting Started Guide - Page 36
panel Front mounting ear Front square-holed bracket Screw 1: Load-bearing screw Using Front Mounting Follow these steps to install a switch into a 19-inch standard cabinet: Ears and Guide Rails 1 Wear an ESD-preventive wrist strap to check the grounding and stability of the cabinet. 2 Take out the - 3Com 4800G | Getting Started Guide - Page 37
on both sides of the cabinet with M5 self-tapping screws, as shown in Figure 28. Figure 28 Install guide rails 4 Hold the two sides of the switch and slide it gently along the guide rails into the cabinet until it is located in a proper position, as shown in Figure 29. Ensure that - 3Com 4800G | Getting Started Guide - Page 38
SWITCH 5 Fix the other end of front mounting ears to the front brackets of the cabinet with M6 screws and captive nuts and ensure that the front mounting ears and guide rails have fixed the switch on the switch. ■ In the case of stack application, the vertical distance between two switches must be - 3Com 4800G | Getting Started Guide - Page 39
power cable of the Switch 4800G 24-Port and Switch 4800G PWR 48-Port The AC-powered Switch 4800G 24-Port and the Switch 4800G PWR 48-Port use the 12V RPS. The DC-powered Switch 4800G 24-Port uses the 12V RPS or the 48V RPS. For the connection of the 48V RPS power cable, refer to section "Connecting - 3Com 4800G | Getting Started Guide - Page 40
12V GND Pin Number 8 9 10 11 12 13 14 Designation GND -50V RPS_pres -50Vrtn -50Vrtn Control Pin GND Connect the DC power cable of the Switch 4800G 24-Port and Switch 4800G PWR 48-Port as follows: 1 Connect one end of the grounding cable to the grounding screw on the rear panel and the other - 3Com 4800G | Getting Started Guide - Page 41
shown in Figure 36, loosen the fastening screws and remove the RPS connector cover from the 12V RPS port. (If no 12V RPS power supply is connected, install the cover.) Figure 37 Connect the 12V RPS connector to the chassis b) Connect one connector (in - 3Com 4800G | Getting Started Guide - Page 42
. ■ You can use only the 12V RPS power cables recommended by 3Com. Connecting the DC power cable of the Switch 4800G PWR 24-Port and Switch 4800G 24-Port SFP The Switch 4800G PWR 24-Port and Switch 4800G 24-Port SFP use the 48V RPS, whose input voltage is in the range of -52 V to -55 V. Figure 38 - 3Com 4800G | Getting Started Guide - Page 43
Switch 4800G 24-Port-DC The Switch 4800G 48-Port and Switch 4800G 24-Port-DC use the 48V RPS, whose input voltage is in the range of -48 V to -60 V. Figure 40 Appearance of the -48V RPS port ˇ ˉ NULL +: -48V (return) terminal -: Negative terminal (-48 V to -60 V) NULL: Reserved 1 Connect one end - 3Com 4800G | Getting Started Guide - Page 44
Cable c CAUTION: Correctly connecting the grounding cable is crucial to lightning protection and electromagnetic susceptibility (EMS). The power input end of the switch is equipped with a noise filter, whose central ground is directly connected to the chassis, forming the chassis ground (also - 3Com 4800G | Getting Started Guide - Page 45
PE wire (1) (6) (2) (3) (5) (4) (1) AC power socket (4) PE wire (2) Grounding terminal (5) Three-core AC power cable (3) Power transformer (6) Ethernet Switch ■ For a -48 VDC powered switch, if none of the first two conditions mentioned above is available, ground it through the return (RTN - 3Com 4800G | Getting Started Guide - Page 46
(9) Grounding terminal (11) DC power input Connecting the Console Cable Console Cable A console cable is an 8-core cable. One end of the cable is a crimped RJ-45 connector, which is connected to the console port of the switch, and the other end is a DB-9 female connector, which is connected to - 3Com 4800G | Getting Started Guide - Page 47
1 Plug the DB-9 female connector of the console cable to the serial port of the PC or terminal where the switch is to be configured. 2 Connect the RJ-45 connector of the console cable to the console port of the switch. c CAUTION: Pay attention to the mark on the console port and be sure to plug the - 3Com 4800G | Getting Started Guide - Page 48
THE SWITCH 10 GE XFP Interface Appearance and front panel of a one-port 10 GE XFP interface module Module Figure 47 Appearance of a one-port 10 GE XFP interface module Figure 48 Front panel of a one-port 10 GE XFP interface module Appearance and front panel of a dual-port 10 GE XFP interface module - 3Com 4800G | Getting Started Guide - Page 49
the front panel of the XFP interface module, and gently push the XFP interface module in along the guide rails until the XFP interface module is in close contact with the switch. Figure 51 Install a 10 GE XFP interface module (1) Switch (3) XFP interface module (2) Optional module slot (4) Push-in - 3Com 4800G | Getting Started Guide - Page 50
of a short-haul dual-port 10 GE CX4 interface module Installation and removal The installation and removal procedures of CX4 interface modules are the same as those of XFP interface modules. Refer to "Installation procedure" on page 48 "Installation procedure" on page 48 and "Removal procedure" on - 3Com 4800G | Getting Started Guide - Page 51
at the end of the connector to horizontally unplug the CX4 cable connector from the CX4 port. c CAUTION: ■ Dedicated CX4 cables of the Switch 4800G are hot on the switch. ■ The grounding cable is connected. ■ The console cable and power cable are connected correctly. ■ All the interface cables are - 3Com 4800G | Getting Started Guide - Page 52
52 CHAPTER 3: INSTALLING THE SWITCH - 3Com 4800G | Getting Started Guide - Page 53
a terminal (a PC in this example) to the console port on the switch with a console cable. Figure 54 Network diagram for configuration environment setup Switch Console port Serial port Connecting the Console Cable Setting Terminal Parameters Console cable PC 1 Plug the DB-9 female connector of - 3Com 4800G | Getting Started Guide - Page 54
None 6 Stop bits: 1 7 Flow control: None 8 Emulation: VT100 The specific procedure is as follows: 1 Select Start > Programs > Accessories > Communications > then click to establish a new connection. The connection description interface appears, as shown below. Figure 55 Connection description of - 3Com 4800G | Getting Started Guide - Page 55
OK after selecting a serial port and the following interface pops up. On the interface, set Bits per second to 9600, Data bits to 8, Parity to None, Stop bits to 1, and Flow control to None. Figure 57 Set the serial port parameters 4 Click OK after setting the serial port parameters and the system - 3Com 4800G | Getting Started Guide - Page 56
56 CHAPTER 4: INITIAL POWER-ON Figure 58 HyperTerminal window 5 Click Properties in the HyperTerminal window to enter the properties window. Click Settings to enter the following properties setting window, set the emulation to VT100, and then click OK. Figure 59 Set terminal emulation in properties - 3Com 4800G | Getting Started Guide - Page 57
: BOOT MENU 1. Download application file to flash 2. Select application file to boot 3. Display all files in flash 4. Delete file from flash 5. Modify bootrom password 6. Enter bootrom upgrade menu 7. Skip current configuration file 8. Set bootrom password recovery 9. Set switch startup mode - 3Com 4800G | Getting Started Guide - Page 58
password Enter bootrom upgrade menu Skip current configuration file Set bootrom password recovery Set switch startup mode Reboot Enter your choice(0-9): Description Boot menu Download ... User interface aux0 is available. Press ENTER to get started. Changing the Boot Mode By default, the - 3Com 4800G | Getting Started Guide - Page 59
bootrom upgrade menu 7. Skip current configuration file 8. Set bootrom password recovery 9. Set switch startup mode 0. Reboot Enter your choice(0-9): Select 0. The system reboots in normal startup mode and displays the following information: Starting...... * * * 3Com Switch 4800G 48-Port - 3Com 4800G | Getting Started Guide - Page 60
following prompt is displayed: You can configure the switch now. n The 3Com Series switches provide abundant command views. For detailed descriptions about the configuration commands and CLI, refer to 3Com Switch 4800G Family Operation Manual and 3Com Switch 4800G Family Command Manual. - 3Com 4800G | Getting Started Guide - Page 61
problems, the TFTP and FTP modules are introduced into the switch. With these modules, the software and files can be loaded through Ethernet port Menu Starting...... * * * 3Com Switch 4800G 48-Port BOOTROM, Version 205 * * * Copyright(c) 2004-2008 3Com Corporation. Creation date : - 3Com 4800G | Getting Started Guide - Page 62
file from flash 5. Modify bootrom password 6. Enter bootrom upgrade menu 7. Skip current configuration file 8. Set bootrom password recovery 9. Set switch startup mode 0. Reboot Enter your choice(0-9): Loading Software Using XModem Through the Console Port Introduction to XModem XModem is a file - 3Com 4800G | Getting Started Guide - Page 63
XModem protocol. The system displays the following download baud rate setting menu: Please select your download baudrate: 1.* 9600 2. 19200 3. 38400 in HyperTerminal, click Configure... in the popup dialog box, select the bits per second of 115,200 in the console port configuration dialog box. - 3Com 4800G | Getting Started Guide - Page 64
64 CHAPTER 5: LOADING THE BOOT ROM AND HOST SOFTWARE Figure 60 Properties dialog box - 3Com 4800G | Getting Started Guide - Page 65
Figure 61 Console port configuration dialog box Local Software Loading 65 5 After setting the baud rate, you need to disconnect and the reconnect HyperTerminal so that the baud rate setting can take effect. Click the Disconnect icon to disconnect the HyperTerminal and then the Call icon to - 3Com 4800G | Getting Started Guide - Page 66
. Loading ...CCCCCCCCCC 7 Select Transfer > Send File in the HyperTerminal, and in the following popup dialog box click Browse..., select the software you need to download, and set the protocol to XModem. Figure 64 Send file dialog box 8 Click Send. The system displays the following page. - 3Com 4800G | Getting Started Guide - Page 67
download completes, the system displays the following information: Loading ...CCCCCCCCCC done! n You do not need to reset the updating now done!" instead of the prompt "Your baudrate should be set to 9600 bps again! Press enter key when ready". 10 Reset HyperTerminal's baud rate to 9600 bps (refer - 3Com 4800G | Getting Started Guide - Page 68
your choice(0-3): 4 Select 1 in the BootROM update menu to download the Boot ROM program using TFTP. Then set the following TFTP-related parameters as required: Load File name Switch IP address Server IP address :Switch 4800G.btm :1.1.1.2 :1.1.1.1 5 Press Enter after entering the information - 3Com 4800G | Getting Started Guide - Page 69
, and connect the switch through the Console port to the configuration PC. n You can use one PC as both configuration device and FTP server. 2 Run the FTP server program on the FTP server, configure an FTP user name and password, and specify the path of the program to be downloaded. 3 Run the - 3Com 4800G | Getting Started Guide - Page 70
is used as both configuration device and FTP server. You can telnet to the switch, and then execute the FTP commands to download the host program Switch 4800G.bin and the Boot ROM program Switch 4800G.btm from the remote FTP server (with IP address 10.1.1.1) to the switch. Figure 68 Load software - 3Com 4800G | Getting Started Guide - Page 71
Password: 230 Logged in successfully [ftp] get Switch 4800G.bin [ftp] get Switch 4800G.btm [ftp] bye 2 Update the Boot ROM program on the switch. bootrom update file Switch 4800G.btm This command will update BootRom file, Continue? [Y/N]y Updating BootRom, please wait... Upgrade Bootrom - 3Com 4800G | Getting Started Guide - Page 72
72 CHAPTER 5: LOADING THE BOOT ROM AND HOST SOFTWARE - 3Com 4800G | Getting Started Guide - Page 73
BOOT MENU 1. Download application file to flash 2. Select application file to boot 3. Display all files in flash 4. Delete file from flash 5. Modify bootrom password 6. Enter bootrom upgrade menu 7. Skip current configuration file 8. Set bootrom password recovery 9. Set switch startup mode 0. Reboot - 3Com 4800G | Getting Started Guide - Page 74
checked, the cause may lie in the console cable or the settings of the terminal (such as hyper terminal) parameters. Please perform the corresponding check. Troubleshooting when the terminal display is illegible If there is illegible display at the configuration terminal, the cause might lie in the - 3Com 4800G | Getting Started Guide - Page 75
) before you plug AC power cord into the switch, thus to prevent the possible damage to the switch due to lightning strike. You can use cable clips device protected by the arrester Overload auto protector, which can be manually reset. c CAUTION: ■ Make sure that the arrester is well grounded - 3Com 4800G | Getting Started Guide - Page 76
of the arrester is set to the reverse polarity. In this case, you should open the power socket Port n Lightning arrester for network port is specially designed for the Ethernet port of 10/100M electrical interface the instruction of arrester for network port, connect the arrester with switch by the - 3Com 4800G | Getting Started Guide - Page 77
Network Port 77 connected to the switch should be inserted into the arrester's OUT end). When you do that, observe whether the arrester indicators normally display. n The instruction of lightning arrester for network port contains the technical specifications, installation and maintenance guide of - 3Com 4800G | Getting Started Guide - Page 78
78 CHAPTER A: LIGHTNING PROTECTION FOR THE SWITCH - 3Com 4800G | Getting Started Guide - Page 79
such as backup and restore for 3Com device configurations as well as firmware and agent upgrades. 3ND makes it easy to roll out network-wide configuration changes with its intelligent VLAN configuration tools and the powerful template based configuration tools. Detailed statistical monitoring and - 3Com 4800G | Getting Started Guide - Page 80
find out more about how 3Com Network Director can help you manage your 3Com network and to download a trial version, go to: www.3com.com/3nd 3Com Network Access Manager 3Com Network Access Manager is installed seamlessly into Microsoft Active Directory and Internet Authentication Service (IAS). It - 3Com 4800G | Getting Started Guide - Page 81
such as switches, routers, security switches, the 3Com VCX™ IP Telephony server, and wireless access points: ■ Up to 250 devices ■ Up to 1,000 devices ■ Up to 5,000 devices ■ An unlimited number of devices To find out more about 3Com Enterprise Management Suite, go to: www.3com.com/ems Integration - 3Com 4800G | Getting Started Guide - Page 82
82 APPENDIX B: 3COM NETWORK MANAGEMENT
-
 1
1 -
 2
2 -
 3
3 -
 4
4 -
 5
5 -
 6
6 -
 7
7 -
8
-
9
-
10
-
11
-
12
-
13
-
14
-
15
-
16
-
17
-
18
-
19
-
20
-
21
-
22
-
23
-
24
-
25
-
26
-
27
-
28
-
29
-
30
-
31
-
32
-
33
-
34
-
35
-
36
-
37
-
38
-
39
-
40
-
41
-
42
-
43
-
44
-
45
-
46
-
47
-
48
-
49
-
50
-
51
-
52
-
53
-
54
-
55
-
56
-
57
-
58
-
59
-
60
-
61
-
62
-
63
-
64
-
65
-
66
-
67
-
68
-
69
-
70
-
71
-
72
-
73
-
74
-
75
-
76
-
77
-
78
-
79
-
80
-
81
-
82
 |
 |

www.3Com.com
Part Number: 10016617 Rev AA
Published: April 2008
3Com
®
Switch 4800G Family
Getting Started Guide
Switch 4800G 24-Port
Switch 4800G PWR 24-Port
Switch 4800G 48-Port
Switch 4800G PWR 48-Port
Switch 4800G 24-Port SFP