ASRock 4CoreDX90-VSTA Quick Installation Guide - Page 19
Hot Plug and Hot Swap Functions for SA - driver
 |
View all ASRock 4CoreDX90-VSTA manuals
Add to My Manuals
Save this manual to your list of manuals |
Page 19 highlights
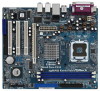
2.8 Hot Plug and Hot Swap Functions for SATA HDDs 4CoreDX90-VSTA motherboard supports Hot Plug and Hot Swap functions for SATA Devices. NOTE What is Hot Plug Function? If the SATA HDDs are NOT set for RAID configuration, it is called "Hot Plug" for the action to insert and remove the SATA HDDs while the system is still power-on and in working condition. However, please note that it cannot perform Hot Plug if the OS has been installed into the SATA HDD. What is Hot Swap Function? If SATA HDDs are built as RAID1 then it is called "Hot Swap" for the action to insert and remove the SATA HDDs while the system is still power-on and in working condition. 2.9 Driver Installation Guide To install the drivers to your system, please insert the support CD to your optical drive first. Then, the drivers compatible to your system can be auto-detected and listed on the support CD driver page. Please follow the order from up to bottom side to install those required drivers. Therefore, the drivers you install can work properly. 2.10 HDMR Card and Driver Installation If you do not insert HDMR card to this motherboard, and you finish installing all drivers to your system now, but in the future, you plan to use HDMR card function on this motherboard, please follow the steps below then. 1. Insert HDMR card to HDMR slot on this motherboard. Please make sure that the HDMR card is completely seated on the slot. 2. Install HDMR card driver from our support CD to your system. 3. Reboot your system. 19 ASRock 4CoreDX90-VSTA Motherboard English
-
 1
1 -
2
-
3
-
4
-
5
-
6
-
7
-
8
-
9
-
10
-
11
-
12
-
13
-
 14
14 -
 15
15 -
 16
16 -
 17
17 -
 18
18 -
 19
19 -
 20
20 -
 21
21 -
 22
22 -
 23
23 -
 24
24 -
25
-
26
-
27
-
28
-
29
-
30
-
31
-
32
-
33
-
34
-
35
-
36
-
37
-
38
-
39
-
40
-
41
-
42
-
43
-
44
-
45
-
46
-
47
-
48
-
49
-
50
-
51
-
52
-
53
-
54
-
55
-
56
-
57
-
58
-
59
-
60
-
61
-
62
-
63
-
64
-
65
-
66
-
67
-
68
-
69
-
70
-
71
-
72
-
73
-
74
-
75
-
76
-
77
-
78
-
79
-
80
-
81
-
82
-
83
-
84
-
85
-
86
-
87
-
88
-
89
-
90
-
91
-
92
-
93
-
94
-
95
-
96
-
97
-
98
-
99
-
100
-
101
-
102
-
103
-
104
-
105
-
106
-
107
-
108
-
109
-
110
-
111
-
112
-
113
-
114
-
115
-
116
-
117
-
118
-
119
-
120
-
121
-
122
-
123
-
124
-
125
-
126
-
127
-
128
 |
 |
