ASRock 4CoreDual-SATA2 R2.0 RAID Installation Guide - Page 21
Remove Array, Add/Remove Spare
 |
View all ASRock 4CoreDual-SATA2 R2.0 manuals
Add to My Manuals
Save this manual to your list of manuals |
Page 21 highlights
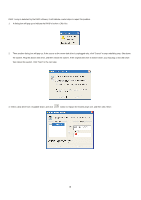
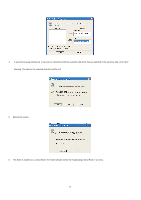
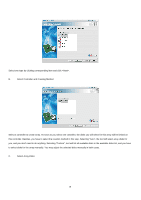
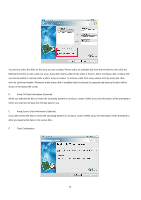
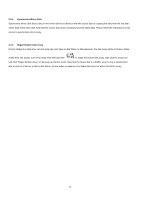
As soon as you click the button, the data on the hardware disk maybe destroyed permanently. So please do confirm your data, and backup the important data before clicking button. G. Successful Information This step informs you that you have create an array successfully. 2.2.2 Remove Array To remove a disk array, you can click on "Remove Array" in the Operation block. If there are arrays in current system, you can finish your removing. You can also remove an array by shifting top-left block to device tree, right-clicking the upper-most level array node and clicking "Remove Array" on the pop-up shortcut menu. Then follow the instructions on the screen to remove array. 2.2.3 Add/Remove Spare This function is specified for RAID1 (Mirroring) disk array. A Spare disk is a special array disk that will be used to replace the Source or Mirror disk when one of them meets disk failure. To Add a Spare disk to or Remove Spare from a RAID1 disk array, you can click "Add/ Remove Spare" in the Operation block. If there are RAID1 arrays in the current system, the "Add/ Remove Spare" wizard will guide you to finish this operation. You can also shift the top-left block of main application window to Array View/Tree, select the upper-most level tree node of the RAID 1 array and right click the array node and click "Add/ Remove Spare" on the pop-up shortcut menu. Then follow the instructions on the screen to add/remove array. 21
-
 1
1 -
2
-
3
-
4
-
5
-
6
-
7
-
8
-
9
-
10
-
11
-
12
-
13
-
14
-
15
-
 16
16 -
 17
17 -
 18
18 -
 19
19 -
 20
20 -
 21
21 -
 22
22
 |
 |
