ASRock AD2550B-ITX User Manual - Page 13
Installation of Memory Modules SO-DIMM, Installing a SO-DIMM - itx motherboard
 |
View all ASRock AD2550B-ITX manuals
Add to My Manuals
Save this manual to your list of manuals |
Page 13 highlights
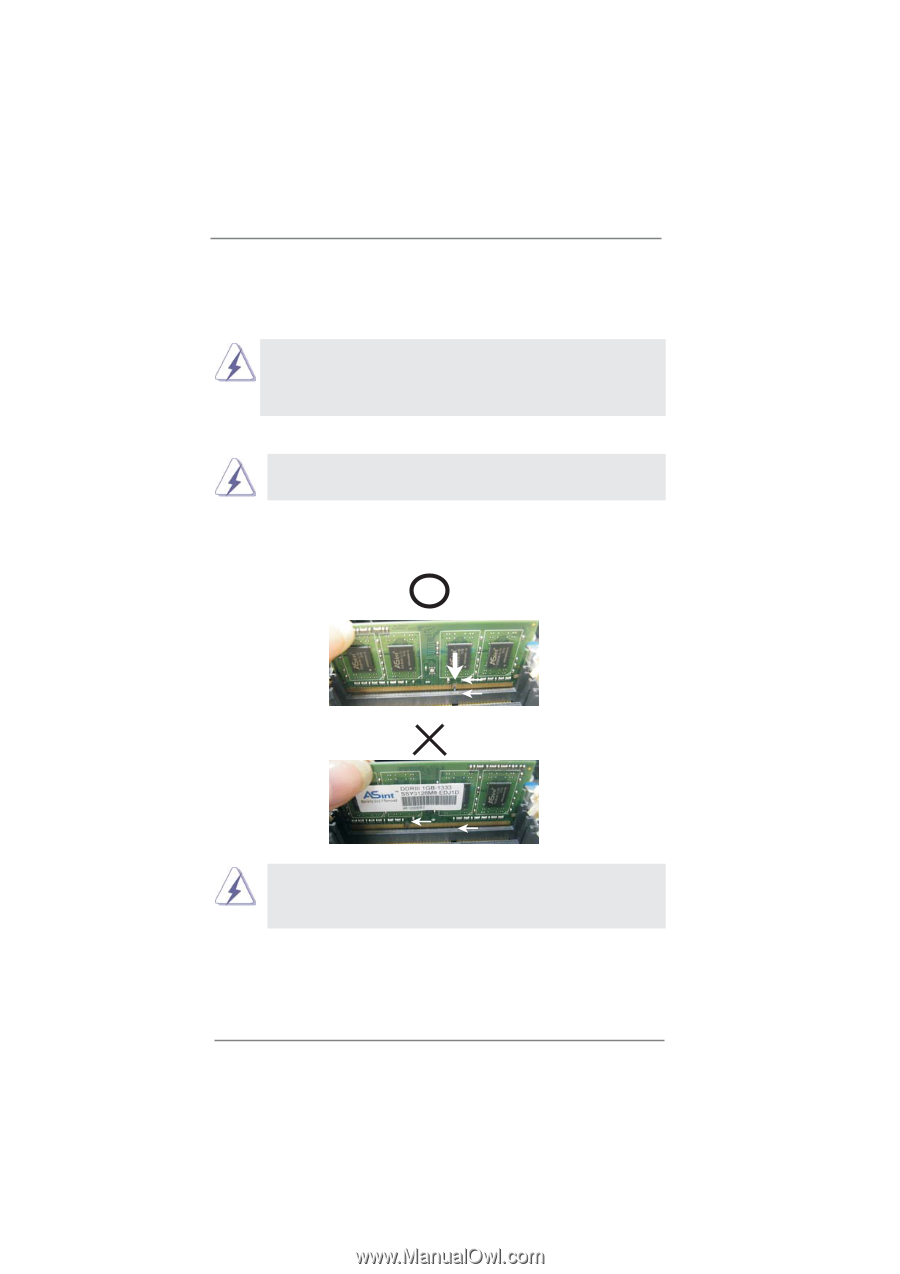
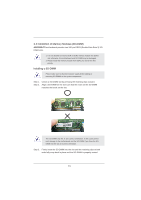
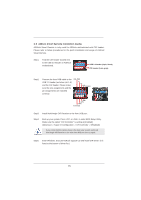
2.3 Installation of Memory Modules (SO-DIMM) AD2550B-ITX motherboard provides two 240-pin DDR3 (Double Data Rate 3) SODIMM slots. 1. It is not allowed to install a DDR or DDR2 memory module into DDR3 slot; otherwise, this motherboard and SO-DIMM may be damaged. 2. Please install the memory module from DDR3_A2 slot for the first priority. Installing a SO-DIMM Please make sure to disconnect power supply before adding or removing SO-DIMMs or the system components. Step 1. Unlock a SO-DIMM slot by pressing the retaining clips outward. Step 2. Align a SO-DIMM on the slot such that the notch on the SO-DIMM matches the break on the slot. notch break notch break The SO-DIMM only fits in one correct orientation. It will cause permanent damage to the motherboard and the SO-DIMM if you force the SODIMM into the slot at incorrect orientation. Step 3. Firmly insert the SO-DIMM into the slot until the retaining clips at both ends fully snap back in place and the SO-DIMM is properly seated. 13
-
 1
1 -
2
-
3
-
4
-
5
-
6
-
7
-
 8
8 -
 9
9 -
 10
10 -
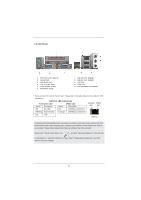 11
11 -
 12
12 -
 13
13 -
 14
14 -
 15
15 -
 16
16 -
 17
17 -
 18
18 -
19
-
20
-
21
-
22
-
23
-
24
-
25
-
26
-
27
-
28
-
29
-
30
-
31
-
32
-
33
-
34
-
35
-
36
-
37
-
38
-
39
 |
 |