ASRock K10N78-1394 Quick Installation Guide - Page 26
English, HDMI Audio Function Operation Guide
 |
View all ASRock K10N78-1394 manuals
Add to My Manuals
Save this manual to your list of manuals |
Page 26 highlights
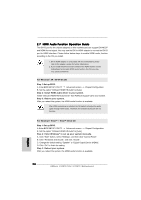
2.7 HDMI Audio Function Operation Guide The DVI-D port for the chipset adopted on this motherboard can support DVI/HDCP and HDMI format signal. You may use the DVI to HDMI adapter to convert the DVI-D port to HDMI interface. Please follow below steps to enable HDMI audio function according to the OS you install. 1. DVI to HDMI adapter is not bundled with this motherboard, please refer to the adapter vendor for further information. 2. If you install the DVI-D monitor instead of the HDMI monitor on this motherboard and enable HDMI audio function, the film you play may pause sometimes. For Windows® XP / XP 64-bit OS Step 1:Set up BIOS. A. Enter BIOS SETUP UTILITY Advanced screen Chipset Configuration. B. Set the option "OnBoard HDMI HD Audio" to [Auto]. Step 2: Install HDMI audio driver to your system. Install "Onboard HDMI HD Audio Driver" from ASRock Support CD to your system. Step 3: Reboot your system. After you reboot the system, the HDMI audio function is available. After HDMI audio driver is installed, the OS default will output the audio signal through HDMI audio. Therefore, the onboard audio jack will not function. For Windows® VistaTM / VistaTM 64-bit OS Step 1:Set up BIOS. A. Enter BIOS SETUP UTILITY Advanced screen Chipset Configuration. B. Set the option "OnBoard HDMI HD Audio" to [Auto]. Step 2: Enter Windows® to set up your system manually. A. Click "Start" button, select "Settings", and then click "Control Panel". B. Click "Hardware and Sound", and click "Sound". C. Change the default setting "Speaker" to "Digital Output Device (HDMI)". D. Click "OK" to finish the setting. Step 3: Reboot your system. After you reboot the system, the HDMI audio function is available. 26 ASRock K10N78-1394 / K10N78 Motherboard English
-
 1
1 -
2
-
3
-
4
-
5
-
6
-
7
-
8
-
9
-
10
-
11
-
12
-
13
-
14
-
15
-
16
-
17
-
18
-
19
-
20
-
 21
21 -
 22
22 -
 23
23 -
 24
24 -
 25
25 -
 26
26 -
 27
27 -
 28
28 -
 29
29 -
 30
30 -
 31
31 -
32
-
33
-
34
-
35
-
36
-
37
-
38
-
39
-
40
-
41
-
42
-
43
-
44
-
45
-
46
-
47
-
48
-
49
-
50
-
51
-
52
-
53
-
54
-
55
-
56
-
57
-
58
-
59
-
60
-
61
-
62
-
63
-
64
-
65
-
66
-
67
-
68
-
69
-
70
-
71
-
72
-
73
-
74
-
75
-
76
-
77
-
78
-
79
-
80
-
81
-
82
-
83
-
84
-
85
-
86
-
87
-
88
-
89
-
90
-
91
-
92
-
93
-
94
-
95
-
96
-
97
-
98
-
99
-
100
-
101
-
102
-
103
-
104
-
105
-
106
-
107
-
108
-
109
-
110
-
111
-
112
-
113
-
114
-
115
-
116
-
117
-
118
-
119
-
120
-
121
-
122
-
123
-
124
-
125
-
126
-
127
-
128
-
129
-
130
-
131
-
132
-
133
-
134
-
135
-
136
-
137
-
138
-
139
-
140
-
141
-
142
-
143
-
144
-
145
-
146
-
147
-
148
-
149
-
150
-
151
-
152
-
153
-
154
-
155
-
156
-
157
-
158
-
159
-
160
-
161
-
162
-
163
-
164
-
165
-
166
-
167
-
168
-
169
-
170
-
171
-
172
-
173
-
174
-
175
-
176
-
177
-
178
-
179
-
180
-
181
-
182
-
183
-
184
-
185
-
186
-
187
-
188
-
189
-
190
-
191
-
192
-
193
-
194
-
195
-
196
-
197
-
198
-
199
-
200
-
201
-
202
-
203
-
204
-
205
-
206
 |
 |