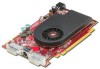
ATI X1650 User Guide
ATI X1650 - AMD Radeon XT 256MB PCI-E Graphics Card Manual
 |
UPC - 727419413909
View all ATI X1650 manuals
Add to My Manuals
Save this manual to your list of manuals |
ATI X1650 manual content summary:
- ATI X1650 | User Guide - Page 1
Radeon® X1650 GTO User's Guide P/N 137-41163-10 - ATI X1650 | User Guide - Page 2
to change without notice. Product may not be exactly as shown in diagrams. Reproduction of this manual, or parts thereof, in any form, without the express written permission of ATI Technologies Inc. is strictly prohibited. Disclaimer While every precaution has been taken in the preparation of this - ATI X1650 | User Guide - Page 3
for use only with IBM AT or compatible UL Listed personal computers that have Installation Instructions detailing user installation of card cage accessories. • Grounding - For continued protection against risk of electric shock and fire, this accessory should be installed only in products equipped - ATI X1650 | User Guide - Page 4
iv - ATI X1650 | User Guide - Page 5
v Table of Contents Introduction 1 Radeon® X1650 GTO Features 1 System Requirements 3 Using 32 Digital Panel Properties 33 Attributes 34 HDTV Support 37 3D 39 Standard Settings 40 Anti-aliasing 3D 59 Avivo™ Video 61 Standard Settings 62 Video Overlay Theater Mode 64 - ATI X1650 | User Guide - Page 6
vi Deinterlacing 66 All Settings 67 VPU Recover 71 Using TV Display and Capture Features 75 Index 79 - ATI X1650 | User Guide - Page 7
the purchase of your ATI Radeon® X1650 GTO graphics card. We hope that you will enjoy countless hours of trouble-free computing. Radeon® X1650 GTO Features Features • HDMI™ and VGA output. • 256MB of DDR2 memory. • PCI Express® X16 bus interface. Ultra-Threaded Shader Engine • Support for Microsoft - ATI X1650 | User Guide - Page 8
2 Radeon® X1650 GTO Features Advanced Image Quality Features • 64-bit floating point HDR rendering supported throughout the pipeline. • Includes support for blending and multi-sample anti-aliasing. • 32-bit integer HDR (10:10:10:2) format supported throughout the pipeline. • Includes support for - ATI X1650 | User Guide - Page 9
. • VGA mode support on all outputs. • Drive two displays simultaneously with independent resolutions and refresh rates. • Compatible with ATI TV/Video encoder products, including Theater 550. System Requirements Operating System Monitor • Windows® XP with Service Pack 2 (SP2). • Windows® XP - ATI X1650 | User Guide - Page 10
4 System Requirements - ATI X1650 | User Guide - Page 11
respectively. Connecting to a Digital Display Using HDMI™ To connect your Radeon® X1650 GTO card to a digital display, use an HDMI™ cable. To connect HDMI™ 1 Determine if your digital display supports an HDMI™ input video connection. 2 Power off your computer and your digital display. 3 Looking at - ATI X1650 | User Guide - Page 12
to a Digital Display Using HDMI™ 1 HDMI™ Connection on graphics card 2 Digital Display 3 HDMI™ Cable 4 Computer Note: If you use multiple monitors, the Radeon® X1650 GTO card must be the primary graphics card. Normally, the system BIOS determines which graphics card will be the primary. - ATI X1650 | User Guide - Page 13
to an Analog Display Using VGA To connect your Radeon® X1650 GTO card to a digital display, use a VGA cable. To connect using VGA 1 Power off your computer and your analog display. 2 Determine if your analog display supports a VGA input video connection. 3 Looking at the back of your PC, locate - ATI X1650 | User Guide - Page 14
first, and then restart your computer so that Windows® can detect the new hardware settings. 4 When the New Hardware Found Wizard appears, at the appropriate prompt insert the ATI Installation CD to load the drivers for your Radeon® X1650 GTO card. To set up a multi-monitor display 1 From the - ATI X1650 | User Guide - Page 15
providing access to the display features contained within the installed ATI hardware and software. Use the Catalyst™ Control Center to access a comprehensive online help system, or connect to the ATI Web site. Launching Catalyst™ Control Center Catalyst™ Control Center can be launched - ATI X1650 | User Guide - Page 16
Catalyst™ Control Center. Other Quick Launch Access Points Launching Catalyst™ Control Center Using the System Tray 1 Right-click the ATI icon in the Windows® System Tray. 2 Select Catalyst™ Control Center from the popup menu. Launching Catalyst™ Control Center Using the Desktop Shortcut When you - ATI X1650 | User Guide - Page 17
as shown) Catalyst™ Control Center Dashboard The Catalyst™ Control Center Dashboard is a graphical representation of the display features of the installed ATI hardware and software. Use the Dashboard to fine-tune your graphic settings, enable or disable connected display devices, and change the - ATI X1650 | User Guide - Page 18
Preferences • Help Catalyst™ Control Center Views The Catalyst™ Control Center Dashboard supports three types of views: • Basic • Advanced • Custom Basic View is launched for the very first time. It includes a wizard that guides you through the process of configuring your display devices. Basic View - ATI X1650 | User Guide - Page 19
a Custom View 1 In Advanced View, click View and select Define Custom View. 2 In the Define a Custom View dialog, click the plus sign beside the graphics card name to expand the tree view. 3 Select the check box next to each aspect you wish to add to your custom view. 4 Click OK to - ATI X1650 | User Guide - Page 20
14 Hotkeys Manager Edit an existing hot key 1 Open Hotkeys Manager. 2 Select an option from the List Hotkeys for drop-down menu. • Optionally, select an aspect from the According to list. 3 Click a hot key to edit. 4 Click Edit button. 5 Choose a modifier. 6 Enter any letter of the alphabet. 7 Click - ATI X1650 | User Guide - Page 21
. Define and save into a profile your own personal video settings that can be quickly activated manually, through a hot key, or by file association. Note: A profile applies to a specific graphics card. If there is more than one graphics card installed in your computer, you need to select the - ATI X1650 | User Guide - Page 22
Manager. 2 Select a profile from Create or Edit a Profile drop-down menu. 3 Click the Activation tab. 4 Set a profile to activate manually: • Click Manually by then select your preferred method for activating a profile. For example, a shortcut on your desktop. • If you choose Hotkeys assignment - ATI X1650 | User Guide - Page 23
Preferences 17 • Optionally, click the Activate button to apply the saved profile but leave the Profiles Manager open. • Optionally, click the Close button to close the Profiles Manager without applying the saved Profile. Delete a profile 1 Open the Profile Manager. 2 Select a profile from the - ATI X1650 | User Guide - Page 24
Splash Screen the Catalyst™ Control Center splash screen will not appear during start up. Show or hide the Catalyst™ Control Center icon in the Windows® System Tray 1 Click Preferences button in the Advanced View of the Dashboard. 2 Click Enable System Tray menu in the drop-down menu. Note: When - ATI X1650 | User Guide - Page 25
in the drop-down menu. 3 Click Yes. Help Use the Catalyst™ Control Center Help feature to access the comprehensive online help system, generate a Problem Report, and get the installed Catalyst™ Control Center version information. To access Help • Click the Help button in the Catalyst™ Control Center - ATI X1650 | User Guide - Page 26
should you experience a problem with your ATI product. This report can be used by an ATI Customer Care agent to help diagnose and resolve the problem. 1 Click the Help button in the Advanced View of the Dashboard. 2 Click Problem Report Wizard. 3 Follow the Wizard's instructions. Display the version - ATI X1650 | User Guide - Page 27
tree view of Advanced View and select either Graphic Software or Graphic Hardware. To access system information • Click the System Information button to open the Windows® System Information. - ATI X1650 | User Guide - Page 28
new to the Catalyst™ Control Center may use the Basic View wizard to help you configure your display preferences. Experienced users who prefer to manually configure their desktop setting should use the Advanced View. Note: The Catalyst™ Control Center will open to the Basic View the very first time - ATI X1650 | User Guide - Page 29
Displays Manager 23 Use Display Manager to set your desktop resolution, the display refresh rate, and arrange your displays. To change your display configuration requires dragging and/or clicking or right-clicking a display icon. Access Displays Manager • From the Tree Menu, click Displays Manager. - ATI X1650 | User Guide - Page 30
24 Displays Manager 3 Click the number 2 icon in the right-hand box. 4 Click Yes to the Enable this display? Enable Clone Mode If the secondary device is disabled: 1 From the Tree View pane, click Displays Manager. 2 Click and drag the display device icon in Attached displays currently disabled to - ATI X1650 | User Guide - Page 31
Displays Manager 25 Enable Stretch Main Horizontally If the secondary display is disabled: 1 From the Tree View pane, click Displays Manager. 2 Click and drag the display device icon from Additional Displays to the empty box to the right of the Main box. 3 Click Stretch horizontally onto [display - ATI X1650 | User Guide - Page 32
the Tree View pane, click Displays Manager. 2 Choose a refresh rate from the Refresh Rate drop-down menu. Note: See your monitor manual for supported refresh rates. Setting a refresh rate higher than recommended by the monitor manufacturer could damage the monitor. Rotate the desktop 1 From the Tree - ATI X1650 | User Guide - Page 33
the Displays Manager aspect and can be configured as required. However, some features that rely on automatic detection, such as extended desktop, will not be supported. - ATI X1650 | User Guide - Page 34
28 Display Options Catalyst™ Control Center: Display Options Select a refresh rate override Some applications may have a default refresh rate lower than the optimal setting for your monitor. 3D Refresh Rate Override enables you to set the refresh rate for full-screen applications or games utilizing - ATI X1650 | User Guide - Page 35
when it is opened or you can manually detect connected devices when they are required. Catalyst™ Control Center is opened. or • Use manual detection only (I must click Detect Displays button). detection, such as extended desktop, will not be supported. 1 From the Tree View pane, click Display - ATI X1650 | User Guide - Page 36
resolution capabilities drop-down menu: • List only those modes supported by all displays • Only allow panning on limited-resolution displays default settings 1 Move the mouse to the bottom right-hand corner of the window. 2 Click Defaults. Note: Clicking Defaults will restore the defaults for the - ATI X1650 | User Guide - Page 37
, and adjust the output display's position and size. Note: Catalyst™ Control Center loads aspects dynamically based on what device is attached to the graphics card. If you have a display device other than a standard monitor or flat panel display (such as an HDTV screen) Digital Panel Properties will - ATI X1650 | User Guide - Page 38
Click Attributes. 3 Select Use Extended Display Identification Data (EDID) or driver defaults to place a check mark in the check box. Apply your settings 1 Move the mouse to the bottom right-hand corner of the window. 2 Click Defaults. Note: Clicking Defaults will restore the defaults for the - ATI X1650 | User Guide - Page 39
Scaling to improve image quality without impacting performance. Use HDTV Support to add EDID information (containing information about the capabilities of loads aspects dynamically based on what device is attached to the graphics card. If you have standard display device such as a CRT monitor or - ATI X1650 | User Guide - Page 40
any image when a display is set to a high resolution. This should only be enabled if the Digital Panel is experiencing these types of problems. Note: Alternate DVI operational mode, when enabled, may eliminate display corruption. Apply your settings 1 Click Apply to save your changes and leave the - ATI X1650 | User Guide - Page 41
Move the mouse to the bottom right-hand corner of the window. 2 Click Defaults. Note: Clicking Defaults will restore the feature in the current view. Avivo™ Color Use Avivo™ Color with ATI graphics cards that support per-display color settings. Independently set the hue and saturation for each - ATI X1650 | User Guide - Page 42
to save your changes and exit the Catalyst™ Control Center. Restore default settings 1 Move the mouse to the bottom right-hand corner of the window. 2 Click Defaults. Note: Clicking Defaults will restore the defaults for the current view only. Previous settings are not altered and will be saved once - ATI X1650 | User Guide - Page 43
in the Displays Manager when the associated display is selected. If you have a CRT and DFP device and want both to support HDTV, you must go to both HDTV Support pages and select both Add 720p check boxes. L WARNING!: Forcing a display mode that exceeds its EDID limits may result in permanent - ATI X1650 | User Guide - Page 44
Custom HDTV Formats list and the Displays Manager mode list. Remove an HDTV Format 1 From the Tree View pane, expand Digital Panel Properties. 2 Click HDTV Support. 3 Click to highlight the HDTV format to be removed in the Predefined and Custom HDTV Formats list box. 4 Click Remove button. Note: The - ATI X1650 | User Guide - Page 45
3D 39 Restore default settings 1 Move the mouse to the bottom right-hand corner of the window. 2 Click Defaults. Note: Clicking Defaults will restore the defaults for the current view only. Previous settings are not altered and will be saved once you - ATI X1650 | User Guide - Page 46
40 Standard Settings Catalyst™ Control Center: 3D Standard Settings (Sample) Standard Settings The Standard settings page provides access to a universal slider control where you can simultaneously adjust all of the standard 3D settings for any type of 3D application. The slider enables you to adjust - ATI X1650 | User Guide - Page 47
of an aspect, not just the feature in the current view. Restore default settings 1 Move the mouse to the bottom right-hand corner of the window. 2 Click Defaults. - ATI X1650 | User Guide - Page 48
aliasing, use the Let the Application Decide option. Your display will automatically adjust to the application's requirements. Set the Anti-Aliasing preference manually 1 From the Tree View pane, expand 3D. 2 Click Anti-aliasing. 3 Ensure the application override is disabled. To do so, make sure the - ATI X1650 | User Guide - Page 49
Anti-aliasing 43 Set the Transparent Anti-aliasing 1 Expand 3D in Advanced View. 2 Click Transparent Anti-Aliasing. 3 Ensure the application override is enabled. To do so, make sure the Let the Application Decide check box is not selected. 4 Click and drag the slider to the desired setting. Note: - ATI X1650 | User Guide - Page 50
44 Adaptive Anti-aliasing Restore default settings 1 Move the mouse to the bottom right-hand corner of the window. 2 Click Defaults. Note: Clicking Defaults will restore the defaults for the current view only. Previous settings are not altered and will be saved once you - ATI X1650 | User Guide - Page 51
Anisotropic Filtering 45 Set the Anisotropic Filtering preference manually 1 From the Tree View pane, expand 3D. 2 this feature may impact performance. Note: This feature is not supported by all ATI graphics cards. Preview your changes • The preview image automatically displays your adjustments - ATI X1650 | User Guide - Page 52
1 Move the mouse to the bottom right-hand corner of the window. 2 Click Defaults. Note: Clicking Defaults will restore the defaults for A.I. Catalyst™ A.I. makes use of ATI's new texture analyzer technology to optimize performance in 3D applications, while Driver, Prince of Persia, and Crazy Taxi 3. - ATI X1650 | User Guide - Page 53
Catalyst™ A.I. 47 Disable Catalyst™ A.I. 1 From the Tree View pane, expand 3D. 2 Select Catalyst™ A.I. 3 Select Disable Catalyst™ A.I. to place a check mark in the check box. Set Catalyst™ A.I. settings 1 From the Tree View pane, expand 3D. 2 Click Catalyst™ A.I. 3 If necessary, clear the check mark - ATI X1650 | User Guide - Page 54
default settings 1 Move the mouse to the bottom right-hand corner of the window. 2 Click Defaults. Note: Clicking Defaults will restore the defaults for the on a 3D object's surface as it moves into the background. A series of high- and lowresolution texture maps are stored in memory and selectively - ATI X1650 | User Guide - Page 55
of an aspect, not just the feature in the current view. Restore default settings 1 Move the mouse to the bottom right-hand corner of the window. 2 Click Defaults. Note: Clicking Defaults will restore the defaults for the current view only. Previous settings are not altered and will be saved once you - ATI X1650 | User Guide - Page 56
of the principal 3D features onto a single page, without any preview window, allowing for quick access and adjustment. You can change the settings because the effect is already known or understood. Set the Anti-aliasing preference manually 1 From the Tree View pane, expand 3D. 2 Click All Settings. - ATI X1650 | User Guide - Page 57
All Settings 51 Set the Anisotropic Filtering preference manually 1 From the Tree View pane, expand 3D. 2 Click All Settings. 3 Ensure the application override is disabled. To do so, make sure the Let the Application - ATI X1650 | User Guide - Page 58
expand 3D. 2 Click All Settings. 3 Scroll to SmartShader™ Effects. 4 Select an effect from the drop down-menu. Note: Effects in the list not supported by Direct 3D® are appended with "(OpenGL® only)". Apply your settings 1 Click Apply to save your changes and leave the Catalyst™ Control Center open - ATI X1650 | User Guide - Page 59
Move the mouse to the bottom right-hand corner of the window. 2 Click Defaults. Note: Clicking Defaults will restore the defaults place a check mark in the check box. Set Support DXT texture formats for Direct 3D® This option enables support for DirectX® compressed texture formats. DXT requires half - ATI X1650 | User Guide - Page 60
should only be enabled if you are experiencing these issues, as it may cause problems in other games. 1 From the Tree View pane, expand 3D. 2 Click for texture and geometry data. If there is insufficient memory available to support Triple buffering, it will automatically be disabled. 1 From the Tree - ATI X1650 | User Guide - Page 61
Color 55 Restore default settings 1 Move the mouse to the bottom right-hand corner of the window. 2 Click Defaults. Note: Clicking Defaults will restore the defaults for the current view only. Previous settings are not altered and will be saved once you - ATI X1650 | User Guide - Page 62
56 Color Desktop Catalyst™ Control Center: Color (Sample) Color Desktop Adjust the overall richness of color by using the Gamma control. To adjust the overall brightness use the Brightness control, and the overall contrast use the Contrast control. Display Color page to configure Desktop 1 From the - ATI X1650 | User Guide - Page 63
the gamma, brightness, and contrast sliders are disabled. The Reactivate ATI color controls button resets the sliders to their previous settings. 1 From the Tree View pane, click Color. 2 Click Reactivate ATI color controls button. Set Color Gamma 1 From the Tree View pane, - ATI X1650 | User Guide - Page 64
to save your changes and exit the Catalyst™ Control Center. Restore default settings 1 Move the mouse to the bottom right-hand corner of the window. 2 Click Defaults. Note: Clicking Defaults will restore the defaults for the current view only. Previous settings are not altered and will be saved once - ATI X1650 | User Guide - Page 65
Color - FullScreen 3D 59 Discard your settings • Click Discard to ignore any unsaved changes and restore the settings that existed when the Catalyst™ Control Center was opened or the last time Apply was used. Discard does not close the Catalyst™ Control Center. Note: Clicking Discard applies to all - ATI X1650 | User Guide - Page 66
to save your changes and exit the Catalyst™ Control Center. Restore default settings 1 Move the mouse to the bottom right-hand corner of the window. 2 Click Defaults. Note: Clicking Defaults will restore the defaults for the current view only. Previous settings are not altered and will be saved once - ATI X1650 | User Guide - Page 67
Avivo™ Video 61 Avivo™ Video Use the Avivo™ Video aspect to apply standard video settings with a Wizard or selecting a video preset. Use Adjustments to configure gamma, brightness, and hue. Use Theater Mode to set aspect ratio and overlay display mode. Preview your changes before applying - ATI X1650 | User Guide - Page 68
from the Video Presets menu. Apply your settings 1 Click Apply to save your changes and leave the Catalyst™ Control Center open. 2 Click OK to save your changes and exit the Catalyst™ Control Center. Restore default settings 1 Move the mouse to the bottom right-hand corner of the window. 2 Click - ATI X1650 | User Guide - Page 69
63 Adjustments Use Avivo™ Video Adjustments to manually set Gamma, Brightness, Contrast, Saturation, and Hue. Let the application control the video adjustments 1 From the Tree View pane, expand Video. 2 Click Adjustments. 3 Click Let the application control the video adjustments. Set Gamma Gamma - ATI X1650 | User Guide - Page 70
green, and blue components of an image. 1 From the Tree View pane, expand Video. 2 Click Adjustments. 3 Click and drag the Hue control slider to the desired settings 1 Move the mouse to the bottom right-hand corner of the window. 2 Click Defaults. Note: Clicking Defaults will restore the defaults for - ATI X1650 | User Guide - Page 71
to be displayed on both displays. The Secondary display displays the same content as the primary. • Optionally, select in Standard Mode if you want the video content to be displayed on the primary display only. • Optionally, the same on all displays if you want the contents displayed the same on all - ATI X1650 | User Guide - Page 72
to the bottom right-hand corner of the window. 2 Click Defaults. Note: Clicking Defaults will video fields of interlaced video. Select one of five options for deinterlacing video for better viewing. • Auto Detect lets the multimedia driver to select the best deinterlacing scheme for different video - ATI X1650 | User Guide - Page 73
, not just the feature in the current view. All Settings The All Settings page combines all of the principal Video features onto a single page, without any preview window, allowing quick access and adjustment. This page is useful when it is not necessary to preview the adjusted settings because - ATI X1650 | User Guide - Page 74
Contrast is the difference between the brightest and darkest parts of an image. 1 From the Tree View pane, expand Video. 2 Click All Settings. 3 Scroll to Video Adjustments. 4 Adjust the Contrast control slider to the desired position. Adjust Saturation Saturation is the measure of amount of - ATI X1650 | User Guide - Page 75
Adjust Hue Hue defines the tint of the red, green, and blue components of an image. 1 From the Tree View pane, expand Video. 2 Click All Settings. 3 Scroll to Video Adjustments. 4 Adjust the Hue control slider to the desired position. Select an Overlay Display when in Clone Mode 1 From the Tree View - ATI X1650 | User Guide - Page 76
to Deinterlacing. 4 Select a deinterlacing mode for the drop down menu. Enable Windows® Media Settings 1 From the Tree View pane, expand Video. 2 Click All Settings. 3 Scroll to Windows® Media Settings. 4 Click Windows® Media Video Acceleration. Apply your settings 1 Click Apply to save your changes - ATI X1650 | User Guide - Page 77
, not just the feature in the current view. VPU Recover VPU Recover enables the ATI display driver to detect when the graphics processor stops responding to display-driver instructions. When this happens, the display driver attempts to reset the graphics hardware. In most cases, VPU Recover will be - ATI X1650 | User Guide - Page 78
Recover is activated. This report assists ATI in determining the cause of the problem. This information is then used to develop more stable graphic drivers. 1 From the Tree View pane, click VPU Recover. 2 Click Prepare an error report if VPU Recover is activated for submission to ATI Technologies. - ATI X1650 | User Guide - Page 79
email. An email is created containing the error report for submission to ATI Technologies. Note: No personal information is included in the error report. settings 1 Move the mouse to the bottom right-hand corner of the window. 2 Click Defaults. Note: Clicking Defaults will restore the defaults for - ATI X1650 | User Guide - Page 80
74 VPU Recover - ATI X1650 | User Guide - Page 81
as a display. Connecting to a Digital Display Using HDMI™ To connect your Radeon® X1650 GTO card to a digital display, use an HDMI™ cable. To connect HDMI™ 1 Determine if your digital display supports an HDMI™ input video connection. 2 Power off your computer and your digital display. 3 Looking at - ATI X1650 | User Guide - Page 82
to a Digital Display Using HDMI™ 1 HDMI™ Connection on graphics card 2 Digital Display 3 HDMI™ Cable 4 Computer Using a Monitor vs. Using TV may not work with TV display enabled. If you experience problems when TV display is enabled, disable TV display to restore your monitor's display. - ATI X1650 | User Guide - Page 83
the TV display to disappear if it is the only display device. Using Games and Applications Some older games and applications may program your Radeon® X1650 GTO directly to run under a specific display mode. This may cause your TV display to turn off automatically or become scrambled (your PC monitor - ATI X1650 | User Guide - Page 84
78 - ATI X1650 | User Guide - Page 85
79 Index Numerics 1080i 37 3D 39, 40, 41, 42, 43, 50, 55, 59 3D Preview 41, 43, 45, 47, 49 3D Settings 39 720p 37 720p mode 37 A Access system information 21 Activate & Close 16 Activate a profile 16 Activate an application, file, or shortcut when a profile is started 16 Adaptive Anti-Aliasing 50 - ATI X1650 | User Guide - Page 86
80 C Catalyst ® A.I. 50 Catalyst ™ A.I. 51 Catalyst A.I. 39, 46, 47 Catalyst A.I. settings 47 Catalyst Control Center 9, 11, 12 Cathode Ray Tube (CRT) 24, 25, 33, 37 Change Catalyst Control Center language 18 Clone Mode 23, 24, 25, 64, 69 Color 35, 36, 55, 56, 57, 58, 59, 60, 63, 68 Color - Full- - ATI X1650 | User Guide - Page 87
81 Disable Catalyst ® A.I. 47 Disable Catalyst A.I. 47 Display Color page 56 Display Data Channel (DDC) 31 Display Detection Options 27 Display Options 27 Display the online help 19 Display the version of the installed Catalyst Control Center 20 Displays Manager 22, 23 Displays Manager Advanced View - ATI X1650 | User Guide - Page 88
Support 37 Help 9, 12, 19 Hide Splash Screen 18 Hide Toolbar Text 18 High Definition Television (HDTV) 24, 25, 31, 33, 37, 38 Hotkeys 12 Hotkeys Manager 13, 14 Hue 35, 61, 63, 64, 69 I Image Scaling 34 Information Center 20 Interlaced 66 L Let the application control the video 15 R Race Driver 46 - ATI X1650 | User Guide - Page 89
Reactivate ATI color modes 30 Restore factory defaults 19 Rotate the desktop 26 rotation 26 S safety instructions iii Same on all displays 69 Saturation 35, 63, 68 Save your Profile manually 45 Set the Anisotropic Filtering to automated preference 45, 51 Set the Anti-Aliasing preference manually - ATI X1650 | User Guide - Page 90
, 65, 66, 67, 68, 69, 70, 71 Video Adjustments 71 video aspect ratio 65, 70 Video Preset 62 Video Wizard 62 Views 12 VPU Recover 71, 72 W Wait for display refresh 50 Wait for vertical refresh setting 52 Windows System Information 21 Windows System Tray 18 Windows XP 3 Wizard 20, 61, 62 Z Z-buffer 54
-
 1
1 -
 2
2 -
 3
3 -
 4
4 -
 5
5 -
 6
6 -
 7
7 -
8
-
9
-
10
-
11
-
12
-
13
-
14
-
15
-
16
-
17
-
18
-
19
-
20
-
21
-
22
-
23
-
24
-
25
-
26
-
27
-
28
-
29
-
30
-
31
-
32
-
33
-
34
-
35
-
36
-
37
-
38
-
39
-
40
-
41
-
42
-
43
-
44
-
45
-
46
-
47
-
48
-
49
-
50
-
51
-
52
-
53
-
54
-
55
-
56
-
57
-
58
-
59
-
60
-
61
-
62
-
63
-
64
-
65
-
66
-
67
-
68
-
69
-
70
-
71
-
72
-
73
-
74
-
75
-
76
-
77
-
78
-
79
-
80
-
81
-
82
-
83
-
84
-
85
-
86
-
87
-
88
-
89
-
90
 |
 |

Radeon
®
X1650
GTO
User’s Guide
P/N 137-41163-10