Acer Aspire 4520 Service Guide - Page 73
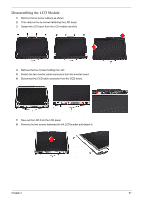
Disassembling the LCD Module, Take out the LCD from the LCD panel.
 |
View all Acer Aspire 4520 manuals
Add to My Manuals
Save this manual to your list of manuals |
Page 73 highlights
Disassembling the LCD Module 1. Remove the six screw rubbers as shown. 2. Then remove the six screws fastening the LCD bezel. 3. Detach the LCD bezel from the LCD module carefully. 4. Remove the four screws holding the LCD. 5. Detach the two inverter cable connectors from the inverter board. 6. Disconnect the CCD cable connector from the CCD board. 7. Take out the LCD from the LCD panel. 8. Remove the two screws fastening the left LCD bracket and detach it. Chapter 3 67
-
 1
1 -
2
-
3
-
4
-
5
-
6
-
7
-
8
-
9
-
10
-
11
-
12
-
13
-
14
-
15
-
16
-
17
-
18
-
19
-
20
-
21
-
22
-
23
-
24
-
25
-
26
-
27
-
28
-
29
-
30
-
31
-
32
-
33
-
34
-
35
-
36
-
37
-
38
-
39
-
40
-
41
-
42
-
43
-
44
-
45
-
46
-
47
-
48
-
49
-
50
-
51
-
52
-
53
-
54
-
55
-
56
-
57
-
58
-
59
-
60
-
61
-
62
-
63
-
64
-
65
-
66
-
67
-
 68
68 -
 69
69 -
 70
70 -
 71
71 -
 72
72 -
 73
73 -
 74
74 -
 75
75 -
 76
76 -
 77
77 -
 78
78 -
79
-
80
-
81
-
82
-
83
-
84
-
85
-
86
-
87
-
88
-
89
-
90
-
91
-
92
-
93
-
94
-
95
-
96
-
97
-
98
-
99
-
100
-
101
-
102
-
103
-
104
-
105
-
106
 |
 |
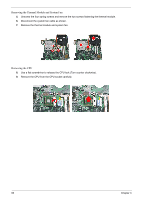
Chapter 3
67
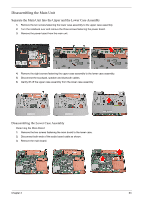
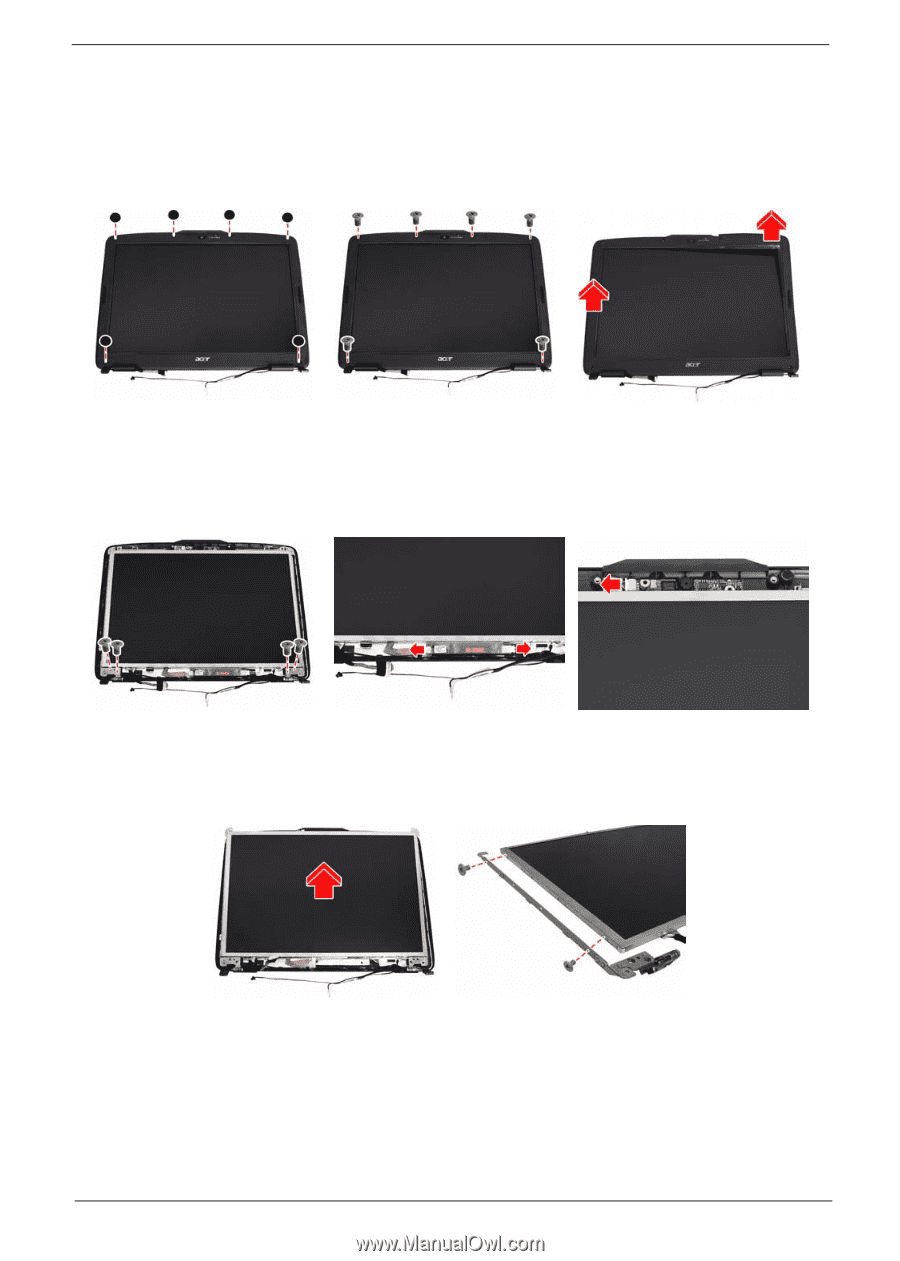
Disassembling the LCD Module
1.
Remove the six screw rubbers as shown.
2.
Then remove the six screws fastening the LCD bezel.
3.
Detach the LCD bezel from the LCD module carefully.
4.
Remove the four screws holding the LCD.
5.
Detach the two inverter cable connectors from the inverter board.
6.
Disconnect the CCD cable connector from the CCD board.
7.
Take out the LCD from the LCD panel.
8.
Remove the two screws fastening the left LCD bracket and detach it.