Acer Aspire V5-472PG User Manual (Windows 8.1) - Page 31
F12 Boot Menu, Enabled, Changes and Exit, Exit Saving Changes, Enter, USB Device, Troubleshoot
 |
View all Acer Aspire V5-472PG manuals
Add to My Manuals
Save this manual to your list of manuals |
Page 31 highlights
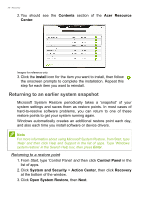
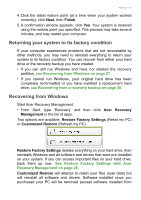
Recovery - 31 b. Use the left or right arrow keys to select the Main menu. c. Press the down key until F12 Boot Menu is selected, press to change this setting to Enabled. d. Use the left or right arrow keys to select the Exit menu. e. Depending on the type of BIOS your computer uses, select Save Changes and Exit or Exit Saving Changes and press Enter. Select OK or Yes to confirm. f. Your computer will restart. 5. During startup, press to open the boot menu. The boot menu allows you to select which device to start from, select the USB drive. a. Use your arrow keys to select USB Device, then press Enter. b. Windows starts from the recovery backup instead of the normal startup process. 6. Select your keyboard type. 7. Select Troubleshoot and then choose the type of recovery to use: a. Click Advanced then System Restore to start Microsoft System Restore: Microsoft System Restore periodically takes a 'snapshot' of your system settings and saves them as restore points. In most cases of hard-to-resolve software problems, you can return to one of these restore points to get your system running again. b. Click Reset your PC to start the reset process: Reset your PC deletes everything on your hard drive, then reinstalls Windows and all software and drivers that were preinstalled on your system. If you can access important files on your hard drive, back them up now. See Reset your PC from the recovery backup on page 32. c. Click Refresh your PC to start the refresh process: Refresh your PC will attempt to retain your files (user data) but will reinstall all software and drivers. Software installed since you purchased your PC will be removed (except software installed from the Windows Store). See Refresh your PC from the recovery backup on page 33.
-
 1
1 -
2
-
3
-
4
-
5
-
6
-
7
-
8
-
9
-
10
-
11
-
12
-
13
-
14
-
15
-
16
-
17
-
18
-
19
-
20
-
21
-
22
-
23
-
24
-
25
-
 26
26 -
 27
27 -
 28
28 -
 29
29 -
 30
30 -
 31
31 -
 32
32 -
 33
33 -
 34
34 -
 35
35 -
 36
36 -
37
-
38
-
39
-
40
-
41
-
42
-
43
-
44
-
45
-
46
-
47
-
48
-
49
-
50
-
51
-
52
-
53
-
54
-
55
-
56
-
57
-
58
-
59
-
60
-
61
-
62
-
63
-
64
-
65
-
66
-
67
-
68
-
69
-
70
-
71
-
72
-
73
-
74
-
75
-
76
-
77
-
78
-
79
-
80
-
81
-
82
-
83
-
84
-
85
-
86
-
87
-
88
-
89
-
90
-
91
-
92
-
93
-
94
 |
 |
