Acer G257HU User Manual
Acer G257HU Manual
 |
View all Acer G257HU manuals
Add to My Manuals
Save this manual to your list of manuals |
Acer G257HU manual content summary:
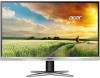
- Acer G257HU | User Manual - Page 1
Acer LCD Monitor User Guide - Acer G257HU | User Manual - Page 2
. Acer Incorporated. All Rights Reserved. Acer LCD Monitor User Guide Original Issue: 12/2014 Changes may be made periodically to the information in this publication without obligation to notify any person of such revisions or changes. Such changes will be incorporated in new editions of this manual - Acer G257HU | User Manual - Page 3
. Follow all warnings and instructions marked on the product. Special notes on LCD monitors The following are normal with the LCD monitor and do not indicate a problem. • Due to the nature of the fluorescent light, the screen may flicker during initial use. Turn off the power switch and then turn it - Acer G257HU | User Manual - Page 4
power from the equipment, be sure to unplug the power cord from the electrical outlet. Safe listening To protect your hearing, follow these instructions on an unstable cart, stand or table. If the monitor, do not be used for other purposes. • Your device uses one of the following power supplies - Acer G257HU | User Manual - Page 5
power supply cord set. If you need to replace the power cord set, make sure that the new power cord meets the following requirements: detachable type, UL listed/CSA certified, type SPT-2, rated 7 A 125 V minimum, VDE approved or its equivalent, 4.6 meters (15 feet) maximum length. Product servicing - Acer G257HU | User Manual - Page 6
death. Switch off the device near gas pumps at service stations. Observe restrictions on the use of radio equipment in acer-group.com/public/Sustainability/sustainability01.htm Visit www.acer-group.com for further information on the features and benefits of our other products. Disposal instructions - Acer G257HU | User Manual - Page 7
malfunction. This product has been shipped enabled for power management: • Activate display's Sleep mode within 15 by adjusting the viewing angle of the monitor, using a footrest, or raising your avoid slouching forward and/or leaning backward • stand up and walk around regularly to remove the - Acer G257HU | User Manual - Page 8
sections provide suggestions on how to reduce eyestrain. Eyes • Rest your eyes frequently. • Give your eyes regular breaks by looking away from the monitor and focusing on a istant point. • Blink frequently to keep your eyes from drying out. Display • Keep your display clean. • Keep your head at - Acer G257HU | User Manual - Page 9
, 40, 20020 Lainate (MI) Italy Tel: +39-02-939-921 ,Fax: +39-02 9399-2913 www.acer.it Declare under our own responsibility that the product: Product: LCD Monitor Trade Name: Acer Model Number: G257HU SKU Number: (G"2x"57=H0U~9x,xax~xxzx,; A ~ Z, or blank) To which this declaration refers - Acer G257HU | User Manual - Page 10
S. A. Tel : 254-298-4000 Fax : 254-298-4147 www.acer.com Federal Communications Commission Declaration of Conformity This device complies with Part 15 of Person: Phone No.: Fax No.: LCD Monitor G257HU G257HU xxxxxx ("x" = 0~9, a ~ z, or A ~ Z) Acer America Corporation 333 West San Carlos St. - Acer G257HU | User Manual - Page 11
instructions iii Special notes on LCD monitors iii Cleaning your monitor iii Accessibility iv Safe listening iv Warnings iv Using electrical power iv Product servicing controls 8 Panel controls 8 Using the Shortcut Menu 9 Acer eColor Management 10 Operation instructions 10 - Acer G257HU | User Manual - Page 12
Information Menu 14 Troubleshooting 15 DVI/HDMI/DP Mode (Optional) 15 English - Acer G257HU | User Manual - Page 13
following items are present when you unpack the box, and save the packing materials in case you need to ship or transport the monitor in the future. LCD monitor Quick start guide Audio cable (Optional) DP Cable (Optional) HDMI cable (Optional) AC Power cord DVI cable (Optional) AC Adapter 1 - Acer G257HU | User Manual - Page 14
-down on a stable surface -- use a cloth to avoid scratching the screen. 1 Attach the monitor stand arm to the base. 2 Ensure that the base is locked onto the monitor stand arm. • Secure the base to the monitor stand arm by turning the white screw using the integrated tab or a suitable coin. (for - Acer G257HU | User Manual - Page 15
to 15 degrees up or 5 degrees down. English Connecting the adapter and AC Power cord • Check first to make sure that the power cord you use is the correct type required for your area. • The monitor has a universal power supply that allows operation in either 100/120 V AC or 220/240 V AC voltage - Acer G257HU | User Manual - Page 16
monitor automatically informs the host system about its capabilities; for example, supported resolutions and corresponding timing. The monitor supports 16 17 18 19 20 21 22 23 24 Description TMDS data 3+ +5 V power DVI detect Hot-plug detection TMDS data 0TMDS data 0+ TMDS data 0/5 shield TMDS data - Acer G257HU | User Manual - Page 17
2 4 6 8 10 12 14 16 18 Description TMDS Data2 Shield TMDS Data1+ TMDS Data1TMDS Data0 Shield TMDS Clock+ TMDS ClockReserved (N.C. on device) SDA +5V Power 20-pin color display signal cable PIN No. 1 3 5 7 9 11 13 15 17 19 Description ML_Lane 0+ ML_Lane 0GND ML_Lane 2+ ML_Lane 2GND CONFIG1 AUX CH - Acer G257HU | User Manual - Page 18
.029 78.750 MAC 1152x870@75Hz 1456x915 68.681 75.062 100.000 VESA 1152x864@75Hz 1600x900 1280x960@60Hz 1800x1000 67.500 60.000 75.000 60. 1688x1066 63.981 79.976 60.020 75.025 108.000 135.000 VESA WXGA WXGA+ 1280x720@60Hz 1280x800@60Hz 1440x900@60Hz 1650x750 1680x831 1904x934 45.000 - Acer G257HU | User Manual - Page 19
Model) a. Make sure both the monitor and computer are powered-OFF. b. Connect the DP monitor and computer Turn on the monitor first, then the computer. This sequence is very important. 4 If the monitor does not function properly, please refer to the troubleshooting section to diagnose the problem - Acer G257HU | User Manual - Page 20
Panel controls No. Item 1 Power button/ indicator 2 < / > button 3 Menu/Enter button 4 Auto/Exit button Description Turn the monitor on/off. Blue indicates power on. Blinking blue indicates standby/ power the Auto Adjustment function and the monitor will automatically optimize the display position, - Acer G257HU | User Manual - Page 21
AUTO Item Empowering Auto Menu Description Press the Empowering Key to open the Acer eColor Management and access the scenario modes. Press the Auto button to activate the Auto Adjustment function and the monitor will automatically optimize the display position, focus, and clock of your display - Acer G257HU | User Manual - Page 22
eColor Management Operation instructions 1 Press the Empowering Key to open the Acer eColor Management OSD menu and access the scenario modes suit any situation. ECO mode Adjusts the settings to reduce power consumption. Standard mode Default settings. Reflects native display capability. - Acer G257HU | User Manual - Page 23
for general reference only. Actual product specifications may vary. Your LCD monitor is equipped with an on-screen display (OSD) menu for making The Picture menu is used for adjusting the picture quality. Picture Acer eColor Management Blue Light Off Brightness Contrast Colour Temp 6-axis - Acer G257HU | User Manual - Page 24
English OSD Menu The OSD menu is used for adjusting the OSD menu location and the timeout setting. OSD OSD Timeout 10 1 Press the Menu button to bring up the OSD menu. 2 Press the < / > button to select OSD and press the Menu button to enter the OSD menu. 3 To adjust the OSD H.Position / V. - Acer G257HU | User Manual - Page 25
English Setting Menu The Setting menu is used for adjusting the general settings for current input signal such as aspect ratio, OSD language, and etc. Setting Wide Mode DDC/CI OD ACM Input Language Reset Full ON Normal OFF HDMI English 1 Press the Menu button to bring up the OSD menu. 2 Press - Acer G257HU | User Manual - Page 26
The Information menu displays the basic information of the LCD monitor. Information 2560x1440 H:68KHz V:60Hz HDMI Input S/N: ETRLA00803104000502400 1 Press the Menu button to bring up the OSD menu. 2 To view the basic information of the LCD monitor, press the < / > button to select Information. 14 - Acer G257HU | User Manual - Page 27
Before sending your LCD monitor for servicing, please check the troubleshooting list below to see if you can self-diagnose the problem. DVI/HDMI/DP Mode (Optional) Problem No picture visible LED status Blue Off Remedy Using the OSD menu, adjust brightness and contrast to maximum or
-
 1
1 -
 2
2 -
 3
3 -
 4
4 -
 5
5 -
 6
6 -
 7
7 -
8
-
9
-
10
-
11
-
12
-
13
-
14
-
15
-
16
-
17
-
18
-
19
-
20
-
21
-
22
-
23
-
24
-
25
-
26
-
27
 |
 |

Acer LCD Monitor
User Guide