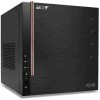
Acer RC111 User Manual
Acer RC111 Manual
 |
View all Acer RC111 manuals
Add to My Manuals
Save this manual to your list of manuals |
Acer RC111 manual content summary:
- Acer RC111 | User Manual - Page 1
RevoCenter Series User Guide Windows Home Server 2011 - Acer RC111 | User Manual - Page 2
All Rights Reserved. RevoCenter Series User Guide Changes may be made periodically to the information in this publication without obligation to notify any person of such revision or changes. Such changes will be incorporated in new editions of this manual or supplementary documents and publications - Acer RC111 | User Manual - Page 3
to disconnect the power, be sure to unplug the power cord from the electrical outlet. CAUTION for Listening To protect your hearing, follow these instructions. • Increase the volume gradually until you can hear clearly and comfortably. • Do not increase the volume level after your ears have adjusted - Acer RC111 | User Manual - Page 4
4 Warnings • Do not use this product near water. • Do not place this product on an unstable cart, stand or table. If the product falls, it could be seriously damaged. • Slots and openings are provided for ventilation to ensure reliable operation of the product and to protect it from overheating. - Acer RC111 | User Manual - Page 5
the requirements for that country/region. For more information on power cord requirements, contact an authorized reseller or service provider. Product servicing Do not attempt to service this product yourself, as opening or removing covers may expose you to dangerous voltage points or other risks - Acer RC111 | User Manual - Page 6
6 need for service • the product does not operate normally after following the operating instructions Note: Adjust only those controls that are covered by the operating instructions, since improper adjustment of other controls may result in damage and will often require extensive work by a qualified - Acer RC111 | User Manual - Page 7
installation. This device generates, uses, and can radiate radio frequency energy and, if not installed and used in accordance with the instructions, may cause harmful interference to radio communications. However, there is no guarantee that interference will not occur in a particular installation - Acer RC111 | User Manual - Page 8
8 Notice Canadian users This Class B digital apparatus complies with Canadian ICES-003. Remarque à l'intention des utilisateurs canadiens Cet appareil numérique de la classe B est conforme a la norme NMB003 du Canada. Compliant with Russian regulatory certification - Acer RC111 | User Manual - Page 9
9 Acer Incorporated 333 West San Carlos St. San Jose, CA 95110, U.S.A. Tel: 254-298-4000 Fax: 254-298-4147 www.acer.com Federal Communications Commission Declaration of Conformity This device complies with Part 15 of the FCC Rules. Operation is subject to the following two conditions: (1) This - Acer RC111 | User Manual - Page 10
10 Acer Incorporated 8F, 88, Sec.1, Hsin Tai Wu Rd., Hsichih Taipei Hsien 221, Taiwan Declaration of Conformity We, Acer Computer (Shanghai) Limited 8F, 88, Sec.1, Hsin Tai Wu Rd., Hsichih, Taipei Hsien 221, Taiwan Contact Person: Mr. Easy Lai Tel: 886-2-8691-3089 Fax: 886-2-8691-3120 E-mail: - Acer RC111 | User Manual - Page 11
11 Low Voltage Directive 2006/95/EC as attested by conformity with the following harmonized standard: • EN60950-1: 2001 + A11: 2004 • EN60065: 2002 + A1: 2006 (Applicable to product built with TV tuner module) Council Decision 98/482/EC (CTR21) for pan- European single terminal connection to the - Acer RC111 | User Manual - Page 12
Contents 1 Introduction 14 Features 14 Specifications 16 Overview 17 Front view 17 Rear view 19 System LED indicators 20 2 Setting up the system 24 Check package contents 25 Select a location 26 System requirements 27 Connect the power cord 29 Connect to the home network 30 - Acer RC111 | User Manual - Page 13
the hard disk drive Adding a hard disk drive Removing a hard disk drive Replacing a failed hard disk drive 6 Troubleshooting First steps checklist Recovering or restoring the home server Specific problems and corrective actions Windows Home Server 2011 Online Help 13 74 75 76 79 81 82 83 83 84 85 - Acer RC111 | User Manual - Page 14
. • Easily add storage space to the home server. See "Adding a hard disk drive" on page 85 for more information. • Windows Media Player and iTunes streaming support. See "Stream - Acer RC111 | User Manual - Page 15
15 Media files" on page 76 for more information. • Remotely wakeup the home server. See "When the back up process is completed, the USB backup indicator turns solid white." on page 81. - Acer RC111 | User Manual - Page 16
I/O ports Power Server operating system (OS) support Home computer OS support Intel® Atom™ Processor ICH9R Up to four • Windows 7 Starter (x86) The Windows Vista Operating System • Windows Vista Home Basic with Service Pack 2 (SP2) (x86 and x64) • Windows Vista Home Premium with SP2 (x86 and - Acer RC111 | User Manual - Page 17
17 Digital media player support Digital media file support Physical dimensions Any DLNA certified device • MPEG-2, MPEG-1, WMV/VC-1, AVI, DVR-MS, H.264/ MPEG-4 AVC, WMA, MPEG-1 Layer 3, WAV, LPCM, AAC, JPEG, PNG, RAW • . - Acer RC111 | User Manual - Page 18
No. Icon 3 4 5 6 7 8 18 Component Hard disk drive (HDD) status indicator Network indicator USB backup button/USB backup indicator USB 2.0 port Front door Open the door to access the hot-swappable HDDs HDD access indicators - Acer RC111 | User Manual - Page 19
19 Rear view No. Icon 1 2 3 4 5 6 Component Recovery/reset button eSATA port USB port Gigabit Ethernet port Power connector System fan Note: If you plug a USB storage device into a USB port and the system doesn't detect it, please unplug the device and plug it into another USB port to see if it - Acer RC111 | User Manual - Page 20
20 System LED indicators Front panel LED indicators The LED indicators mounted on the front panel provide information about the status of the system, its hard drives, and network connection. No. Indicator 1 Power button Color State Description White On System is connected to the power supply - Acer RC111 | User Manual - Page 21
new HDD is mounted before disk format is performed Random blink • HDD is mounted into the drive bay and is in the process of being manually added into the server storage • HDD is in the process of being removed from the server storage. • HDD Failure White On HDD is mounted into - Acer RC111 | User Manual - Page 22
On • USB storage device is connected to the USB port • Backup completed Random blink System is backing up files from a USB storage device For detailed instructions on how to back up files from a USB storage device, see "Using the one-touch USB backup feature" on page 79. Off USB storage device - Acer RC111 | User Manual - Page 23
23 Gigabit Ethernet port LED indicators No. Indicator 1 Speed indicator 2 Link/ activity indicator Color None Green Amber Green State Description Off 10 Mbps connection On 100 Mbps connection On 1000 Mbps connection On Network link is detected Random Transmit or receive activity - Acer RC111 | User Manual - Page 24
24 2 Setting up the system Follow these steps to set up the RevoCenter Series to run in your home network. • Check package contents • Select a location for the home server • Ensure your computer meets the minimum specifications required • Connect the power cord • Connect to the home network • Power - Acer RC111 | User Manual - Page 25
failure or restore the home server to its factory default. Refer to "Recovering or restoring the home server" on page 94 for detailed instructions. • Quick Start Guide • Warranty card If any of the above items are damaged or missing, contact your reseller or retailer from which you purchased this - Acer RC111 | User Manual - Page 26
26 Select a location Before unpacking and installing the system, select a suitable site for the system for maximum efficiency. Consider the following factors when choosing a site for the system: • Near a grounded power outlet • Clean and dust free • Stable surface free from vibration • Well- - Acer RC111 | User Manual - Page 27
Ultimate (x86 and x64) • Windows 7 Enterprise (x86 and x64) • Windows 7 Starter (x86) • The Windows Vista Operating System • Windows Vista Home Basic with Service Pack 2 (SP2) (x86 and x64) • Windows Vista Home Premium with SP2 (x86 and x64) • Windows Vista Business with SP2 (x86 and x64) • Windows - Acer RC111 | User Manual - Page 28
28 • Internet connection • 100 Mbps to 1000 Mbps Gigabit Ethernet connection • Broadband connection (DSL or cable) • Broadband router (DHCP enabled and meets UPnP standards.) • Digital media player for streaming media files • iTunes 7.1 or later • Windows Media Player 10 or later - Acer RC111 | User Manual - Page 29
29 Connect the power cord Plug the power cord into the power connector and the other end into an electrical outlet. - Acer RC111 | User Manual - Page 30
Series to your broadband router with a network cable. Wireless connection to your broadband router is not supported. However, home computers that are connected through a wireless connection are supported. Connect one end of the network cable into the network port and the other end to a Gigabit - Acer RC111 | User Manual - Page 31
31 Power on the system After making sure that you have set up the system properly and connected all the required cables, you can now power on the system. Press the power button to turn system on. The LED indicators on the front panel will flash, change colors and turn to solid white after startup. - Acer RC111 | User Manual - Page 32
32 Install the Windows Home Server Connector on the first computer After setting up your RevoCenter Series, you must install the Windows Home Server Connector on your computer. Note: Prior to installing the Windows Home Server Connector, make sure you have administrator privileges. Refer to the - Acer RC111 | User Manual - Page 33
33 2 Click the Download and run the setup wizard icon. 3 Click the Download Software for windows icon to help you connect this computer to the server. - Acer RC111 | User Manual - Page 34
34 After the components are installed, the Windows Home Server Connector installation starts to find and connect to your RevoCenter Series. After the installation process is done, there will be a pop up window to ask for password to enter dashboard. - Acer RC111 | User Manual - Page 35
install it. This process may take some time. Note: Please ensure your PC's wireless and wired connections are on the same subnet to avoid causing problems when setting up Windows Home Server. - Acer RC111 | User Manual - Page 36
36 Install the Windows Home Server Connector on the client computers You can follow similar steps to install connector software on other computers. 1 Please go to Explorer and find your home server (with the computer name you have assigned) in other devices, then doubleclick the device icon to get - Acer RC111 | User Manual - Page 37
name of the home server. 3 Under Windows Home Server Connector Setup, click Download software for windows. 4 Follow all onscreen installation instructions until you finish installation. Note: If Microsoft .Net 4.0 isn't installed on your PC, the Windows Home Server Connector installer will download - Acer RC111 | User Manual - Page 38
38 Note: Please ensure your PC's wireless and wired connections are on the same subnet to avoid causing problems when setting up Windows Home Server. Connect to the Home Server Dashboard In order to remotely administer the home server, you need to log onto - Acer RC111 | User Manual - Page 39
39 To log onto the home server using Windows Home Server icon: 1 On your computer, click Start > Programs > Windows Home Server 2011 Launch Pad then use your predefined User name and password to log in. 2 There will be four short cuts in the launch pad as below. - Acer RC111 | User Manual - Page 40
40 3 Click the Dashboard icon and enter your administrator password to log in the dashboard main page. - Acer RC111 | User Manual - Page 41
41 3 Windows Home Server Dashboard The Windows Home Server Dashboard is a tool that provides remote management of the home server and allows you to monitor and back up computers on the home network. It allows you to remotely administer your home server from anywhere on the home network. Once logged - Acer RC111 | User Manual - Page 42
42 on each of your home computers, they are automatically backed up on each night to your home server. The options on the Computers & Backup tab allow you to: • View the computer properties • Start a backup for the computer • Restore files or folders for the computer • Customize Backup for the - Acer RC111 | User Manual - Page 43
43 Users You can use the Users tab on the Windows Home Server Dashboard to create a personal user account, enable a guest account, and maintain user accounts on the home server. The options on the User Accounts tab allow you to: • Add - Create a new user account on the home server and set access - Acer RC111 | User Manual - Page 44
44 Server Folders and Hard Drives You can use the Server Folders and Hard Drives tab on the Windows Home Server Dashboard to add, open, remove, and view shared folders on the home server. With Shared Folders you can centrally store files on your home server so that you can share with other people on - Acer RC111 | User Manual - Page 45
45 Previous versions are enabled by default but can be disabled/enabled manually through the Server Folders and Hard Drives tab. Opening a hard drive's properties will display "Shadow Copy" options. Shadow Copies is the technology that enables the - Acer RC111 | User Manual - Page 46
46 The options on the Share folders and Hard Drives tab allow you to: • ADD - Create a new shared folder on the home server. • VIEW/CHANGE - View and change shared folder properties. • OPEN - Browse files and folders in the shared folder. • REMOVE - Delete an existing folder from the home server. - Acer RC111 | User Manual - Page 47
aid of a calendar event. The status sub-tab contains six panels, which show all settings and events. Status panel Shows status information like service state, update information etc. License panel Shows the current state of a trial license and is used to buy and install a license. Monitored sources - Acer RC111 | User Manual - Page 48
provides an all around monitoring mechanism to help you keep an eye on the home server's health and performance details. System Information supports the following features: • Acer RevoCenter Home Server - Displays basic information about the home server, such as the specification of the processor - Acer RC111 | User Manual - Page 49
49 To adjust the LED brightness of the home server: On the LED Brightness field, drag the slider in a horizontal manner to a desired position. Note: When you restart the Home Server, the LED brightness will revert back to its default settings. Note: The Wi-Fi settings can only be enabled when a - Acer RC111 | User Manual - Page 50
50 Hardware Health and Performance Monitor Use the Hardware Health and Performance Monitor settings page to set a refresh interval for monitoring data, configure performance threshold settings. In the Hardware Health and Performance Monitor page, you can configure the following settings: • Auto - Acer RC111 | User Manual - Page 51
icon, click Help. Green - your home network is healthy Yellow - your home network is at risk Red - your home server has found a critical problem Blue - tray information such as backup White - tray disconnected (Those icons will be provided separately.) Settings The Settings button on the upper right - Acer RC111 | User Manual - Page 52
52 server settings. The Settings window provides a variety of administrative options. In the Settings window you can configure the settings for the following categories: • General • Media • Home Group • Remote Web Access - Acer RC111 | User Manual - Page 53
53 General The General settings page allows you to modify the date and time, language selection, Windows Update settings, Customer Experience Improvement program, and enable or disable Windows error reporting. - Acer RC111 | User Manual - Page 54
54 Media The Media settings page allows you to enable or disable Windows Home Server media sharing capabilities. And also the to set up video streaming quality. - Acer RC111 | User Manual - Page 55
the Windows Home Server 2011 Dashboard to manage your HomeGroup. If you use the HomeGroup tools that are available in Control Panel, you can experience problems when sharing files and folders. - Acer RC111 | User Manual - Page 56
Click Settings. 4 In the navigation pane, select Remote Web Access. 5 Under Router, click Setup to configure your broadband router. Make sure your router supports UPnP standards and the UPnP setting must be enabled on your router for Windows Home Server to automatically configure it. In this step - Acer RC111 | User Manual - Page 57
57 • Port 80 - Connects over your home network to the RevoCenter Series home page using the HTTP protocol. • Port 443 - Connects over your home network to the RevoCenter Series logon page using HTTPS, an encrypted Secure Sockets Layer protocol. • Port 4125 - Connects to your home computers via the - Acer RC111 | User Manual - Page 58
58 8 After you configure remote access, test the remote connectivity from outside of your home. Refer to "Access the RevoCenter Series home page" on page 71. - Acer RC111 | User Manual - Page 59
for home computers • Back up the home server • Access the RevoCenter Series home page • Access the shared folders on the home server • Enable iTunes service • Stream Media files • Using the one-touch USB backup feature To learn more about using the Windows Home Server Console to configure the home - Acer RC111 | User Manual - Page 60
60 Create user accounts After you complete Windows Home Server Setup and install the Windows Home Server Connector software on all of your home computers, you are ready to set up your user accounts for the people in your household. There are two types of user accounts that you can set up for the - Acer RC111 | User Manual - Page 61
61 4 Click the Users tab. 5 Select Guest, then click View the account properties, be sure the user account check box is selected. Caution: If you have a wireless network, secure it before you enable the guest account with no password. For more information, see the documentation for your wireless - Acer RC111 | User Manual - Page 62
62 To add a personal user account: 1 Double-click the Windows Home Server icon tray. in the system 2 Log on to the Windows Home Server Launch pad. 3 Click the Dashboard icon. 4 Click Users tab, then click Add a user account. 5 On the User Accounts Setup window, click Change the password - Acer RC111 | User Manual - Page 63
63 7 Select the shared folder access for this user account then click Next. 8 Select Remote Web Access for this user account. 9 Select the Do not allow Remote Web Access check box if you don't want to allow the user to remotely access the home server. 10 Click Create account. Note: 1. You can only - Acer RC111 | User Manual - Page 64
64 Add a shared folder Shared folders are places for you to organize and store files on the home server so that you can share them with other people on your home network. 1 Double-click the Windows Home Server icon tray. in the system 2 Log on to the Windows Home Server Dashboard. 3 Click the - Acer RC111 | User Manual - Page 65
65 Configure backup for home computers You can customize the backup of each of your home computers from the Windows Home Server Dashboard. Note: After you install the Windows Home Server Connector to the home computer all hard drive volumes on the home computer are automatically backed up each - Acer RC111 | User Manual - Page 66
66 5 The back up status will be displayed in the Back up status column. - Acer RC111 | User Manual - Page 67
67 Back up the home server You can back up your home server to ensure that you have backup copies of important files that are located in your Windows Home Server. To back up the home server: 6 Double-click the Windows Home Server icon tray. in the system 7 Log on to the Windows Home Server - Acer RC111 | User Manual - Page 68
68 9 Be sure that Show all disks that can be used as back up disks is selected, then select the drive you would like to use to back up your home server. 10 Click Next, and label the destination disks. - Acer RC111 | User Manual - Page 69
69 11 Click Next and specify the back up schedule. 12 Click Next. And select which items to back up. - Acer RC111 | User Manual - Page 70
70 13 Confirm the back up settings and click Apply settings. 14 When you've finished the Back up HDD configuration, you can the back up the drive info from the Dashboard. - Acer RC111 | User Manual - Page 71
sure the home server is configured for remote access. See "Access the RevoCenter Series home page" on page 71. Note: You may need to add services from your broadband provider to use the remote access features in Windows Home Server. 2 Double-click the Windows Home Server icon in the system tray. - Acer RC111 | User Manual - Page 72
72 3 Log on to the Windows Home Server Launch Pad then click the Remote Access Icon. 4 Log on with User name and password. The home page include three tabs: • Home - This page appears every time you log on to the Web page. • Computers - Allows you to perform remote administration on the home server - Acer RC111 | User Manual - Page 73
73 Note: Make sure that the home computer is configured to allow remote access. • Shared Folders - Allows you to access the shared folders you have access privileges over the Internet. • Media Library - Allows you to remote streaming media files that is stored on the default share folders (Pictures/ - Acer RC111 | User Manual - Page 74
74 Access the shared folders on the home server To access the shared folders using the Windows Home Server icon: 1 Right-click the Windows Home Server icon . in the system tray. 2 Click Shared Folders. 3 Double-click a shared folder in the window to open it. - Acer RC111 | User Manual - Page 75
or disable the iTunes server function, specify how often the music library is updated, set a password to secure the iTunes Server access. To enable iTunes service: 1 Double-click the Windows Home Server icon tray. in the system 2 Log on to the Windows Home Server Launch pad then log on to - Acer RC111 | User Manual - Page 76
76 Stream Media files You can use Windows Media Player 11 or iTunes to play music files stored on the home server to your computer. To stream audio in Windows Media Player 11: 1 Make sure that media sharing is enabled. 2 Make sure Digital Media Server is enabled. 3 Open the Windows Media Player. - Acer RC111 | User Manual - Page 77
77 4 Click the Library tab. The Acer RevoCenter Series appears in the navigation pane. 5 Browse or search for the item you want to play, then click the Play button. - Acer RC111 | User Manual - Page 78
78 To stream audio in iTunes: 1 Make sure that media sharing and the iTunes service are enabled. Refer to "Enable iTunes service" on page 75 for more information. 2 Open the iTunes. The Acer RevoCenter Series appears under Shared on the left of the iTunes window. Audio files - Acer RC111 | User Manual - Page 79
, Videos, Photos. When Windows Home Server cannot determine file type, the file is automatically stored into the Others folder. Important: Only the front USB port supports the backup feature. To use one-touch USB backup to back up data from a USB storage device: 1 Plug the USB device into the front - Acer RC111 | User Manual - Page 80
80 2 Press the USB backup button. The USB backup indicator blinks white. 3 All files on the USB storage device are copied into the Public shared folders. Note: During the copy process, Windows Home Server checks the file properties including time, size, and file name to verify whether a file of the - Acer RC111 | User Manual - Page 81
details. 1 Make sure the home server is configured for remote access. See "Remote Web Access" on page 56. Note: You may need to add services from your broadband provider to use the remote access features provided by Windows Home Server. 2 Install the application called My Home Server which can be - Acer RC111 | User Manual - Page 82
82 3 Open the My Home Server application on your Windows Phone 7 device. 4 Enter your Windows Home Server address and press submit. 5 Enter your user name and password for the server and press Sign In. Note: If you want to download or upload files to folders, you must log on with a personal user - Acer RC111 | User Manual - Page 83
83 Users The users panorama item is designed to perform basic user management tasks, including: • View user account details • Enable/disable a user account • Change a user account password Devices The devices panorama lets you: • View the computers on your home network and their MAC details. • View - Acer RC111 | User Manual - Page 84
84 Media The media panorama lets you discover and view streams of media elements stored on your server. - Acer RC111 | User Manual - Page 85
85 5 Configuring the hard disk drive The system supports up to four 3.5-inch hot-swappable SATA hard disk drives. Warning: The first hard drive, located on the bottom of the HDD bay, is not - Acer RC111 | User Manual - Page 86
86 (2) Remove the HDD carrier by pressing the HDD carrier latch (1). (3) Pull the lever (2) and slide the HDD carrier from the chassis (3). (4) Insert the new drive into the right side of the carrier aligning the pins into the HDD's mounting holes (1). (5) Slightly bend the left side rail and insert - Acer RC111 | User Manual - Page 87
87 (6) With the lever still extended, slide the carrier all the way into the drive bay (1). Do not push on the lever until it begins to close by itself. (7) Use the lever to push the carrier until it docks into place, then close the lever (2). (8) Close the door of the home server. 2 Add the Brand - Acer RC111 | User Manual - Page 88
88 (3) Click the Alert Viewer. (4) Select the new hard drive warning message then click Format the hard disk. (5) Select the hard disk to format then click Format disk. - Acer RC111 | User Manual - Page 89
89 Removing a hard disk drive Caution: If you are removing a hard drive which is defined as a server back up drive, be sure to remove it from Dashboard before removing it from the home server. 1 Safely remove a Server Back up drive from the Windows Home Server Console. (1) Double-click the - Acer RC111 | User Manual - Page 90
90 2 Remove the HDD from the home server. Note: Before removing the HDD, make sure the HDD indicator on the front panel lights purple. (1) Open the door of the home server. (2) Press the HDD carrier latch (1). (3) Pull the lever (2) and slide the HDD carrier from the chassis (3). - Acer RC111 | User Manual - Page 91
91 (4) Close the door of the home server. Replacing a failed hard disk drive 1 Follow steps 1 and 2 of the "Removing a hard disk drive" section. 2 Remove the HDD from the carrier. (1) Gently pry open the left side rail (1, 2), as shown. (2) Remove the drive from the carrier (3). 3 Install the new - Acer RC111 | User Manual - Page 92
92 (2) Slightly bend the left side rail and insert the pins into the HDD's mounting holes (2). 4 Install the new HDD to the home server. - Acer RC111 | User Manual - Page 93
93 6 Troubleshooting This chapter describes a list of possible situations that may arise during the use of your home server. If you are unable to resolve problems on your own, contact your dealer or local Acer representative for assistance. First steps checklist • Is the AC power available at the - Acer RC111 | User Manual - Page 94
94 Recovering or restoring the home server RevoCenter Series includes a Server Recovery DVD that allows you to recover your home server after a system failure (i.e., the operating system is corrupted, the main system hard drive failed). You can also use this disc to restore the home server to its - Acer RC111 | User Manual - Page 95
95 2 Click Next. 3 Read the End-User License Agreement. If you agree with the terms of the agreement, then select the I accept the terms of the user license agreement option button. 4 Please prepare a USB pen drive which is larger than 8 GB, connect to the client PC and then click Next to create the - Acer RC111 | User Manual - Page 96
96 5 Recover the home server. (1) Connect the USB pen drive with the server restore image inside and plug into USB port on server. (2) Press the power button to turn on the system, after you hear the beep sound, quickly insert a paperclip into the Recovery pin hole at the back of the system. The - Acer RC111 | User Manual - Page 97
97 - Acer RC111 | User Manual - Page 98
98 7 Select Restore your server from a back up: Use this option to recover from a system failure. You will lose your system settings and user accounts. Data recovery will be attempted. (Recommended). - Acer RC111 | User Manual - Page 99
99 8 Click Next and follow all onscreen instructions until you finish recovery process. - Acer RC111 | User Manual - Page 100
use of your server. Possible solutions are listed for each problem. Power indicator does not light. • Make sure the power sure the hard drive is compatible. If the drives are pre-installed, contact technical support. Home server cannot connect to a network and the network indicator on the front - Acer RC111 | User Manual - Page 101
101 (3) Select Reset the Windows Home Server Dashboard from the drop-down menu. (4) Click OK. Backup service is not running If you see the If backup service is not running, please restart the console. error message, try resetting the home server. 1 Launch Windows Home Server Dashboard. 2 Click - Acer RC111 | User Manual - Page 102
102 Can't connect to some computers on the RevoCenter Series Remote Access page Make sure the home computer is configured to allows remote desktop connection. To configure computers that are running Windows XP: 1 Log on to the computer with a user account that has administrator privileges. 2 Click - Acer RC111 | User Manual - Page 103
you don't remember the password, you must reset the home server. Refer to "Recovering or restoring the home server" on page 94 for more information. Troubleshooting Windows Home Server 2011 Online Help If you have any other questions related to Windows Home Server, please refer to this website: http
-
 1
1 -
 2
2 -
 3
3 -
 4
4 -
 5
5 -
 6
6 -
 7
7 -
8
-
9
-
10
-
11
-
12
-
13
-
14
-
15
-
16
-
17
-
18
-
19
-
20
-
21
-
22
-
23
-
24
-
25
-
26
-
27
-
28
-
29
-
30
-
31
-
32
-
33
-
34
-
35
-
36
-
37
-
38
-
39
-
40
-
41
-
42
-
43
-
44
-
45
-
46
-
47
-
48
-
49
-
50
-
51
-
52
-
53
-
54
-
55
-
56
-
57
-
58
-
59
-
60
-
61
-
62
-
63
-
64
-
65
-
66
-
67
-
68
-
69
-
70
-
71
-
72
-
73
-
74
-
75
-
76
-
77
-
78
-
79
-
80
-
81
-
82
-
83
-
84
-
85
-
86
-
87
-
88
-
89
-
90
-
91
-
92
-
93
-
94
-
95
-
96
-
97
-
98
-
99
-
100
-
101
-
102
-
103
 |
 |

RevoCenter Series
User Guide
Windows Home Server 2011