Acer TravelMate 250 TravelMate 240/250 Service Guide - Page 87
Installing the Upper Case Assemly, See Installing the Floppy Disk Drive Module
 |
View all Acer TravelMate 250 manuals
Add to My Manuals
Save this manual to your list of manuals |
Page 87 highlights
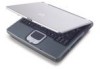
3. Connect the touch pad cable to the touchpad board with a plastic tweezers. Installing the Upper Case Assemly 1. See "Installing the Speaker Set" on page 86. 2. See "Installing the DC Board" on page 86. 3. See "Installing the PCMCIA Slot" on page 86. 4. See "Installing the Main Board" on page 86. 5. See "Installing the HDD Bracket" on page 87. 6. See "Installing the ODD Module" on page 87. 7. See "Installing the CPU Heatsink Plate" on page 88. 8. See "Installing the VGA Heatsink Plate" on page 88. 9. See "Installing the Floppy Disk Drive Module" on page 88. 10. See "Installing the Touchpad Cable" on page 89. 11. See "Installing the Touchpad Board" on page 89. 12. Attach the upper case assembly to the lower case assembly. 13. Fasten the 15 screws on the bottom. Then secure the 6 screws as the picture shows. Chapter 3 78