Adobe 27510753 Switch Guide - Page 33
Working with Graphics, files .AI, PDF, TIFF, GIF, JPEG, BMP, EPS, DCS, PICT, WMF, EMF, PCX
 |
UPC - 718659445294
View all Adobe 27510753 manuals
Add to My Manuals
Save this manual to your list of manuals |
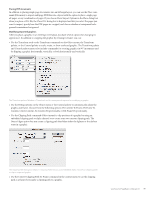
Page 33 highlights
Section 6: Working with Graphics Like PageMaker, you can easily import graphics, such as pictures and drawings, to enhance the look of an InDesign CS2 document. You can also use the program's drawing tools to create your own vector graphics. Adobe Bridge, a new standalone file browser that's included with InDesign CS2, makes it easy to locate, browse, compare, sort, and place the graphics you use in your InDesign layouts. (For more information about Bridge, see pages 41-42.) In this section, you'll learn about the graphic formats InDesign CS2 supports, how to import graphics, how to modify imported graphics, and how to create graphics within InDesign CS2. Placing graphics You import graphics into InDesign CS2 by using the Place command (File menu). If you place a graphic while the text insertion point is flashing or text is selected, the graphic appears as an anchored graphic rather than as a standalone graphic with its own frame. If you create an anchored graphic when using the Place command but you want to create a standalone graphic instead, choose Undo, and then click the loaded graphics cursor on an empty portion of the page to place the graphic. If you don't want to create an anchored graphic, choose the Selection tool before choosing Place. You can also copy and paste or drag and drop to import graphics into InDesign CS2. (For more information about creating frames when you import a graphic, see "Creating frames" on page 22.) InDesign imports the following graphic formats: native Photoshop files (.PSD), native Illustrator files (.AI), PDF, TIFF, GIF, JPEG, BMP, EPS, DCS, PICT, WMF, EMF, PCX, PNG, and Scitex CT. Placing and working with native Photoshop files You can place images created with Photoshop 4.0 and later directly into an InDesign document. If you place a Photoshop file that contains paths, masks, or alpha channels, InDesign can use them to remove backgrounds (that is, to create transparent backgrounds) or to wrap text around graphics. InDesign also lets you control the visibility of layer comps and layers when you place native Photoshop files, as well as the visibility of layers when you place PDF-compatible Illustrator files and layered PDF files. For native Photoshop files, you can use the file's original layer comp and layer visibility settings, or you can choose a different layer comp or show and hide individual layers from within InDesign. To adjust layer comp or layer visibility during import, select Show Import Options in the Place dialog box (File > Place). After you click Open, adjust the settings in the Layers panel of the Show Import Options dialog box. To adjust layer comp or layer visibility after you place a graphic, select the frame that contains the graphic, choose Object > Object Layer Options, and then adjust the settings in the Object Layer Options dialog box. If you intend to use native Photoshop files in your InDesign layouts, you should work closely with your production staff and printers to ensure that nobody flattens the Photoshop files, since this will prevent you from working with layers and layer comps in InDesign. Working with Illustrator graphics In addition to importing native Illustrator files using the Place command (File menu), you can also drag and drop or copy and paste Illustrator files into InDesign to work with them as editable objects. When you copy and paste or drag and drop objects from Illustrator, they're displayed in InDesign as a grouped collection of editable objects. If you want to work with the objects individually, select the group with the Selection tool, and then choose Object > Ungroup. If you copy and paste or drag and drop a text frame from Illustrator into InDesign, you can color, rotate, and scale the text in InDesign, but you can't edit the text. If you need to transfer editable text from Illustrator to InDesign, highlight the text in Illustrator, copy it, and then paste it into InDesign. Before you copy and paste or drag and drop Illustrator objects into InDesign, make sure that Copy As AICB (Adobe Illustrator Clipboard) is checked in the File Handling & Clipboard panel of the Illustrator Preferences dialog box. If Prefer PDF When Pasting is selected in the File Handling & Clipboard panel, individual objects will not be editable in InDesign. Switching from PageMaker to InDesign CS2 33
-
 1
1 -
2
-
3
-
4
-
5
-
6
-
7
-
8
-
9
-
10
-
11
-
12
-
13
-
14
-
15
-
16
-
17
-
18
-
19
-
20
-
21
-
22
-
23
-
24
-
25
-
26
-
27
-
 28
28 -
 29
29 -
 30
30 -
 31
31 -
 32
32 -
 33
33 -
 34
34 -
 35
35 -
 36
36 -
 37
37 -
 38
38 -
39
-
40
-
41
-
42
-
43
-
44
-
45
-
46
-
47
-
48
-
49
-
50
-
51
-
52
-
53
-
54
-
55
-
56
-
57
-
58
-
59
-
60
-
61
-
62
-
63
-
64
 |
 |
