Airlink AWLL5077 Quick Installation Guide - Page 5
Step 2.2, Step 2.3 - airlink101 windows 7
 |
UPC - 658729081642
View all Airlink AWLL5077 manuals
Add to My Manuals
Save this manual to your list of manuals |
Page 5 highlights
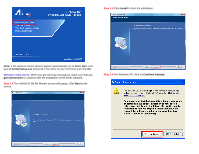
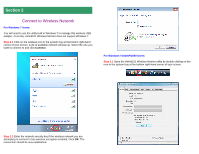
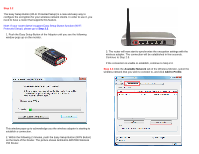
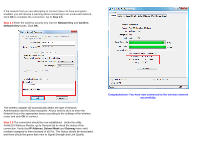
Step 2.2 The Easy Setup Button (Wi-Fi Protected Setup) is a new and easy way to configure the encryption for your wireless network clients. In order to use it, you need to have a router that supports this feature. Note: If your router doesn't support Easy Setup Button function (Wi-Fi Protected Setup), please go to Step 2.3. 1. Push the Easy Setup Button of the Adapter until you see the following window pops up on the monitor. 3. The router will now start to synchronize the encryption settings with the wireless adapter. The connection will be established in few seconds. Continue to Step 2.5. If the connection is unable to establish, continue to Step 2.3. Step 2.3 Click the Available Network tab of the Wireless Monitor, select the wireless network that you wish to connect to, and click Add to Profile. This window pops up to acknowledge you the wireless adapter is starting to establish a connection. 2. Within the following 2 minutes, push the Easy Setup Button (WPS Button) on the back of the Router. The picture shows Airlink101 AR570W Wireless 150 Router.
-
 1
1 -
 2
2 -
 3
3 -
 4
4 -
 5
5 -
 6
6 -
 7
7
 |
 |
