Airlink WLL013 Quick installation guide
Airlink WLL013 Manual
 |
View all Airlink WLL013 manuals
Add to My Manuals
Save this manual to your list of manuals |
Airlink WLL013 manual content summary:
- Airlink WLL013 | Quick installation guide - Page 1
the Wireless LAN Card device to your computer before installing its software. If this happens, the Windows PnP function will detect the Wireless LAN Card and issue a dialog box requesting its driver. Click Cancel to quit the wizard and unplug the Wireless LAN Card. 1. Close all Windows programs - Airlink WLL013 | Quick installation guide - Page 2
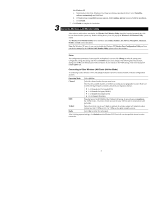
for driver. Select Install the software automatically and click Next. b. If Windows logo compatibility message appears, click Continue Anyway to proceed with the installation. c. Click Finish. 7. Click Finish to complete the installation. Using the Wireless LAN Monitor Utility After software and - Airlink WLL013 | Quick installation guide - Page 3
to enable the roaming feature. Radio Select On to enable the radio signal. After finishing required settings, click Submit and the Wireless LAN Card will start to make connection. Checking Link Quality (Infrastructure Mode Only) The Status field displays the information about the status of - Airlink WLL013 | Quick installation guide - Page 4
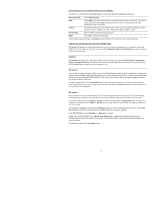
click OK. The following describes the essential instructions on using Windows XP wireless utility to get your wireless network established. For more information please refer to Windows XP on-line help. Connecting to an Access Point or Wireless LAN Card Double-clicking the network connection icon to - Airlink WLL013 | Quick installation guide - Page 5
to specify the network methods to be used with your Wireless LAN Card. The network policy depends on your wireless network. For TCP/IP protocol, you should configure its properties as instructed by your network administrator. Wireless Networks Under Available networks section, you can also see all
-
 1
1 -
 2
2 -
 3
3 -
 4
4 -
 5
5
 |
 |

1
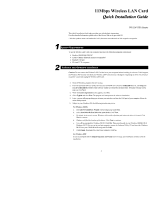
11Mbps Wireless LAN Card
Quick Installation Guide
802.11b USB Adapter
This
Quick Installation
Guide
only provides you with the basic instructions.
For more detailed information, please refer to the
Manual
file on the provided CD.
* All other product names and trademarks in this document are trademarks of their respective companies.
System Requirements
To use the Wireless LAN Card, your computer must meet the following minimum requirements:
°
Windows 98(SE)/Me/2000/XP
°
32 MB of RAM, additional memory recommended
°
Standard USB port
°
UL listed I.T.E. computers.
Software and Hardware Installation
Caution:
Do not connect the Wireless LAN Card device to your computer before installing its software. If this happens,
the Windows PnP function will detect the Wireless LAN Card and issue a dialog box requesting its driver. Click Cancel
to quit the wizard and unplug the Wireless LAN Card.
1.
Close all Windows programs that are running.
2.
Insert the provided Software Utility CD into your CD-ROM drive and select
Utility&Driver
. Or, run
Setup.exe
from
D
:\
Utility&Driver
folder of the Software Utility CD where
D
is the drive letter. When the welcome screen
pops up, click
Next
.
3.
When the
License Agreement
screen appears, click
Yes
.
4.
Select
Typical
and click
Next
. The program will auto-process the software installation.
5.
Later, a screen will pop up asking you to insert your wireless card into the USB port of your computer. Please do
as the dialog request.
6.
Subject to your Windows OS, the following situation may occur:
For Windows 98(SE)
a.
The
Add New Hardware Wizard
screen will pop up. Click
Next.
b.
Select
Search for the best driver for your device.
Click
Next.
c.
By default, in the search screen, Windows will be able to find the path where the driver is located. Click
Next
to continue.
d.
Windows will find the location of the driver. Click
Next
to continue.
e.
You will be prompted for Windows 98 CD. Click
OK
. Then enter the path to your Windows 98(SE) CD (if
Windows 98 CD files are not in you host computer, remove the Software Utility CD and insert the Windows
98 CD into your CD-ROM at this step) and click
OK
.
f.
Click
Finish
. If prompted to restart your computer. Click
No
.
For Windows 2000
If you are prompted with the
Digital Signature not Found
alarm message, just click
Yes
to continue with the
installation.
1
2