Alpine HCE-C1100 Owners Manual - Page 2

Befestigen Sie das Netzteil.

Page 2 highlights

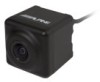
Installation/Installation/Instalación/Montage/Montaggio/Montering Check Accessory Parts/Vérifiez les accessoires/Compruebe los accesorios/Überprüfen Sie, ob alle Teile mitgelifert wurden/Verificare le componenti accessorie/Kontrollera medföljande delar ● HCE-C1100 A Rearview camera A Caméra de recul A Cámara de marcha atrás A Rückfahrkamera A Telecamera posteriore A Backkamera A B Power unit B Alimentation B Unidad de alimentación B Netzteil B Alimentatore B Strömenhet B C Camera mounting C Support de fixation C Soporte de la cámara C Kamerahalterung C Supporto telecamera C Kamerafäste C D Camera mounting stage D Palier de montage de la caméra D Plataforma de montaje de la cámara D Kamerahalterungsplattform D Supporto di montaggio della telecamera D Kamerans monteringsstadiet D камеры (0.5m)/(0,5m) Reverse/ACC/Video/GND : 3m Reverse/ACC/Video/GND : 3m Marcha atrás/ACC/Video/TIERRA: 3m Rückfahrk./ACC/Video/Masse: 3m Reverse/ACC/Video/GND: 3m Back/ACC/Video/GND: 3m Reverse/ACC/Video/GND: 3m E Camera mounting screws E Vis de montage de la caméra E Tornillos de montaje de la cámara E Kamera-Montageschrauben E Viti di montaggio della telecamera E Kamerans monteringsskruvar E F Self-tapping screw F Vis autotaraudeuse F Tornillo macho roscador F Schneidschraube F Vite autofilettante F Gängpressad skruv F G Waterproofing pad G Protège câble étanche G Dispositivo protector resistente al agua G Wasserdichtes Pad G Protezione impermeabile G Vattentätningsdyna G H Waterproofing pad adhesive sheet H Adhésif pour protège câble étanche H Hoja adhesiva para el dispositivo protector resistente al agua H Klebestreifen für wasserdichtes Pad H Foglio adesivo protezione impermeabile H Självhäftande ark för vattentätningsdyna H (4 screws)/(4 vis)/(4 tornillos)/(4 Schrauben)/(4 viti)/(4 skruvar)/(4 2 screws for mounting camera, 2 angle adjustment screws)/ (2 vis pour le montage de la caméra, 2 vis pour le réglage d'angle)/ (2 tornillos para montar la cámara, 2 tornillos de ajuste de ángulo)/ (2 Schrauben für die Monatge der Kamera, 2 Winkeleinstellungsschrauben)/ (2 viti per il montaggio della telecamera, 2 viti di regolazione dell'angolazione)/ (2 screws for mounting camera, 2 angle adjustment screws) - (2 skruvar för montering av kamera, 2 vinkeljusteringsskruvar)/ (2 2 I Camera extension cable I Rallonge câble camera I Cable de extensión de la cámera I Kameraverlängerungskabel I Cavo di prolunga per la telecamera I Kameraförlängningskabel I (4 screws)/(4 vis)/(4 tornillos)/ (4 Schrauben)/(4 viti)/(4 skruvar)/ (4 винта) J Cable tie J Serre-câble J Brida para cable J Kabelbinder J Fascetta serracavi J Fastbindningsrem J K Heat-shrink Tube K Tube thermorétrécissable K Tubo termorretráctil K Heißschrumpfschlauch K Tubo termorestringente K Värmekrympande rör K (7 m) ● HCE-C1100D A Rearview camera A Caméra de recul A Cámara de marcha atrás A Rückfahrkamera A Telecamera posteriore A Backkamera A (5 pcs)/(5 pcs)/(5 piezas)/(5 Stk)/(5 pz)/ (5 st)/(5 шт.) C Camera mounting C Support de fixation C Soporte de la cámara C Kamerahalterung C Supporto telecamera C Kamerafäste C D Camera mounting stage D Palier de montage de la caméra D Plataforma de montaje de la cámara D Kamerahalterungsplattform D Supporto di montaggio della telecamera D Kamerans monteringsstadiet D камеры E Camera mounting screws E Vis de montage de la caméra E Tornillos de montaje de la cámara E Kamera-Montageschrauben E Viti di montaggio della telecamera E Kamerans monteringsskruvar E (0.5m)/(0,5m) F Self-tapping screw F Vis autotaraudeuse F Tornillo macho roscador F Schneidschraube F Vite autofilettante F Gängpressad skruv F G Waterproofing pad G Protège câble étanche G Dispositivo protector resistente al agua G Wasserdichtes Pad G Protezione impermeabile G Vattentätningsdyna G H Waterproofing pad adhesive sheet H Adhésif pour protège câble étanche H Hoja adhesiva para el dispositivo protector resistente al agua H Klebestreifen für wasserdichtes Pad H Foglio adesivo protezione impermeabile H Självhäftande ark för vattentätningsdyna H (4 screws)/(4 vis)/(4 tornillos)/(4 Schrauben)/(4 viti)/(4 skruvar)/(4 2 screws for mounting camera, 2 angle adjustment screws)/ (2 vis pour le montage de la caméra, 2 vis pour le réglage d'angle)/ (2 tornillos para montar la cámara, 2 tornillos de ajuste de ángulo)/ (2 Schrauben für die Monatge der Kamera, 2 Winkeleinstellungsschrauben)/ (2 viti per il montaggio della telecamera, 2 viti di regolazione dell'angolazione)/ (2 screws for mounting camera, 2 angle adjustment screws) - (2 skruvar för montering av kamera, 2 vinkeljusteringsskruvar)/ (2 2 I Camera extension cable I Rallonge câble camera I Cable de extensión de la cámera I Kameraverlängerungskabel I Cavo di prolunga per la telecamera I Kameraförlängningskabel I (4 screws)/(4 vis)/(4 tornillos)/ (4 Schrauben)/(4 viti)/(4 skruvar)/ (4 винта) J Cable tie J Serre-câble J Brida para cable J Kabelbinder J Fascetta serracavi J Fastbindningsrem J K Heat-shrink Tube K Tube thermorétrécissable K Tubo termorretráctil K Heißschrumpfschlauch K Tubo termorestringente K Värmekrympande rör K (10.5m)/(10,5m) (5 pcs)/(5 pcs)/(5 piezas)/(5 Stk)/(5 pz)/ (5 st)/(5 шт.) Installation Location/Emplacement de l'installation/Ubicación de la instalación/ Montageort/Posizione di montaggio/ Monteringsplats Install to the Rear Garnish/Installez la caméra sur la carrosserie arrière/ Instalación en el acabado trasero/Montage am Heckklappengriff/ Montaggio sulla modanatura posteriore/Montering i bakluckan 2.5 13 30 21 Fig.1/Schéma 1/Fig.1/ Fig.2/Schéma 2/Fig.2/ Fig.3/Schéma 3/Fig.3/ Abb. 1/Fig.1/Bild 1/Рис. 1 Abb. 2/Fig.2/Bild 2/Рис. 2 Abb. 3/Fig.3/Bild 3/Рис. 3 English 1 Attach the mounting bracket to the camera mounting stage with the angle adjustment screw as shown in the figure. 2 Attach the camera to the camera mounting bracket C. Pull the camera cable through to the camera mounting bracket C, and secure with the hex screws E (see Fig. 2). 3 Loosen the camera mounting bracket C and angle adjustment screw. Determine the attachment angle, and carefully tighten the angle adjustment screw. 4 Make a 13 mm hole in the rear bumper camera mounting bracket (see Fig. 3). 5 Pull the camera cable inside the car through the hole made in step 3. 6 Peel off the adhesive seal from the camera mounting bracket and attach the camera mounting bracket on the chassis of the vehicle. If required, fix the camera mounting bracket using self-tapping screws. • Attach the camera in a position where it does not touch the number plate. • Use retail touch-up paint to paint the surface and surrounding area when a hole has been made in a metal surface. • Waterproof securely the hole made for the camera cable using a commercially-available waterproof tape or sealing material. • If necessary, use a self-tapping screw F to fix the camera mounting bracket (In the case of a plastic mount area). Français 1 Attachez le support de montage au palier de montage de la caméra avec la vis pour le réglage d'angle comme indiqué sur la figure. 2 Fixez la caméra sur le support C. Passez le câble de la caméra dans le support C, puis fixez-le à l'aide des vis hexagonales E (schéma 2). 3 Déserrez le support de la caméra C et insérez la vis pour le réglage d'angle. Choisissez l'angle de fixation, puis resserrez délicatement la vis dans cet angle. 4 Faites un trou de 13 mm dans la carrosserie arrière pour fixer le support de la caméra (schéma 3). 5 Faites passer le câble de la caméra à l'intérieur du véhicule par le trou fait à l'étape 3. 6 Retirez le film protecteur du support de la caméra, puis fixez ce dernier sur le châssis du véhicule. Le cas échéant, fixez le support à l'aide des vis autotaraudeuses. • Fixez la caméra de façon à ce qu'elle ne touche pas la plaque d'immatriculation. • Si vous avez percé un trou dans une surface métallique, une retouche est nécessaire sur et autour de la surface avec une peinture spéciale. • Les passes-fils à l'intérieur du véhicule doivent être imperméables ; pour cela, utilisez du ruban adhésif imperméable ou un autre produit d'étanchéité vendu dans le commerce. • Si besoin est, utilisez une vis autotaraudeuse F pour fixer le support de la caméra (notamment si la surface de montage est en plastique). Español 1 Acople el soporte de montaje a la plataforma de montaje de la cámara con el tornillo de ajuste, tal y como se muestra en la figura. 2 Coloque la cámara en el soporte de la cámara C. Tire del cable de la cámara a través del soporte de la cámara C y fíjelo con los tornillos hexagonales E (véase la figura 2). 3 Afloje el soporte de la cámara C e inserte en ángulo el tornillo de ajuste. Calcule el ángulo de fijación y, con cuidado, apriete el tornillo en dicho ángulo. 4 Realice un agujero de 13 mm en el soporte de la cámara del acabado trasero (véase la figura 3). 5 Tire del cable de la cámara desde el interior del coche a través el agujero del paso 3. 6 Retire el sello adhesivo del soporte de la cámara y fíjelo en el chasis del vehículo. Si fuera necesario, fije el soporte de la cámera con ayuda de los tornillos embriados suministrados. • Coloque la cámara en una posición en la que no toque la matrícula. • Utilice pintura para retocar la superficie y el área que rodea el agujero realizado en la superficie de metal. • Para garantizar que las arandelas aislantes colocadas en el interior del vehículo son resistentes al agua, utilice cinta adhesiva resistente al agua o algún tipo de material sellante. • Si es necesario, utilice un tornillo macho roscador F para fijar el soporte de la cámara (en caso de que el área de instalación sea de plástico). Deutsch 1 Befestigen Sie die Kamerahalterung an der Kamerahalterungsplattform mit der Schraube zur Winkeleinstellung wie in Abb. 1 dargestellt. 2 Befestigen Sie die Kamera an der Kamerahalterung C. Führen Sie das Kamerakabel durch die Kamerahalterung C, und befestigen Sie sie mit den Inbus-Schrauben E (siehe Abb. 2). 3 Lösen Sie die Kamerahalterung C und die Schraube zur Winkelanpassung. Bestimmen Sie den Winkel für die Anbringung, und ziehen Sie die Schraube für die Winkelanpassung vorsichtig fest. 4 Bohren Sie ein 13 mm großes Loch in die HeckklappengriffKamerahalterung (siehe Abb. 3). 5 Führen Sie das Kamerakabel durch das in Schritt 3 gebohrte Loch ins Auto. 6 Lösen Sie die Klebefolie von der Kamerahalterung, und bringen Sie die Kamerahalterung an der Fahrzeugkarosserie an. Befestigen Sie die Kamerahalterung gegebenenfalls mit Schneidschrauben. • Befestigen Sie die Kamera so, dass sie nicht das Nummernschild berührt. • Bringen Sie Reparaturlack auf der Oberfläche und um das Loch herum an, wenn Sie ein solches in eine Metalloberfläche gebohrt haben. • Dichten Sie das für das Kamerakabel gebohrte Loch mit handelsüblichem Dichtband oder Dichtungsmaterial wasserdicht ab. • Falls nötig, befestigen Sie die Kamerahalterung mit einer Blechschraube F (falls der Befestigungsbereich aus Plastik besteht). Italiano 1 Fissare la staffa di montaggio al supporto di montaggio della telecamera con la vite di regolazione dell'angolazione, come illustrato nella figura. 2 Montare la telecamera sul supporto C. Inserire il cavo nel supporto della telecamera C e fissare quest'ultimo usando le viti a testa esagonale E (Fig. 2). 3 Allentare il supporto C e la vite di regolazione dell'angolazione. Stabilire l'angolazione di montaggio e serrare lentamente la vite di regolazione. 4 Effettuare un foro da 13 mm sul supporto di montaggio nella modanatura posteriore (Fig. 3). 5 Tirare il cavo della telecamera nell'abitacolo attraverso il foro praticato al punto 3. 6 Rimuovere la pellicola protettiva dell'adesivo dal supporto della telecamera e fissare quest'ultimo sul telaio del veicolo. Se necessario, fissare il supporto della telecamera utilizzando viti filettanti. • Fissare la telecamera in una posizione in cui non tocchi la targa. • Utilizzare la vernice di ritocco sulla superficie e intorno al foro praticato sulla superficie metallica. • Verificare che il foro effettuato per il cavo della telecamera sia a tenuta utilizzando un nastro impermeabilizzante o un sigillante disponibile in commercio. • Se necessario, utilizzare una vite autofilettante F per montare il supporto della telecamera (se la superficie di montaggio è in plastica). Svenska 1 Fäst monteringskonsolen till kamerans monteringsplattform med skruven för vinkeljustering (se bilden). 2 Montera kameran i kamerafästet C. Dra igenom kamerakabeln till kamerafästet C och dra fast den med insexskruvarna E (se Bild 2). 3 Lossa skruven till kamerafästet C och vinkeljusteringen. Bestäm infästningsvinkeln och dra försiktigt åt justeringsskruven. 4 Borra ett 13 mm hål i bakluckan där kamerafästet ska monteras (se Bild 3). 5 Dra in kamerakabeln i bilen genom hålet som borrades i steg 3. 6 Ta bort skyddet på kamerafästets självhäftande yta och montera kamerafästet på bilen. Vid behov kan kameran monteras med skruvar. • Montera kameran i en position där den inte kommer i kontakt med nummerplåten. • Använd rostskyddsfärg på ytan och området kring det borrade hålet om det gjorts i en yta av metall. • Täta genomföringshålet för kabeln ordentligt med tape eller tätningsmassa. • Använd vid behov en gängpressad skruv F för att fixera kamerafästet (om fästytan är av plast). 1 2 C C E 2). 3 C 4 13 3). 5 3. 6 F Installing the Power Unit/Installation du bloc d'alimentation/ Instalación de la unidad de alimentación/Montage des Netzteils/ Installazione dell'alimentatore/Installation av strömenheten Secure the power unit. English CAUTION Secure the power unit so there is no excess force applied to the cords connected to the power unit. Avoid drastic bending such as 90 degree bend at the base of the coupler. Secure the power unit using a commercially available double-sided tape, cable tie, etc. Sécurisez l'alimentation. Français Attention Sécurisez l'alimentation de sorte qu'aucune force excessive ne soit appliquée aux cordons branchés à l'alimentation. Evitez les courbures drastiques comme une courbure de 90 degrés à la base du coupleur. Sécurisez l'alimentation à l'aide de ruban double face disponible dans le commerce, un serre-câble, etc. Fije la unidad de alimentación. Español Precaución Fije la unidad de alimentación de forma que los cables no queden sometidos a una fuerza excesiva una vez conectados a la misma. Evite doblarlos de forma drástica como, por ejemplo, en ángulos de 90 grados, en la base del acoplador. Fije la unidad de alimentación utilizando una cinta adhesiva de doble cara, una brida para cables, etc. Befestigen Sie das Netzteil. Deutsch Vorsicht Befestigen Sie das Netzteil so, dass keine übermäßige Belastung auf die Kabel ausgeübt wird, die am Netzteil angeschlossen sind. Angeschlossene Kabel keinesfalls knicken und vor scharfen Kanten schützen. Sichern Sie das Netzteil mit einem handelsüblichen doppelseitigen Klebeband, Kabelbinder etc. Fissare la scatola di alimentazione. Italiano Attenzione Fissare la scatola di alimentazione in modo che non venga esercitata pressione eccessiva sui cavi a essa collegati. Evitare piegature estreme, ad esempio a 90 gradi, alla base dell'accoppiatore. Fissare la scatola di alimentazione utilizzando nastro biadesivo, fascette serracavi, ecc., disponibili in commercio. Fäst nätaggregatet. Svenska Svenska Nr. Namn Kontakt för 1 videoutgång Anslutning för 2 kamera 3 Säkring Back/ 4 ACCledning 5 Jordledning Kabelfärg Röd Svart Specifikation/ Funktion Visar en kamerabild på en ansluten monitor eller navigationssystem. Videosignal från kameran. 7,0 A Denna ledning används för att ge ström till enheten när backen läggs i. Fäst ledningen till en metalldel I bilens kaross. Anslut till Anslut till kamerans videoingång på den anslutna enheten. Anslut kamerans förlängningskabel (medföljer) bak på kameran. Anslut ledning till ACC-läget. Anslut ledningen till en metalldel I bilens kaross. Se till att jordningen är ordentlig, i annat fall fungerar inte enheten. • Montera kamerakabeln och RCA-förlängningskabeln en bit ifrån radioantennen och antennkabeln. Störningar kan uppstå om de hamnar för nära varandra eller om de lindas ihop. 1 2 камеры 3 7,0 A Вывод Reverse/ 4 ACC ACC. Вывод 5 Черный RCA ● HCE-C1100D HCE-C1100D-compatible Alpine AV Head Unit*/Unité principale AV Alpine compatible avec HCE-C1100D*/Unidad principal AV Alpine compatible con el HCE-C1100D*/HCE-C1100D-kompatibles Alpine AVHauptgerät*/Unità principale AV Alpine compatibile con HCE-C1100D*/HCE-C1100D-kompatibel Alpine AV huvudenhet Alpine HCE-C1100D* Camera extension cable (supplied)/ Rallonge câble camera (fournie)/ Cable de extensión de la cámera (suministrada)/ Kameraverlängerungskabel (mitgeliefert)/ Cavo di prolunga per la telecamera (in dotazione)/ Kameraförlängningskabel (medföljer Försiktighet Fäst nätaggregatet så att kablarna som ansluts till nätaggregatet inte kan kraftigt påfrestas. Undvik skarpa böjningar, som i 90 garder, nederst på kopplaren. Rearview camera/Caméra de recul/ Cámara de marcha atrás/ Rückfahrkamera/Telecamera posteriore/ Backkamera Fig.4/Schéma 4/Fig.4/Abb. 4/Fig.4/Bild 4/Рис. 4 Fäst nätaggregatet med dubbelsidig tejp, kabelklämma osv. som finns i handeln. 90 Power unit/Alimentation/Unidad de alimentación/Netzteil/Scatola di alimentazione/Nätaggregat Commercially available double-sided tape, etc./Ruban double face disponible dans le commerce, etc./Cinta adhesiva de doble cara, etc./Handelsübliches doppelseitiges Klebeband usw./Nastro biadesivo disponibile in commercio, ecc./Dubbelsidig tejp osv. som finns i handeln Connections/Raccordements/Conexiones/Anschlüsse/Collegamenti/ Anslutningar ● HCE-C1100 Camera extension cable (supplied) /Rallonge câble caméra (fournie)/ Cable de extensión de la cámara (incluido)/ Kameraverlängerungskabel (mitgeliefert)/Cavo di prolunga della telecamera (fornito in dotazione)/ Kameraförlängningskabel (medföljer camera only/caméra uniquement/solo la cámara/nur Kamera/solo telecamera/endast kamera камера CAMERA DC12V Power unit/Alimentation/ Unidad de alimentación/ Netzteil/Scatola di alimentazione/ Nätaggregat 4 Fuse (7.0 А)/Fusible (7,0 А)/ Fusible (7,0 А)/Sicherung (7,0 А)/ Fusibile (7,0 А) /Säkring (7,0 7,0 А) 3 5 1 English No. Name Video Output 1 Connector Rear Camera 2 Connector 3 Fuse Reverse/ACC 4 Lead 5 Ground Lead Lead color Red Black Specification/ Function Connect to Outputs a camera video on the connected monitor or navigation system. Connect to the camera video input connector of the connected device. Inputs the rear camera video signal. Connect the camera extension cable (included) to the rear camera. 7.0A When reversing the vehicle, the lead is used to supply power to the unit. Connect the lead to the ACC position. Fix the lead securely to a metal part of the car's chassis. Connect the lead securely to a metal part of the car's chassis. Failure to do so may cause a malfunction. • Install the camera cable and RCA cable wiring away from the radio antenna and antenna cable. If they are too close, or wrapped together, noise can result. Français No Nom Connecteur de 1 sortie vidéo Connecteur 2 de la caméra arrière 3 Fusible 4 Fil Reverse/ACC Conducteur de 5 terre Couleur du connecteur Rouge Noir Caractéristique/ fonction Reproduit l'image de la caméra sur le moniteur connecté ou le système de navigation. Diffuse le signal vidéo de la caméra arrière. 7,0A Lorsque vous faites marche arrière, ce fil est utilisé pour alimenter l'unité. Fixez ce connecteur correctement à un élé ment métallique du châssis du véhicule. Le raccorder à Raccordez-le au connecteur d'entrée vidéo de la caméra du périphérique connecté. Connectez la rallonge de la caméra (fournie) à la caméra arrière. Raccordez le connecteur à une position ACC. Raccordez ce connecteur correctement à un élément métallique du châssis du véhicule. Dans le cas contraire, un dysfonctiopnnement peut se produire. • Installez le câble de la caméra et la rallonge RCA à l'écart de l'antenne radio et du câble d'antenne. S'ils sont trop prêts les uns des autres, ou enroulés ensemble, des interférences peuvent se produire. Español N.o Nombre Conector de 1 salida de vídeo Conector de 2 cámera trasera 3 Fusible Cable Marcha 4 atrás/ACC 5 Cable de tierra Color del cable Rojo Negro Especificación/ Función Emite la imagen de la cámera en el monitor o en el sistema de navegación conectado. recibe la señal de vídeo de la cámera trasera. 7,0A Cuando el vehículo circula marcha atrás, este cable se utiliza para alimentar la unidad. Fije el cable correctamente a una pieza metálica del chasis del vehículo. Conectar a Conecte el conector de entrada de vídeo de la cámara del dispositivo conectado. Conecte el cable de extensión de la cámara (incluido) a la cámara trasera. Conecte el cable en la posición ACC. Conecte el cable correctamente a una pieza metálica del chasis del vehículo. Si no lo hace, la unidad podría no funccionar correctamente. • Instale el cable de la cámara y el cable del cableado RCA alejado de la antena de la radio y del cable de la antena. En caso contrario, se pueden producir ruidos. Deutsch Nr. Bezeichnung 1 Videoausgang Anschluss für 2 Rückfahrkamera 3 Sicherung Rückfahr4 /ACCKabel 5 Massekabel Kabelfarbe Rot Schwarz Spezifikation/ Funktion Anschluss Zum Ausgeben eines Kamerabildes an den angeschlossenen Monitor oder das Navigationssystem. Schließen Sie ihn an den Kameravideoeingangsstecker des angeschlossenen Geräts an. Zum Einspeisen des Videosignals von der Rückfahrkamera. Schließen Sie das Verlängerungskabel der Kamera (mitgeliefert) an der Rückseite der Kamera an. 7,0 A Beim Rückwärtsfahren wird das Gerät über dieses Kabel mit Strom versorgt. Schließen Sie das Kabel an den ACC-Anschluss an. Befestigen Sie das Kabel sicher an einem Metallteil der Fahrzeugkarosserie. Schließen Sie das Kabel sicher an ein Metallteil der Fahrzeugkarosserie an.Andernfalls kann es zu Fehlfunktionen kommen. • Installieren Sie das Kamerakabel und das RCA-Kabel nicht in der Nähe der Radioantenne und dem Antennenkabel. Wenn sie sich zu dicht beieinander befinden oder verwickelt werden, können Störgeräusche auftreten. Italiano N. Nome Connettore 1 uscita video Connettore 2 videocamera posteriore 3 Fusibile Cavo Reverse/ 4 ACC 5 Cavo di massa Colore cavo Rosso Nero Caratteristica tecnica/ Collegare a Funzione Riproduce un'immagine della videocamera sul monitor o sul sistema di navigazione collegato. Collegare al connettore di ingresso video della telecamera del dispositivo collegato. Immette il segnale video della telecamera posteriore. Collegare il cavo di prolunga della telecamera (fornito in dotazione) alla telecamera posteriore. 7,0 A Quando si procede in retromarcia, il cavo viene utilizzato per fornire alimentazione all'unità. Collegare il cavo in posizione ACC. Fissare saldamente il cavo ad una parte metallica del telaio del veicolo. Collegare saldamente il cavo ad una parte metallica del telaio del veicolo. In caso contrario, potrebbero verificarsi problemi di funzionamento. • Installare il cavo della telecamera e il cavo RCA lontano dall'antenna della radio e dal relativo filo. Se sono troppo vicini o uniti, i cavi possono produrre disturbi. English • For details on connection, refer to the installation manual of the HCE-C1100D-compatible product. Connect the rear camera input connector only. * This product can only connect to Alpine Mobile Media Stations with the dedicated Alpine camera input. For information on HCE-C1100D-compatible products, contact your local authorized Alpine dealer or visit the Alpine Website. Français • Pour plus de détails sur la connexion, consultez le guide d'installation du produit compatible avec HCE-C1100D. Raccordez uniquement la borne d'entrée de la caméra arrière. * Cet appareil ne peut être raccordé qu'à une station multimédia portable Alpine via la borne d'entrée de la caméra Alpine. Pour plus d'informations sur les produits compatibles avec HCE-C1100D, contactez votre revendeur Alpine ou consultez le site Web Alpine. Español • Para obtener más información acerca de la conexión, consulte el manual de instalación del producto compatible con el HCEC1100D. Conecte únicamente el conector de entrada de la cámara de visión trasera. * Este producto solo puede conectarse a equipos Mobile Media de Alpine con una entrada exclusiva de cámara de Alpine. Para obtener información sobre los productos compatibles con HCE-C1100D, póngase en contacto con su distribuidor autorizado Alpine o visite el sitio web de Alpine. Deutsch • Ausführliche Informationen zu den Anschlüssen finden Sie in der Installationsanleitung des HCE-C1100D-kompatiblen Produkts. Stellen Sie nur eine Verbindung zur Eingangsbuchse der Rückfahrkamera her. * Dieses Produkt kann nur mit Mobile-Media-Stationen von Alpine mit geeignetem Alpine-Kameraeingang angeschlossen werden. Informationen zu HCE-C1100D-kompatiblen Produkten erhalten Sie von Ihrem autorisierten AlpineHändler vor Ort oder besuchen Sie die Website von Alpine. Italiano • Per informazioni sul collegamento, consultare il manuale di installazione del prodotto compatibile con HCE-C1100D. La telecamera posteriore deve essere collegata solo al connettore di ingresso. * Questo prodotto può essere collegato esclusivamente a unità Alpine Mobile Media Station dotate dell'apposito ingresso compatibile con telecamere Alpine. Per informazioni sui prodotti compatibili con HCE-C1100D rivolgersi al rivenditore autorizzato Alpine di zona oppure visitare il sito Web di Alpine. Svenska • För mer information om anslutning, se handboken för den HCEC1100D-kompatibla produkten. Anslut bara backkameraingången. * Denna produkt kan endast anslutas till Alpine Mobile Media Stations med därtill avsedd Alpine-kameraingång. Information om produkter som är kompatibla med HCE-C1100D kan du få av din lokala, auktoriserade Alpineåterförsäljare, eller genom ett besök på Alpines webbplats. HCEC1100D Alpine Alpine HCE-C1100D Alpine Alpine. Adjusting the Camera Angle/Réglage de l'angle de la caméra/Ajuste del ángulo de la cámara/Anpassen des Kamerawinkels/Regolazione dell'angolazione della telecamera/Justering av kameravinkeln Fig.6/Schéma 6/Fig.6/ Abb. 6/Fig.6/Bild 6/Рис. 6 Fig.7/Schéma 7/Fig.7/ Abb. 7/Fig.7/Bild 7/Рис. 7 Fig.8/Schéma 8/Fig.8/ Abb. 8/Fig.8/Bild 8/Рис. 8 English Caution When adjusting the camera angle, do so after turning off the engine and applying the hand brake to avoid an accident. 1 Put the gear shift into reverse (R), and check the image from the camera on the display. 2 Loosen the camera mounting bracket C and angle adjustment screw. Determine the camera angle, and carefully tighten the angle adjustment screw. Français Attention Veillez à couper le moteur et à mettre le frein à main avant de régler l'angle de la caméra afin d'éviter tout accident. 1 Mettez le levier de vitesse en marche arrière (R), puis vérifiez l'image de la caméra affichée à l'écran. 2 Desserrez le support de la caméra C et insérez la vis pour le réglage d'angle. Choisissez l'angle de la caméra, puis reserrez délicatement la vis dans l'angle. Español Precaución Cuando ajuste el ángulo de la cámara, apague primero el motor y ponga el freno de mano para evitar posibles accidentes. 1 Ponga la palanca de marchas en marcha atrás (R) y compruebe la imagen de la cámara que se muestra en la pantalla. 2 Afloje el soporte de la cámara C e inserte en ángulo el tornillo de ajuste. Calcule el ángulo de la cámara y, con cuidado, apriete el tornillo en dicho ángulo. Deutsch Vorsicht Wenn Sie den Kamerawinkel einstellen, schalten Sie zunächst den Motor aus und ziehen Sie die Handbremse an, damit es zu keinem Unfall kommt. 1 Legen Sie den Rückwärtsgang (R) ein, und überprüfen Sie das Bild der Kamera auf dem Bildschirm. 2 Lösen Sie die Kamerahalterung C und die Schraube zur Winkelanpassung. Bestimmen Sie den Kamerawinkel, und ziehen Sie die Schraube für die Winkelanpassung vorsichtig fest. Italiano Attenzione Per evitare incidenti, prima di regolare l'angolazione della telecamera spegnere il motore e inserire il freno di stazionamento. 1 Inserire la retromarcia (R) e controllare l'immagine rimandata sul display dalla telecamera. 2 Allentare il supporto della telecamera C e la vite di regolazione dell'angolazione. Stabilire l'angolazione della telecamera e serrare lentamente la vite di regolazione. Svenska Försiktighet För att undvika olyckor ska justering av kamerans vinkel göras först när bilen stängts av och handbromsen dragits åt. 1 Lägg i backen (R) och kontrollera bilden från kameran på skärmen. 2 Lossa skruven till kamerafästet C och vinkeljusteringen. Bestäm kameravinkeln och dra försiktigt åt justeringsskruven. 1 R 2 C Securing the Camera Cable/Fixation du câble de la caméra/Fijación del cable de la cámara/Befestigen des Kamerakabels/Fissaggio del cavo della telecamera/Infästning av kamerakabeln A B CD (A) Rearview camera/Caméra arrière/Cámera trasera/Rückfahrkamera/ Telecamera per retromarcia/Backkamera (B) To Power unit/Vers le bloc d'alimentation/A la unidad de alimentación/An Netzteil/All'unità di alimentazione/Till strömförsörjningsenheten (C) Clamper/Attache-fils/Fijador/Klammer/Elemento di fissaggio/Klämma (D) Waterproofing pad/Protège-câbles imperméable/Dispositivo protector resistente al agua/Wasserdichtes Polster/Protezione impermeabile/ Vattentätningsdyna Fig.9/Schéma 9/Fig.9/Abb. 9/Fig.9/Bild 9/Рис. 9 English 1 Secure the camera cable while referring to Fig. 9. Attach the waterproof pad G with the waterproof pad adhesive sheet H, and secure any slack cable around the waterproof pad G using the wire clamp J. • Ensure the cable does not get caught in the trunk, rear door(s) or any hinges. • The cable should go on the outside of car hinges and harness covers. • After completing wiring, open and close the trunk and the rear doors several times to confirm the cable is not getting caught or rubbing anywhere. Français 1 Fixez le câble de la caméra en vous reportant au schéma 9. Fixez le protège-câbles G sur son ruban adhésif H, puis fixez et tendez le câble sortant du protège-câbles G à l'aide de l'attache-fils J. • Assurez-vous que le câble n'est pas coincé dans la malle, dans les portes arrières ou dans une charnière. • Le câble doit être hors des protections des charnières et des harnais. • Une fois le câblage terminé, ouvrez et refermez plusieurs fois la malle arrière et les portes arrières afin de vous assurez que le câble n'est pas coincé et qu'il ne subit aucun frottement. Español 1 Fije el cable de la cámara siguiendo el diagrama de la figura 9. Coloque el dispositivo protector resistente al agua G con la hoja adhesiva correspondiente H y fije cualquier cable que sobresalga alrededor del dispositivo resistente al agua G con ayuda del fijador de cables J. • Verifique que el cable no queda atrapado en el maletero, las puertas traseras o en cualquier bisagra. • El cable debe estar fuera de las protecciones de las bisagras y arneses del vehículo. • Una vez finalizado el cableado, abra y cierre el maletero y las puertas traseras varias veces para comprobar que el cable no queda atrapado ni plegado en ningún sitio. Deutsch 1 Befestigen Sie das Kamerakabel anhand Abb. 9. Befestigen Sie das wasserdichte Polster G mit dem Klebestreifen für das wasserdichte Polster H und befestigen Sie lose Kabel um das wasserdichte Polster G herum mit der Kabelklemme J. • Vergewissern Sie sich, dass das Kabel nicht im Kofferraum, an den hinteren Türen oder Scharnieren eingeklemmt wird. • Das Kabel sollte über die Scharniere und Kabelabdeckungen hinweg geführt werden. • Nachdem die Verkabelung erfolgt ist, öffnen und schließen Sie den Kofferraum und die hinteren Türen mehrmals, um sicherzustellen, dass das Kabel nicht eingeklemmt oder berührt wird. Italiano 1 Fissare il cavo della telecamera come mostrato nella Fig. 9. Incollare la protezione impermeabile G dal lato adesivo H e fermare eventuali parti del cavo allentate intorno alla protezione G utilizzando il fermacavo J. • Accertarsi che il cavo non rimanga impigliato nel portabagagli, negli sportelli posteriori o nelle cerniere. • Il cavo deve passare all'esterno delle cerniere dell'auto e dei copricavi. • Al termine del collegamento, aprire e chiudere più volte il portabagagli e gli sportelli posteriori, verificando che il cavo non rimanga impigliato o strisci con parti del veicolo. Svenska 1 Fäst kamerakabeln enligt anvisningarna i Bild 9. Sätt fast den vattentäta dynan G med det självhäftande arket för vattentätningsdynan H och fäst eventuellt slak kabel rund den vattentäta dynan G med sladdklämman J. • Se till att kabeln inte fastnar i bagageluckan, bakdörren eller gångjärnen. • Kabeln ska löpa utanför bilens gångjärn och kabelskydden. • När dragningen utförts ska du öppna och stänga bagageluckan och bakdörrarna flera gånger, så att kabeln inte fastnar eller skaver någonstans. 1 9 G H G J. Special Instructions for Pickup Truck Installations/Instructions spéciales pour installation sur un pickup/Instrucciones especiales para las instalaciones en camionetas/ Front of pickup truck*/ Avant du pickup*/ Parte delantera de la camioneta* Recommended camera power supply mounting location (inside pickup cab)/ Emplacement de montage recommandé de l'alimentation de la caméra (à l'intérieur de la cabine du pickup)/ Ubicación recomendada para colocar la fuente de alimentación de la cámara (en el interior de la camioneta) a b e c d Fig.12/Schéma 12/Fig.12 * Any type of vehicle, including pickup trucks, where the connector is installed outside of the cabin./ * Tout type de véhicule, notamment des camionnettes, où le connecteur est installé hors de la cabine./ * Cualquier tipo de vehículo, incluidas las camionetas, donde el conector se debe instalar fuera de la cabina. I Camera extension cable/ A Camera cable/ I Rallonge câble K Heat-shrink Tube/ A Câble de caméra/ K Tube thermorétractable/ Caméra / I Cable de extensión de K Tubo termorretráctil A Cable de la cámera Cámara About 0.5 inch/ Environ 0,5 pouce/ Aprox. 0,5 pulgada (A) Fig.13/Schéma 13/Fig.13 (B) (D) (D) (C) (A) Fig.14/Schéma 14/Fig.14 Fig.15/Schéma 15/Fig.15 English a: Rubber grommet to pass camera wire from inside of pickup truck cab to underside of pickup truck chassis. b: In pickup truck* installations, the wire that connects between the camera and the camera power supply typically gets installed under the pickup truck chassis. - This wire must be protected from damage using split-loom tubing in any areas where it is installed under the pickup chassis. - The rubber grommet where the wire passes from the cab to the underside of the truck must be sealed with silicone to prevent moisture intrusion into the pickup truck cab. c: White connector between rearview camera and power supply. (HCE-C1100 only) d: Recommended HCE-C1100/HCE-C1100D rearview camera mounting location (on rear bumper). e: In pickup truck installations, the white electrical connector between the rearview camera and the camera's power supply may be exposed to moisture. If so, it must be sealed to prevent corrosion.(HCE-C1100 only) Perform waterproofing with the provided heat-shrink tube by following the procedure below: 1 Preparation -Fig.13 (1) Insert the heat-shrink tube K over the camera extension cable I. (2) Connect the camera cable A to the connector of the camera extension cable I. (3) Install the heat-shrink tube K so connector (A) is covered (with approx. 0.5 inch). 2 Waterproofing -Fig.14 When preparation is complete, straighten the cable, and shrink the heat-shrink tube K by heating it from side (B) with a heat gun. 3 Check -Fig.15 Ensure that connectors (A) and (C) is entirely covered with the heat-shrink tube K. When the heat-shrink tube is at its smallest, epoxy or caulk should be flowed onto the (D) sections to complete the waterproofing process. Caution • Be careful not to melt the camera cable or camera extension cable by the heat gun. • Be careful not to burn yourself during this procedure. • After waterproofing is complete, do not bend the cord forcibly. Français a: Passe-cloison en caoutchouc pour faire transiter le fil de la caméra de l'intérieur de la cabine du pickup vers le dessous du châssis. b: En cas d'installation sur un pickup*, le fil qui relie la caméra à son alimentation est généralement installé sous le châssis du véhicule. - Le fil doit être protégé contre les dégâts au moyen d'un tubage pour câblage, là où il est installé sous le châssis du pickup. - Le passe-cloison en caoutchouc, utilisé pour acheminer le fil de la cabine vers le dessous du pickup, doit être protégé avec du silicone pour éviter toute intrusion d'humidité dans la cabine du véhicule. c: Connecteur blanc entre la caméra de recul et l'alimentation. (HCE-C1100 uniquement) d: Emplacement de montage recommandé de la caméra de recul HCE-C1100/HCE-C1100D (sur le pare-chocs arrière). e: En cas d'installation sur un pickup, le connecteur électrique blanc situé entre la caméra de recul et son alimentation risque d'être exposé à l'humidité. Si c'est le cas, il doit être protégé afin d'éviter toute corrosion. (HCE-C1100 uniquement) Vérifiez l'étanchéité à l'aide du tube thermorétrécissable en suivant la procédure ci-dessous: 1 Préparation - Fig.13 (1) Insérez le câble d'extension de la caméra I dans le tube thermorétrécissable K. (2) Raccordez le câble de la caméra A au connecteur du câble d'extension de la caméra I. (3) Installez le tube thermorétrécissable K afin que le Connecteur (A) soit couvert (avec un débordement d'environ 0,5 pouce). 2 Étanchéité - Fig.14 Une fois la préparation terminée, tendez le câble et rétrécissez le tube thermorétrécissable K en le chauffant du côté (B) à l'aide d'un pistolet à air chaud. 3 Vérification - Fig.15 Vérifiez que les connecteurs (A) et (C) sont entièrement couverts par le tube thermorétrécissable K. Lorsque le tube thermorétrécissable atteint sa taille minimale, vous devez insérer de la résine époxy ou une résine de colmatage dans les sections (D) pour compléter le processus d'étanchéité. Attention • Veillez à ne pas faire fondre le câble de la caméra ou le câble d'extension de la caméra lorsque vous utilisez le pistolet à air chaud. • Veillez à ne pas vous brûler lors de cette procédure. • Une fois le processus d'étanchéité terminé, veillez à ne pas tordre le câble de force. Español a: Arandela de goma para pasar el cable de la cámara desde el interior de la cabina de la camioneta a la parte inferior del chasis de la camioneta. b: En instalaciones realizadas en camionetas*, el cable que conecta la cámara y la fuente de alimentación de la cámara normalmente se instala bajo el chasis de la camioneta. - Este cable debe estar protegido mediante un tubo de hendidura en espiral en las zonas en las que se encuentre instalado bajo el chasis de la camioneta. - La arandela de goma por el que pasa el cable desde la cabina hasta la parte inferior de la camioneta se debe sellar con silicona para evitar la entrada de humedad en la cabina de la camioneta. c: Conector blanco entre la cámara de visión trasera y la fuente de alimentación. (solo la HCE-C1100) d: Ubicación recomendada para colocar la cámara de visión trasera HCE-C1100/HCE-C1100D (en el parachoques trasero). e: En instalaciones realizadas en camionetas, el conector eléctrico blanco situado entre la cámara de visión trasera y la fuente de alimentación de la cámara podría estar expuesto a la humedad. En ese caso se debe sellar para evitar la corrosión.(solo la HCE-C1100) Lleve a cabo el proceso de impermeabilidad con el tubo termorretráctil suministrado siguiendo estos pasos: 1 Preparación - Fig. 13 (1) Inserte el tubo termorretráctil K en el cable prolongador de la cámara I. (2) Conecte el cable de la cámara A al conector del cable prolongador de la cámara I. (3) Instale el tubo termorretráctil K de modo que el Conector (A) quede cubierto (con aproximadamente 0,5 pulgadas de exceso). 2 Impermeabilidad - Fig. 14 Una vez concluida la preparación, enderece el cable y reduzca el tubo termorretráctil K calentándolo desde un lado (B) con una pistola de aire caliente. 3 Comprobación - Fig. 15 Verifique que el conector (A) y el (C) están totalmente cubiertos con el tubo termorretráctil K. Cuando el tubo termorretráctil esté recogido, deberá introducirse epoxi o masilla para que circule por las secciones (D) para completar el proceso de impermeabilidad. Precaución • Tenga mucho cuidado de no derretir el cable de la cámara o el cable prolongador de la cámara con la pistola de aire caliente. • Preste mucha atención para no sufrir quemaduras al realizar este procedimiento. • Una vez concluido el proceso de impermeabilidad, no doble el cable con fuerza. Besondere Anweisungen für Kleintransporter-Installationen /Istruzioni speciali per installazione su cassonati /Speciella instruktioner för installation på varubilar Vorderseite des Kleintransporters*/Parte anteriore del cassonato*/Fram på varubilen Empfohlener Einbauort für Kameranetzteil (innerhalb der Fahrerkabine des Kleintransporters) / Posizione di montaggio consigliata dell'alimentazione della telecamera (all'interno della cabina del cassonato) / Rekommenderad förutsedd kraftförsörjning för kameran placering (inne i varubilens hytt a b e c d Abb. 12/Fig. 12/Bild 12/Рис. 12 * Jede Art von Fahrzeug, einschließlich Kleintransporter, wobei der Stecker außerhalb der Fahrerkabine installiert ist. / * Qualsiasi tipo di veicolo, inclusi i cassonati, in cui il connettore viene installato all'esterno della cabina. / * Vilken som helst typ av fordon, inklusive varubilar, där kontaktdonet installeras utanför hytten. / I Kamera verlängerungskabel / I Cavo di prolunga della telecamera / K Schrumpfschlauch / I Kamera K Tubo förlängningskabel / I termorestringente / K Krymprör / K кабель трубка A Kamera kabel / A Cavo della telecamera / A Kamera kabel / A кабель Etwa 0,5 Zoll / Circa 0,5 pollice / Ungefär 0,5 tum 0,5 дюйм (A) Abb. 13/Fig. 13/Bild 13/Рис. 13 (B) Abb. 14/Fig. 14/Bild 14/Рис. 14 (D) (D) (C) (A) Abb. 15/Fig. 15/Bild 15/Рис. 15 Deutsch a: Gummitülle, um das Kameraanschlusskabel von der Innenseite der Kabine des Kleintransporters zur Unterseite der Karosserie des Kleintransporters zu führen. b: Bei Kleintransporter*-Installationen wird das Kameraanschlusskabel, das die Kamera mit dem Netzteil verbindet, in der Regel unter der Karosserie des Kleintransporters installiert. - Diese Anschlusskabel müssen vor Schäden geschützt werden, indem geteilte Rohrleitungen in allen Bereichen verwendet werden, die unter der Karosserie des Kleintransporters installiert werden. - Die Gummidichtung, wo das Kamerakabel von der Kabine an der Unterseite des LKW verläuft, muss mit Silikon abgedichtet werden, um das Eindringen von Feuchtigkeit in die LKWKabine zu verhindern. c: Weißer Stecker zwischen Rückfahrkamera und Stromversorgung. (nur HCE-C1100) d: Empfohlener Einbauort der HCE-C1100/HCE-C1100D Rückfahrkamera (am hinteren Stoßfänger). e: Bei Installationen in Kleintransportern kann der weiße Elektrostecker zwischen der Rückfahrkamera und der KameraStromversorgung Feuchtigkeit ausgesetzt sein. Falls dies der Fall ist, dichten Sie ihn ab, um Korrosion zu vermeiden. (nur HCE-C1100) Führen Sie eine Abdichtung mit dem mitgelieferten Heißschrumpfschlauch aus, indem Sie wie folgt vorgehen: 1 Vorbereitung -Abb.13 (1) Stecken Sie den Heißschrumpfschlauch K über das Verlängerungskabel I der Kamera. (2) Schließen Sie das Kamerakabel A an den Stecker des Verlängerungskabels I der Kamera an. (3) Installieren Sie den Heißschrumpfschlauch K, so dass die Stecker (A) (mit etwa 0,5 Zoll) abgedeckt ist. 2 Abdichtung -Abb.14 Wenn die Vorbereitung abgeschlossen ist, richten Sie das Kabel gerade aus und schrumpfen Sie den Heißschrumpfschlauch K durch Erhitzen der Seite (B) mit einer Heißluftpistole. 3 Überprüfung -Abb.15 Stellen Sie sicher, dass die Stecker (A) und (C) vollständig mit dem Heißschrumpfschlauch K abgedeckt sind. Zusätzlich sollte Epoxid-oder Dichtungsmasse auf die (D) Abschnitte verteilt werden, um den Abdichtungsvorgang abzuschließen. Vorsicht • Achten Sie darauf, das Kabel der Kamera oder das Verlängerungskabel der Kamera nicht mit der Heißluftpistole zu beschädigen. • Nachdem die Abdichtung abgeschlossen ist, die Steckverbindung nicht verbiegen. Italiano a: Anello di gomma per passare il filo della telecamera dall'interno della cabina del cassonato al lato inferiore del telaio del veicolo. b: Nei cassonati*, il filo che collega la telecamera alla relativa alimentazione si installa generalmente sotto il telaio del veicolo. - Questo filo va protetto da danneggiamenti mediante l'utilizzo di corrugati flessibili in tutti i punti del telaio del cassonato in cui è installato. - È necessario sigillare con silicone l'anello di gomma nel quale passa il filo dalla cabina alla parte inferiore del cassonato per impedire l'infiltrazione di umidità nella cabina del veicolo. c: Connettore bianco tra la telecamera per retromarcia e l'alimentazione. (solo HCE-C1100) d: Posizione consigliata per il montaggio della telecamera per retromarcia HCE-C1100/HCE-C1100D (sul paraurti posteriore). e: Nelle installazioni su cassonati, il connettore elettrico bianco fra la telecamera per retromarcia e la relativa alimentazione potrebbe essere esposto a umidità. In tal caso deve essere sigillato per impedirne la corrosione. (solo HCE-C1100) Eseguire il test di impermeabilità con il tubo termorestringente fornito in dotazione seguendo la procedura riportata di seguito: 1 Preparazione - Fig. 13 (1) Inserire il tubo termorestringente K nel cavo di prolunga I della telecamera. (2) Collegare il cavo A della telecamera al connettore del cavo di prolunga I della telecamera. (3) Installare il tubo termorestringente K in modo che il Connettore sia coperto (con una sporgenza di circa 0,5 pollici). 2 Test di impermeabilità - Fig. 14 Terminata la preparazione, tendere il cavo e restringere il tubo termorestringente K riscaldandolo dal lato (B) con una pistola termica. 3 Verifica - Fig. 15 Verificare che i connettori (A) e (C) siano interamente coperti dal tubo termorestringente K. Quando il tubo termorestringente si è ridotto al massimo, è necessario versare resina epossidica o stucco sulle parti (D) per completare il test di impermeabilità. Attenzione • Fare attenzione a non fondere il cavo della telecamera o il cavo di prolunga della telecamera con la pistola termica. • Fare attenzione a non ustionarsi durante questa operazione. • Terminato il test di impermeabilità, non piegare con forza il cavo. Svenska a: Införingshylsa i gummi för att dra kamerans kabel inifrån varubilens hytt till undersidan av chassit. b: I installationer för varubilar*, installeras kabeln som ansluter kameran till strömförsörjningen i vanliga fall under varubilens chassi. - Den här kabeln måste skyddas mot skada med hjälp av en delad ledningsdragning i de områden där den installeras under varubilens chassi. - Införingshylsan i gummi i vilken kabeln ska dras från hytten till undersidan av varubilen måste isoleras med silikon för att förhindra att fukt tränger in i hytten. c: Vitt kontaktdon mellan den bakre kameran och strömförsörjningen. (endast HCE-C1100) d: Rekommenderad plats för montering av HCE-C1100/ HCE-1100D bakre kamera (på den bakre stötfångaren). e: I installationer för varubilar, kan den vita elkontakten mellan den bakre kameran och kamerans strömförsörjning utsättas för fukt. Om detta inträffat måste den isoleras för att förhindra korrosion. (endast HCE-C1100) Använd krympröret för en vattentät installation som levereras enligt följande procedur: 1 Förberedelse -Bild 13 (1) Sätt i krympröret K över kamerans förlängningskabel I. (2) Anslut kamerakabeln A till kontaktdonet på kamerans förlängningskabel I. (3) Installera krympröretK så att kontaktdon (A) täcks (med ung. 0,5 tum). 2 Vattentäthet installation -Bild 14 När förberedelsen har avslutats, dra åt kabeln och krymp krympröret K genom att värma det från sidan (B) med en värmepistol. 3 Kontroll -Bild 15 Se till att kontaktdonen (A) och (C) täcks helt med krympröret K. När krympröret är som minst ska epoxi och fogtätning föras in i sektionerna (D) för att avsluta vattentätningen. Försiktighet • Se till att inte smälta kamerakabeln eller kamerans förlängningskabel med värmepistolen. • Se till att bränna dig under arbetet. • Böj inte anslutningskabeln efter att vattentätningen slutförts. HCE-C1100) HCE-C1100/HCE-C1100D HCE-C1100) 1 13 (1 K I. (2 A I. (3 K 0,5 2 14 K 3 15 K D силой. Specifications/Spécifications/Especificaciones/Technische Daten/ Caratteristiche techniche/Tekniska data ● HCE-C1100 English Power Requirements DC9V to DC15.6V Ground Type Negative ground type Power Consumption 1.2W (12V) Output Image*1 Composite Video NTSC Output Drive Capacity 1Vp-p (75 Ω) Image Sensor 1/3.7 inch CMOS image sensor, aspect ratio 4:3 Effective Number of Pixels 640 (horizontal)×480 (vertical) approximately 0.3 Mega pixels Lens Section Focal length f=1.34mm, brightness F=1:2.0 Angle of Field Horizontal: 131°, vertical: 103° Automatic Image Adjusting Function Automatic white balance adjustment Water Resistance IP67 S/N ratio 40.5 db or more Resolution (Horizontal) 330 TV lines (center area) Illumination Range Approximately 1.5 to 100klx Operating Temperature Range Camera Section -22 to +158F (-30 to +70°C) Power Section -22 to +158F (-30 to +70°C) External dimensions (W×H×D) Camera Section 23.6×23.6×24.0mm (excluding projection on the rear) Power Section 38.0×25.0×15.0mm (excluding projection) Weight Camera Section 27g (camera only) Power Section 83g (including cord) *1 This product outputs NTSC image. It does not output PAL image. Français Alimentation Nécessaire Type de Masse Consommation Sortie Image*1 Capacité de la commande de sortie Capteur d'image Nombre de pixels effectifs Lentille Champ de vision Fonction ajustement automatique de l'image Résistance à l'eau Ratio Signal/Bruit Résolution (Horizontal) Plage d'illumination 9V à 15,6V continu Masse négative 1,2W (12V) Vidéo Composite NTSC 1Vp-p (75 Ω) Capteur d'image CMOS 1/3.7 de pouce, ratio 4:3 640 (horizontal)×480 (vertical) environ 0,3 Mégapixels Distance focale f=1,34mm, Luminosité F=1:2,0 Horizontal : 131°, vertical : 103° Réglage automatique de la balance des blancs IP67 40,5 db ou plus 330 lignes de Télévision (centrale) Environ 1,5 à 100klx Température de fonctionnement Caméra Section d'alimentation -22 à +158F (-30 à +70°C) -22 à +158F (-30 à +70°C) Dimensions externes (L×H×P) Poids Caméra 23,6×23,6×24.0 mm (sauf partie arrière de la caméra) Section d'alimentation Caméra Section d'alimentation 38,0×25,0×15,0 mm (partie saillante non comprise) 27g (caméra uniquement) 83g (cordon compris) *1 Ce produit génère des images NTSC. Il ne génère pas d'image PAL. Español Requisitos de alimentación Tipo de toma de tierra Consumo eléctrico Imagen de salida*1 Capacidad de salida de la unidad Sensor de imagen Número efectivo de píxeles Sección de la lente Ángulo de campo Función de ajuste de imagen automático Resistencia al agua Relación señal/ruido Resolución (Horizontal) Alcance de la iluminación Intervalo de temperatura de funcionamiento Sección de la cámara Sección de alimentación Dimensiones externas (ancho×alto×prof.) Sección de la cámara Sección de alimentación Sección de la cámara Peso Sección de alimentación De 9 V CC a 15,6 V CC Tipo toma de tierra negativa 1,2 W (12 V) Vídeo compuesto NTSC 1 Vp-p (75 Ω) Sensor de imagen CMOS de 1/3,7 pulg., relación de aspecto 4:3 640 (horizontal)×480 (vertical), aproximadamente 0,3 megapíxeles Longitud focal f = 1,34 mm, brillo F = 1:2,0 Horizontal: 131°, vertical: 103° Ajuste automático del balance de blancos IP67 40,5 db o más 330 líneas de TV (área central) Aproximadamente de 1,5Lx a 100klx De -22 a +158F (de -30 a +70°C) De -22 a +158F (de -30 a +70°C) 23,6×23,6×24,0 mm (salvo el saliente en la parte trasera) 38,0×25,0×15,0 mm (salvo el saliente) 27 gr (solo la cámara) 83 gr (incluyendo el cable) *1 Este producto emite imágenes NTSC. No emite imágenes PAL. Deutsch Stromversorgung Massetyp Stromverbrauch Ausgebebild*1 Ausgabelaufwerkkapazität Bildsensor Effektive Anzahl der Pixel Objektivbereich Bildwinkel Automatische Bildeinstellungsfunktion Wasserfestigkeit S/N Verhältnis Auflösung (Horizontal) Beleuchtungsbereich Betriebstemperaturbereich Kamerateil Leistungsteil Äußere Abmessungen (B×H×T) Gewicht Kamerateil Leistungsteil Kamerateil Leistungsteil DC9V bis DC15,6V Negativer Massetyp 1,2W (12V) Kompositvideo NTSC 1Vp-p (75 Ω) 1/3,7 Zoll CMOS Bildsensor, Seitenverhältnis 4:3 640 (horizontal)×480 (vertikal) etwa 0,3 Megapixel Brennweite f=1,34mm, Helligkeit F=1:2,0 Horizontal: 131°, vertikal: 103° automatischer Weißabgleich IP67 40,5 db oder mehr 330 TV TV-Zeilen (Mittelbereich) Etwa 1,5Lx bis 100klx -22 bis +158 F (-30 bis +70°C) -22 bis +158 F (-30 bis +70°C) 23,6×23,6×24,0mm (ohne Schutz auf der Rückseite) 38,0×25,0×15,0mm (ohne Schutz) 27g (nur Kamera) 83g (einschließlich Kabel) *1 Dieses Produkt gibt ein NTSC-Bild aus. Es gibt kein PAL-Bild aus. Italiano Requisiti di alimentazione Tipo di messa a terra Consumo elettrico Uscita immagine*1 Capacità di azionamento uscita Sensore immagine Numero effettivo di pixel Sezione obiettivo Angolo di campo Funzione regolazione automatica dell'immagine Impermeabilità Rapporto S/N Risoluzione (orizzontale) Illuminazione Temperatura di funzionamento Sezione telecamera Sezione alimentazione Dimensioni esterne (L×A×P) Sezione telecamera Sezione alimentazione Sezione telecamera Peso Sezione alimentazione CC da 9 a 15,6 V Messa a terra negativa 1,2 W (12 V) Video composito NTSC 1 Vp-p (75 Ω) Sensore immagine CMOS 1/3,7 di pollice, formato 4:3 640 (orizzontale) × 480 (verticale) approssimativamente 0,3 megapixel Lunghezza focale f= 1,34 mm, luminosità F= 1:2,0 Orizzontale: 131°, verticale: 103° Regolazione automatica del bilanciamento del bianco IP67 40.5 db o superiore 330 linee TV (area centrale) Approssimativamente da 1,5Lx a 100klx Da -22 a +158F (-30 a +70°C) Da -22 a +158F (-30 a +70°C) 23,6×23,6×24,0 mm (esclusa proiezione sul retro) 38,0×25,0×15,0 mm (esclusa proiezione) 27 g (solo telecamera) 83 g (incluso cavo) *1 Questo prodotto riproduce immagini NTSC. Non riproduce immagini PAL. Svenska Effektbehov Typ av jordning Effektförbrukning Bildutmatning*1 Utmatningskapacitet Bildsensor Effektivt antal bildpunkter Linsprofil Fältvinkel Automatisk bildjusteringsfunktion Vattenbeständighet S/N-ratio Upplösning (vågrätt) Belysningsområde DC9V till DC15,6V Negativ typ av jordning 1,2W (12V) Sammansatt video NTSC 1Vp-p (75 Ω) 1/3,7 tum CMOS bildsensor, bildformat 4:3 640 (vågrätt)×480 (lodrätt) ungefär 0,3 megapixel Brännvidd f=1,34 mm, ljusstyrka F=1:2.0 Vågrätt: 131°, lodrätt: 103° Automatisk justering av vitbalansering IP67 40.5 db eller mer 330 TV-linjer (mittenområde) Ungefär 1,5Lx till 100klx Drifttemperaturens område Kamerasektion -22 till +158F (-30 till +70°C) Matarsektion -22 till +158F (-30 till +70°C) Externa dimensioner (B×H×D) Vikt Kamerasektion 23,6×23,6×24,0 mm (exklusiv projektion bak) Matarsektion 38,0×25,0×15,0 mm (förutom projektion) Kamerasektion Kamerasektion 27g (endast kamera) Matarsektion Matarsektion 83g (med tråd) *1 Den här produkten sänder en NTSC-bild. Den sänder ingen PALbild. This device complies with part 15 of the FCC Rules. Operation is subject to the following two conditions. (1) This device may not cause harmful interference, and (2) this device must accept any interference received, including interference that may cause undesired operation. 1 Секция 9-15,6 1,2 Вт (12 NTSC 1 75 CMOS 1/3,7 4:3 640 480 0,3 f=1,34 F=1:2,0 131 103 IP67 40.5 330 1,5 100 22 до +158F (от -30 до +70°C) от -22 до +158F (от -30 до +70°C) 23,6×23,6×24,0 38,0×25,0×15,0 27 83 *1 NTSC PAL. ● HCE-C1100D English Power Requirements Ground Type Power Consumption Output Image Output Drive Capacity Image Sensor Effective Number of Pixels Lens Section Angle of Field Automatic Image Adjusting Function Water Resistance S/N ratio Resolution (Horizontal) Illumination Range Operating Temperature Range External dimensions (W×H×D) Weight DC5.0V to DC7.0V Negative ground type 0.57W (6V) Composite Video NTSC 1Vp-p (75 Ω) 1/3.7 inch CMOS image sensor, aspect ratio 4:3 640 (horizontal)×480 (vertical) approximately 0.3 Mega pixels Focal length f=1.34mm, brightness F=1:2.0 Horizontal: 131°, vertical: 103° Automatic white balance adjustment IP67 40.5db or more 330 TV lines (center area) Approximately 1.5 to 100klx -22 to +158F (-30 to +70°C) 23.6×23.6×24.0mm (excluding projection on the rear) 27g (including cord) Français Alimentation Nécessaire Type de Masse Consommation Sortie Image Capacité de la commande de sortie Capteur d'image Nombre de pixels effectifs Lentille Champ de vision Fonction ajustement automatique de l'image Résistance à l'eau Ratio Signal/Bruit Résolution (Horizontal) Plage d'illumination Température de fonctionnement Dimensions externes (L×H×P) Poids 5,0V à 7m0V continu Masse négative 0,57W (6V) Vidéo Composite NTSC 1Vp-p (75 Ω) Capteur d'image CMOS 1/3.7 de pouce, ratio 4:3 640 (horizontal)×480 (vertical) environ 0,3 Mégapixels Distance focale f=1,34mm, Luminosité F=1:2,0 Horizontal : 131°, vertical : 103° Réglage automatique de la balance des blancs IP67 40,5db ou plus 330 lignes de Télévision (centrale) Environ 1,5 à 100klx -22 à +158F (-30 à +70°C) 23,6×23,6×24.0 mm (sauf partie arrière de la caméra) 27g (cordon compris) Español Requisitos de alimentación Tipo de toma de tierra Consumo eléctrico Imagen de salida Capacidad de salida de la unidad Sensor de imagen Número efectivo de píxeles Sección de la lente Ángulo de campo Función de ajuste de imagen automático Resistencia al agua Relación señal/ruido Resolución (Horizontal) Alcance de la iluminación Intervalo de temperatura de funcionamiento Dimensiones externas (ancho×alto×prof.) Peso De 5,0 V CC a 7,0 V CC Tipo toma de tierra negativa 0,57 W (6V) Vídeo compuesto NTSC 1 Vp-p (75 Ω) Sensor de imagen CMOS de 1/3,7 pulg., relación de aspecto 4:3 640 (horizontal) × 480 (vertical), aproximadamente 0,3 megapíxeles Longitud focal f = 1,34 mm, brillo F = 1:2,0 Horizontal: 131°, vertical: 103° Ajuste automático del balance de blancos IP67 40,5 db o más 330 líneas de TV (área central) Aproximadamente de 1,5Lx a 100klx De -22 a +158F (de -30 a +70ºC) 23,6×23,6×24,0 mm (salvo el saliente en la parte trasera) 27 gr (incluyendo el cable) Deutsch Stromversorgung Massetyp Stromverbrauch Ausgebebild Ausgabelaufwerkkapazität Bildsensor Effektive Anzahl der Pixel Objektivbereich Bildwinkel Automatische Bildeinstellungsfunktion Wasserfestigkeit S/N Verhältnis Auflösung (Horizontal) Beleuchtungsbereich Betriebstemperaturbereich Kameraabmessungen (B×H×T) Gewicht DC5,0V bis DC7,0V Negativer Massetyp 0,57W (6V) Kompositvideo NTSC 1Vp-p (75 Ω) 1/3,7 Zoll CMOS Bildsensor, Seitenverhältnis 4:3 640 (horizontal)×480 (vertikal) etwa 0,3 Megapixel Brennweite f=1,34mm, Helligkeit F=1:2,0 Horizontal: 131°, vertikal: 103° automatischer Weißabgleich IP67 40,5db oder mehr 330 TV TV-Zeilen (Mittelbereich) Etwa 1,5Lx bis 100klx -22 bis +158 F (-30 bis +70°C) 23,6×23,6×24,0mm (ohne Schutz auf der Rückseite) 27g (einschließlich Kabel) Italiano Requisiti di alimentazione Tipo di messa a terra Consumo elettrico Uscita immagine Capacità di azionamento uscita Sensore immagine Numero effettivo di pixel Sezione obiettivo Angolo di campo Funzione regolazione automatica dell'immagine Impermeabilità Rapporto S/N Risoluzione (orizzontale) Illuminazione Temperatura di funzionamento Dimensioni esterne (L×A×P) Peso CC da 5,0 a 7,0 V Messa a terra negativa 0,57 W (6V) Video composito NTSC 1 Vp-p (75 Ω) Sensore immagine CMOS 1/3,7 di pollice, formato 4:3 640 (orizzontale) × 480 (verticale) approssimativamente 0,3 megapixel Lunghezza focale f= 1,34 mm, luminosità F= 1:2,0 Orizzontale: 131°, verticale: 103° Regolazione automatica del bilanciamento del bianco IP67 40,5 db o superiore 330 linee TV (area centrale) Approssimativamente da 1,5Lx a 100klx Da -22 a +158F (-30 a +70°C) 23,6×23,6×24,0 mm (esclusa proiezione sul retro) 27 g (incluso cavo) Svenska Spänningsbehov Typ av jordning Effektförbrukning Bildutmatning Utmatningskapacitet Bildsensor Effektivt antal bildpunkter Linsprofil Fältvinkel Automatisk bildjusteringsfunktion Vattenbeständighet S/N-ratio Upplösning (vågrätt) Belysningsområde Drifttemperaturens område Externa dimensioner (B×H×D) Vikt DC5,0V till DC7,0V Negativ typ av jordning 0,57W (6V) Sammansatt video NTSC 1Vp-p (75 Ω) 1/3,7 tum CMOS bildsensor, bildformat 4:3 640 (vågrätt)×480 (lodrätt) ungefär 0,3 megapixel Brännvidd f=1,34 mm, ljusstyrka F=1:2.0 Vågrätt: 131°, lodrätt: 103° Automatisk justering av vitbalansering IP67 40,5 db eller mer 330 TV-linjer (mittenområde) Ungefär 1,5Lx till 100klx -22 till +158F (-30 till +70°C) 23,6×23,6×24,0 mm (exklusiv projektion bak) 27g (med tråd) 5,0-7,0 0,57 Вт (6 NTSC 1 75 CMOS 1/3,7 4:3 640 480 0,3 f=1,34 F=1:2,0 131 103° IP67 40,5 330 1,5 100 22 до +158F (от -30 до +70°C) 23,6×23,6×24,0 27 www.Alpine.ru English Information on Disposal of Old Electrical and Electronic Equipment and Battery (applicable for countries that have adopted spearate waste collection systems) If you want to dispose this product, do not mix it with general household waste. There is a separate collection system for used electronic products in accordance with legislation that requires proper treatment, recovery and recycling. Contact your local authority for details in locating a recycle facility nearest to you. Proper recycling and waste disposal will help conserve resources whist preventing detrimental effects on our health and the environment. Français Information sur le traitement des Déchets Electriques et Electroniques (DEEE), pour les pays ayant adoptés un traitement séparés de ces déchets Si vous possédez des appareils Electriques ou Electroniques usagés, ne les jetez pas dans le système général. Conformément à la Directive Européenne, transposée dans votre pays, il existe un système séparé de recyclage et de traitement de ces déchets. Veuillez contacter l'administration locale afin de prendre connaissance du lieu de recyclage et de traitement le plus proche de chez vous. Ce système est destiné à protéger l'environnement. Español Información sobre la eliminación de Viejos Equipos Eléctricos y Electrónicos, así como Baterías (aplicable en los países que han adoptado sistemas de recogida selectiva de residuos) Si desea deshacerse de este producto, no lo mezcle con los residuos generales de su hogar. Existe un sistema de recogida selectiva para aparatos electrónicos usados de acuerdo a la legislación, que requiere un tratamiento adecuado de recuperación y reciclado. Póngase en contacto con las autoridades locales para obtener más información sobre el punto de recogida y tratamiento más cercano. El apropiado reciclado y eliminación de residuos ayuda a conservar los recursos y a contribuir en la prevención de los efectos negativos y perjudiciales sobre nuestra salud y el medio ambiente. Deutsch Informationen zur Entsorgung von Elektro- und Elektronikgeräten und Batterien (anwendbar für Länder, die ein separates Sammelsystem übernommen haben) Wenn Sie dieses Produkt entsorgen wollen, entsorgen Sie

  • 1
  • 2

Installation/Installation/Instalación/Montage/Montaggio/Montering/
Установка
Check Accessory Parts/Vérifiez les accessoires/Compruebe los accesorios/Überprüfen Sie, ob alle
Teile mitgelifert wurden/Verificare le componenti accessorie/Kontrollera medföljande delar/
Проверьте дополнительные детали
HCE-C1
100
A
Rearview camera
A
Caméra de recul
A
Cámara de marcha atrás
A
Rückfahrkamera
A
Telecamera posteriore
A
Backkamera
A
Камера заднего вида
B
Power unit
B
Alimentation
B
Unidad de alimentación
B
Netzteil
B
Alimentatore
B
Strömenhet
B
Блок питания
C
Camera mounting
C
Support de fixation
C
Soporte de la cámara
C
Kamerahalterung
C
Supporto telecamera
C
Kamerafäste
C
Крепление камеры
D
Camera mounting stage
D
Palier de montage de la caméra
D
Plataforma de montaje de la cámara
D
Kamerahalterungsplattform
D
Supporto di montaggio della
telecamera
D
Kamerans monteringsstadiet
D
Платформа для монтирования
камеры
G
Waterproofing pad
G
Protège câble étanche
G
Dispositivo protector resistente
al agua
G
Wasserdichtes Pad
G
Protezione impermeabile
G
Vattentätningsdyna
G
Водонепроницаемая
прокладка
H
Waterproofing pad adhesive sheet
H
Adhésif pour protège câble
étanche
H
Hoja adhesiva para el dispositivo
protector resistente al agua
H
Klebestreifen für wasserdichtes
Pad
H
Foglio adesivo protezione
impermeabile
H
Självhäftande ark för
vattentätningsdyna
H
Самоклеящаяся полоска
водонепроницаемой прокладки
(0.5m)
/(0,5m)
E
Camera mounting screws
E
Vis de montage de la caméra
E
Tornillos de montaje de la cámara
E
Kamera-Montageschrauben
E
Viti di montaggio della
telecamera
E
Kamerans monteringsskruvar
E
Винты для крепления камеры
(4 screws)/(4 vis)/(4 tornillos)/(4
Schrauben)/(4 viti)/(4 skruvar)/(4 винта)
(2 screws for mounting camera, 2
angle adjustment screws)/
(2 vis pour le montage de la caméra, 2
vis pour le réglage d'angle)/
(2 tornillos para montar la cámara, 2
tornillos de ajuste de ángulo)/
(2 Schrauben für die
Monatge der Kamera, 2
Winkeleinstellungsschrauben)/
(2 viti per il montaggio della
telecamera, 2 viti di regolazione
dell'angolazione)/
(2 screws for mounting camera,
2 angle adjustment screws) - (2
skruvar för montering av kamera, 2
vinkeljusteringsskruvar)/
(2 винта для крепления камеры, 2
винта регулировки угла)
I
Camera extension cable
I
Rallonge câble camera
I
Cable de extensión de la cámera
I
Kameraverlängerungskabel
I
Cavo di prolunga per la
telecamera
I
Kameraförlängningskabel
I
Удлинительный кабель камеры
K
Heat-shrink Tube
K
Tube thermorétrécissable
K
Tubo termorretráctil
K
Heißschrumpfschlauch
K
Tubo termorestringente
K
Värmekrympande rör
K
Термоусадочная трубка
(7 m)
HCE-C
1100
D
A
Rearview camera
A
Caméra de recul
A
Cámara de marcha atrás
A
Rückfahrkamera
A
Telecamera posteriore
A
Backkamera
A
Камера заднего вида
Reverse/ACC/Video/GND : 3m
Marcha atrás/ACC/Video/TIERRA: 3m
Rückfahrk./ACC/Video/Masse: 3m
Reverse/ACC/Video/GND: 3m
Back/ACC/Video/GND: 3m
Reverse/ACC/Video/GND: 3m
F
Self-tapping screw
F
Vis autotaraudeuse
F
Tornillo macho roscador
F
Schneidschraube
F
Vite autofilettante
F
Gängpressad skruv
F
Самонарезающий винт
(4 screws)/(4 vis)/(4 tornillos)/
(4 Schrauben)/(4 viti)/(4 skruvar)/
(4 винта)
J
Cable tie
J
Serre-câble
J
Brida para cable
J
Kabelbinder
J
Fascetta serracavi
J
Fastbindningsrem
J
Кабельная стяжка
(5
pcs
)/(5
pcs
)/(5
piezas
)/(5
Stk
)/(5
pz
)/
(5 s
t
)/(5
шт.
)
C
Camera mounting
C
Support de fixation
C
Soporte de la cámara
C
Kamerahalterung
C
Supporto telecamera
C
Kamerafäste
C
Крепление камеры
D
Camera mounting stage
D
Palier de montage de la caméra
D
Plataforma de montaje de la cámara
D
Kamerahalterungsplattform
D
Supporto di montaggio della
telecamera
D
Kamerans monteringsstadiet
D
Платформа для монтирования
камеры
E
Camera mounting screws
E
Vis de montage de la caméra
E
Tornillos de montaje de la cámara
E
Kamera-Montageschrauben
E
Viti di montaggio della
telecamera
E
Kamerans monteringsskruvar
E
Винты для крепления камеры
(0.5m)
/(0,5m)
(4 screws)/(4 vis)/(4 tornillos)/(4
Schrauben)/(4 viti)/(4 skruvar)/(4 винта)
(2 screws for mounting camera, 2
angle adjustment screws)/
(2 vis pour le montage de la caméra, 2
vis pour le réglage d'angle)/
(2 tornillos para montar la cámara, 2
tornillos de ajuste de ángulo)/
(2 Schrauben für die
Monatge der Kamera, 2
Winkeleinstellungsschrauben)/
(2 viti per il montaggio della
telecamera, 2 viti di regolazione
dell'angolazione)/
(2 screws for mounting camera,
2 angle adjustment screws) - (2
skruvar för montering av kamera, 2
vinkeljusteringsskruvar)/
(2 винта для крепления камеры, 2
винта регулировки угла)
G
Waterproofing pad
G
Protège câble étanche
G
Dispositivo protector resistente
al agua
G
Wasserdichtes Pad
G
Protezione impermeabile
G
Vattentätningsdyna
G
Водонепроницаемая
прокладка
H
Waterproofing pad adhesive sheet
H
Adhésif pour protège câble
étanche
H
Hoja adhesiva para el dispositivo
protector resistente al agua
H
Klebestreifen für wasserdichtes
Pad
H
Foglio adesivo protezione
impermeabile
H
Självhäftande ark för
vattentätningsdyna
H
Самоклеящаяся полоска
водонепроницаемой прокладки
I
Camera extension cable
I
Rallonge câble camera
I
Cable de extensión de la cámera
I
Kameraverlängerungskabel
I
Cavo di prolunga per la
telecamera
I
Kameraförlängningskabel
I
Удлинительный кабель камеры
(10.5m)/(10,5m)
K
Heat-shrink Tube
K
Tube thermorétrécissable
K
Tubo termorretráctil
K
Heißschrumpfschlauch
K
Tubo termorestringente
K
Värmekrympande rör
K
Термоусадочная трубка
F
Self-tapping screw
F
Vis autotaraudeuse
F
Tornillo macho roscador
F
Schneidschraube
F
Vite autofilettante
F
Gängpressad skruv
F
Самонарезающий винт
(4 screws)/(4 vis)/(4 tornillos)/
(4 Schrauben)/(4 viti)/(4 skruvar)/
(4 винта)
J
Cable tie
J
Serre-câble
J
Brida para cable
J
Kabelbinder
J
Fascetta serracavi
J
Fastbindningsrem
J
Кабельная стяжка
(5 pcs)/(5 pcs)/(5 piezas)/(5 Stk)/(5 pz)/
(5 st)/(5 шт.)
Installation Location/Emplacement de
l’installation/Ubicación de la instalación/
Montageort/Posizione di montaggio/
Monteringsplats/Место установки
Install to the Rear Garnish/Installez la caméra sur la carrosserie arrière/
Instalación en el acabado trasero/Montage am Heckklappengriff/
Montaggio sulla modanatura posteriore/Montering i bakluckan/
Установка сзади над номерным знаком
Fig.2/Schéma 2/Fig.2/
Abb. 2/Fig.2/Bild 2/Рис. 2
Fig.3/Schéma 3/Fig.3/
Abb. 3/Fig.3/Bild 3/Рис. 3
2.5
13
30
21
Fig.1/Schéma 1/Fig.1/
Abb. 1/Fig.1/Bild 1/Рис. 1
English
1
Attach the mounting bracket to the camera mounting stage
with the angle adjustment screw as shown in the figure.
2
Attach the camera to the camera mounting bracket
C
. Pull
the camera cable through to the camera mounting bracket
C
, and secure with the hex screws
E
(see Fig. 2).
3
Loosen the camera mounting bracket
C
and angle
adjustment screw. Determine the attachment angle, and
carefully tighten the angle adjustment screw.
4
Make a 13 mm hole in the rear bumper camera mounting
bracket (see Fig. 3).
5
Pull the camera cable inside the car through the hole made in
step 3.
6
Peel off the adhesive seal from the camera mounting bracket
and attach the camera mounting bracket on the chassis of the
vehicle. If required, fix the camera mounting bracket using
self-tapping screws.
Attach the camera in a position where it does not touch the
number plate.
Use retail touch-up paint to paint the surface and surrounding
area when a hole has been made in a metal surface.
Waterproof securely the hole made for the camera cable using a
commercially-available waterproof tape or sealing material.
If necessary, use a self-tapping screw
F
to fix the camera
mounting bracket (In the case of a plastic mount area).
Français
1
Attachez le support de montage au palier de montage de la
caméra avec la vis pour le réglage d'angle comme indiqué sur
la figure.
2
Fixez la caméra sur le support
C
. Passez le câble de la caméra
dans le support
C
, puis fixez-le à l’aide des vis
hexagonales
E
(schéma 2).
3
Déserrez le support de la caméra
C
et insérez la vis pour le
réglage d’angle. Choisissez l’angle de fixation, puis resserrez
délicatement la vis dans cet angle.
4
Faites un trou de 13 mm dans la carrosserie arrière pour fixer
le support de la caméra (schéma 3).
5
Faites passer le câble de la caméra à l’intérieur du véhicule par
le trou fait à l’étape 3.
6
Retirez le film protecteur du support de la caméra, puis fixez
ce dernier sur le châssis du véhicule. Le cas échéant, fixez le
support à l’aide des vis autotaraudeuses.
Fixez la caméra de façon à ce qu’elle ne touche pas la plaque
d’immatriculation.
Si vous avez percé un trou dans une surface métallique, une
retouche est nécessaire sur et autour de la surface avec une
peinture spéciale.
Les passes-fils à l’intérieur du véhicule doivent être imperméables
; pour cela, utilisez du ruban adhésif imperméable ou un autre
produit d’étanchéité vendu dans le commerce.
Si besoin est, utilisez une vis autotaraudeuse
F
pour fixer le
support de la caméra (notamment si la surface de montage est en
plastique).
Español
1
Acople el soporte de montaje a la plataforma de montaje de
la cámara con el tornillo de ajuste, tal y como se muestra en la
figura.
2
Coloque la cámara en el soporte de la cámara
C
. Tire del
cable de la cámara a través del soporte de la cámara
C
y fíjelo
con los tornillos hexagonales
E
(véase la figura 2).
3
Afloje el soporte de la cámara
C
e inserte en ángulo el
tornillo de ajuste. Calcule el ángulo de fijación y, con cuidado,
apriete el tornillo en dicho ángulo.
4
Realice un agujero de 13 mm en el soporte de la cámara del
acabado trasero (véase la figura 3).
5
Tire del cable de la cámara desde el interior del coche a través
el agujero del paso 3.
6
Retire el sello adhesivo del soporte de la cámara y fíjelo en
el chasis del vehículo. Si fuera necesario, fije el soporte de la
cámera con ayuda de los tornillos embriados suministrados.
Coloque la cámara en una posición en la que no toque la
matrícula.
Utilice pintura para retocar la superficie y el área que rodea el
agujero realizado en la superficie de metal.
Para garantizar que las arandelas aislantes colocadas en el interior
del vehículo son resistentes al agua, utilice cinta adhesiva resistente
al agua o algún tipo de material sellante.
Si es necesario, utilice un tornillo macho roscador
F
para fijar el
soporte de la cámara (en caso de que el área de instalación sea de
plástico).
Deutsch
1
Befestigen Sie die Kamerahalterung an der
Kamerahalterungsplattform mit der Schraube zur
Winkeleinstellung wie in Abb. 1 dargestellt.
2
Befestigen Sie die Kamera an der Kamerahalterung
C
. Führen
Sie das Kamerakabel durch die Kamerahalterung
C
, und
befestigen Sie sie mit den Inbus-Schrauben
E
(siehe Abb. 2).
3
Lösen Sie die Kamerahalterung
C
und die Schraube
zur Winkelanpassung. Bestimmen Sie den Winkel für
die Anbringung, und ziehen Sie die Schraube für die
Winkelanpassung vorsichtig fest.
4
Bohren Sie ein 13 mm großes Loch in die Heckklappengriff-
Kamerahalterung (siehe Abb. 3).
5
Führen Sie das Kamerakabel durch das in Schritt 3 gebohrte
Loch ins Auto.
6
Lösen Sie die Klebefolie von der Kamerahalterung, und
bringen Sie die Kamerahalterung an der Fahrzeugkarosserie
an. Befestigen Sie die Kamerahalterung gegebenenfalls mit
Schneidschrauben.
Befestigen Sie die Kamera so, dass sie nicht das Nummernschild
berührt.
Bringen Sie Reparaturlack auf der Oberfläche und um das Loch
herum an, wenn Sie ein solches in eine Metalloberfläche gebohrt
haben.
Dichten Sie das für das Kamerakabel gebohrte Loch mit
handelsüblichem Dichtband oder Dichtungsmaterial wasserdicht
ab.
Falls nötig, befestigen Sie die Kamerahalterung mit einer
Blechschraube
F
(falls der Befestigungsbereich aus Plastik
besteht).
Svenska
Nr.
Namn
Kabelfärg
Specifikation/
Funktion
Anslut till
1
Kontakt för
videoutgång
Visar en kamerabild
på en ansluten
monitor eller
navigationssystem.
Anslut till kamerans
videoingång på den
anslutna enheten.
2
Anslutning för
kamera
Videosignal från
kameran.
Anslut kamerans
förlängningskabel
(medföljer) bak på kameran.
3
Säkring
7,0 A
4
Back/
ACCledning
Röd
Denna ledning
används för att ge
ström till enheten när
backen läggs i.
Anslut ledning till
ACC-läget.
5
Jordledning
Svart
Fäst ledningen till
en metalldel I bilens
kaross.
Anslut ledningen till en
metalldel I bilens kaross.
Se till att jordningen är
ordentlig, i annat fall
fungerar inte enheten.
Montera kamerakabeln och RCA-förlängningskabeln en bit ifrån
radioantennen och antennkabeln. Störningar kan uppstå om de
hamnar för nära varandra eller om de lindas ihop.
Русский
Наименование
Цвет вывода
Характеристика/
функция
Подключение к
1
Разъем
видеовыхода
Вывод видео камеры
на подключенный
монитор или
навигационную
систему.
Подключите к разъему
видеовхода камеры
подключенного
устройства.
2
Разъем задней
камеры
Вход видеосигнала
задней камеры.
Подключите
удлинительный кабель
камеры (входит в
комплект) к задней
камере.
3
Предохранитель
7,0 A
4
Вывод Reverse/
ACC
Красный
Когда автомобиль
подает назад, этот
вывод используется
для подачи питания
на устройство.
Подключите провод
питания к точке ACC.
5
Вывод
заземления
Черный
Надежно
прикрепите вывод к
металлической части
кузова автомобиля.
Надежно
подключите вывод к
металлической части
кузова автомобиля.
В противном
случае возможна
неисправность.
Проведите кабель камеры и кабель RCA на удалении
от радиоантенны и кабеля антенны. Если они будут
расположены слишком близко или спутаны между собой,
возможны помехи.
HCE-C1
100
D
Fig.4/Schéma 4/Fig.4/Abb. 4/Fig.4/Bild 4/Рис. 4
HCE-C1
100
D-compatible Alpine AV Head Unit*/Unité
principale AV Alpine compatible avec HCE-C1
100
D*/Unidad
principal AV Alpine compatible con el
HCE-C1
100
D*/HCE-C1
100
D-kompatibles Alpine
AVHauptgerät*/Unità principale AV Alpine compatibile con
HCE-C1
100
D*/HCE-C1
100
D-kompatibel Alpine AV
huvudenhet*/Головное устройство аудио-видео Alpine,
совместимое с HCE-C1
100
D*
Camera extension cable (supplied)/
Rallonge câble camera (fournie)/
Cable de extensión de la cámera (suministrada)/
Kameraverlängerungskabel (mitgeliefert)/
Cavo di prolunga per la telecamera (in dotazione)/
Kameraförlängningskabel (medföljer)/
Удлинительный кабель камеры (входит в комплект)
Rearview camera/Caméra de recul/
Cámara de marcha atrás/
Rückfahrkamera/Telecamera posteriore/
Backkamera/Камера заднего вида
English
For details on connection, refer to the installation manual of the
HCE-C1
100
D-compatible product. Connect the rear camera
input connector only.
*
This product can only connect to Alpine Mobile Media
Stations with the dedicated Alpine camera input. For
information on HCE-C1
100
D-compatible products, contact
your local authorized Alpine dealer or visit the Alpine Website.
Français
Pour plus de détails sur la connexion, consultez le guide
d’installation du produit compatible avec HCE-C1
100
D.
Raccordez uniquement la borne d’entrée de la caméra arrière.
*
Cet appareil ne peut être raccordé qu’à une station
multimédia portable Alpine via la borne d’entrée de la caméra
Alpine. Pour plus d’informations sur les produits compatibles
avec HCE-C1
100
D, contactez votre revendeur Alpine ou
consultez le site Web Alpine.
Español
Para obtener más información acerca de la conexión, consulte el
manual de instalación del producto compatible con el HCE-
C1
100
D. Conecte únicamente el conector de entrada de la
cámara de visión trasera.
*
Este producto solo puede conectarse a equipos Mobile Media
de Alpine con una entrada exclusiva de cámara de Alpine.
Para obtener información sobre los productos compatibles
con HCE-C1
100
D, póngase en contacto con su distribuidor
autorizado Alpine o visite el sitio web de Alpine.
Deutsch
Ausführliche Informationen zu den Anschlüssen finden Sie
in der Installationsanleitung des HCE-C1
100
D-kompatiblen
Produkts. Stellen Sie nur eine Verbindung zur Eingangsbuchse der
Rückfahrkamera her.
*
Dieses Produkt kann nur mit Mobile-Media-Stationen von
Alpine mit geeignetem Alpine-Kameraeingang angeschlossen
werden. Informationen zu HCE-C1
100
D-kompatiblen
Produkten erhalten Sie von Ihrem autorisierten Alpine-
Händler vor Ort oder besuchen Sie die Website von Alpine.
Italiano
Per informazioni sul collegamento, consultare il manuale di
installazione del prodotto compatibile con HCE-C1
100
D. La
telecamera posteriore deve essere collegata solo al connettore di
ingresso.
*
Questo prodotto può essere collegato esclusivamente a unità
Alpine Mobile Media Station dotate dell’apposito ingresso
compatibile con telecamere Alpine. Per informazioni sui
prodotti compatibili con HCE-C1
100
D rivolgersi al
rivenditore autorizzato Alpine di zona oppure visitare il sito
Web di Alpine.
Svenska
För mer information om anslutning, se handboken för den HCE-
C1
100
D-kompatibla produkten. Anslut bara backkameraingången.
*
Denna produkt kan endast anslutas till Alpine Mobile
Media Stations med därtill avsedd Alpine-kameraingång.
Information om produkter som är kompatibla med
HCE-C1
100
D kan du få av din lokala, auktoriserade Alpine-
återförsäljare, eller genom ett besök på Alpines webbplats.
Русский
Подробные сведения о подключения приводятся в
руководстве по установке продукта, совместимого с HCE-
C1
100
D. Подключите только разъем входа задней камеры.
*
Данный продукт можно подключать только к мобильным
медиастанциям Alpine со специальным входом для
камер Alpine. Для получения информации о продуктах,
совместимых с HCE-C1
100
D, обратитесь к местному
официальному дилеру Alpine или посетите веб-сайт Alpine.
Adjusting the Camera Angle/Réglage de l’angle de la caméra/Ajuste
del ángulo de la cámara/Anpassen des Kamerawinkels/Regolazione
dell’angolazione della telecamera/Justering av kameravinkeln/
Изменение угла зрения камеры
Fig.7/Schéma 7/Fig.7/
Abb. 7/Fig.7/Bild 7/Рис. 7
Fig.8/Schéma 8/Fig.8/
Abb. 8/Fig.8/Bild 8/Рис. 8
Fig.6/Schéma 6/Fig.6/
Abb. 6/Fig.6/Bild 6/Рис. 6
English
Caution
When adjusting the camera angle, do so after turning off the
engine and applying the hand brake to avoid an accident.
1
Put the gear shift into reverse (R), and check the image from
the camera on the display.
2
Loosen the camera mounting bracket
C
and angle
adjustment screw. Determine the camera angle, and carefully
tighten the angle adjustment screw.
Français
Attention
Veillez à couper le moteur et à mettre le frein à main avant de régler
l’angle de la caméra afin d’éviter tout accident.
1
Mettez le levier de vitesse en marche arrière (R), puis vérifiez
l’image de la caméra affichée à l’écran.
réglage d’angle. Choisissez l’angle de la caméra, puis reserrez
délicatement la vis dans l’angle.
Español
Precaución
Cuando ajuste el ángulo de la cámara, apague primero el motor y
ponga el freno de mano para evitar posibles accidentes.
1
Ponga la palanca de marchas en marcha atrás (R) y
compruebe la imagen de la cámara que se muestra en la
pantalla.
2
Afloje el soporte de la cámara
C
e inserte en ángulo el
tornillo de ajuste. Calcule el ángulo de la cámara y, con
cuidado, apriete el tornillo en dicho ángulo.
Deutsch
Vorsicht
Wenn Sie den Kamerawinkel einstellen, schalten Sie zunächst den
Motor aus und ziehen Sie die Handbremse an, damit es zu keinem
Unfall kommt.
1
Legen Sie den Rückwärtsgang (R) ein, und überprüfen Sie das
Bild der Kamera auf dem Bildschirm.
2
Lösen Sie die Kamerahalterung
C
und die Schraube zur
Winkelanpassung. Bestimmen Sie den Kamerawinkel, und
ziehen Sie die Schraube für die Winkelanpassung vorsichtig fest.
Italiano
Attenzione
Per evitare incidenti, prima di regolare l’angolazione della
telecamera spegnere il motore e inserire il freno di stazionamento.
1
Inserire la retromarcia (R) e controllare l’immagine rimandata
sul display dalla telecamera.
2
Allentare il supporto della telecamera
C
e la vite di
regolazione dell’angolazione. Stabilire l’angolazione della
telecamera e serrare lentamente la vite di regolazione.
Svenska
Försiktighet
För att undvika olyckor ska justering av kamerans vinkel göras först
när bilen stängts av och handbromsen dragits åt.
1
Lägg i backen (R) och kontrollera bilden från kameran på
skärmen.
2
Lossa skruven till kamerafästet
C
och vinkeljusteringen.
Bestäm kameravinkeln och dra försiktigt åt justeringsskruven.
c: Vitt kontaktdon mellan den bakre kameran och
strömförsörjningen.
(endast HCE-C1100)
d: Rekommenderad plats för montering av HCE-C1
100/
HCE-1100D
bakre kamera (på den bakre stötfångaren).
e: I installationer för varubilar, kan den vita elkontakten mellan
den bakre kameran och kamerans strömförsörjning utsättas
för fukt. Om detta inträffat måste den isoleras för att
förhindra korrosion.
(endast HCE-C1100)
Använd krympröret för en vattentät installation som levereras
enligt följande procedur:
1 Förberedelse -Bild 13
(1) Sätt i krympröret
K
över kamerans förlängningskabel
I
.
(2)
Anslut kamerakabeln
A
till kontaktdonet på kamerans
förlängningskabel
I
.
(3)
Installera krympröret
K
så att
kontaktdon
(A) täcks (med
ung. 0,5
tum).
2
Vattentäthet installation -Bild 14
När förberedelsen har avslutats, dra åt kabeln och krymp
krympröret
K
genom att värma det från sidan (B) med en
värmepistol.
3 Kontroll -Bild 15
Se till att kontaktdonen (A) och (C) täcks helt med krympröret
K
.
När krympröret är som minst ska epoxi och fogtätning föras in i
sektionerna (D) för att avsluta vattentätningen.
Försiktighet
Se till att inte smälta kamerakabeln eller kamerans
förlängningskabel med värmepistolen.
Se till att bränna dig under arbetet.
Böj inte anslutningskabeln efter att vattentätningen slutförts.
Русский
а: Резиновая втулка для выведения провода камеры из
кабины на днище пикапа.
б: При установке в пикапе*, провод, соединяющий камеру
с блоком питания, обычно устанавливается на днище
пикапа.
Везде, где провод проходит под днищем пикапа, он
должен быть защищен от повреждений при помощи
ребристой трубки.
Резиновая втулка, устанавливаемая в месте выведения
провода из кабины на днище пикапа, должна быть
уплотнена при помощи кремнийорганического герметика
для предотвращения попадания воды в кабину пикапа.
в: Белый разъем для соединения камеры заднего вида и
блока питания.
(только HCE-C1100)
г: Рекомендуемое место установки камеры заднего вида
HCE-C1
100/HCE-C1100D
(на заднем бампере).
д: При установке в пикапе, белый электрический разъем
для соединения камеры заднего вида и блока питания
камеры может быть подвержен воздействию влаги. Если
это происходит, его необходимо герметизировать для
предотвращения коррозии.
(только HCE-C1100)
Обеспечьте гидроизоляцию при помощи идущей в комплекте
термоусадочной трубки, выполнив приведенную ниже
процедуру:
1
Подготовка — рис. 13
(1) Наденьте термоусадочную трубку
K
на удлинительный
кабель камеры
I
.
(2) Подключите кабель камеры
A
к разъему удлинительного
кабеля камеры
I
.
(3) Наденьте термоусадочную трубку
K
таким образом,
чтобы
разъем
(А) была закрыта (с запасом прибл.
0,5 дюйма).
2
Гидроизоляция — рис. 14
После завершения подготовки выпрямите кабель и усадите
термоусадочную трубку
K
, нагрев ее со стороны (В) при
помощи термофена.
3
Проверка — рис. 15
Убедитесь, что разъемы (А) и (С) полностью закрыты
термоусадочной трубкой
K
.
После того как термоусадочная трубка максимально
усядет, секции (D) следует залить эпоксидной смолой
или пластичным материалом для завершения процесса
гидроизоляции.
Осторожно
Будьте осторожны, чтобы не оплавить кабель камеры или
удлинительный кабель камеры при помощи термофена.
Будьте осторожны, чтобы не обжечься во время выполнения
этой процедуры.
После завершения гидроизоляции не сгибайте кабель с
силой.
Specifications/Spécifications/Especificaciones/Technische Daten/
Caratteristiche techniche/Tekniska data/Характеристики
HCE-C1
100
English
Power Requirements
DC9V to DC15.6V
Ground Type
Negative ground type
Power Consumption
1.2
W (12V)
Output Image*1
Composite Video NTSC
Output Drive Capacity
1Vp-p (75 Ω)
Image Sensor
1/3.7 inch CMOS image sensor, aspect ratio 4:3
Effective Number of Pixels
640 (horizontal)×480 (vertical) approximately 0.3 Mega pixels
Lens Section
Focal length f=1.34mm, brightness F=1:2.
0
Angle of Field
Horizontal: 131°, vertical: 103°
Automatic Image Adjusting
Function
Automatic white balance adjustment
Water Resistance
IP67
S/N ratio
4
0.5
db or more
Resolution (Horizontal)
330 TV lines (center area)
Illumination Range
Approximately 1.5 to 100klx
Operating
Temperature
Range
Camera Section
-22 to +158F (-30 to +70°C)
Power Section
-22 to +158F (-30 to +70°C)
External
dimensions
(W×H×D)
Camera Section
23.6×23.6×24.0mm (excluding projection on the rear)
Power Section
38.0×25.0×15.0mm (excluding projection)
Weight
Camera Section
27g (camera only)
Power Section
83g (including cord)
*
1 This product outputs NTSC image. It does not output PAL image.
Français
Alimentation Nécessaire
9V à 15,6V continu
Type de Masse
Masse négative
Consommation
1,2
W (12V)
Sortie Image*1
Vidéo Composite NTSC
Capacité de la commande
de sortie
1Vp-p (75 Ω)
Capteur d’image
Capteur d’image CMOS 1/3.7 de pouce, ratio 4:3
Nombre de pixels effectifs
640 (horizontal)×480 (vertical) environ 0,3 Mégapixels
Lentille
Distance focale f=1,34mm, Luminosité F=1:2,
0
Champ de vision
Horizontal : 131°, vertical : 103°
Fonction ajustement automatique
de l’image
Réglage automatique de la balance des blancs
Résistance à l'eau
IP67
Ratio Signal/Bruit
4
0,5
db ou plus
Résolution (Horizontal)
330 lignes de Télévision (centrale)
Plage d’illumination
Environ 1,5 à 100klx
Température de
fonctionnement
Caméra
-22 à +158F (-30 à +70°C)
Section
d’alimentation
-22 à +158F (-30
à +70°C)
Dimensions
externes
(L×H×P)
Caméra
23,6×23,6×24.0 mm (sauf partie arrière de la caméra)
Section
d’alimentation
38,0×25,0×15,0 mm (partie saillante non comprise)
Poids
Caméra
27g (caméra uniquement)
Section
d’alimentation
83g (cordon compris)
*
1 Ce produit génère des images NTSC. Il ne génère pas d'image PAL.
Español
Requisitos de alimentación
De 9 V CC a 15,6 V CC
Tipo de toma de tierra
Tipo toma de tierra negativa
Consumo eléctrico
1,2
W (12 V)
Imagen de salida*1
Vídeo compuesto NTSC
Capacidad de salida de la unidad
1 Vp-p (75 Ω)
Sensor de imagen
Sensor de imagen CMOS de 1/3,7 pulg., relación de
aspecto 4:3
Número efectivo de píxeles
640 (horizontal)×480 (vertical), aproximadamente 0,3
megapíxeles
Sección de la lente
Longitud focal f = 1,34 mm, brillo F = 1:2,
0
Ángulo de campo
Horizontal: 131°, vertical: 103°
Función de ajuste de imagen
automático
Ajuste automático del balance de blancos
Resistencia al agua
IP67
Relación señal/ruido
4
0,5
db o más
Resolución (Horizontal)
330 líneas de TV (área central)
Alcance de la iluminación
Aproximadamente de 1,5Lx a 100klx
Intervalo de
temperatura de
funcionamiento
Sección de la
cámara
De -22 a +158F (de -30 a +70°C)
Sección de
alimentación
De -22 a +158F (de -30 a +70°C)
Dimensiones
externas
(ancho×alto×prof.)
Sección de la
cámara
23,6×23,6×24,0 mm (salvo el saliente en la parte trasera)
Sección de
alimentación
38,0×25,0×15,0 mm (salvo el saliente)
Peso
Sección de la
cámara
27 gr (solo la cámara)
Sección de
alimentación
83 gr (incluyendo el cable)
*
1 Este producto emite imágenes NTSC. No emite imágenes PAL.
Deutsch
Stromversorgung
DC9V bis DC15,6V
Massetyp
Negativer Massetyp
Stromverbrauch
1,2
W (12V)
Ausgebebild*1
Kompositvideo NTSC
Ausgabelaufwerkkapazität
1Vp-p (75 Ω)
Bildsensor
1/3,7 Zoll CMOS Bildsensor, Seitenverhältnis 4:3
Effektive Anzahl der Pixel
640 (horizontal)×480 (vertikal) etwa 0,3 Megapixel
Objektivbereich
Brennweite f=1,34mm, Helligkeit F=1:2,
0
Bildwinkel
Horizontal: 131°, vertikal: 103°
Automatische
Bildeinstellungsfunktion
automatischer Weißabgleich
Wasserfestigkeit
IP67
S/N Verhältnis
40,5
db oder mehr
Auflösung (Horizontal)
330 TV TV-Zeilen (Mittelbereich)
Beleuchtungsbereich
Etwa 1,5Lx bis 100klx
Betriebstemper-
aturbereich
Kamerateil
-22 bis +158 F (-30 bis +70°C)
Leistungsteil
-22 bis +158 F (-30 bis +70°C)
Äußere
Abmessungen
(B×H×T)
Kamerateil
23,6×23,6×24,0mm (ohne Schutz auf der Rückseite)
Leistungsteil
38,0×25,0×15,0mm (ohne Schutz)
Gewicht
Kamerateil
27g (nur Kamera)
Leistungsteil
83g (einschließlich Kabel)
*
1 Dieses Produkt gibt ein NTSC-Bild aus. Es gibt kein PAL-Bild aus.
Securing the Camera Cable/Fixation du câble de la caméra/Fijación del
cable de la cámara/Befestigen des Kamerakabels/Fissaggio del cavo
della telecamera/Infästning av kamerakabeln/Закрепление кабеля
камеры
C
D
B
A
(A)
Rearview camera/Caméra arrière/Cámera trasera/Rückfahrkamera/
Telecamera per retromarcia/Backkamera/Камера заднего вида
(B)
To Power unit/Vers le bloc d’alimentation/A la unidad de alimentación/An
Netzteil/All’unità di alimentazione/Till strömförsörjningsenheten/На блок
питания
(C)
Clamper/Attache-fils/Fijador/Klammer/Elemento di fissaggio/Klämma/
Фиксатор
(D)
Waterproofing pad/Protège-câbles imperméable/Dispositivo protector
resistente al agua/Wasserdichtes Polster/Protezione impermeabile/
Vattentätningsdyna/Водонепроницаемая прокладка
Fig.9/Schéma 9/Fig.9/Abb. 9/Fig.9/Bild 9/Рис. 9
English
1
Secure the camera cable while referring to Fig. 9.
Attach the waterproof pad
G
with the waterproof pad
adhesive sheet
H
, and secure any slack cable around the
waterproof pad
G
using the wire clamp
J
.
Ensure the cable does not get caught in the trunk, rear door(s) or
any hinges.
The cable should go on the outside of car hinges and harness
covers.
After completing wiring, open and close the trunk and the rear
doors several times to confirm the cable is not getting caught or
rubbing anywhere.
Français
1
Fixez le câble de la caméra en vous reportant au schéma 9.
Fixez le protège-câbles
G
sur son ruban adhésif
H
, puis
fixez et tendez le câble sortant du protège-câbles
G
à l’aide
de l’attache-fils
J
.
Assurez-vous que le câble n’est pas coincé dans la malle, dans les
portes arrières ou dans une charnière.
Le câble doit être hors des protections des charnières et des
harnais.
Une fois le câblage terminé, ouvrez et refermez plusieurs fois la
malle arrière et les portes arrières afin de vous assurez que le câble
n’est pas coincé et qu’il ne subit aucun frottement.
Español
1
Fije el cable de la cámara siguiendo el diagrama de la figura 9.
Coloque el dispositivo protector resistente al agua
G
con la
hoja adhesiva correspondiente
H
y fije cualquier cable que
sobresalga alrededor del dispositivo resistente al agua
G
con ayuda del fijador de cables
J
.
Verifique que el cable no queda atrapado en el maletero, las
puertas traseras o en cualquier bisagra.
El cable debe estar fuera de las protecciones de las bisagras y
arneses del vehículo.
Una vez finalizado el cableado, abra y cierre el maletero y las
puertas traseras varias veces para comprobar que el cable no
queda atrapado ni plegado en ningún sitio.
Deutsch
1
Befestigen Sie das Kamerakabel anhand Abb. 9.
Befestigen Sie das wasserdichte Polster
G
mit dem
Klebestreifen für das wasserdichte Polster
H
und befestigen
Sie lose Kabel um das wasserdichte Polster
G
herum mit der
Kabelklemme
J
.
Vergewissern Sie sich, dass das Kabel nicht im Kofferraum, an den
hinteren Türen oder Scharnieren eingeklemmt wird.
Das Kabel sollte über die Scharniere und Kabelabdeckungen
hinweg geführt werden.
Nachdem die Verkabelung erfolgt ist, öffnen und schließen Sie den
Kofferraum und die hinteren Türen mehrmals, um sicherzustellen,
dass das Kabel nicht eingeklemmt oder berührt wird.
Italiano
1
Fissare il cavo della telecamera come mostrato nella Fig. 9.
Incollare la protezione impermeabile
G
dal lato adesivo
H
e fermare eventuali parti del cavo allentate intorno alla
protezione
G
utilizzando il fermacavo
J
.
Accertarsi che il cavo non rimanga impigliato nel portabagagli,
negli sportelli posteriori o nelle cerniere.
Il cavo deve passare all’esterno delle cerniere dell’auto e dei
copricavi.
Al termine del collegamento, aprire e chiudere più volte il
portabagagli e gli sportelli posteriori, verificando che il cavo non
rimanga impigliato o strisci con parti del veicolo.
Svenska
1
Fäst kamerakabeln enligt anvisningarna i Bild 9.
Sätt fast den vattentäta dynan
G
med det självhäftande arket
för vattentätningsdynan
H
och fäst eventuellt slak kabel
rund den vattentäta dynan
G
med sladdklämman
J
.
Se till att kabeln inte fastnar i bagageluckan, bakdörren eller
gångjärnen.
Kabeln ska löpa utanför bilens gångjärn och kabelskydden.
När dragningen utförts ska du öppna och stänga bagageluckan och
bakdörrarna flera gånger, så att kabeln inte fastnar eller skaver
någonstans.
Русский
1
Закрепите кабель камеры согласно рис. 9.
Прикрепите водонепроницаемую прокладку
G
при
помощи самоклеящейся полоски
H
и зафиксируйте
свободный кабель вокруг водонепроницаемой прокладки
G
при помощи зажима для проводов
J
.
Убедитесь, что кабель не переламывается багажником,
задними дверями или какими-либо шарнирными
соединениями.
Кабель должен проходить с внешней стороны шарнирных
соединений и кожухов, закрывающих проводку автомобиля.
После завершения прокладки кабеля несколько раз откройте
и закройте багажник и задние двери, чтобы убедиться, что
кабель нигде не зажимается и не трется.
Special Instructions for Pickup Truck Installations/Instructions
spéciales pour installation sur un pickup/Instrucciones especiales para
las instalaciones en camionetas/
a
b
c
d
e
Fig.12/Schéma 12/Fig.12
Front of pickup truck
*
/
Avant du pickup
*
/
Parte delantera de la camioneta
*
Recommended camera power supply mounting
location (inside pickup cab)/
Emplacement de montage recommandé de
l’alimentation de la caméra (à l’intérieur de la
cabine du pickup)/
Ubicación recomendada para colocar la fuente
de alimentación de la cámara (en el interior de
la camioneta)
Any type of vehicle, including pickup trucks, where the connector is
installed outside of the cabin./
Tout type de véhicule, notamment des camionnettes, où le
connecteur est installé hors de la cabine./
Cualquier tipo de vehículo, incluidas las camionetas, donde el
conector se debe instalar fuera de la cabina.
(A)
(B)
2
Desserrez le support de la caméra
C
et insérez la vis pour le
(D)
(D)
(C)
(A)
I
Camera extension
cable/
I
Rallonge câble
caméra/
I
Cable de extensión de
la cámera
K
Heat-shrink Tube/
K
Tube thermorétractable/
K
Tubo termorretráctil
A
Camera cable/
A
Câble de
Caméra /
A
Cable de
Cámara
About 0.5 inch/
Environ 0,5 pouce/
Aprox. 0,5 pulgada
Fig.13/Schéma 13/Fig.13
Fig.14/Schéma 14/Fig.14
Fig.15/Schéma 15/Fig.15
English
a: Rubber grommet to pass camera wire from inside of pickup
truck cab to underside of pickup truck chassis.
b: In pickup truck
*
installations, the wire that connects between
the camera and the camera power supply typically gets
installed under the pickup truck chassis.
This wire
must be protected
from damage using split-loom
tubing in any areas where it is installed under the pickup
chassis.
The rubber grommet where the wire passes from the cab to
the underside of the truck
must be sealed
with silicone to
prevent moisture intrusion into the pickup truck cab.
c:
White connector between rearview camera and power supply.
(HCE-C1100 only)
d: Recommended HCE-C1
100/HCE-C1100D
rearview camera
mounting location (on rear bumper).
e: In pickup truck installations, the white electrical connector
between the rearview camera and the camera’s power supply
may be exposed to moisture.
If so, it
must be sealed
to prevent corrosion.
(HCE-C1100 only)
Perform waterproofing with the provided heat-shrink tube by
following the procedure below:
1 Preparation -Fig.13
(1) Insert the heat-shrink tube
K
over the camera extension
cable
I
.
(2) Connect the camera cable
A
to the connector of the
camera extension cable
I
.
(3)
Install the heat-shrink tube
K
so
connector
(A) is covered
(with
approx. 0.5 inch).
2 Waterproofing -Fig.14
When preparation is complete, straighten the cable, and shrink
the heat-shrink tube
K
by heating it from side (B) with a heat
gun.
3 Check -Fig.15
Ensure that connectors (A) and (C) is entirely covered with the
heat-shrink tube
K
.
When the heat-shrink tube is at its smallest, epoxy or caulk
should be flowed onto the (D) sections to complete the
waterproofing process.
Caution
Be careful not to melt the camera cable or camera extension
cable by the heat gun.
Be careful not to burn yourself during this procedure.
After waterproofing is complete, do not bend the cord forcibly.
*
*
*
Vérifiez l’étanchéité à l’aide du tube thermorétrécissable en
suivant la procédure ci-dessous:
1 Préparation - Fig.13
(1) Insérez le câble d’extension de la caméra
I
dans le tube
thermorétrécissable
K
.
(2) Raccordez le câble de la caméra
A
au connecteur du câble
d’extension de la caméra
I
.
(3)
Installez le tube thermorétrécissable
K
afin que le
Connecteur
(A)
soit couvert (avec un débordement d’environ 0,5 pouce).
2 Étanchéité - Fig.14
Une fois la préparation terminée, tendez le câble et rétrécissez le
tube thermorétrécissable
K
en le chauffant du côté (B) à l’aide
d’un pistolet à air chaud.
3 Vérification - Fig.15
Vérifiez que les connecteurs (A) et (C) sont entièrement couverts
par le tube thermorétrécissable
K
.
Lorsque le tube thermorétrécissable atteint sa taille minimale,
vous devez insérer de la résine époxy ou une résine de
colmatage dans les sections (D) pour compléter le processus
d’étanchéité.
Attention
Veillez à ne pas faire fondre le câble de la caméra ou le câble
d’extension de la caméra lorsque vous utilisez le pistolet à air
chaud.
Veillez à ne pas vous brûler lors de cette procédure.
Une fois le processus d’étanchéité terminé, veillez à ne pas tordre
le câble de force.
Español
a: Arandela de goma para pasar el cable de la cámara desde el
interior de la cabina de la camioneta a la parte inferior del
chasis de la camioneta.
b: En instalaciones realizadas en camionetas
*
, el cable que
conecta la cámara y la fuente de alimentación de la cámara
normalmente se instala bajo el chasis de la camioneta.
Este cable
debe estar protegido
mediante un tubo de
hendidura en espiral en las zonas en las que se encuentre
instalado bajo el chasis de la camioneta.
La arandela de goma por el que pasa el cable desde la cabina
hasta la parte inferior de la camioneta
se debe sellar
con
silicona para evitar la entrada de humedad en la cabina de la
camioneta.
c:
Conector blanco entre la cámara de visión trasera y la fuente
de alimentación.
(solo la HCE-C1100)
d: Ubicación recomendada para colocar la cámara de visión
trasera HCE-C1
100/HCE-C1100D
(en el parachoques trasero).
e: En instalaciones realizadas en camionetas, el conector
eléctrico blanco situado entre la cámara de visión trasera y la
fuente de alimentación de la cámara podría estar expuesto
a la humedad. En ese caso
se debe sellar
para evitar la
corrosión.
(solo la HCE-C1100)
Lleve a cabo el proceso de impermeabilidad con el tubo
termorretráctil suministrado siguiendo estos pasos:
1
Preparación - Fig. 13
(1)
(2)
(3)
Inserte el tubo termorretráctil
K
en el cable prolongador de
la cámara
I
.
Conecte el cable de la cámara
A
al conector del cable
prolongador de la cámara
I
.
Instale el tubo termorretráctil
K
de modo que el
Conector
(A) quede cubierto (con aproximadamente 0,5 pulgadas de
exceso).
2
Impermeabilidad - Fig. 14
Una vez concluida la preparación, enderece el cable y reduzca el
tubo termorretráctil
K
calentándolo desde un lado (B) con una
pistola de aire caliente.
3
Comprobación - Fig. 15
Verifique que el conector (A) y el (C) están totalmente cubiertos
con el tubo termorretráctil
K
.
Cuando el tubo termorretráctil esté recogido, deberá
introducirse epoxi o masilla para que circule por las secciones (D)
para completar el proceso de impermeabilidad.
Precaución
Tenga mucho cuidado de no derretir el cable de la cámara o el
cable prolongador de la cámara con la pistola de aire caliente.
Preste mucha atención para no sufrir quemaduras al realizar este
procedimiento.
Una vez concluido el proceso de impermeabilidad, no doble el
cable con fuerza.
Besondere Anweisungen für Kleintransporter-Installationen /Istruzioni
speciali per installazione su cassonati /Speciella instruktioner för
installation på varubilar /Специальные инструкции по установке на
пикапе
Abb. 12/Fig. 12/Bild 12/Рис. 12
Vorderseite des Kleintransporters
*
/Parte
anteriore del cassonato
*
/Fram på varubilen
*/
Передняя сторона пикапа
*
Empfohlener Einbauort für Kameranetzteil
(innerhalb der Fahrerkabine des
Kleintransporters) /
Posizione di montaggio consigliata
dell'alimentazione della telecamera (all'interno
della cabina del cassonato) /
Rekommenderad förutsedd kraftförsörjning för
kameran placering (inne i varubilens hytt) /
Рекомендуемое место установки блока
питания камеры (внутри кабины пикапа)
Jede Art von Fahrzeug, einschließlich Kleintransporter, wobei der
Stecker außerhalb der Fahrerkabine installiert ist. /
Qualsiasi tipo di veicolo, inclusi i cassonati, in cui il connettore
viene installato all'esterno della cabina. /
Vilken som helst typ av fordon, inklusive varubilar, där
kontaktdonet installeras utanför hytten. /
Любой тип автомобиля, включая пикапы, в которых
разъем устанавливается за пределами кабины.
(A)
(B)
I
Kamera
verlängerungskabel /
I
Cavo di prolunga
della telecamera /
I
Kamera
förlängningskabel /
I
Камера,
удлинительный
кабель
K
Schrumpfschlauch /
K
Tubo
termorestringente /
K
Krymprör /
K
Термоусадочная
трубка
A
Kamera kabel /
A
Cavo della
telecamera /
A
Kamera kabel /
A
Камера,
кабель
Etwa 0,5 Zoll /
Circa 0,5 pollice /
Ungefär 0,5 tum /
Прибл. 0,5 дюйм
Abb. 13/Fig. 13/Bild 13/Рис. 13
Abb. 14/Fig. 14/Bild 14/Рис. 14
Abb. 15/Fig. 15/Bild 15/Рис. 15
Deutsch
a: Gummitülle, um das Kameraanschlusskabel von der
Innenseite der Kabine des Kleintransporters zur Unterseite der
Karosserie des Kleintransporters zu führen.
b: Bei Kleintransporter*-Installationen wird das
Kameraanschlusskabel, das die Kamera mit dem
Netzteil verbindet, in der Regel unter der Karosserie des
Kleintransporters installiert.
Diese Anschlusskabel müssen vor Schäden geschützt werden,
indem geteilte Rohrleitungen in allen Bereichen verwendet
werden, die unter der Karosserie des Kleintransporters
installiert werden.
Die Gummidichtung, wo das Kamerakabel von der Kabine an
der Unterseite des LKW verläuft, muss mit Silikon abgedichtet
werden, um das Eindringen von Feuchtigkeit in die LKW-
Kabine zu verhindern.
c: Weißer Stecker zwischen Rückfahrkamera und
Stromversorgung.
(nur HCE-C1100)
d: Empfohlener Einbauort der HCE-C1
100/HCE-C1100D
Rückfahrkamera (am hinteren Stoßfänger).
e: Bei Installationen in Kleintransportern kann der weiße
Elektrostecker zwischen der Rückfahrkamera und der Kamera-
Stromversorgung Feuchtigkeit ausgesetzt sein. Falls dies der
Fall ist, dichten Sie ihn ab, um Korrosion zu vermeiden.
(nur
HCE-C1100)
Führen Sie eine Abdichtung mit dem mitgelieferten
Heißschrumpfschlauch aus, indem Sie wie folgt vorgehen:
1 Vorbereitung -Abb.13
(1) Stecken Sie den Heißschrumpfschlauch
K
über das
Verlängerungskabel
I
der Kamera.
(2) Schließen Sie das Kamerakabel
A
an den Stecker des
Verlängerungskabels
I
der Kamera an.
(3) Installieren Sie den Heißschrumpfschlauch
K
, so dass die
Stecker
(A) (mit etwa 0,5 Zoll) abgedeckt ist.
2 Abdichtung -Abb.14
Wenn die Vorbereitung abgeschlossen ist, richten Sie das Kabel
gerade aus und schrumpfen Sie den Heißschrumpfschlauch
K
durch Erhitzen der Seite (B) mit einer Heißluftpistole.
3 Überprüfung -Abb.15
Stellen Sie sicher, dass die Stecker (A) und (C) vollständig mit
dem Heißschrumpfschlauch
K
abgedeckt sind.
Zusätzlich sollte Epoxid-oder Dichtungsmasse auf die (D)
Abschnitte verteilt werden, um den Abdichtungsvorgang
abzuschließen.
Vorsicht
Achten Sie darauf, das Kabel der Kamera oder das
Verlängerungskabel der Kamera nicht mit der Heißluftpistole zu
beschädigen.
Nachdem die Abdichtung abgeschlossen ist, die
Steckverbindung nicht verbiegen.
Italiano
a: Anello di gomma per passare il filo della telecamera
dall'interno della cabina del cassonato al lato inferiore del
telaio del veicolo.
b: Nei cassonati*, il filo che collega la telecamera alla relativa
alimentazione si installa generalmente sotto il telaio del
veicolo.
Questo filo va protetto da danneggiamenti mediante l'utilizzo
di corrugati flessibili in tutti i punti del telaio del cassonato in
cui è installato.
È necessario sigillare con silicone l'anello di gomma nel quale
passa il filo dalla cabina alla parte inferiore del cassonato per
impedire l'infiltrazione di umidità nella cabina del veicolo.
c: Connettore bianco tra la telecamera per retromarcia e
l'alimentazione.
(solo HCE-C1100)
d: Posizione consigliata per il montaggio della telecamera per
retromarcia HCE-C1
100/HCE-C1100D
(sul paraurti posteriore).
e: Nelle installazioni su cassonati, il connettore elettrico bianco
fra la telecamera per retromarcia e la relativa alimentazione
potrebbe essere esposto a umidità. In tal caso deve essere
sigillato per impedirne la corrosione.
(solo HCE-C1100)
*
*
*
*
Русский
Требования по питанию:
9-15,6 В пост. тока
Тип заземления
Заземление отрицательного полюса
Потребление питания
1,2
Вт (12 В)
Выводимое изображение*1
Композитный видеосигнал NTSC
Выходной видеосигнал
размах напряжения 1В Выходное сопротивление - 75 Ом
Датчик изображения
Матрица CMOS 1/3,7 дюйма, пропорции 4:3
Фактическое количество
пикселей
640 (по горизонтали)×480 (по вертикали),
приблизительно 0,3 мегапикселя
Секция объектива
Фокусное расстояние f=1,34 мм, светосила F=1:2,
0
Угол обзора
По горизонтали: 131°, по вертикали: 103°
Функция автоматической
настройки изображения
Автоматическая настройка баланса белого
Водонепроницаемость
IP67
Соотношение сигнал/шум
4
0.5
дБ или больше
Разрешение (по горизонтали)
330 линий КТВ (центральная область)
Диапазон освещенности
Приблизительно от 1,5 люкс до 100килолюкс
Диапазон
температуры
работы
Секция
камеры
от -22 до +158F (от -30 до +70°C)
Секция блока
питания
от -22 до +158F (от -30 до +70°C)
Внешние
габариты
(Ш×В×Г)
Секция
камеры
23,6×23,6×24,0 мм (без учета выступа сзади)
Секция блока
питания
38,0×25,0×15,0 мм (с учетом выступа)
Вес
Секция
камеры
27 г (только камера)
Секция блока
питания
83 г (включая шнур)
*
1 Данный продукт выводит изображение стандарта NTSC.
Он не выводит изображение стандарта PAL.
HCE-C1
100
D
English
Power Requirements
DC
5
.0V
to DC7.0V
Ground Type
Negative ground type
Power Consumption
0.5
7
W
(6V)
Output Image
Composite Video NTSC
Output Drive Capacity
1Vp-p (75 Ω)
Image Sensor
1/3.7 inch CMOS image sensor, aspect ratio 4:3
Effective Number of Pixels
640 (horizontal)×480 (vertical) approximately 0.3 Mega
pixels
Lens Section
Focal length f=1.34mm, brightness F=1:2.
0
Angle of Field
Horizontal: 131°, vertical: 103°
Automatic Image Adjusting
Function
Automatic white balance adjustment
Water Resistance
IP67
S/N ratio
4
0.5
db or more
Resolution (Horizontal)
330 TV lines (center area)
Illumination Range
Approximately 1.5 to 100klx
Operating Temperature Range
-22 to +158F (-30 to +70°C)
External dimensions (W×H×D)
23.6×23.6×24.0mm (excluding projection on the rear)
Weight
27g (including cord)
Français
Alimentation Nécessaire
5,0V à 7m0V continu
Type de Masse
Masse négative
Consommation
0,5
7
W
(6V)
Sortie Image
Vidéo Composite NTSC
Capacité de la commande de sortie
1Vp-p (75 Ω)
Capteur d’image
Capteur d’image CMOS 1/3.7 de pouce, ratio 4:3
Nombre de pixels effectifs
640 (horizontal)×480 (vertical) environ 0,3 Mégapixels
Lentille
Distance focale f=1,34mm, Luminosité F=1:2,
0
Champ de vision
Horizontal : 131°, vertical : 103°
Fonction ajustement automatique
de l’image
Réglage automatique de la balance des blancs
Résistance à l'eau
IP67
Ratio Signal/Bruit
4
0,5
db ou plus
Résolution (Horizontal)
330 lignes de Télévision (centrale)
Plage d’illumination
Environ 1,5 à 100klx
Température de fonctionnement
-22 à +158F (-30
à +70°C)
Dimensions externes (L×H×P)
23,6×23,6×24.0 mm (sauf partie arrière de la caméra)
Poids
27g (cordon compris)
Español
Requisitos de alimentación
De 5,0 V CC a 7,0 V CC
Tipo de toma de tierra
Tipo toma de tierra negativa
Consumo eléctrico
0,5
7
W
(6V)
Imagen de salida
Vídeo compuesto NTSC
Capacidad de salida de la unidad
1 Vp-p (75 Ω)
Sensor de imagen
Sensor de imagen CMOS de 1/3,7 pulg., relación de
aspecto 4:3
Número efectivo de píxeles
640 (horizontal) × 480 (vertical), aproximadamente 0,3
megapíxeles
Sección de la lente
Longitud focal f = 1,34 mm, brillo F = 1:2,
0
Ángulo de campo
Horizontal: 131°, vertical: 103°
Función de ajuste de imagen
automático
Ajuste automático del balance de blancos
Resistencia al agua
IP67
Relación señal/ruido
4
0,5
db o más
Resolución (Horizontal)
330 líneas de TV (área central)
Alcance de la iluminación
Aproximadamente de 1,5Lx a 100klx
Intervalo de temperatura de
funcionamiento
De -22 a +158F (de -30 a +70ºC)
Dimensiones externas
(ancho×alto×prof.)
23,6×23,6×24,0 mm (salvo el saliente en la parte trasera)
Peso
27 gr (incluyendo el cable)
Deutsch
Stromversorgung
DC5,0V bis DC7,0V
Massetyp
Negativer Massetyp
Stromverbrauch
0,5
7
W
(6V)
Ausgebebild
Kompositvideo NTSC
Ausgabelaufwerkkapazität
1Vp-p (75 Ω)
Bildsensor
1/3,7 Zoll CMOS Bildsensor, Seitenverhältnis 4:3
Effektive Anzahl der Pixel
640 (horizontal)×480 (vertikal) etwa 0,3 Megapixel
Objektivbereich
Brennweite f=1,34mm, Helligkeit F=1:2,
0
Bildwinkel
Horizontal: 131°, vertikal: 103°
Automatische
Bildeinstellungsfunktion
automatischer Weißabgleich
Wasserfestigkeit
IP67
S/N Verhältnis
4
0,5
db oder mehr
Auflösung (Horizontal)
330 TV TV-Zeilen (Mittelbereich)
Beleuchtungsbereich
Etwa 1,5Lx bis 100klx
Betriebstemperaturbereich
-22 bis +158 F (-30 bis +70°C)
Kameraabmessungen (B×H×T)
23,6×23,6×24,0mm (ohne Schutz auf der Rückseite)
Gewicht
27g (einschließlich Kabel)
Italiano
Requisiti di alimentazione
CC da 5,0 a 7,0 V
Tipo di messa a terra
Messa a terra negativa
Consumo elettrico
0,5
7
W
(6V)
Uscita immagine
Video composito NTSC
Capacità di azionamento uscita
1 Vp-p (75 Ω)
Sensore immagine
Sensore immagine CMOS 1/3,7 di pollice, formato 4:3
Numero effettivo di pixel
640 (orizzontale) × 480 (verticale) approssimativamente
0,3 megapixel
Sezione obiettivo
Lunghezza focale f= 1,34 mm, luminosità F= 1:2,
0
Angolo di campo
Orizzontale: 131°, verticale: 103°
Funzione regolazione automatica
dell'immagine
Regolazione automatica del bilanciamento del bianco
Impermeabilità
IP67
Rapporto S/N
4
0,5
db o superiore
Risoluzione (orizzontale)
330 linee TV (area centrale)
Illuminazione
Approssimativamente da 1,5Lx a 100klx
Temperatura di funzionamento
Da -22 a +158F (-30 a +70°C)
Dimensioni esterne (L×A×P)
23,6×23,6×24,0 mm (esclusa proiezione sul retro)
Peso
27 g (incluso cavo)
Svenska
Spänningsbehov
DC5,0V till DC7,0V
Typ av jordning
Negativ typ av jordning
Effektförbrukning
0,5
7
W
(6V)
Bildutmatning
Sammansatt video NTSC
Utmatningskapacitet
1Vp-p (75 Ω)
Bildsensor
1/3,7 tum CMOS bildsensor, bildformat 4:3
Effektivt antal bildpunkter
640 (vågrätt)×480 (lodrätt) ungefär 0,3 megapixel
Linsprofil
Brännvidd f=1,34 mm, ljusstyrka F=1:2.
0
Fältvinkel
Vågrätt: 131°, lodrätt: 103°
Automatisk bildjusteringsfunktion
Automatisk justering av vitbalansering
Vattenbeständighet
IP67
S/N-ratio
4
0,5
db eller mer
Upplösning (vågrätt)
330 TV-linjer (mittenområde)
Belysningsområde
Ungefär 1,5Lx till 100klx
Drifttemperaturens område
-22 till +158F (-30 till +70°C)
Externa dimensioner (B×H×D)
23,6×23,6×24,0 mm (exklusiv projektion bak)
Vikt
27g (med tråd)
Русский
Требования по питанию
5,0-7,0 В пост. тока
Тип заземления
Заземление отрицательного полюса
Потребление питания
0,5
7
Вт
(6В пост.)
Выводимое изображение
Композитный видеосигнал NTSC
Выходной видеосигнал
размах напряжения 1В Выходное сопротивление
- 75 Ом
Датчик изображения
Матрица CMOS 1/3,7 дюйма, пропорции 4:3
Фактическое количество
пикселей
640 (по горизонтали)×480 (по вертикали),
приблизительно 0,3 мегапикселя
Секция объектива
Фокусное расстояние f=1,34 мм, светосила F=1:2,
0
Угол обзора
По горизонтали: 131°, по вертикали: 103°
Функция автоматической
настройки изображения
Автоматическая настройка баланса белого
Водонепроницаемость
IP67
Соотношение сигнал/шум
4
0,5
дБ или больше
Разрешение (по горизонтали)
330 линий КТВ (центральная область)
Диапазон освещенности
Приблизительно от 1,5 люкс до 100килолюкс
Диапазон температуры работы
от -22 до +158F (от -30 до +70°C)
Внешние габариты (Ш×В×Г)
23,6×23,6×24,0 мм (без учета выступа сзади)
Вес
27 г (включая шнур)
Для потребителей в России: Информация о сервисных центрах
доступна на сайте www.Alpine.ru
Для потребителей в России: Срок службы данного изделия
- три года.
Другие страны: пожалуйста, обращайтесь за
сведениями к вашему диллеру или дистрибьютеру.
This device complies with part 15 of the FCC Rules.
Operation is subject to the following two conditions.
(1) This device may not cause harmful interference, and (2)
this device must accept any interference received, including
interference that may cause undesired operation.
Italiano
1
Fissare la staffa di montaggio al supporto di montaggio della
telecamera con la vite di regolazione dell'angolazione, come
illustrato nella figura.
2
Montare la telecamera sul supporto
C
. Inserire il cavo nel
supporto della telecamera
C
e fissare quest’ultimo usando le
viti a testa esagonale
E
(Fig. 2).
3 Allentare il supporto
C
e la vite di regolazione
dell’angolazione. Stabilire l’angolazione di montaggio e
serrare lentamente la vite di regolazione.
4
Effettuare un foro da 13 mm sul supporto di montaggio nella
modanatura posteriore (Fig. 3).
5
Tirare il cavo della telecamera nell’abitacolo attraverso il foro
praticato al punto 3.
6
Rimuovere la pellicola protettiva dell’adesivo dal supporto
della telecamera e fissare quest’ultimo sul telaio del veicolo.
Se necessario, fissare il supporto della telecamera utilizzando
viti filettanti.
Fissare la telecamera in una posizione in cui non tocchi la targa.
Utilizzare la vernice di ritocco sulla superficie e intorno al foro
praticato sulla superficie metallica.
Verificare che il foro effettuato per il cavo della telecamera sia a
tenuta utilizzando un nastro impermeabilizzante o un sigillante
disponibile in commercio.
Se necessario, utilizzare una vite autofilettante
F
per montare il
supporto della telecamera (se la superficie di montaggio è in
plastica).
Svenska
1
Fäst monteringskonsolen till kamerans monteringsplattform
med skruven för vinkeljustering (se bilden).
2
Montera kameran i kamerafästet
C
. Dra igenom
kamerakabeln till kamerafästet
C
och dra fast den med
insexskruvarna
E
(se Bild 2).
3
Lossa skruven till kamerafästet
C
och vinkeljusteringen.
Bestäm infästningsvinkeln och dra försiktigt åt
justeringsskruven.
4
Borra ett 13 mm hål i bakluckan där kamerafästet ska
monteras (se Bild 3).
5
Dra in kamerakabeln i bilen genom hålet som borrades i steg
3.
6
Ta bort skyddet på kamerafästets självhäftande yta och
montera kamerafästet på bilen. Vid behov kan kameran
monteras med skruvar.
Montera kameran i en position där den inte kommer i kontakt
med nummerplåten.
Använd rostskyddsfärg på ytan och området kring det borrade
hålet om det gjorts i en yta av metall.
Täta genomföringshålet för kabeln ordentligt med tape eller
tätningsmassa.
Använd vid behov en gängpressad skruv
F
för att fixera
kamerafästet (om fästytan är av plast).
Русский
1
Прикрепите монтажный кронштейн к платформе для
монтирования камеры при помощи винта регулировки
угла, как показано на рисунке.
2
Прикрепите камеру к монтажному кронштейну камеры
C
.
Проведите кабель камеры через монтажный кронштейн
камеры
C
и зафиксируйте при помощи винтов с
шестигранной головкой
E
(см. рис. 2).
3
Ослабьте крепление монтажного кронштейна камеры
C
и винта регулировки угла.Определите угол крепления и
аккуратно затяните винт регулировки угла.
4
Сделайте отверстие диаметром 13 мм в заднем бампере
по месту установки монтажного кронштейна камеры (см.
рис. 3).
5
Проведите кабель камеры внутрь автомобиля через
отверстие, сделанное в шаге 3.
6
Снимите защитную ленту с самоклеящейся поверхности
монтажного кронштейна камеры и прикрепите монтажный
кронштейн к кузову автомобиля. Если требуется,
зафиксируйте монтажный кронштейн камеры при помощи
самонарезающих винтов.
Прикрепите камеру в таком положении, где она не будет
касаться номерного знака.
Воспользуйтесь автомобильной краской (приобретается
в магазине), чтобы покрасить место, где в поверхности
кузова было сделано отверстие.
Обеспечьте полную водонепроницаемость отверстия,
сделанного для кабеля камеры, используя доступную в
продаже водостойкую пленку или уплотнитель.
Если необходимо, воспользуйтесь самонарезающим винтом
F
, чтобы зафиксировать монтажный кронштейн камеры
(если камера установлена на пластиковой поверхности).
Installing the Power Unit/Installation du bloc d’alimentation/
Instalación de la unidad de alimentación/Montage des Netzteils/
Installazione dell’alimentatore/Installation av strömenheten/
Установка блока питания
Secure the power unit.
English
CAUTION
Secure the power unit so there is no excess
force applied to the cords connected to the
power unit.
Avoid drastic bending such as 90 degree
bend at the base of the coupler.
Secure the power unit using a commercially available
double-sided tape, cable tie, etc.
Sécurisez l'alimentation.
Français
Attention
Sécurisez l'alimentation de sorte qu'aucune
force excessive ne soit appliquée aux
cordons branchés à l'alimentation.
Evitez les courbures drastiques comme
une courbure de 90 degrés à la base du
coupleur.
Sécurisez l'alimentation à l'aide de ruban double face
disponible dans le commerce, un serre-câble, etc.
Fije la unidad de
alimentación.
Español
Precaución
Fije la unidad de alimentación de forma que
los cables no queden sometidos a una fuerza
excesiva una vez conectados a la misma.
Evite doblarlos de forma drástica como,
por ejemplo, en ángulos de 90 grados, en la
base del acoplador.
Fije la unidad de alimentación utilizando una cinta adhesiva
de doble cara, una brida para cables, etc.
Befestigen Sie das Netzteil.
Deutsch
Vorsicht
Befestigen Sie das Netzteil so, dass
keine übermäßige Belastung auf die
Kabel ausgeübt wird, die am Netzteil
angeschlossen sind.
Angeschlossene Kabel keinesfalls knicken
und vor scharfen Kanten schützen.
Sichern Sie das Netzteil mit einem handelsüblichen
doppelseitigen Klebeband, Kabelbinder etc.
Fissare la scatola di
alimentazione.
Italiano
Attenzione
Fissare la scatola di alimentazione in
modo che non venga esercitata pressione
eccessiva sui cavi a essa collegati.
Evitare piegature estreme, ad esempio a 90
gradi, alla base dell'accoppiatore.
Fissare la scatola di alimentazione utilizzando nastro
biadesivo, fascette serracavi, ecc., disponibili in commercio.
Fäst nätaggregatet.
Svenska
Försiktighet
Fäst nätaggregatet så att kablarna som
ansluts till nätaggregatet inte kan kraftigt
påfrestas.
Undvik skarpa böjningar, som i 90 garder,
nederst på kopplaren.
Fäst nätaggregatet med dubbelsidig tejp, kabelklämma osv.
som finns i handeln.
Закрепите блок питания.
Русский
Осторожно
Закрепите блок питания таким образом,
чтобы на подключенные к блоку питания
кабели не приходилась сильная нагрузка.
Следите за тем, чтобы кабель не
изгибался слишком сильно, например на
90 градусов в основании соединителя.
Закрепите блок питания при помощи доступной в
продаже двусторонней клейкой ленты, кабельной
стяжки и т. п.
Power unit/Alimentation/Unidad
de alimentación/Netzteil/Scatola
di alimentazione/Nätaggregat/
Блок питания
Commercially available double-sided
tape, etc./Ruban double face disponible
dans le commerce, etc./Cinta adhesiva
de doble cara, etc./Handelsübliches
doppelseitiges Klebeband usw./Nastro
biadesivo disponibile in commercio,
ecc./Dubbelsidig tejp osv. som finns
i handeln./Доступная в продаже
двусторонняя клейкая лента и т. п.
Connections/Raccordements/Conexiones/Anschlüsse/Collegamenti/
Anslutningar/Соединения
HCE-C1
100
1
DC12V
CAMERA
3
4
5
camera
only/caméra
uniquement/solo
la cámara/nur
Kamera/solo
telecamera/endast
kamera/только
камера
Camera extension
cable
(supplied)
/Rallonge câble caméra (fournie)/
Cable de extensión de la cámara
(incluido)/
Kameraverlängerungskabel
(mitgeliefert)/Cavo di prolunga della
telecamera (fornito in dotazione)/
Kameraförlängningskabel
(medföljer)/
Удлинительный шнур камеры (входит
в комплект)
Power unit/Alimentation/
Unidad de alimentación/
Netzteil/Scatola
di alimentazione/
Nätaggregat/Блок питания
Fuse (7.0 А)/Fusible (7,0 А)/
Fusible (7,0 А)/Sicherung (7,0 А)/
Fusibile (7,0 А) /Säkring (7,0 А)/
Предохранитель (7,0 А)
English
No.
Name
Lead color
Specification/
Function
Connect to
1
Video Output
Connector
Outputs a camera
video on the
connected monitor or
navigation system.
Connect to the camera
video input connector of
the connected device.
2
Rear Camera
Connector
Inputs the rear camera
video signal.
Connect the camera
extension cable (included)
to the rear camera.
3
Fuse
7.0A
4
Reverse/ACC
Lead
Red
When reversing the
vehicle, the lead is
used to supply power
to the unit.
Connect the lead to the
ACC position.
5
Ground Lead
Black
Fix the lead securely
to a metal part of the
car’s chassis.
Connect the lead securely
to a metal part of the car’s
chassis. Failure to do so may
cause a malfunction.
Install the camera cable and RCA cable wiring away from the
radio antenna and antenna cable. If they are too close, or wrapped
together, noise can result.
Français
N
o
Nom
Couleur du
connecteur
Caractéristique/
fonction
Le raccorder à
1
Connecteur de
sortie vidéo
Reproduit l’image
de la caméra sur le
moniteur connecté
ou le système de
navigation.
Raccordez-le au connecteur
d’entrée vidéo de la caméra
du périphérique connecté.
2
Connecteur
de la caméra
arrière
Diffuse le signal vidéo
de la caméra arrière.
Connectez la rallonge de
la caméra (fournie) à la
caméra arrière.
3
Fusible
7,0A
4
Fil Reverse/ACC
Rouge
Lorsque vous faites
marche arrière, ce
fil est utilisé pour
alimenter l’unité.
Raccordez le connecteur à
une position ACC.
5
Conducteur de
terre
Noir
Fixez ce connecteur
correctement à un élé
ment métallique du
châssis du véhicule.
Raccordez ce connecteur
correctement à un
élément métallique du
châssis du véhicule.
Dans le cas contraire, un
dysfonctiopnnement peut
se produire.
Installez le câble de la caméra et la rallonge RCA à l’écart de
l’antenne radio et du câble d’antenne. S’ils sont trop prêts les uns
des autres, ou enroulés ensemble, des interférences peuvent se
produire.
Español
N.
o
Nombre
Color del
cable
Especificación/
Función
Conectar a
1
Conector de
salida de vídeo
Emite la imagen de la
cámera en el monitor
o en el sistema
de navegación
conectado.
Conecte el conector de
entrada de vídeo de la
cámara del dispositivo
conectado.
2
Conector de
cámera trasera
recibe la señal de
vídeo de la cámera
trasera.
Conecte el cable de
extensión de la cámara
(incluido) a la cámara
trasera.
3
Fusible
7,0A
4
Cable Marcha
atrás/ACC
Rojo
Cuando el vehículo
circula marcha atrás,
este cable se utiliza
para alimentar la
unidad.
Conecte el cable en la
posición ACC.
5
Cable de tierra
Negro
Fije el cable
correctamente a una
pieza metálica del
chasis del vehículo.
Conecte el cable
correctamente a una
pieza metálica del chasis
del vehículo. Si no lo
hace, la unidad podría no
funccionar correctamente.
Instale el cable de la cámara y el cable del cableado RCA alejado
de la antena de la radio y del cable de la antena. En caso
contrario, se pueden producir ruidos.
Deutsch
Nr.
Bezeichnung
Kabelfarbe
Spezifikation/
Funktion
Anschluss
1
Videoausgang
Zum Ausgeben eines
Kamerabildes an den
angeschlossenen
Monitor oder das
Navigationssystem.
Schließen Sie ihn an den Ka-
meravideoeingangsstecker
des angeschlossenen
Geräts an.
2
Anschluss für
Rückfahrkamera
Zum Einspeisen des
Videosignals von der
Rückfahrkamera.
Schließen Sie das
Verlängerungskabel der
Kamera (mitgeliefert) an der
Rückseite der Kamera an.
3
Sicherung
7,0 A
4
Rückfahr-
/ACCKabel
Rot
Beim Rückwärtsfahren
wird das Gerät über
dieses Kabel mit
Strom versorgt.
Schließen Sie das Kabel an
den ACC-Anschluss an.
5
Massekabel
Schwarz
Befestigen Sie das
Kabel sicher an
einem Metallteil der
Fahrzeugkarosserie.
Schließen Sie das Kabel
sicher an ein Metallteil
der Fahrzeugkarosserie
an.Andernfalls kann es zu
Fehlfunktionen kommen.
Installieren Sie das Kamerakabel und das RCA-Kabel nicht in der
Nähe der Radioantenne und dem Antennenkabel. Wenn sie sich
zu dicht beieinander befinden oder verwickelt werden, können
Störgeräusche auftreten.
Italiano
N.
Nome
Colore cavo
Caratteristica tecnica/
Funzione
Collegare a
1
Connettore
uscita video
Riproduce
un’immagine della
videocamera sul
monitor o sul sistema
di navigazione
collegato.
Collegare al connettore
di ingresso video della
telecamera del dispositivo
collegato.
2
Connettore
videocamera
posteriore
Immette il segnale
video della telecamera
posteriore.
Collegare il cavo di
prolunga della telecamera
(fornito in dotazione) alla
telecamera posteriore.
3
Fusibile
7,0 A
4
Cavo Reverse/
ACC
Rosso
Quando si procede
in retromarcia, il cavo
viene utilizzato per
fornire alimentazione
all’unità.
Collegare il cavo in
posizione ACC.
5
Cavo di massa
Nero
Fissare saldamente
il cavo ad una parte
metallica del telaio del
veicolo.
Collegare saldamente il
cavo ad una parte metallica
del telaio del veicolo. In
caso contrario, potrebbero
verificarsi problemi di
funzionamento.
Installare il cavo della telecamera e il cavo RCA lontano
dall'antenna della radio e dal relativo filo. Se sono troppo vicini o
uniti, i cavi possono produrre disturbi.
(D)
(D)
(C)
(A)
Information on Disposal of Old Electrical and Electronic Equipment
and Battery (applicable for countries that have adopted spearate
waste collection systems)
If you want to dispose this product, do not mix it with general
household waste. There is a separate collection system for used
electronic products in accordance with legislation that requires
proper treatment, recovery and recycling. Contact your local
authority for details in locating a recycle facility nearest to you.
Proper recycling and waste disposal will help conserve resources
whist preventing detrimental effects on our health and the
environment.
Русский
Осторожно
Если требуется изменить угол обзора камеры, во избежание
аварии сначала выключите двигатель и установите ручной
тормоз.
1
Включите заднюю передачу (R), после чего проверьте на
экране изображение камеры.
2
Ослабьте крепление монтажного кронштейна камеры
C
и
винта регулировки угла. Определите угол обзора камеры
и аккуратно затяните винт регулировки угла.
Français
a: Passe-cloison en caoutchouc pour faire transiter le fil de la
caméra de l’intérieur de la cabine du pickup vers le dessous
du châssis.
b: En cas d’installation sur un pickup
*
, le fil qui relie la caméra à
son alimentation est généralement installé sous le châssis du
véhicule.
Le fil
doit être protégé
contre les dégâts au moyen d’un
tubage pour câblage, là où il est installé sous le châssis du
pickup.
Le passe-cloison en caoutchouc, utilisé pour acheminer le fil
de la cabine vers le dessous du pickup,
doit être protégé
avec du silicone pour éviter toute intrusion d’humidité dans
la cabine du véhicule.
c: Connecteur blanc entre la caméra de recul et l’alimentation.
(HCE-C1100 uniquement)
d: Emplacement de montage recommandé de la caméra de
recul HCE-C1
100/HCE-C1100D
(sur le pare-chocs arrière).
e: En cas d’installation sur un pickup, le connecteur électrique
blanc situé entre la caméra de recul et son alimentation risque
d’être exposé à l’humidité. Si c’est le cas, il
doit être protégé
afin d’éviter toute corrosion.
(HCE-C1100 uniquement)
a
c
d
e
Eseguire il test di impermeabilità con il tubo termorestringente
fornito in dotazione seguendo la procedura riportata di seguito:
1
Preparazione - Fig. 13
(1) Inserire il tubo termorestringente
K
nel cavo di prolunga
I
della telecamera.
(2) Collegare il cavo
A
della telecamera al connettore del cavo
di prolunga
I
della telecamera.
(3)
Installare il tubo termorestringente
K
in modo che il
Connettore
sia coperto (con una sporgenza di circa 0,5 pollici).
2
Test di impermeabilità - Fig. 14
Terminata la preparazione, tendere il cavo e restringere il tubo
termorestringente
K
riscaldandolo dal lato (B) con una pistola
termica.
3
Verifica - Fig. 15
Verificare che i connettori (A) e (C) siano interamente coperti dal
tubo termorestringente
K
.
Quando il tubo termorestringente si è ridotto al massimo, è
necessario versare resina epossidica o stucco sulle parti (D) per
completare il test di impermeabilità.
Attenzione
Fare attenzione a non fondere il cavo della telecamera o il cavo di
prolunga della telecamera con la pistola termica.
Fare attenzione a non ustionarsi durante questa operazione.
Terminato il test di impermeabilità, non piegare con forza il cavo.
Svenska
a: Införingshylsa i gummi för att dra kamerans kabel inifrån
varubilens hytt till undersidan av chassit.
b: I installationer för varubilar*, installeras kabeln som ansluter
kameran till strömförsörjningen i vanliga fall under varubilens
chassi.
Den här kabeln måste skyddas mot skada med hjälp av en
delad ledningsdragning i de områden där den installeras
under varubilens chassi.
Införingshylsan i gummi i vilken kabeln ska dras från hytten
till undersidan av varubilen måste isoleras med silikon för att
förhindra att fukt tränger in i hytten.
Italiano
Requisiti di alimentazione
CC da 9 a 15,6 V
Tipo di messa a terra
Messa a terra negativa
Consumo elettrico
1,2
W (12 V)
Uscita immagine*1
Video composito NTSC
Capacità di azionamento uscita
1 Vp-p (75 Ω)
Sensore immagine
Sensore immagine CMOS 1/3,7 di pollice, formato 4:3
Numero effettivo di pixel
640 (orizzontale) × 480 (verticale) approssimativamente
0,3 megapixel
Sezione obiettivo
Lunghezza focale f= 1,34 mm, luminosità F= 1:2,
0
Angolo di campo
Orizzontale: 131°, verticale: 103°
Funzione regolazione automatica
dell'immagine
Regolazione automatica del bilanciamento del bianco
Impermeabilità
IP67
Rapporto S/N
4
0.5
db o superiore
Risoluzione (orizzontale)
330 linee TV (area centrale)
Illuminazione
Approssimativamente da 1,5Lx a 100klx
Temperatura di
funzionamento
Sezione
telecamera
Da -22 a +158F (-30 a +70°C)
Sezione
alimentazione
Da -22 a +158F (-30 a +70°C)
Dimensioni
esterne (L×A×P)
Sezione
telecamera
23,6×23,6×24,0 mm (esclusa proiezione sul retro)
Sezione
alimentazione
38,0×25,0×15,0 mm (esclusa proiezione)
Peso
Sezione
telecamera
27 g (solo telecamera)
Sezione
alimentazione
83 g (incluso cavo)
*
1 Questo prodotto riproduce immagini NTSC. Non riproduce
immagini PAL.
Svenska
Effektbehov
DC9V till DC15,6V
Typ av jordning
Negativ typ av jordning
Effektförbrukning
1,2
W (12V)
Bildutmatning*1
Sammansatt video NTSC
Utmatningskapacitet
1Vp-p (75 Ω)
Bildsensor
1/3,7 tum CMOS bildsensor, bildformat 4:3
Effektivt antal bildpunkter
640 (vågrätt)×480 (lodrätt) ungefär 0,3 megapixel
Linsprofil
Brännvidd f=1,34 mm, ljusstyrka F=1:2.
0
Fältvinkel
Vågrätt: 131°, lodrätt: 103°
Automatisk bildjusteringsfunktion
Automatisk justering av vitbalansering
Vattenbeständighet
IP67
S/N-ratio
4
0.5
db eller mer
Upplösning (vågrätt)
330 TV-linjer (mittenområde)
Belysningsområde
Ungefär 1,5Lx till 100klx
Drifttemperatu-
rens område
Kamerasektion
-22 till +158F (-30 till +70°C)
Matarsektion
-22 till +158F (-30 till +70°C)
Externa
dimensioner
(B×H×D)
Kamerasektion
23,6×23,6×24,0 mm (exklusiv projektion bak)
Matarsektion
38,0×25,0×15,0 mm (förutom projektion)
Vikt
Kamerasektion
Kamerasektion 27g (endast kamera)
Matarsektion
Matarsektion 83g (med tråd)
*
1 Den här produkten sänder en NTSC-bild. Den sänder ingen PAL-
bild.
English
Français
Español
Italiano
Svenska
Information sur le traitement des Déchets Electriques et
Electroniques (DEEE), pour les pays ayant adoptés un traitement
séparés de ces déchets
Si vous possédez des appareils Electriques ou Electroniques usagés,
ne les jetez pas dans le système général. Conformément à la
Directive Européenne, transposée dans votre pays, il existe un
système séparé de recyclage et de traitement de ces déchets.
Veuillez contacter l'administration locale afin de prendre
connaissance du lieu de recyclage et de traitement le plus proche
de chez vous. Ce système est destiné à protéger
l'environnement.
Informationen zur Entsorgung von Elektro- und Elektronikgeräten
und Batterien (anwendbar für Länder, die ein separates
Sammelsystem übernommen haben)
Wenn Sie dieses Produkt entsorgen wollen, entsorgen Sie dies nicht
über den normalen Hausmüll. Es gibt ein separates Sammelsystem
für gebrauchte elektronische Geräte in Einklang mit den
Rechtsvorschriften, die eine angemessene Behandlung, Verwertung
und Recycling erfordert. Kontaktieren Sie Ihre lokale Behörde für
Details bei der Suche nach einer Recycling-Anlage Ihrer Nähe.
Ordnungsgemäße Verwertung und Entsorgung trägt dazu bei,
Ressourcen zu schonen und schädliche Auswirkungen auf unsere
Gesundheit und die Umwelt zu verhindern.
Deutsch
Información sobre la eliminación de Viejos Equipos Eléctricos y
Electrónicos, así como Baterías (aplicable en los países que han
adoptado sistemas de recogida selectiva de residuos)
Si desea deshacerse de este producto, no lo mezcle con los
residuos generales de su hogar. Existe un sistema de recogida
selectiva para aparatos electrónicos usados de acuerdo a la
legislación, que requiere un tratamiento adecuado de recuperación
y reciclado. Póngase en contacto con las autoridades locales para
obtener más información sobre el punto de recogida y tratamiento
más cercano. El apropiado reciclado y eliminación de residuos
ayuda a conservar los recursos y a contribuir en la prevención de los
efectos negativos y perjudiciales sobre nuestra salud y el medio
ambiente.
Avvertenze sullo smaltimento di dispositivi elettronici guasti o usati
e delle batterie (valido per quei paesi che hanno adottato il sistema
di raccolta differenziata)
In caso di smaltimento del prodotto, non gettarlo assolutamente
insieme ai rifiuti domestici. Esiste un sistema di raccolta differenziata
per prodotti elettronici conforme alle leggi che regolano il
trattamento, il deposito e il riciclo. Contattare le autorità locali per
ulteriori informazioni e per trovare il punto di raccolta più vicino alla
vostra abitazione. Un corretto riciclo e un appropriato smaltimento
dei rifiuti contribuirà a conservare le risorse e a prevenire effetti
nocivi sia sulla salute che sull'ambiente.
Information om återvinning av avfall från elektriska och elektroniska
produkter och batterier (tillämpligt f,ör länder som har infört system
för återvinning och sortering av avfall)
Om du vill slänga denna produkt, blanda den ej med vanliga
hushållssopor. Det finns ett separat direktiv för elektronikåtervinning
som kräver rätt hantering av förbrukade produkter. Kontakta din
kommun angående information om var du kan lämna den för
återvinning. Rätt återvinning och sophantering sparar jordens
resurser och vår hälsa samt miljö.