Alpine HCE-C300R Owners Manual - Page 22
Installing the Buzzer, Installing the Switch
 |
UPC - 793276401847
View all Alpine HCE-C300R manuals
Add to My Manuals
Save this manual to your list of manuals |
Page 22 highlights
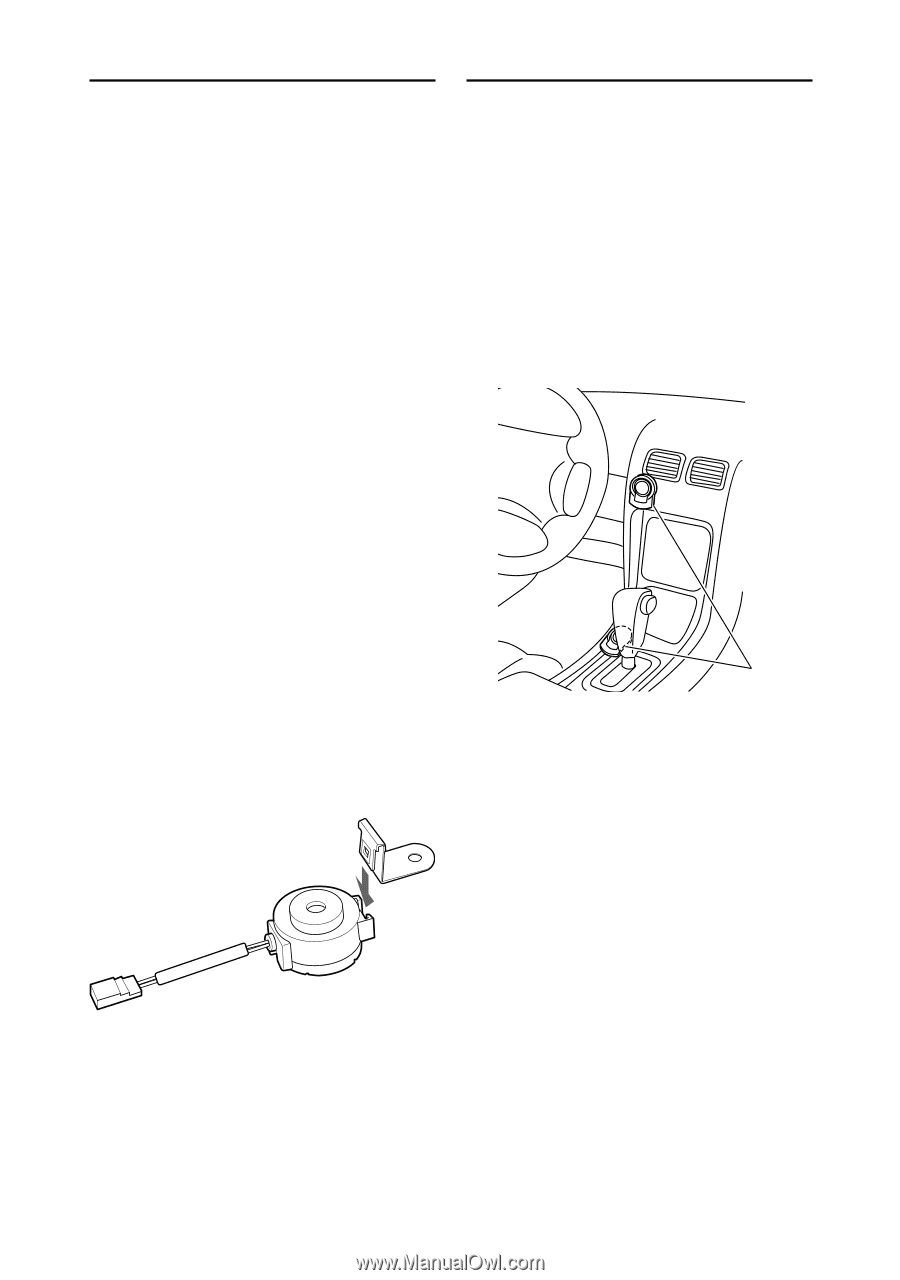
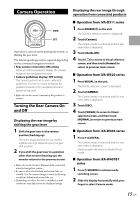
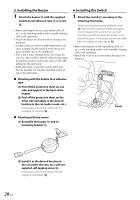
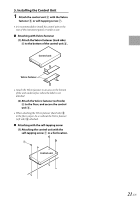
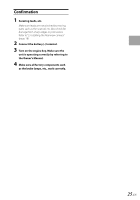
3. Installing the Buzzer 1 Attach the buzzer O with the supplied double-faced adhesive tape S or screw R. • Before attaching the buzzer, wipe off any dust, oil, etc., on the attaching surface with a suitable cleaning cloth (sold separately). • Attach the buzzer in a location where driving is not hindered. • Locations that are subject to high temperatures can cause warping. Do not install in areas that receive direct sunlight, such as the dashboard. • This is not a water resistant device. Do not get the unit wet. Also, install so that the cable feed opening is facing downwards to avoid water drops on the cable falling into the alarm unit. • If the alarm hole is closed off, sound output may become unstable. Do not place anything within 10 mm of the alarm hole. e Attaching with the double-face adhesive tape (1) Peel off the protective sheet on one side, and apply it to the back of the buzzer. (2) Peel off the protective sheet on the other side and apply to the desired location in the car (under a seat, etc.). If necessary, secure the cable with the supplied cord clamp T. e Attaching with the screws (1) Assemble the buzzer O and its mounting bracket P. 4. Installing the Switch 1 Attach the switch L according to the following illustration. Attach the supplied switch adhesive sheet M. Peel off the protective sheet, and apply it to the back of the switch, then peel off the other protective sheet and install in the desired location. If necessary, secure the cable with the supplied cord clamps N. • Before attaching the switch, wipe off any dust, oil, etc., on the attaching surface with a suitable cleaning cloth (sold separately). • Attach the switch in a location where driving is not hindered. Switch (2) Install it in the desired location in the car (under the seat, etc.) with the supplied self-tapping screw R. If necessary, secure the cable with the supplied cord clamp T. 20-EN
-
 1
1 -
2
-
3
-
4
-
5
-
6
-
7
-
8
-
9
-
10
-
11
-
12
-
13
-
14
-
15
-
16
-
 17
17 -
 18
18 -
 19
19 -
 20
20 -
 21
21 -
 22
22 -
 23
23 -
 24
24 -
 25
25 -
 26
26 -
 27
27 -
28
-
29
-
30
-
31
-
32
-
33
-
34
-
35
-
36
-
37
-
38
-
39
 |
 |