Amana AER5523XAB Use and Care - Page 10
Troubleshooting
 |
UPC - 883049212753
View all Amana AER5523XAB manuals
Add to My Manuals
Save this manual to your list of manuals |
Page 10 highlights
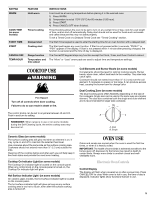
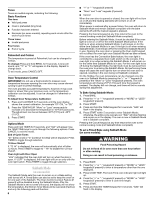
CONTROL PANEL AND OVEN DOOR EXTERIOR To avoid damage to the control panel, do not use abrasive cleaners, steel-wool pads, gritty washcloths or abrasive paper towels. Cleaning Method: ■ Glass cleaner and soft cloth or sponge: Apply glass cleaner to soft cloth or sponge, not directly on panel. ■ All-Purpose Appliance Cleaner Part Number 31682 (not included): See cover for contact information. COIL ELEMENTS (on some models) Cleaning Method: ■ Damp cloth: Make sure control knobs are off and elements are cool. Do not clean or immerse in water. Soil will burn off when hot. BURNER BOWLS (on some models) Before removing or replacing coil elements and burner bowls, make sure they are cool and the control knobs are in the OFF position. Remove the coil element by pushing the edge of the coil element toward the receptacle. Lift it enough to clear the burner bowl. Pull the coil element straight away from the receptacle to remove. Lift out the burner bowl. Cleaning Method: Chrome burner bowls Wash frequently in warm, soapy water. (It is not recommended to wash chrome bowls in a dishwasher.) A mild abrasive cleaner and a plastic scrubber can be used to remove stubborn stains. For heavily soiled bowls, place an ammonia soaked paper towel on the stains and allow to soak for a short time, then gently scrub with a plastic scrubber. SURFACE UNDER COOKTOP (on some models) The coil cooktop will lift up to provide easy access for cleaning beneath. Lift the cooktop by both front corners until the support locks into place. Cleaning Method: ■ Steel-wool pad To avoid damage to the range, do not remove the cooktop. OVEN RACKS Cleaning Method: ■ Steel-wool pad ■ For racks that have discolored and are harder to slide, a light coating of vegetable oil applied to the rack guides will help them slide. STORAGE DRAWER Check that storage drawer is cool and empty before cleaning. Cleaning Method: ■ Mild detergent OVEN CAVITY Food spills should be cleaned when oven cools. At high temperatures, foods react with porcelain and staining, etching, pitting or faint white spots can result. Cleaning Method: ■ Self-Cleaning cycle: See "Self-Cleaning Cycle" first. Do not use oven cleaners. Oven Light The oven light is a standard 40-watt appliance bulb. Before replacing, make sure the oven and cooktop are cool and the control knobs are in the off position. 2. Turn the glass bulb cover in the back of the oven counterclockwise to remove. 3. Turn bulb counterclockwise to remove from socket. To Replace: 1. Unplug range or disconnect power. 4. Replace bulb, then bulb cover by turning clockwise. 5. Plug in range or reconnect power. TROUBLESHOOTING First try the solutions suggested here or visit our website and reference the Frequently Asked Questions (FAQs) section to possibly avoid the cost of a service call. www.amana.com Nothing will operate ■ Is the power supply cord unplugged? Plug into a grounded outlet. ■ Has a household fuse blown, or has a circuit breaker tripped? Replace the fuse or reset the circuit breaker. If the problem continues, call an electrician. Cooktop will not operate ■ Is the control knob set correctly? Push in knob before turning to a setting. ■ On ceramic glass models, is the oven control lockout set? See the control lock keypad feature in the "Feature Guide" section. ■ Has a self-clean cycle been selected? On some ceramic glass models, the cooktop will not operate during a self-clean cycle. 10 Excessive heat around cookware on cooktop ■ Is the cookware the proper size? Use cookware about the same size as the surface cooking area, element or surface burner. Cookware should not extend more than ½" (1.3 cm) outside the cooking area. Cooktop cooking results not what expected ■ Is the control knob set to the proper heat level? See "Cooktop Use" section. ■ Is the range level? Level the range. See the Installation Instructions. Oven will not operate ■ Is the electronic oven control set correctly? See "Electronic Oven Controls" section. ■ Has a delay start been set? See "Timed Cooking" section.
-
 1
1 -
2
-
3
-
4
-
 5
5 -
 6
6 -
 7
7 -
 8
8 -
 9
9 -
 10
10 -
 11
11 -
 12
12
 |
 |
