Amana AER6303MFB Owners Manual
Amana AER6303MFB Manual
 |
View all Amana AER6303MFB manuals
Add to My Manuals
Save this manual to your list of manuals |
Amana AER6303MFB manual content summary:
- Amana AER6303MFB | Owners Manual - Page 1
FREESTANDING ELECTRIC RANGE OWNER'S MANUAL Table of Contents RANGE SAFETY 2 Range Safety 2 RANGE MAINTENANCE AND CARE 4 Self-Cleaning Cycle (on some models 4 General Cleaning 4 INSTALLATION INSTRUCTIONS 6 REQUIREMENTS 6 Tools and Parts 6 Location Requirements 7 Electrical Requirements - - Amana AER6303MFB | Owners Manual - Page 2
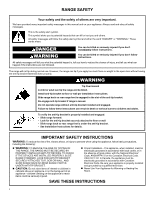
RANGE SAFETY Your safety and the safety of others are very important. We have provided many important safety messages in this manual and on and tell you what can happen if the instructions are not followed. The range will not tip during normal use. However, the range can tip if you apply too much - Amana AER6303MFB | Owners Manual - Page 3
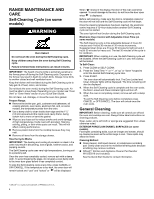
INSTRUCTIONS ceramic, earthenware, or other glazed utensils are suitable for range-top service without breaking due to the sudden change in temperature. or around any part of the oven. � Clean Only Parts Listed in Manual. � Before Self-Cleaning the Oven - Remove broiler pan and other utensils. - Amana AER6303MFB | Owners Manual - Page 4
" or "Oven Vents" section in your Quick Start Guide. Do not clean, rub, damage, or move the oven door gasket. Prepare Range: � Remove the broiler pan, grid, cookware and are off and the oven and cooktop are cool. Always follow label instructions on cleaning products. Soap, water, and a soft cloth or - Amana AER6303MFB | Owners Manual - Page 5
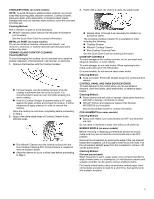
to soft cloth or sponge, not directly on panel. � Affresh® Kitchen and Appliance Cleaner Part Number W10355010 (not included): See the Quick Start Guide for contact information. COIL ELEMENTS (on some models) Cleaning Method: � Damp cloth: Make sure control knobs are OFF and elements are cool. Do - Amana AER6303MFB | Owners Manual - Page 6
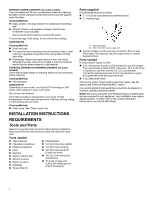
the cooktop by both front corners until the support locks into place. Cleaning Method: � Glass ): See the Quick Start Guide for contact information. To avoid damage to the range, do not remove the before starting installation. Read and follow the instructions provided with any tools listed here. - Amana AER6303MFB | Owners Manual - Page 7
standards CAN/CSA-Z240.1-latest edition, or with local codes. Mobile home installations require: � When this range is installed in a mobile home, it must be secured according to the instructions in this document. � Four-wire power supply cord or cable must be used in a mobile home installation - Amana AER6303MFB | Owners Manual - Page 8
you will be using and follow the instructions provided for it here. � Range must be connected to the proper electrical voltage 61.0 cm to 91.4 cm) of slack in the line so that the range can be moved if servicing is ever necessary. � A UL listed conduit connector must be provided at each end - Amana AER6303MFB | Owners Manual - Page 9
leveling leg Install Anti-Tip Bracket WARNING Tip Over Hazard A child or adult can tip the range and be killed. Install anti-tip bracket to floor or wall per installation instructions. Slide range back so rear range foot is engaged in the slot of the anti-tip bracket. Re-engage anti-tip bracket if - Amana AER6303MFB | Owners Manual - Page 10
of the determined mounting method. See the following illustrations. Floor Mounting 8. Move range forward onto shipping base, cardboard or hardboard to continue installing the range using the following installation instructions. Rear Position Wall Mounting Front Position Diagonal (2 options) 10 - Amana AER6303MFB | Owners Manual - Page 11
. Pull cover down and toward you to remove cover from range. Electrical Shock Hazard Disconnect power before servicing. Use 8 gauge copper or 6 gauge aluminum wire. Electrically ground range. Failure to follow these instructions can result in death, fire, or electrical shock. 3. Depending on your - Amana AER6303MFB | Owners Manual - Page 12
must be cut out and removed. 5. Complete installation following instructions for your type of electrical connection: 4-wire (recommended) 3- supply cord through the strain relief on the cord/conduit plate on bottom of range. Allow enough slack to easily attach the wiring to the terminal block. 4- - Amana AER6303MFB | Owners Manual - Page 13
to neutral wire of power supply cord. 1. Feed the power supply cord through the strain relief in the cord/conduit plate on bottom of range. Allow enough slack to easily attach the wiring to the terminal block. A. 10-32 hex nut D. Neutral (white) wire B. Line 2 (red) E. Line 1 (black) C. Ground - Amana AER6303MFB | Owners Manual - Page 14
cut out and removed. A. Metal ground strap B. Discard C. Ground-link screw 2. Use a Phillips screwdriver to remove the ground-link screw from the back of the range. Save the ground-link screw and the end of the ground link under the screw. 3. Pull the wires through the strain relief on bottom of - Amana AER6303MFB | Owners Manual - Page 15
cm) from the mounting wall, the rear range foot may not engage the bracket. Slide the range forward and determine if there is an obstruction between the range and the mounting wall. If you need assistance or service, refer to the Quick Start Guide for contact information. 6. Repeat steps 1 and 2 to - Amana AER6303MFB | Owners Manual - Page 16
warming drawer or premium storage drawer from the glide alignment notch and lift up the drawer alignment tab from the glide. 2. If range is not level, pull range forward until rear leveling leg is removed from the anti-tip bracket. 3. Follow the directions in Style 1 or Style 2, depending on the - Amana AER6303MFB | Owners Manual - Page 17
Pull the storage drawer straight back to the drawer stop. Oven Door For normal range use, it is not suggested to remove the oven door. However, if removal is necessary, make sure the oven is off and cool. Then, follow these instructions. The oven door is heavy. To Remove: 1. Open oven door all the - Amana AER6303MFB | Owners Manual - Page 18
Assistance or Service: Please reference the Quick Start Guide for contact information. Moving the Range WARNING Tip Over Hazard A child or adult can tip the range and be killed. Install anti-tip bracket to floor or wall per installation instructions. Slide range back so rear range foot is engaged
-
 1
1 -
 2
2 -
 3
3 -
 4
4 -
 5
5 -
 6
6 -
 7
7 -
8
-
9
-
10
-
11
-
12
-
13
-
14
-
15
-
16
-
17
-
18
 |
 |

W11509598A
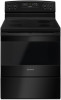
FREESTANDING ELECTRIC RANGE
OWNER’S MANUAL
Table of Contents
RANGE SAFETY
..............................................................
2
Range Safety
.............................................................
2
RANGE MAINTENANCE AND CARE
...................................
4
Self-Cleaning Cycle (on some models)
............................
4
General Cleaning
........................................................
4
INSTALLATION INSTRUCTIONS
........................................
6
REQUIREMENTS
.............................................................
6
Tools and Parts
..........................................................
6
Location Requirements
................................................
7
Electrical Requirements – U.S.A. Only
.............................
8
INSTALLATION
...............................................................
9
Unpack Range
...........................................................
9
Install Anti-Tip Bracket
.................................................
9
Electrical Connection - U.S.A. Only
...............................
11
Verify Anti-Tip Bracket Is Installed and Engaged
..............
15
Level Range
............................................................
16
Warming Drawer or Premium Storage Drawer (on
some models)
..........................................................
16
Storage Drawer (on some models)
...............................
17
Oven Door
...............................................................
17
Complete Installation
.................................................
18
Moving the Range
.....................................................
18
IMPORTANT:
Save for local electrical inspector's use.