Apple MA356LL User Guide
Apple MA356LL - Mac Pro - 1 GB RAM Manual
 |
UPC - 885909093694
View all Apple MA356LL manuals
Add to My Manuals
Save this manual to your list of manuals |
Apple MA356LL manual content summary:
- Apple MA356LL | User Guide - Page 1
Mac Pro User's Guide Includes setup, expansion, and troubleshooting information for your Mac Pro computer - Apple MA356LL | User Guide - Page 2
that the information in this manual is accurate. Apple is not responsible for printing or clerical errors. Apple 1 Infinite Loop Cupertino, CA 95014-2084 408-996-1010 www.apple.com Apple, the Apple logo, AirPort, AppleShare, AppleTalk, FireWire, iCal, iLife, iPod, iTunes, Mac, Mac OS, Macintosh, and - Apple MA356LL | User Guide - Page 3
Expansion Options 24 Getting Answers 27 Chapter 3: Working Inside Your Computer 28 Opening the Computer 32 Installing Memory 38 Installing Internal Storage Devices 47 Adding PCI Express Cards 50 Replacing the Internal Backup Battery 53 Chapter 4: Troubleshooting 53 Problems with Your Mac Pro 3 - Apple MA356LL | User Guide - Page 4
58 Problems with Your Display 60 Problems with Your Internet Connection 63 Using Apple Hardware Test 64 Reinstalling the Software That Came with Your Computer 65 Maximizing Ethernet Performance 66 Learning More, Service, and Support 68 Locating Your Serial Number 69 Appendix A: Specifications 77 - Apple MA356LL | User Guide - Page 5
new high-performance Mac Pro computer. This chapter contains instructions for setting up your computer and display. Your Mac Pro features the latest computer technology, including advanced 64-bit multicore processor technology, high-speed FB-DIMM memory, PCI Express graphics and expansion cards, and - Apple MA356LL | User Guide - Page 6
display Pick up your Mac Pro by both of its handles using correct lifting techniques. If your display is heavy, use correct lifting techniques when positioning it as well. Position the computer and display so that:  They are each on a sturdy, flat surface  The power cable connectors don't press - Apple MA356LL | User Guide - Page 7
Step 2: Plug in the power cord Plug the power cord completely into the recessed power cord socket on the back of your Mac Pro and plug the other end into a grounded outlet or a grounded power strip. Power cord socket Power cord plug Chapter 1 Getting Started 7 - Apple MA356LL | User Guide - Page 8
, you may have one or more cables to connect. Check the instructions that came with the display for additional setup information. Display ports USB the back of your Mac Pro. You can connect any Apple display to either port. For full resolution on a 30-inch Apple Cinema HD Display, use DVI port 1. 8 - Apple MA356LL | User Guide - Page 9
cable You can also connect displays that have an Apple Display Connector (ADC) or a video graphics array (VGA) connector using one of the following adapters: Â To connect a VGA display, use the Apple DVI to VGA Display Adapter included with your Mac Pro to connect the display to the DVI port. Â To - Apple MA356LL | User Guide - Page 10
cable To access the Internet or a network, connect one end of an Ethernet cable to either of the Ethernet ports on the back of your Mac Pro. Connect the other end to a DSL modem, cable modem, or Ethernet network. Gigabit Ethernet ports Step 5: Connect the keyboard and mouse Connect the keyboard - Apple MA356LL | User Guide - Page 11
Plug the mouse into a USB port on the keyboard. Keyboard Mouse If the keyboard cable is not long enough to reach a USB port on your computer, use the keyboard extension cable that came with your computer. Apple keyboard extension cable Chapter 1 Getting Started 11 - Apple MA356LL | User Guide - Page 12
Using a Wireless Keyboard and Mouse If you purchased an Apple Wireless Keyboard and Mouse with your Mac Pro, follow the instructions that came with the keyboard and mouse to set them up. Step 6: Turn on your Mac Pro Press the power (®) button on the front of the computer to turn it on. If your - Apple MA356LL | User Guide - Page 13
from sleep and bypass the startup process. To put the computer to sleep, do one of the following: Â Choose Apple () > Sleep. Â Press the power button on the front of your Mac Pro. Â Choose Apple () > System Preferences, click Energy Saver, and set a sleep timer. Chapter 1 Getting Started 13 - Apple MA356LL | User Guide - Page 14
Click the mouse. Â Press the power button on the front of your Mac Pro. Shutting Down Your Mac Pro If you will not be using your Mac Pro for a day or more, you should turn it off. To turn off your Mac Pro, choose Apple () > Shut Down. WARNING: Do not turn off your Mac Pro by turning off the switch - Apple MA356LL | User Guide - Page 15
at www.apple.com links you to the latest Apple news, free downloads, and online catalogs of software and hardware for your Mac Pro. You can also find the manuals for many Apple products, and technical support for all of Apple's products, on the Apple Support website at www.apple.com/support. 15 - Apple MA356LL | User Guide - Page 16
Basic Features on the Front of Your Mac Pro Optical drive Status light Second optical drive (optional) ® Power button f Headphone jack USB 2.0 ports (2) FireWire 800 port FireWire 400 port 16 Chapter 2 Getting to Know Your Mac Pro - Apple MA356LL | User Guide - Page 17
) discs. To open the drive, press the Media Eject (C) key on your Apple Keyboard. If your Mac Pro has a second optical drive, press the Option and Media Eject (C) keys to open it. ® Power button Press this button to turn on your Mac Pro, put it to sleep, or wake it from sleep. To restart, press - Apple MA356LL | User Guide - Page 18
Ports and Connectors on the Back of Your Mac Pro Power socket ¥ Locking latch d USB 2.0 ports (3) H FireWire 400 port H FireWire 800 port G Gigabit Ethernet ports (2) 18 Chapter 2 Getting to Know Your Mac Pro - Apple MA356LL | User Guide - Page 19
, 400, and 800 Mbit/s. G Dual Gigabit Ethernet ports with jumbo frame support Connect your Mac Pro to a high-speed Ethernet network to access the Internet or network resources such as printers and servers, and share information over the network using a CAT 5e cable. Chapter 2 Getting to Know Your - Apple MA356LL | User Guide - Page 20
More Ports and Connectors on the Back PCI Express expansion slots £ DVI display port 1 £ DVI display port 2 Optical digital audio out port Optical digital audio in port , Audio line-in port - Audio line-out port 20 Chapter 2 Getting to Know Your Mac Pro - Apple MA356LL | User Guide - Page 21
, to either port. For full resolution, connect the 30-inch Apple Cinema HD Display to port 1. You can also connect displays that use a video graphics array (VGA) connector with the Apple DVI to VGA Display Adapter that came with your Mac Pro. Optical digital audio in and out ports Connect to decks - Apple MA356LL | User Guide - Page 22
Internal Expansion Options 22 Chapter 2 Getting to Know Your Mac Pro Optical drive carrier Hard disk drive carriers (4) Slots 2-4: PCI Express Battery Slot 1: Double-wide PCI Express graphics (graphics card installed) Top memory card Bottom memory card - Apple MA356LL | User Guide - Page 23
Cards" on page 47. Memory cards Your Mac Pro has two memory cards. Each card holds up to 4 FB-DIMMS, for a total of 8 DIMMs. To add more memory, install 667MHz FB-DIMMs in pairs on the memory cards. See "Installing Memory" on page 32 for information about the specific type of memory used in Mac Pro - Apple MA356LL | User Guide - Page 24
the following: To learn about... Installing additional drives, memory, expansion cards, or changing the battery Troubleshooting your computer if you have a problem Finding service and support for your Mac Pro Using Mac OS X Using iLife applications See... Chapter 3, "Working Inside Your Computer - Apple MA356LL | User Guide - Page 25
." The AirPort Support page at www.apple.com/support/airport. Or open AirPort Help by clicking and holding the Home button at the top of a Mac Help page, and then choose AirPort Help from the list. The Bluetooth Support page at www.apple.com/support/ bluetooth. Or open the Bluetooth File Exchange - Apple MA356LL | User Guide - Page 26
- Apple MA356LL | User Guide - Page 27
Backup Battery" on page 50 WARNING: Apple recommends that you have an Apple-certified technician install memory, PCI Express cards, and internal storage devices. To contact an Apple Authorized Service Provider or Apple for service, see "Learning More, Service, and Support" on page 66. If you install - Apple MA356LL | User Guide - Page 28
Opening the Computer 1 Before you open your Mac Pro, shut it down by choosing Apple () > Shut Down. · WARNING: Always shut down your Mac Pro before opening it to avoid damaging its internal components or the components you want to install. Do not open the computer or attempt to install - Apple MA356LL | User Guide - Page 29
the metal on top of the computer. 4 Unplug all the cables and the power cord from the computer. · WARNING: To avoid damaging internal components or the components you want to install, always unplug your Mac Pro. Don't attempt to install items while it's plugged in. Chapter 3 Working Inside Your - Apple MA356LL | User Guide - Page 30
5 Hold the side panel and lift the latch on the back of the computer. Lift the latch while holding the side panel. 30 Chapter 3 Working Inside Your Computer - Apple MA356LL | User Guide - Page 31
6 Remove the side panel. Pull the top of the side panel out and lift it up. Important: When you remove the side panel, hold it securely. Chapter 3 Working Inside Your Computer 31 - Apple MA356LL | User Guide - Page 32
from older Mac computers cannot be used in your Mac Pro. Note: When purchasing DIMMs for use in Mac computers, make sure that the memory vendor conforms to the Joint Electron Device Engineering Council (JEDEC) specification. Check with your memory vendor to ensure that the DIMMs support the correct - Apple MA356LL | User Guide - Page 33
, open it, and remove the side panel, following the instructions on page 28. · WARNING: Let your computer cool down for 5 to 10 minutes before you touch the internal components. The components on the memory cards may be very hot. 2 Remove the memory card and place it on a soft, clean cloth. Chapter - Apple MA356LL | User Guide - Page 34
. Repeat to install the second FB-DIMM. Don't touch the gold DIMM connectors. Important: Add DIMMs to the memory cards in the order shown here. Top memory card Bottom memory card First pair of additional DIMMs Second pair of additional DIMMs Third pair of additional DIMMs 34 Chapter 3 Working - Apple MA356LL | User Guide - Page 35
side, push the memory cards straight down into the memory slots. 5 Lay your Mac Pro down on a soft, clean cloth on the desk or work surface to avoid scratching the work surface or your Mac Pro. 6 Install the memory cards, pushing slightly until they are seated in the memory slot. Chapter 3 Working - Apple MA356LL | User Guide - Page 36
7 Stand your Mac Pro up and replace the side panel. Important: When you replace the side panel, hold it securely so it stays in place as you push the latch down. Place the side panel in the slot and then push to close. 36 Chapter 3 Working Inside Your Computer - Apple MA356LL | User Guide - Page 37
8 Push the latch down to secure the side panel. While pushing the side panel against the computer, push the latch down until it is firmly secured against the back of the computer. To lock the side panel or secure the computer, flip down the lock tab before you close the latch. This provides a - Apple MA356LL | User Guide - Page 38
 Height: 1.0 inch For more information about requirements and devices supported, visit an Apple Authorized Reseller or the Apple Support website at www.apple.com/support. Important: Use the original Apple cables that came with your Mac Pro when you install or replace the optical drives. Installing - Apple MA356LL | User Guide - Page 39
To install a hard disk drive: 1 Open your Mac Pro and remove the side panel following the instructions that begin on page 28. 2 Lift the latch to unlock the hard drive carriers. Important: When the latch is down, the carriers are locked in - Apple MA356LL | User Guide - Page 40
4 Use the four screws on the carrier to attach the hard disk drive to the carrier. Important: If the printed circuit board is exposed on the bottom of the hard disk drive, hold the drive by its sides. To avoid damaging the drive, don't touch the printed circuit board. Position the connectors towards - Apple MA356LL | User Guide - Page 41
5 Lift the latch and then slide the carrier over the guides and into the drive bay, until it's seated in the bay and snaps into place. The connectors on the drive plug into the computer when - Apple MA356LL | User Guide - Page 42
, set the drive to cable select mode if the manufacturer hasn't already done so. To replace the optical drive: 1 Open your Mac Pro and remove the side panel following the instructions on page 28. 2 Lift the latch to unlock the optical drive carriers. Important: When the latch is down, the drives and - Apple MA356LL | User Guide - Page 43
4 Disconnect the power and ribbon cables from the optical drive and remove the carrier. Chapter 3 Working Inside Your Computer 43 - Apple MA356LL | User Guide - Page 44
5 Remove the optical drive from the carrier by unscrewing the four attachment screws. 6 Use the four screws from the original optical drive to attach the replacement drive to the carrier. Four extra screws 44 Chapter 3 Working Inside Your Computer - Apple MA356LL | User Guide - Page 45
7 Slide the optical drive and carrier over the guides halfway into the drive bay, 8 Attach the power and ribbon cables to the back of the drive. Power cable middle connector Ribbon cable end connector Chapter 3 Working Inside Your Computer 45 - Apple MA356LL | User Guide - Page 46
9 Lift the latch and then slide the optical drive carrier into the drive bay, pushing it into place. Make sure the latch is up. 10 Replace the side panel and push the latch down to secure it. 46 Chapter 3 Working Inside Your Computer - Apple MA356LL | User Guide - Page 47
cards. Before installing a card, check its specifications to make sure it can operate in your Mac Pro. To adjust the bandwidth of the PCI Express slots in your Mac Pro, use the Expansion Slot Utility, located on your startup disk in /System/Library/Core Services/. Important: Combined maximum power - Apple MA356LL | User Guide - Page 48
2 Lay your Mac Pro down on a soft, clean cloth to avoid scratching it or the work surface. 3 Unscrew the captive screws in the PCI bracket and remove the bracket. 4 Remove the port access cover from the slot in which you plan to install the card. PCI bracket Port access cover To remove a card, push - Apple MA356LL | User Guide - Page 49
remove the hard disk drives and carriers, and remove adjacent cards. If you have a full-length card, install the end of the card in the card guide first, and then align the card with the PCI slot to finish installing it. Secure the card with the PCI bracket. Insert the PCI bracket under the brace - Apple MA356LL | User Guide - Page 50
the latch down to secure it. Replacing the Internal Backup Battery Your Mac Pro uses a CR 2032 Lithium battery that preserves settings, such as the date and time, when your Mac Pro is off. If you notice intermittent problems when your Mac Pro starts up or changes in the date and time settings, you - Apple MA356LL | User Guide - Page 51
WARNING: Installing the battery incorrectly may cause an explosion. Use only the same type of battery or an equivalent recommended by new battery positive (+) side up. Remove the card in slot 1. Push on the tab to release the catch. 5 Replace the PCI Express cards that you removed (see page 47). 6 - Apple MA356LL | User Guide - Page 52
- Apple MA356LL | User Guide - Page 53
Troubleshooting 4 4 If you have a problem while working with your Mac Pro, here are some things you can try right away. Occasionally you may have a problem while working with your Mac Pro. This chapter gives you some solutions to try. Problems with Your Mac Pro If your Mac Pro won't respond or - Apple MA356LL | User Guide - Page 54
Mac Pro by choosing Apple () > Restart to be sure the problem is entirely cleared up. You can also restart by pressing the power (®) button for about 5 or 6 seconds until your Mac Pro shuts down. Press the power (®) button again to start up your Mac Pro. Â If the problem occurs only when you use - Apple MA356LL | User Guide - Page 55
use. Quit applications that are open, and then try again. If that doesn't work, choose Apple memory, a PCI expansion card, problem: Â One short flash followed by a longer off period: No valid memory. Â Three short flashes followed by a longer off period: Failed memory. Chapter 4 Troubleshooting - Apple MA356LL | User Guide - Page 56
. You have a problem using your computer or working with Mac OS X. Â Look in Mac Help (in the Help menu) for instructions and troubleshooting information. Â For the latest troubleshooting information and software updates, go to the Apple Support website at www.apple.com/support. 56 Chapter - Apple MA356LL | User Guide - Page 57
instructions. Â For more information, search for "Software Update" in Mac Help. Â For the latest information about Mac OS X, go to the Mac OS X website at www.apple.com/macosx. Problems with AirPort Wireless Communication If you have trouble using AirPort reception. Chapter 4 Troubleshooting 57 - Apple MA356LL | User Guide - Page 58
information, see the instructions that came with the wireless device or search for "AirPort" in Mac Help. Problems with Your Display WARNING: If you have a problem with your Apple display and nothing in this manual solves it, contact an Apple Authorized Service Provider or Apple for assistance. If - Apple MA356LL | User Guide - Page 59
start up using the software Apple () > System Preferences. Click Displays, select Color, and click Calibrate. For more information on color and your display, see Mac Help. Â The flickering may be caused by interference from a nearby power Mac Help. After you change the screen resolution, desktop - Apple MA356LL | User Guide - Page 60
lamp. Contact an Apple Authorized Reseller or Apple Authorized Service Provider. Problems with Your Internet Connection If you have trouble with your Internet connection, you can try the steps in this section starting with Network Diagnostics. To use Network Diagnostics: 1 Choose Apple () > System - Apple MA356LL | User Guide - Page 61
instructions. If Network Diagnostics can't resolve the problem, there may be a problem with the Internet service provider (ISP) you are trying to connect to, with an external device you are using to the wall jack. Check the cables and power supplies for Ethernet hubs and routers. Turn the modem - Apple MA356LL | User Guide - Page 62
Check the cables and power supplies to your Ethernet hubs and using an AirPort Base Station, check Mac Help or visit the Apple AirPort website at www.apple.com/support/ airport. If you cannot resolve the issue using these steps, contact your ISP or network administrator. 62 Chapter 4 Troubleshooting - Apple MA356LL | User Guide - Page 63
of the error code before pursuing support options. If Apple Hardware Test does not detect a hardware failure, the problem may be software-related. For more information about Apple Hardware Test, see the Apple Hardware Test Read Me file on the Mac OS X Install Disc 1. Chapter 4 Troubleshooting 63 - Apple MA356LL | User Guide - Page 64
. Apple is not responsible for any lost data. Installing Mac OS X To install Mac OS X: 1 Back up your important files, if possible. 2 Insert the Mac OS X Install Disc 1 that came with your computer. 3 Double-click "Install Mac OS X and Bundled Software." 4 Follow the onscreen instructions. 5 Select - Apple MA356LL | User Guide - Page 65
Mac OS X" instructions above. Maximizing Ethernet Performance Your computer performs best when the Ethernet port to which it is connected is set to autonegotiate. Ask your network administrator to verify this setting. Important: If you experience connection problems . Chapter 4 Troubleshooting 65 - Apple MA356LL | User Guide - Page 66
Hardware Test. If you didn't order AirPort or Bluetooth wireless technology with your Mac Pro, contact an Apple Authorized Service Provider or an Apple Store. Online Resources For online service and support information, go to www.apple.com/support. Choose your country from the pop-up menu. You can - Apple MA356LL | User Guide - Page 67
AppleCare Service and Support Information Your Mac Pro comes with 90 days of telephone support and one year of service coverage at an Apple-authorized repair center. You can extend your coverage by purchasing the AppleCare Protection Plan. For more information, visit the website address for your - Apple MA356LL | User Guide - Page 68
the serial number of your Mac Pro. Open System Profiler, located in the Utilities folder in the Applications folder, and click the System Profile tab. The serial number is also on the configuration label, which is located on the back of your Mac Pro near the video ports. 68 Chapter 4 Troubleshooting - Apple MA356LL | User Guide - Page 69
)  Eight DIMM slots available (four slots per memory card)  Error-correcting code (ECC)  72-bit wide, 240-pin modules  36 memory devices maximum per DIMM  Contain an Apple-approved heat sink (for best acoustic performance)  Conform to JEDEC specification (see page 32)  Maximum height of 31 - Apple MA356LL | User Guide - Page 70
the amount of memory. Graphics Card PCI Express graphics card with two Digital Visual Interface (DVI) connectors. Video Display Modes For technical specifications for your display: Â Apple displays: Go to www.apple.com/displays. Â Non-Apple displays: Go to www.apple.com/guide. SuperDrive (DVD+R DL - Apple MA356LL | User Guide - Page 71
Enhanced CD  DVD-Video  DVD±R  DVD±RW  DVD+R DL USB Specifications  Support for Universal Serial Bus (USB) 2.0 and 1.1  Seven external USB Type A ports  Two USB 2.0 ports on the front  Three USB 2.0 ports on the back  Two USB 1.1 ports on the Apple Keyboard  Each rear port is on a separate - Apple MA356LL | User Guide - Page 72
12 V  Output power: Up to a maximum of 28 W for all 4 ports or 7 W for any one port Ethernet Specifications  IEEE 802.3 100 m  Channel speeds: IEEE Autonegotiation of 10Base-T, 100Base-TX, and 1000Base-T Bluetooth 2.0+EDR Specifications (Optional)  Wireless data rate: Up to 3 Mbit/s  Range: Up - Apple MA356LL | User Guide - Page 73
AirPort Extreme Specifications (Optional)  Frequency band: 2.4 and 5 gigahertz (GHz)  Radio output power: 20 dBm (nominal) Compatibility  802.11a, b, g, and draft n Optical Digital Audio Specifications  Data format: Sony/Phillips Digital Interface (S/PDIF) protocol (IEC60958-3)  Connector type: - Apple MA356LL | User Guide - Page 74
Specifications  Sample rate: 44.1 kHz, 48 kHz, or 96 kHz  Jack type: 1/8" mini  Bits per sample: 16-bit or 24-bit  Frequency response: 20 Hz to 20 kHz, +0.5 dB/-3 dB Analog audio out using ) (+5.1 dBµ)  Output impedance: 24 ohms  Output power: 90 milliwatts (mW)  Signal-to-noise ratio: Greater - Apple MA356LL | User Guide - Page 75
Power Supply cards Combined maximum power consumption for all four PCI Express slots should not exceed 300 watts (W). USB devices Each of the computer's built-in USB ports is allotted 500 mA. FireWire devices The computer can provide up to 28 W total to the FireWire ports. Appendix A Specifications - Apple MA356LL | User Guide - Page 76
and Battery Your computer has CMOS custom circuitry with a long-life battery. Battery Use a 3-volt, CR 2032 Lithium coin cell replacement battery (see "Replacing the Internal  Relative humidity: 5% to 95% (noncondensing)  Altitude: 0 to 3048 meters (0 to 10,000 feet) 76 Appendix A Specifications - Apple MA356LL | User Guide - Page 77
procedures, routine maintenance, and ergonomic considerations for using your computer and display. Important Safety Information The only way to disconnect power completely from your computer is to unplug the power cord from the main power supply. To disconnect your display completely, you must - Apple MA356LL | User Guide - Page 78
period of time, remove the battery. For service or questions about your warranty, contact an Apple Authorized Service Provider or Apple. Service and support information is included with your computer's documentation. Apple and the Environment At Apple, we recognize our responsibility to minimize the - Apple MA356LL | User Guide - Page 79
't bump into anything when it opens. Â Close the drive when you're not using it. Â Do not put anything on the drive tray when it is open. other abrasive surface. If you need to clean the lens, see an Apple Authorized Service Provider for a lens cleaner. Â Keep your computer away from any source - Apple MA356LL | User Guide - Page 80
support your lower back (lumbar region). Follow the manufacturer's instructions for adjusting the backrest to fit your body properly. Â When you use the your feet. Or you can lower the desktop to eliminate the need for a footrest. Another option is to use a desk with a keyboard tray that's lower - Apple MA356LL | User Guide - Page 81
reflections on the screen from overhead lights and nearby windows. If possible, use a tiltable display stand. The stand lets you set the display at the slightly Screen positioned to avoid reflected glare Lower back supported Clearance under work surface Thighs tilted slightly Feet flat - Apple MA356LL | User Guide - Page 82
For more information about health, safety, and maintenance, go to the Apple ergonomic website at www.apple.com/about/ergonomics. Avoid Hearing Damage WARNING: Permanent hearing loss may occur if earbuds or headphones are used at high volume. You can adapt over time to a higher volume of sound that - Apple MA356LL | User Guide - Page 83
is not installed and used properly-that is, in strict accordance with Apple's instructions-it may cause interference with radio and television reception. This equipment has been tested and found to comply with the limits for a Class B digital device in accordance with the specifications in Part 15 - Apple MA356LL | User Guide - Page 84
to indoor use due to its operation in the 5.15 to 5.25 GHz frequency range to reduce the potential for harmful interference to cochannel Mobile Satellite systems. Cet appareil doit être utilisé à l'intérieur. Exposure to Radio Frequency Energy The radiated output power of the AirPort Card in this - Apple MA356LL | User Guide - Page 85
Korea Keyboard Statement Korea Statements Singapore Wireless Certification Taiwan Statement Taiwan Class B Statement VCCI Class B Statement Mouse Class 1 LED Information The Apple Mighty Mouse is a Class 1 LED product in accordance with IEC 60825-1 A1 A2. It also complies with the Canadian ICES-003 - Apple MA356LL | User Guide - Page 86
Mac Pro to the phone line using an external USB modem, refer to the telecommunications agency information in the documentation that came with your modem. Apple and the Environment Apple information is available on the web at: www.apple.com/environment Disposal and Recycling Information This symbol - Apple MA356LL | User Guide - Page 87
Taiwan: European Union-Disposal Information The symbol above means that according to local laws and regulations your product should be disposed of separately from household waste. When this product reaches its end of life, take it to a collection point designated by local authorities. Some - Apple MA356LL | User Guide - Page 88
- Apple MA356LL | User Guide - Page 89
Service and Support 67 Apple Hardware Test 66 applications force quit 54 freezing 56 installing 64 problems 56 assistants Setup Assistant 12 B battery disposal 86 internal backup battery 23 replacing 50 Bluetooth 72 C CD-RW 70 changing the desktop 64 hard disk drives 38 Mac OS X 64 memory 32 89 - Apple MA356LL | User Guide - Page 90
19 problems connecting to Internet 61 processor 69 protective film 5 R RAM 23, 69 reset the PRAM 54 S safety information 77 screen freezes 60 Serial ATA drive 38 serial number 68 service and support information 67 shutting off power 6, 14, 28 sleep 13, 17 software updating 57 specifications 69 - Apple MA356LL | User Guide - Page 91
- Apple MA356LL | User Guide - Page 92
-
 1
1 -
 2
2 -
 3
3 -
 4
4 -
 5
5 -
 6
6 -
 7
7 -
8
-
9
-
10
-
11
-
12
-
13
-
14
-
15
-
16
-
17
-
18
-
19
-
20
-
21
-
22
-
23
-
24
-
25
-
26
-
27
-
28
-
29
-
30
-
31
-
32
-
33
-
34
-
35
-
36
-
37
-
38
-
39
-
40
-
41
-
42
-
43
-
44
-
45
-
46
-
47
-
48
-
49
-
50
-
51
-
52
-
53
-
54
-
55
-
56
-
57
-
58
-
59
-
60
-
61
-
62
-
63
-
64
-
65
-
66
-
67
-
68
-
69
-
70
-
71
-
72
-
73
-
74
-
75
-
76
-
77
-
78
-
79
-
80
-
81
-
82
-
83
-
84
-
85
-
86
-
87
-
88
-
89
-
90
-
91
-
92
 |
 |

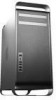
Mac Pro
User’s Guide
Includes setup, expansion,
and troubleshooting
information for your
Mac Pro computer