Apple MB673Z/A User Manual
Apple MB673Z/A - Aperture - Mac Manual
 |
UPC - 885909249695
View all Apple MB673Z/A manuals
Add to My Manuals
Save this manual to your list of manuals |
Apple MB673Z/A manual content summary:
- Apple MB673Z/A | User Manual - Page 1
Aperture 2 User Manual - Apple MB673Z/A | User Manual - Page 2
for providing paid for support services. Every effort has been made to ensure that the information in this manual is accurate. Apple is not responsible for printing or clerical errors. Because Apple frequently releases new versions and updates to its system software, applications, and Internet sites - Apple MB673Z/A | User Manual - Page 3
Editing with Aperture 34 Image Processing 35 Distribution 40 Sharing Images with iLife and iWork Applications 41 Backing Up Your Work 43 The Aperture Interface 44 The Aperture Main Window 45 Browser 48 Viewer 50 Full Screen View 57 Inspector Pane 61 Toolbar 62 Control Bar 64 Import Pane 65 Vault - Apple MB673Z/A | User Manual - Page 4
and Selecting Images from Your iPhoto Library 143 Transferring Projects from Another System 143 Making an Immediate Backup 144 Where Aperture Stores Your Managed Files in the Library 144 Migrating Images from Previous Versions of Aperture Part II Chapter 5 Photo Editing 149 Working with Images in - Apple MB673Z/A | User Manual - Page 5
Images in the Browser 163 Sorting Images 163 Rotating Images 165 Creating Versions of an Image 166 Deleting Images from the Browser 168 Dragging Images Showing Hot and Cold Areas in Your Images 191 Viewing Images at Full Resolution 192 Viewing Master Images 192 Setting Up the Viewer for Onscreen - Apple MB673Z/A | User Manual - Page 6
Chapter 9 Chapter 10 Chapter 11 Chapter 12 233 Rating Images 234 An Overview of the Aperture Rating System 236 Rating Images 238 Sorting Images by Rating 239 Including Image Rating in Your Workflow 240 Comparing and Rating Images 242 Keyboard Shortcuts for Displaying - Apple MB673Z/A | User Manual - Page 7
An Overview of Adjustments in Aperture 332 Using the Adjustment Controls 333 Working with Adjustment Tools in the Viewer 334 Performing Adjustments in Full Screen View 335 Applying Adjustments to a Group of Images 337 Working with Adjustment Presets 342 Remove Adjustments Command 342 Using Modifier - Apple MB673Z/A | User Manual - Page 8
378 Viewing the Corrected Image Without Red Eye Target Overlays 379 Moving Red Eye Target Overlays 380 Deleting Red Eye Target Overlays 381 Working with the Retouch and Spot & Patch Controls 381 Working with the Retouch Controls 386 Working with the Spot & Patch Controls 398 Working with the - Apple MB673Z/A | User Manual - Page 9
in Your Printer 487 Exporting Your Images 487 An Overview of Exporting Images 489 Exporting Copies of Masters 492 Exporting Image Versions 505 Working with Export Presets 509 Creating Slideshow Presentations 510 An Overview of Slideshows 512 Creating a Slideshow 513 Controlling a Slideshow 513 - Apple MB673Z/A | User Manual - Page 10
Chapter 19 Chapter 20 Chapter 21 518 Creating a Growing Grid of Images 519 Playing Your Slideshow on Your Main Display Only 520 Displaying Your Images to Music 523 Using the Light Table 524 An Overview of the Light Table 525 Creating a Light Table Album 526 Placing and Viewing Images in the Light - Apple MB673Z/A | User Manual - Page 11
Working with the Vault Pane 616 Creating Vaults 617 Updating Vaults 618 Disconnecting a Vault's Hard Drive from Your System Temporarily 618 Reconnecting a Vault's Hard Drive to your System 619 Deleting a Vault Permanently 619 Backing Up Images from a Portable in the Field 621 Restoring Your Aperture - Apple MB673Z/A | User Manual - Page 12
- Apple MB673Z/A | User Manual - Page 13
is a powerful and easy-to-use digital image management system that can track thousands of digital images and provides the to another format before viewing, adjusting, organizing, or printing them. Aperture supports RAW formats from leading digital camera manufacturers (including Canon and Nikon). Â - Apple MB673Z/A | User Manual - Page 14
introduction to the Aperture interface, and detailed instructions for using the many features and tools in Aperture, continue reading this manual. Â For a list of the keyboard and solutions, go to the Aperture Support website, available from the Aperture Help menu. 14 Preface Introducing Aperture - Apple MB673Z/A | User Manual - Page 15
and Acquisition I Chapter 1 Chapter 2 Chapter 3 Chapter 4 This section provides introductory information about the application and its interface. It also explains how to set up your image management system and import images into it. An Overview of Aperture The Aperture Interface Working with - Apple MB673Z/A | User Manual - Page 16
- Apple MB673Z/A | User Manual - Page 17
images. Once you're familiar with Aperture, you'll find in-depth explanations and instructions in later chapters. This chapter covers: Â A First Look at Aperture (p. 18 (p. 34) Â Distribution (p. 35) Â Sharing Images with iLife and iWork Applications (p. 40) Â Backing Up Your Work (p. 41) 17 - Apple MB673Z/A | User Manual - Page 18
. Note: Because you can customize the toolbar, adding and deleting the buttons you want, your toolbar may appear different from the one pictured in this manual. For more information about changing the toolbar, see "Customizing the Toolbar" on page 78. 18 Part I Interface and Acquisition - Apple MB673Z/A | User Manual - Page 19
to install sample projects. You can import the sample projects into Aperture from the Aperture installation disc at any time after installing the application. Creating Projects and Importing Your Photos To use Aperture, you first import your photos. You can import digital photos directly from your - Apple MB673Z/A | User Manual - Page 20
you can create albums. Over the long term you may be using Aperture to track years of projects, so you'll want to develop a naming system that is easy to use and understand. For more information about organizing your images in projects and albums, see Chapter 3, "Working with Aperture Projects," on - Apple MB673Z/A | User Manual - Page 21
. For example, if you have bracketed images or images shot in quick succession, you can have Aperture import and stack these images together to make reviewing and working with them easier. Chapter 1 An Overview of Aperture 21 - Apple MB673Z/A | User Manual - Page 22
images are located, and Aperture adds them to its management system without changing the image locations. This means that with Aperture files from a variety of supported digital cameras  TIFF Note: For a list of supported digital cameras, go to http://www.apple.com/aperture. For more information - Apple MB673Z/A | User Manual - Page 23
with your images, you select a project in the Projects inspector and Aperture displays that project's images in the Browser. You use the Browser to review, organize, and select images. You can display the Browser only or display the Browser and a Viewer that shows images in detail. When you select - Apple MB673Z/A | User Manual - Page 24
you can work with them in detail. Toolbar available in Full Screen view The displayed image fills the screen. Filmstrip available in Full Screen view To see images in Full Screen view, you press F. Press F again to exit Full Screen view. In Full Screen view, you can change the display of images to - Apple MB673Z/A | User Manual - Page 25
and present the best of your photos at optimal size during client reviews. Working with Heads-Up Displays To work efficiently in Aperture, you can HUDs) to change images. For example, when you view images in Aperture in Full Screen view, you can open an Inspector HUD to adjust your images. Inspector - Apple MB673Z/A | User Manual - Page 26
Working with Inspectors Aperture also provides an Adjustments inspector for applying adjustments and a Metadata inspector that allows you to review metadata and assign it to your images. You can show or hide the Adjustments and Metadata inspectors by clicking the appropriate tab at the top - Apple MB673Z/A | User Manual - Page 27
with Aperture You can rate images as you review them in the Viewer, in the Browser, or in Full Screen view. By selecting an image and controls for assigning ratings also appear in the control bar and in the filmstrip in Full Screen view, if you prefer to use them. Stars indicate the rating. X - Apple MB673Z/A | User Manual - Page 28
Finding and Displaying Images with the Query HUD You can use the Query HUD to search for and display only certain photos in a project or album. Click the Query HUD button beside the search field in the Browser and the Query HUD appears. In the Query HUD, you can specify criteria for the photos you - Apple MB673Z/A | User Manual - Page 29
to them. For example, you might use the comparison method to make final selections of the best images in a series. Or, you might compare two versions of an image and make adjustments. Chapter 1 An Overview of Aperture 29 - Apple MB673Z/A | User Manual - Page 30
, such as bracketed shots or shots taken in quick succession, Aperture can automatically stack related shots. You can also select and manually stack related shots yourself and review them for a "pick", the image that you intend to use. A stack with three images is shown expanded, or open. The Stack - Apple MB673Z/A | User Manual - Page 31
a means to easily locate specific images among thousands. Applying keywords is also required if you plan to sell images to image libraries, such as Corbis or you define. You can display images in the Viewer with their version names and any assigned keywords appearing on or below the image. Keywords - Apple MB673Z/A | User Manual - Page 32
You can also show keyword controls in the control bar at the bottom of the Aperture main window by choosing Window > Show Keyword Controls. Using these simple controls, you can display different categories of keywords and easily apply those keywords with a quick click or keystroke. Your Aperture - Apple MB673Z/A | User Manual - Page 33
into a Smart Album. You use the Query HUD to specify the image keywords or other criteria that identify the images you want, and image versions automatically appear in the album. By adjusting the search criteria, you change the contents of the Smart Album. For example, after creating an empty - Apple MB673Z/A | User Manual - Page 34
Image Processing You can use Aperture to crop, rotate, horizontally align, and remove red-eye from images, as well as adjust color and exposure, reduce noise, and so on. Aperture provides controls for performing many types of image adjustments, including:  RAW image fine-tuning  Exposure - Apple MB673Z/A | User Manual - Page 35
. You can also easily export your images to a third-party application such as Adobe Photoshop, make adjustments, and then bring the adjusted methods of distribution:  Creating slideshow presentations  Performing Light Table reviews  Creating webpages and web journals  Ordering printed books  - Apple MB673Z/A | User Manual - Page 36
Presenting Your Images in Slideshows You can use Aperture to make slideshow presentations to clients or viewers. Using one or two large-screen displays, you can set Aperture to present slideshow images in a variety of ways. For example, you can present images as a sequence of single images or as - Apple MB673Z/A | User Manual - Page 37
I Reviewing Images in the Aperture Light Table You can use the Aperture Light Table to freely arrange and organize a group of images visually to see how - Apple MB673Z/A | User Manual - Page 38
webpages to your MobileMe account, or you can post them to your own website server and then provide the Internet address to clients or other reviewers. Aperture provides ready-made themes and webpage layouts that you can quickly choose for the design of your pages. To create webpages that present - Apple MB673Z/A | User Manual - Page 39
I You can also create a web journal, which allows you to mix text and images on the webpage. For example, you might create a web journal that chronicles your latest trip and include your photos. You create web journal pages by creating a web journal album and using the Webpage Editor to design your - Apple MB673Z/A | User Manual - Page 40
your printer and meet custom print requirements. For more information about print export your original masters as well as versions that you've created. Aperture provides many review and select iPhoto images that you want to import. You can import documents or files from iLife or iWork applications - Apple MB673Z/A | User Manual - Page 41
up the masters of referenced images located outside the Aperture library. You must maintain your own backup system of referenced image masters. Aperture does back up the versions, previews, and metadata information associated with referenced images, but not the masters themselves. You can view your - Apple MB673Z/A | User Manual - Page 42
- Apple MB673Z/A | User Manual - Page 43
associated with Aperture in the index and glossary. This chapter covers: Â The Aperture Main Window (p. 44) Â Browser (p. 45) Â Viewer (p. 48) Â Full Screen View (p. 50) Â Inspector Pane (p. 57) Â Toolbar (p. 61) Â Control Bar (p. 62) Â Import Pane (p. 64) Â Vault Pane (p. 65) Â Book Layout Editor - Apple MB673Z/A | User Manual - Page 44
the Inspector pane by pressing I. Arranging the Interface Aperture provides four basic views of your images: Browser Only, Browser & Viewer, Viewer Only, and Full Screen. The areas in the Aperture interface are resizable, and you can customize any of these views to suit your workflow. To see the - Apple MB673Z/A | User Manual - Page 45
I Browser The Browser displays a project's or album's thumbnail images. When you select a project or album in the Projects inspector, images appear in the Browser. You can display images in the Browser in three ways: in filmstrip view, in grid view, and in list view. You can also open multiple - Apple MB673Z/A | User Manual - Page 46
a selected project appear as thumbnails within the Browser arranged in columns and rows. You can adjust the size of the thumbnails to easily review and work with your images. B CD E F A G H A Browser The Browser displays the contents of any project or album selected in the Projects inspector - Apple MB673Z/A | User Manual - Page 47
I Browser in List View When the Browser is in list view, images in a selected project appear as rows of information. Metadata about each image appears in columns, and by clicking a column heading you can sort the images by that column category. B A A List of images B Column headings The Browser - Apple MB673Z/A | User Manual - Page 48
in the Viewer. You use these controls to change the number of images displayed in the Viewer, display the masters that versions are based on, display images at full resolution, display the primary image selection only, and display Preview images (optimized JPEGs) only. Use these tools to select and - Apple MB673Z/A | User Manual - Page 49
metadata to one or several images with this tool. Use the guides to help manually straighten (or level) the selected image. Trim the selected image , occurring when the subject's retinas reflect light from your camera's flash, with this tool. For more information about working with the adjustment - Apple MB673Z/A | User Manual - Page 50
adjustments. Click again to switch the view back to the current version. C Zoom Viewer button Click this button to move between viewing an image Browser. Full Screen View Full Screen view projects your images onto a black background for detailed viewing. Using a dual-display system in Full Screen - Apple MB673Z/A | User Manual - Page 51
and proof your images. Use the toolbar buttons and tools to change your images. The toolbar includes buttons for creating versions and working with stacks, as well as a full set of image adjustment tools. Use the filmstrip to move through, organize, and rate your images. Chapter 2 The Aperture - Apple MB673Z/A | User Manual - Page 52
also use the J, K, and L keys to shuttle through your images. Search Controls A B A Search field B Query HUD button Enter text; images that match appear in the full-screen view. Click this button to open the Query HUD to search for images. 52 Part I Interface and Acquisition - Apple MB673Z/A | User Manual - Page 53
. Click this button to give the selected image a Select rating (five stars). Controls in the Toolbar Always Show Toolbar button To view the Full Screen view toolbar: m In Full Screen view, move the pointer to the top of your primary screen. You can also have the toolbar always appear on the screen - Apple MB673Z/A | User Manual - Page 54
to the stack's pick. Select a stack item, then click this button to move the selected stack item farther from the stack's pick. Select an image version to represent a stack, then click this button to select the image as the pick within that particular album (the stack can have a different pick image - Apple MB673Z/A | User Manual - Page 55
set of adjustments or metadata to one or several images with this tool. Use the guides to help manually straighten (or level) the selected image. Trim the selected image with this tool. Remove 's retinas reflect light from your camera's flash, with this tool. Chapter 2 The Aperture Interface 55 - Apple MB673Z/A | User Manual - Page 56
applied adjustments. Click again to switch the view back to the current version. C Zoom Viewer button Click this button to move between viewing an Buttons A BC D E A Loupe B Keywords HUD C Inspector HUD D Exit Full Screen E Always Show Toolbar button Click this button to open the Loupe, which - Apple MB673Z/A | User Manual - Page 57
I Inspector Pane The Inspector pane provides easy access to your projects, to image metadata, and to controls for adjusting images. The Inspector pane includes three inspectors: the Projects inspector, the Metadata inspector, and the Adjustments inspector. Click the tabs at the top of the Inspector - Apple MB673Z/A | User Manual - Page 58
Inspector The Metadata inspector displays an image's caption text, keywords, version number, filename, and file size. You can also view speed, date and time, focal length, exposure, metering pattern, and flash information. IPTC information can be embedded in a digital image with most software - Apple MB673Z/A | User Manual - Page 59
I To display the Metadata inspector, do one of the following: m Click the Metadata tab in the Inspector pane (or press Control-D). m Press W repeatedly to cycle through the inspectors until you select the one you want. B C A A Metadata display buttons B Metadata View pop-up menu C Metadata Action - Apple MB673Z/A | User Manual - Page 60
Adjustments Inspector You can use controls in the Adjustments inspector to apply, edit, and remove image adjustments. Controls in the Adjustments inspector are grouped according to the type of image adjustment they perform. You can see the controls for an adjustment by clicking its disclosure - Apple MB673Z/A | User Manual - Page 61
pane of the Inspector HUD in Full Screen view. For more information, see Chapter 7,"Viewing Images in Full Screen View," on page 207. buttons you want, your toolbar may appear different from the one pictured in this manual. A Inspector button B Import button C New pop-up menu D Email button - Apple MB673Z/A | User Manual - Page 62
Click this button to switch to Full Screen view, in which images are displayed on the screen without the Inspector pane, Browser, or Viewer. I Loupe button Click this button to open the - Apple MB673Z/A | User Manual - Page 63
I Keyword Controls You can display keyword controls in the control bar and use the buttons and pop-up menus to apply keywords to images. To display keyword controls in the control bar: m Choose Window > Show Keyword Controls (or press Shift-D). A B C A Individual keyword buttons Click any of - Apple MB673Z/A | User Manual - Page 64
Navigation Buttons A B A Previous Image B Next Image Click this button to go to the previous image. Click this button to go to the next image. Import Pane The Import pane displays a list of connected cameras, card readers, and external hard disk drives, as well as local hard disks and mounted - Apple MB673Z/A | User Manual - Page 65
been backed up to your vault. When your vault is up to date, the Vault Status button appears black. When a change to at least one version occurs, such as an adjustment, the Vault Status button appears yellow. When Aperture determines that even a single master has not been backed up, the Vault - Apple MB673Z/A | User Manual - Page 66
Book Layout Editor When you create a new book album, the Book Layout Editor appears. In it, you can create a variety of printed books to showcase your images. Select a page to edit in the Pages pane. Design each page in the Book Layout Editor. Pages Pane D E C B A H GF A Add Pages pop-up menu B - Apple MB673Z/A | User Manual - Page 67
I C Theme button Click this button to choose a theme and layout for your book's pages. D Edit Content button Click this button to change images or edit text on your pages. E Edit Layout button Click this button to change the page layout, moving and resizing text, metadata, and photo boxes on - Apple MB673Z/A | User Manual - Page 68
Text, Metadata, and Photo Box Buttons AB C D E A Add Text Box B Add Metadata Box C Add Photo Box D Send Backward E Bring Forward Click this button to add a text box to the page. Click this button to add a metadata box to the page. Click this button to add a photo box to the page. Click this - Apple MB673Z/A | User Manual - Page 69
A B C D A Large Hardcover B Large Softcover C Show Full Spreads D Show Single Pages Click this button to choose a large print your book's pages. Click this button to purchase a printed copy of your book from Apple's print vendor. Click this button to go to the previous page of your book. Click - Apple MB673Z/A | User Manual - Page 70
B A J M L K A Detail Images pane Click the thumbnail image in this pane to see the enlarged version of the selected image. B Pages pane Click a page's thumbnail to see the enlarged version. C Site Theme button Click this button to choose a theme, or layout, for your webpages. D Metadata - Apple MB673Z/A | User Manual - Page 71
and images, to display on the web. When working with a web journal, you can manually arrange images and text on the page. C DE F GHI B A PO N pane to see the enlarged version of a selected image. Select a page's thumbnail in this pane to see the enlarged version. Click this button to choose - Apple MB673Z/A | User Manual - Page 72
E Add Text Box button Click this button to add a text box to the current webpage. F Columns value slider Specify the number of columns you want on a page. G "Fit images within" pop-up menu Choose how images appear on the webpage from this pop-up menu. H Width value slider Specify the width - Apple MB673Z/A | User Manual - Page 73
I Light Table The Light Table provides an open workspace where you can freely arrange images. You can use the Light Table to review and compare images, create mockups of webpages, compare color values in a selection of images before applying color corrections, or do anything else that involves - Apple MB673Z/A | User Manual - Page 74
screen extends. You can use HUDs in all the main window views, including Full Screen view. Inspector HUD The Inspector HUD provides access to three inspector panes: the Inspector pane. You can use the HUD in the Viewer or in Full Screen view. To open a pane, click the corresponding button at the top - Apple MB673Z/A | User Manual - Page 75
I Individual Adjustment Tool HUDs Many of the Aperture adjustment tools, including Crop, Spot & Patch, Red Eye, Lift, Stamp, and Retouch, work in conjunction with HUDs. To view any of these HUDs: m Select the adjustment tool in the tool strip. To learn more about the adjustment tools, see Chapter 14 - Apple MB673Z/A | User Manual - Page 76
H New Album With Click this button to create a new album containing images that Current Images button match the current search criteria. I New Smart Album button Click this button to create a new Smart Album based on the search criteria. For more information, see Chapter 13, "Grouping Images - Apple MB673Z/A | User Manual - Page 77
Only: Use this view to display images in an enlarged Browser so you can review images, perform initial rating passes, and create and work with stacks of images views: m Choose Browser Only, Browser & Viewer, Viewer Only, or Full Screen from the View menu (or press V). You can use keyboard shortcuts - Apple MB673Z/A | User Manual - Page 78
Keyboard shortcut shift T F Function Show/Hide toolbar Enter/Exit Full Screen view Customizing the Toolbar The toolbar can be customized to display exactly the tools you need. You can customize the toolbar by selecting the - Apple MB673Z/A | User Manual - Page 79
I Customizing the Toolbar Buttons Aperture provides a simple drag-and-drop interface for adding, deleting, and rearranging the toolbar buttons. To customize the toolbar: 1 Do one of the following: Â Choose View > Customize Toolbar. Â Control-click the toolbar, then choose Customize Toolbar from the - Apple MB673Z/A | User Manual - Page 80
, called command sets, that can be imported and exported for use by others. If you're more familiar with keyboard shortcuts from other applications, you can use the Command Editor to substitute keyboard shortcuts for the default set of Aperture keyboard shortcuts. To display the Command Editor in - Apple MB673Z/A | User Manual - Page 81
have no additional markings. Several keys are shaded with diagonal lines, indicating that they are reserved for system use. Keys with assigned shortcuts Keys reserved for system commands Unassigned keys Choosing a Command Set By default, Aperture uses a standard set of commands, with the language - Apple MB673Z/A | User Manual - Page 82
Viewing Keyboard Shortcuts by Group The Command List area displays several groupings of commands, organized by Aperture menus as well as by types of command. Click a group to have the Command list display only the commands and keyboard shortcuts in that group. Command groups Searching for Commands - Apple MB673Z/A | User Manual - Page 83
I To search for and highlight a keyboard shortcut on the virtual keyboard: 1 Click the Keyboard Highlight button to the left of the search field. The keyboard dims. 2 Click in the search field and begin typing. The Command list changes as you type, highlighting the keys related to your search term. - Apple MB673Z/A | User Manual - Page 84
When you select a command in the Command list, the Detail area displays a brief description of the command. Assigning Keyboard Shortcuts Customizing shortcuts in the Command Editor is fast and easy. Because the default Standard Set includes commands for which no shortcut is defined, you may want to - Apple MB673Z/A | User Manual - Page 85
I To save a command set: m Click the Save button in the lower-right corner of the Command Editor. If you close the Command Editor with unsaved changes, Aperture prompts you to save the command set. To delete a command set: 1 Make sure you are using the command set you want to delete, then choose - Apple MB673Z/A | User Manual - Page 86
for changing your images outside of Aperture, as well as selecting the email application and settings you want used when emailing images. You can also create a this button to display options for reviewing and updating web galleries that you've published to MobileMe. 86 Part I Interface - Apple MB673Z/A | User Manual - Page 87
complete. B "Create new versions Select this checkbox to have Aperture automatically create a new when making version when you adjust a selected change. E "When a camera is connected" pop-up menu Specify which application should open when a camera is connected to your computer. F Auto Adjust - Apple MB673Z/A | User Manual - Page 88
for projects versions in a project or album in the Projects inspector. and albums" checkbox C "Show 'Loading...' Select this checkbox to have Aperture display an initial proxy indicator while full size image if there is any delay when loading a full-size image. images load" checkbox D "Double - Apple MB673Z/A | User Manual - Page 89
field You can use an external editor to make adjustments to your images. To identify an external image editor, click Choose and select an application. To open an image in the external editor, select the image, then choose Images > Edit With > External Editor. D "Email images using" If you want - Apple MB673Z/A | User Manual - Page 90
. The higher the quality you select, the more disk space the previews require. B "Use embedded JPEG Select this checkbox to set Aperture to use sharing of JPEG preview images with iLife and iWork iLife and iWork" applications, select this checkbox. checkbox E "Limit preview size" To set a - Apple MB673Z/A | User Manual - Page 91
I Metadata Preferences A B C D E A Viewer area Select the Viewer checkbox to specify how you want metadata displayed for images in the Viewer. Select the Set buttons and choose the information you want displayed from the Set 1 and Set 2 pop-up menus. You can also choose where the information - Apple MB673Z/A | User Manual - Page 92
whether you want Aperture to update your web galleries pop-up menu automatically on a scheduled basis or whether you want to update them manually. You can have Aperture automatically update the galleries once an hour, once a day, or once a week. C "Albums you published" list Lists the albums - Apple MB673Z/A | User Manual - Page 93
Working with Aperture Projects 3 3 The basic components of Aperture, including projects, albums, and versions, provide the building blocks for working in a nondestructive environment. This chapter explains basic elements in Aperture and describes how to set up and use projects - Apple MB673Z/A | User Manual - Page 94
management system: Â Masters: The original image files imported from your camera, memory card, computer, or external storage media. Â Versions: tend to be quite large. Projects consisting of several thousand masters require high-capacity hard disks. For information about importing your masters, see - Apple MB673Z/A | User Manual - Page 95
refers to the master on your hard disk, but it is not the master itself. Versions store only the thumbnail image, adjustments, and embedded information. A full image file is not created until you are ready to print or export, saving valuable storage space on your hard disk. In many cases, your - Apple MB673Z/A | User Manual - Page 96
masters and track all changes to versions. You can easily transfer projects from one Aperture system to another. All links between versions and their masters are maintained when on your website or export the album's contents for review by a prospective client. 96 Part I Interface and Acquisition - Apple MB673Z/A | User Manual - Page 97
into relevant groups. For example, images in your Soccer project can be divided into three albums: Game 1, Game 2, and Game 3. Three albums created within one project You can also place versions from other projects into an album that resides within a project. What Are Folders? In Aperture, you - Apple MB673Z/A | User Manual - Page 98
Files" on page 106. Projects that you transfer from other Aperture systems to your Aperture system are also added to the library. And when you back up masters are stored in the library exactly as they were in previous versions of Aperture. Aperture manages master image files in the library, keeping - Apple MB673Z/A | User Manual - Page 99
If you reconnect the hard disk or other storage device later, Aperture accesses the masters automatically and you can work with and change their versions again. You can also relocate masters, moving them out of the library or moving referenced masters to different hard disk locations. If needed, you - Apple MB673Z/A | User Manual - Page 100
, you create a vault to hold the backup. A vault is a container that holds an exact copy of the library. This includes projects, masters, and any versions you've created. You can easily create and update a vault to back up the library. It's a good idea to create multiple vaults on multiple external - Apple MB673Z/A | User Manual - Page 101
I Using More Than One Album in a Project For some projects, it makes sense to use several albums within the project. You can use albums in several ways, including: Â Albums as events: Break a project into a series of albums according to specific events. For example, a wedding project can be divided - Apple MB673Z/A | User Manual - Page 102
You can create projects at any time, although typically you create them when you import images. When you import images into the Aperture library and no project is selected, a new project is created to contain those images. However, you can create a new empty project at any time. For more information - Apple MB673Z/A | User Manual - Page 103
I Opening and Closing Projects To work with your images in Aperture, you first select a project in the Projects inspector to open it in the Browser. You can open and work on more than one project at a time. When multiple projects are open, each project appears in the Browser with its own tab. You - Apple MB673Z/A | User Manual - Page 104
To switch between several open projects: m In the Browser, click a project's tab. Projects are identified by their tabs. To close a project: 1 Click the project's tab to bring it to the front. 2 Do one of the following: Â Choose File > Close Tab (or press Command-W). Â Click the tab's close button. - Apple MB673Z/A | User Manual - Page 105
with its contents. Warning: This action cannot be undone. Once you click the Delete button, the masters are moved to the Trash. All versions and their adjustments and metadata are permanently deleted. To permanently remove the masters from your hard disk, empty the Trash. Chapter 3 Working with - Apple MB673Z/A | User Manual - Page 106
separator. Working with Library Files When the library file becomes large and requires more disk space than is available in its current location, you can or on a different disk. Each time you open Aperture, the application opens the library in the location you specified. To change the location - Apple MB673Z/A | User Manual - Page 107
locations on your internal hard disk, or on different hard disks. You then specify in the Aperture Preferences window which library file the application should access when it opens. Creating a new, empty library file is as easy as specifying a different folder for the library in the Preferences - Apple MB673Z/A | User Manual - Page 108
Working with the Library in the Projects Inspector Clicking the Library icon in the Projects inspector displays thumbnails of all the images in the library in the Browser. When you click the disclosure triangle beside the Library icon in the Projects inspector, you see the project named All Projects - Apple MB673Z/A | User Manual - Page 109
(p. 138) Â Importing Your iPhoto Library (p. 139) Â Browsing and Selecting Images from Your iPhoto Library (p. 141) Â Transferring Projects from Another System (p. 143) Â Making an Immediate Backup (p. 143) Â Where Aperture Stores Your Managed Files in the Library (p. 144) Â Migrating Images from - Apple MB673Z/A | User Manual - Page 110
file and an image thumbnail corresponding to each master. Import RAW & JPEG Aperture library (system disk) Importing to Aperture Project Versions Masters Back up Camera Vault (FireWire drive) You can import masters directly from a camera or card reader and from your hard disk drives - Apple MB673Z/A | User Manual - Page 111
I File Formats You Can Import into the Library Aperture is a QuickTime-compatible application, so it supports standard QuickTime-compatible still-image file formats, as well as some other file formats and file types. The following file types and formats can be - Apple MB673Z/A | User Manual - Page 112
files, see "Importing Image Files Stored on Your Computer" on page 119. Â Try out the different methods for importing individual files into your system. You can import individual files, import files stored in folders, and drag files or folders from the Finder into Aperture. For more information, see - Apple MB673Z/A | User Manual - Page 113
I You can change the order of images in the dialog by choosing a sort order from the Sorting pop-up menu. You can also select images in the Import dialog and rotate them to the orientation you want. Click a Rotate button and then click the image you want to rotate, or select several images to be - Apple MB673Z/A | User Manual - Page 114
, depending on the type of camera). Some cameras automatically select the correct transfer mode when connected to a computer. See your camera's manual for specific instructions. Importing All Images from a Camera or Card Reader You can import all the image files located on your camera or card reader - Apple MB673Z/A | User Manual - Page 115
I 2 Do one of the following: Â If you want to import into a new, empty project: Choose File > New Project (or press Command-N) to create a new project. You can also choose New Project from the New pop-up menu in the toolbar. Note: You can also click the Library icon in the Projects inspector, if - Apple MB673Z/A | User Manual - Page 116
master filenames from your camera or card. Choose a name format from the Version Name pop-up menu to have your images stored using a specified name also apply the name format to the master as well. Choose Edit from the Version Name pop-up menu to define a new naming scheme. For more information about - Apple MB673Z/A | User Manual - Page 117
I Importing a Selection of Images You can also import a selection of images from your camera or card reader. To import a selection of images: 1 Connect your camera or card reader to your computer. The Import pane and Import dialog appear, showing the images on the camera or card. 2 In the Projects - Apple MB673Z/A | User Manual - Page 118
master filenames from your camera or card. Choose a name format from the Version Name pop-up menu to have your images stored using a specified name also apply the name format to the master as well. Choose Edit from the Version Name pop-up menu to define a new naming scheme. For more information about - Apple MB673Z/A | User Manual - Page 119
as navigating to the folder where they reside on your hard disk using the Import dialog. When you import images from a folder on your computer system, you have the choice of importing the images into a new project or an existing one. To import image files stored on your computer's hard disk - Apple MB673Z/A | User Manual - Page 120
3 In the file browser, navigate to the folder containing the image files you want to import. Select the folder of images you want to import. When you have selected the folder containing the image files you want to import, image thumbnails appear in the Import dialog. 4 In the Projects inspector, do - Apple MB673Z/A | User Manual - Page 121
master filenames from your camera or card. Choose a name format from the Version Name pop-up menu to have your images stored using a specified name also apply the name format to the master as well. Choose Edit from the Version Name pop-up menu to define a new naming scheme. For more information about - Apple MB673Z/A | User Manual - Page 122
for the files you are moving or copying using this pop-up menu. You specify filenames used within Aperture by choosing a name format from the Version Name pop-up menu. You can also have Aperture change the Finder filename of images to the selected name format by selecting the "Apply to - Apple MB673Z/A | User Manual - Page 123
I You choose the subfolder organization you want from the Subfolders pop-up menu. You can also specify your own custom folder organization by choosing the Edit command. Subfolders pop-up menu For more information about creating custom subfolder hierarchies, see "Importing Masters for Referenced - Apple MB673Z/A | User Manual - Page 124
3 In the file browser, navigate to the folder containing the image files you want to import. Select the folder of images you want to import. When you have selected the folder containing the image files you want to import, image thumbnails appear in the Import dialog. 4 In the Projects inspector, do - Apple MB673Z/A | User Manual - Page 125
filenames from your camera or card. Choose a name format from the Version Name pop-up menu to have your images stored using a specified name also apply the name format to the masters as well. Choose Edit from the Version Name pop-up menu to define a new naming scheme. For more information about - Apple MB673Z/A | User Manual - Page 126
 Current Year  Current Month  Current Day  Folder Name  Project Name You can also create a hierarchy of folders within folders. For example, you can specify that Aperture place your images in a subfolder named Date, and within that folder you can create subfolders identified by the time the - Apple MB673Z/A | User Manual - Page 127
import new photos. Aperture provides the following preset name formats: Preset name format Master Filename Image Date/Time Version Name Version Name and Date/Time Version Name with Sequence Version Name with Index Custom Name with Index Custom Name with Counter Example IMG001 2005-10-14 09.03.25 - Apple MB673Z/A | User Manual - Page 128
filenames" checkbox to apply the name format you want to the masters. Then both versions and masters share the same name format. When you export masters, you can also media among multiple photographers, transfer projects to other Aperture systems, move files across a network, and properly restore - Apple MB673Z/A | User Manual - Page 129
respectively. These characters may not be supported or may be difficult to work with when exported to other applications. These characters are often used in in different programming languages and operating systems, so certain processing scripts and applications may treat your files differently than - Apple MB673Z/A | User Manual - Page 130
you select the name elements you want in the Naming Presets dialog. You can compose a name format that combines the following name elements:  Version Name  Master Filename  Sequence Number (1 of 3, 2 of 3, 3 of 3, and so on)  Image Year  Image Month  Image Day  Image Date  Image Time  Index - Apple MB673Z/A | User Manual - Page 131
name format: 1 In the Import dialog, choose Edit from the Version Name pop-up menu. The Naming Presets dialog appears. 2 Click Name field, if you want. 5 Click OK. Your new name format now appears in the Version Name pop-up menu. When using a counter in your name format, you can specify the starting - Apple MB673Z/A | User Manual - Page 132
Adding Metadata to Images During Import You can add metadata to your images as they are imported into Aperture. Adding metadata during import helps you keep track of your images and quickly locate them using the Query HUD. For example, you can add IPTC keywords and other metadata to the image files. - Apple MB673Z/A | User Manual - Page 133
and images shot continuously or within short intervals of time. You can manually adjust the stacking of images shot within a short period of time by images are stacked, drag the slider to the Off position. You can also manually select and stack images in the Import dialog in the same way you can - Apple MB673Z/A | User Manual - Page 134
After you've imported images, you can adjust the date and time of any versions you've created by choosing Metadata > Adjust Date and Time. For more if you have image files scattered on your desktop or throughout folders on your system and you want to consolidate them in one place in the library. To - Apple MB673Z/A | User Manual - Page 135
shot immediately appear in an Aperture project as you shoot. You can review an image in detail, make production changes, and then shoot and immediately Note: For a list of cameras that Aperture supports for tethered shooting, go to: http://www.apple.com/aperture/raw/cameras.html. See your camera's - Apple MB673Z/A | User Manual - Page 136
To use tethered shooting, you first connect your camera to the computer using a USB or FireWire cable. You then select a project for the images to be stored in. Aperture provides a Tether Settings dialog for choosing your tethered shooting settings, and you can use this dialog to specify any other - Apple MB673Z/A | User Manual - Page 137
I To set up Aperture for tethered shooting: 1 Connect your camera to your computer. 2 Select or create a project or album to hold the images. 3 Choose File > Tether > Start Session. 4 Specify the import settings you want. For more information about the import settings, see "Importing from Your - Apple MB673Z/A | User Manual - Page 138
Importing Folders of Images from the Finder If you've spent time organizing your images into a meaningful hierarchy on your computer and you want to keep that organization, you can import a folder of images as a project or drag it directly into the Projects inspector. When you import a folder of - Apple MB673Z/A | User Manual - Page 139
also apply the name format to the masters as well. Choose Edit from the Version Name pop-up menu to define a new naming scheme. For more information about Albums from your iPhoto library. Note: You must upgrade to iPhoto version 5.0.4 or later before you can import photos from your iPhoto library - Apple MB673Z/A | User Manual - Page 140
filenames from your camera or card. Choose a name format from the Version Name pop-up menu to have your images stored using a specified name also apply the name format to the masters as well. Choose Edit from the Version Name pop-up menu to define a new naming scheme. For more information about - Apple MB673Z/A | User Manual - Page 141
Images from Your iPhoto Library You can open the Aperture iPhoto Browser to review iPhoto images and import specific images into the Aperture library. The iPhoto Browser images in your Aperture library with any iLife or iWork application that has a media browser. Chapter 4 Importing Images 141 - Apple MB673Z/A | User Manual - Page 142
upper-right corner of the iPhoto Browser. 2 Type text in the search field. After locating images that you'd like to transfer to your Aperture system, you can drag selected images from the iPhoto Browser (or from the Preview window) into an Aperture project. To import images from the iPhoto Browser - Apple MB673Z/A | User Manual - Page 143
you work with several computers, or work on projects with other people, you may find it necessary to transfer projects from one Aperture system to another. Transferring projects is a simple import process. To transfer a project from one computer to another: 1 Select the project you want to transfer - Apple MB673Z/A | User Manual - Page 144
it, creates changes that the application cannot track. Migrating Images from Previous Versions of Aperture Aperture 2 provides new RAW decoding algorithms that deliver improved RAW image quality. With improved default rendering of RAW images from supported - Apple MB673Z/A | User Manual - Page 145
" on page 146. Important: The Migrate Images command cannot be undone. However, you can return an individual image to the previous version's RAW decoding process using the Version pop-up menu in the RAW Fine Tuning area of the Adjustments inspector or the Adjustments pane of the Inspector HUD. For - Apple MB673Z/A | User Manual - Page 146
to process the RAW files-preferably when you don't require the use of your Aperture system. Migrating Images Individually with the RAW Fine Tuning Controls Version pop-up menu in the RAW Fine Tuning adjustment. The image is redecoded using the Aperture 2 RAW decoding process, the image version - Apple MB673Z/A | User Manual - Page 147
for photo editing and working with your images. Working with Images in the Browser Displaying Images in the Viewer Viewing Images in Full Screen View Stacking Images and Making Picks Rating Images Applying Keywords to Images Working with Metadata Searching for and Displaying Images Grouping Images - Apple MB673Z/A | User Manual - Page 148
- Apple MB673Z/A | User Manual - Page 149
. You can quickly search for an image in a project, reorder and sort images, rotate images to portrait or landscape orientation, create new versions, and delete images. This chapter covers: Â An Overview of the Browser (p. 150) Â Navigating Through and Selecting Images (p. 153) Â Working with Images - Apple MB673Z/A | User Manual - Page 150
images appear in the Browser. You select images in the Browser to work with them. You can move and rearrange images, rotate images, make new versions, and delete images from the project. Sorting pop-up menu Sort Direction button Filmstrip View, Grid View, and List View buttons Query HUD button - Apple MB673Z/A | User Manual - Page 151
II Â Tool strip: Click the buttons in the tool strip to select tools to work with. The tool strip provides access to the Selection tool for selecting images, the Rotate Right and Rotate Left tools for rotating images, and the Lift and Stamp tools for lifting keywords and adjustments from images and - Apple MB673Z/A | User Manual - Page 152
List view displays a list of your images with associated file information. Use list view when you need to see or sort your images by corresponding file data such as image date, file size, or rating. Images displayed in list view in the Browser List view is a great way to quickly see information - Apple MB673Z/A | User Manual - Page 153
II Navigating Through and Selecting Images Selecting images is a fundamental task in Aperture. Knowing the many ways you can select images can help increase your productivity and satisfaction while working with your images. Navigating Through Images in the Browser You can select one or several of - Apple MB673Z/A | User Manual - Page 154
Selecting Images Aperture provides fast and efficient ways of selecting images, depending on your work style and preferences. You can select images in the following ways. Task Action Select a single image  Click the image.  Press the arrow keys to navigate to the image. Select a range of - Apple MB673Z/A | User Manual - Page 155
II Working with Images in Filmstrip View You can use the filmstrip view in combination with the Viewer to quickly scroll from image to image, making changes and comparing images. For example, you can select several images in a row, group them in a stack, apply ratings, and compare them side by side - Apple MB673Z/A | User Manual - Page 156
Working with Images in Grid View Grid view displays a grid of thumbnails as a top-level view of your project. Grid view is the Browser's default view. If your project has many images, you may want to adjust the size of the thumbnails to a size convenient for selecting and working with them. You can - Apple MB673Z/A | User Manual - Page 157
II Depending on your work preferences, you may want to lighten or darken the background that your thumbnails appear against in the Browser. The darker the background, the less it interferes with the colors in your image. It's a good idea to set the background to a dark color when performing color - Apple MB673Z/A | User Manual - Page 158
You can also easily rename files after importing. When you rename a file, you are renaming the image version, not the master. The filename of the original master does not change. To rename an image version in list view: m Select an image, double-click the image name, then enter a new name. Choosing - Apple MB673Z/A | User Manual - Page 159
II When you're working with the Browser and Viewer together, you can also reposition the Browser on the screen. For example, you can rotate the Browser to the side. Browser rotated You can also swap the position of the Viewer and Browser when you want. To rotate the position of the Browser: m - Apple MB673Z/A | User Manual - Page 160
you select an image in the Viewer, Aperture first displays a preview image as it reads the larger master on disk. It then displays the full master once the image is completely accessed. This process of displaying previews and then the masters can be nearly instantaneous, or, depending on the size - Apple MB673Z/A | User Manual - Page 161
II Searching for Images in the Browser When you have many images in a project, more than the Browser can display at once, you can use the search field to locate images. Enter the search criteria in the search field and Aperture finds the image or images for you. Query HUD button Search field You - Apple MB673Z/A | User Manual - Page 162
To set the Browser Query HUD to show all images: 1 In the Projects inspector, select an album. 2 In the Browser, click the Query HUD button (with a magnifying glass icon). 3 In the Query HUD, deselect the Rating checkbox. All images, including rejects, appear in the Browser, and Showing All appears - Apple MB673Z/A | User Manual - Page 163
button to select an ascending or descending sort order. Rotating Images When images are imported into a project, some may appear in an incorrect orientation, requiring you to rotate them right side up. The Browser's tool strip (or the Viewer tool strip in filmstrip view) provides rotate buttons for - Apple MB673Z/A | User Manual - Page 164
To rotate images individually, do one of the following: m To rotate individual images, select the Rotate Left tool or Rotate Right tool in the tool strip, then click an image. Rotate Left tool Rotate Right tool m Select the image you want to rotate, then choose Images > Rotate Counterclockwise (or - Apple MB673Z/A | User Manual - Page 165
for placement in a webpage or book. When you copy an image, Aperture makes a new version of the image. When you create a new image version, you have a choice of copying the original master image or the currently selected version with any changes you've made. For example, if you've made a series of - Apple MB673Z/A | User Manual - Page 166
in the stack. A gray border surrounds the images in a stack. When a stack is open, you can select any of its image versions to display that version in the Viewer. For more information about working with stacks, see Chapter 8, "Stacking Images and Making Picks," on page 219. Deleting Images - Apple MB673Z/A | User Manual - Page 167
an image and delete all the images in the stack as well as the master. Warning: When you delete a master, the master and all version information is permanently removed from the Aperture library. This includes all applied adjustments and metadata. You cannot use the Undo command to restore the master - Apple MB673Z/A | User Manual - Page 168
Images folder in the folder that holds your vault. The Deleted Images folder holds the deleted masters only; it does not hold any information about versions or changes to your files. You can open this folder and import the original masters. To remove the deleted images from your hard disk, move - Apple MB673Z/A | User Manual - Page 169
. If you drag an image from a Smart Album into another album, the version is copied to the new location. If you drag an image into a project , Aperture moves the master to the destination project. All links to versions in other albums are maintained. For more information about using Smart Albums - Apple MB673Z/A | User Manual - Page 170
or volume. A referenced image appears as an offline image if the hard disk holding the referenced image's master has been disconnected from your computer system. A referenced image is listed as "not found" when its master has been deleted, moved to the Trash, or moved from its original hard disk - Apple MB673Z/A | User Manual - Page 171
II Displaying a List of Referenced Images When working with numerous images in the Browser, you may need to determine which images have masters that reside in the Aperture library and which are referenced images whose masters are located elsewhere on your hard disks. You can select a group of images - Apple MB673Z/A | User Manual - Page 172
in another application, you will not see the changes or adjustments you've made to the image in Aperture. Your changes appear in versions stored in adjustments to the image until you reconnect the master to your Aperture system. If you have disconnected a hard disk drive that holds a referenced - Apple MB673Z/A | User Manual - Page 173
II 4 Click the Show Reconnect Options button. Select the volume you want here, and navigate to the location of the file on the hard disk. 5 At the top of the dialog, select the file path for the master that you want to reconnect. A thumbnail of the image and some identifying metadata appear. 6 In - Apple MB673Z/A | User Manual - Page 174
you want the masters named. For example, choose Master Filename from the Version Name pop-up menu to have your files stored using the current master filenames from your camera or card. Choose a name format from the Version Name pop-up menu to have your masters stored using a specified name - Apple MB673Z/A | User Manual - Page 175
image in Aperture, a new version is created and tracked in the Aperture library. No new files are recorded on the hard disk in the location of the referenced image's master. When you move a referenced image between the projects on your Aperture system, the referenced image's master remains - Apple MB673Z/A | User Manual - Page 176
Working with Two or More Projects Open You can work with two projects open at once, splitting the Browser into a separate pane for each project. Project tab When you Option-click a second project in the Projects inspector, Aperture splits the Browser into two panes and shows thumbnails for both - Apple MB673Z/A | User Manual - Page 177
II You use the Metadata pane of the Preferences window to customize the display of information shown with images in the Browser. The Browser's metadata display settings appear here. In the Browser section, you select the Set buttons and choose the information you want displayed in grid view or - Apple MB673Z/A | User Manual - Page 178
- Apple MB673Z/A | User Manual - Page 179
detail or view several images at a time. This chapter provides instructions for displaying images in the Viewer so you can make adjustments, closely compare similar images, and inspect images at full resolution. If you use a dual-display system, you can set the Viewer to show your images on both - Apple MB673Z/A | User Manual - Page 180
display other similar or related images next to it for inspection. You might use the Aperture comparison feature to select images from a series or compare versions of adjusted images to see which is the best. You can use the Viewer to compare two images. 180 Part II Photo Editing - Apple MB673Z/A | User Manual - Page 181
size of your display and Viewer, images may be displayed at a reduced size to fit your Viewer. You can have Aperture display your images at full resolution, pixel for pixel, which can create images larger than can fit on your display's screen. Displaying an image at - Apple MB673Z/A | User Manual - Page 182
means of viewing your images. Aperture can show your images on both displays, allowing you to dedicate one display to enlarged views. When your system uses two or more displays, Aperture provides two Viewers, called the Main Viewer and Secondary Viewer. Just as you can with a single Viewer, you - Apple MB673Z/A | User Manual - Page 183
, three images, or multiple images at a time. If your system uses multiple displays, you can configure your main and secondary displays to images simultaneously. The display settings you choose also set the display of images in Full Screen view. To display a single image, do one of the following: m - Apple MB673Z/A | User Manual - Page 184
other images to compare against it. The comparison feature is useful for making final selections of the best images in a series or comparing two versions of an image for correct exposure or highlights. When comparing images, you can apply ratings and keywords and make adjustments to selected images - Apple MB673Z/A | User Manual - Page 185
is set as the compare image. This stack viewing feature also works in Full Screen view. To set the Viewer to automatically open and compare the images or thumbnail in the Aperture library. Aperture also provides a second version of the Loupe for your convenience. For more information about using - Apple MB673Z/A | User Manual - Page 186
To show the Loupe, do one of the following: m Click the Loupe button in the toolbar. m Choose View > Show Loupe, or press the Grave Accent (`) key. Note: To hide the Loupe, do any of the above again. The Loupe appears. Loupe Loupe pop-up menu Moving the Loupe You can move the Loupe by dragging it - Apple MB673Z/A | User Manual - Page 187
II To use the pointer to magnify parts of an image: m Choose Focus on Cursor from the Loupe pop-up menu. Choose Focus on Cursor from the pop-up menu. To turn off this feature, choose Focus on Loupe from the Loupe pop-up menu again. Changing the Size and Magnification of the Loupe You can also - Apple MB673Z/A | User Manual - Page 188
m Choose View > Loupe Scaling > Decrease Zoom, or press Command-Shift-Minus Sign (-), to decrease the Loupe's magnification. Press these keys repeatedly to decrease magnification more. m Place the pointer within the Loupe and roll the mouse wheel to create smooth changes in magnification. Displaying - Apple MB673Z/A | User Manual - Page 189
II Using the Alternate Loupe You can also use an alternate Loupe to examine parts of an image. You position the small ring of the alternate Loupe over the portion of the image you want to see, and the large ring shows a magnified view. It's useful for making quick checks for dust specks, flaws, - Apple MB673Z/A | User Manual - Page 190
beyond the standard limits of the Aperture working color space. For example, white areas in an image brightly lit with direct sunlight, or bright flashes off a water surface, may be so bright that their color is outside the working color space. In addition, images may occasionally have black areas - Apple MB673Z/A | User Manual - Page 191
Viewer button in the Viewer tool strip. Click the button again to turn off the full-resolution display. Zoom Viewer button When an image doesn't fit within the area of other parts of the image, also known as panning. To pan the full-resolution image in the Viewer, do one of the following: m Drag - Apple MB673Z/A | User Manual - Page 192
quickly display the master image on which a selected version is based. To display the master image for a selected version, do one of the following: m Choose View Onscreen proofing changes the look of images in the Viewer and in Full Screen view. To choose a proofing profile: m Choose View > Proofing - Apple MB673Z/A | User Manual - Page 193
Displays" on page 629. When your system uses two displays, Aperture provides two Viewers in which you can view multiple images. These Viewers are called the Main Viewer and Secondary Viewer. The Main Viewer is used for displaying the Aperture application, and the Secondary Viewer for viewing images - Apple MB673Z/A | User Manual - Page 194
To display the same images in both the Main and Secondary Viewers, do one of the following: m Choose View > Secondary Viewer > Mirror (or press Option-M). m Choose Mirror from the Viewer Mode pop-up menu in the tool strip. To display a selection of images across both the Main and Secondary Viewers, - Apple MB673Z/A | User Manual - Page 195
II To set the display of metadata shown with images in the Viewer: 1 Do one of the following: Â Choose Aperture > Preferences, or press Command-Comma (,), then click Metadata. Â Press Command-J. In the Metadata pane, you can choose how you want to view metadata in the Viewer. 2 Select the Viewer - Apple MB673Z/A | User Manual - Page 196
versions, or you can create previews manually whenever you need them. To maintain an efficient use of disk space and adequate display speed, you can control the size of previews, from a preview image that has the full at all. Previews are also shared with applications in iLife and iWork. As an - Apple MB673Z/A | User Manual - Page 197
media browsers and the screen saver cannot see your Aperture libraries. The XML file is updated whenever Aperture quits or is no longer the active application. For very large libraries, the XML file can take some time to update. In this case, if you are not sharing your previews with other - Apple MB673Z/A | User Manual - Page 198
, as well as when versions are created or adjusted. For new projects, Aperture examines the application preference described earlier ("New tells Aperture what to do the next time an image is imported or a version is created or adjusted. To generate previews, you can use the shortcut menus described - Apple MB673Z/A | User Manual - Page 199
what to do the next time an image is imported or a version is created or adjusted. To generate previews, you can use the shortcut and you choose Update Previews for Project, Aperture alerts you that no work is required. However, you can force the rebuilding of previews. To force the rebuilding of - Apple MB673Z/A | User Manual - Page 200
To delete JPEG previews for an image selection: 1 In the Browser, select an image or group of images whose JPEG previews you want to delete. 2 Control-click the image selection, then choose Delete Previews from the shortcut menu. To update JPEG previews for an image selection: 1 In the Browser, - Apple MB673Z/A | User Manual - Page 201
the Welcome to Aperture dialog  When an image is imported, or a version is created, rotated, or adjusted-provided that the Maintain Previews item is rendering a group of preview images, Aperture uses the current application preference settings for compression quality and picture size, not the - Apple MB673Z/A | User Manual - Page 202
To update previews to use new size and compression settings: 1 In the Browser, select the images you want to update. 2 Hold down the Option key, Control-click the image selection, and choose Generate Previews from the shortcut menu. If you encounter performance issues, you can check the Activity - Apple MB673Z/A | User Manual - Page 203
quality while conserving the disk space that masters (especially RAW files) require. To use previews for offline referenced images: 1 Make sure the on the web, on DVDs, in slideshows, and in podcasts. You can also download your Aperture pictures to your iPod, import them into iPhoto, or use them to - Apple MB673Z/A | User Manual - Page 204
previews are built, you can open any of the iLife and iWork applications and use your Aperture images. Generating Previews for Smart Albums You can also Aperture will build it or update it). You can also drag a single version out of the Aperture Browser, and a plus sign (+) appears over the pointer - Apple MB673Z/A | User Manual - Page 205
, and in podcasts. You can also download your Aperture pictures to your iPod, import them into iPhoto, or use them to create Pages documents. The media browsers in the iLife and iWork applications now support browsing Aperture libraries. For each version in the library, Aperture provides two JPEG - Apple MB673Z/A | User Manual - Page 206
Integration with Mac OS X Desktop & Screen Saver System Preferences Like images in iPhoto libraries, images in Controlling Previews with the Project Action Pop-Up Menu" on page 198.) This can cause problems if a project contains damaged files or images in unsupported file formats. In Aperture, - Apple MB673Z/A | User Manual - Page 207
many of the tools and HUDs in Aperture. This chapter explains how you can use Full Screen view's filmstrip and toolbar to move through and rate your images. You can also use the Aperture HUDs in Full Screen view to adjust, retouch, and add metadata to your images. This chapter covers: Â An - Apple MB673Z/A | User Manual - Page 208
-display system, see "Setting Up Your System with Two Displays" on page 629. You can view, compare, and stack your images in Full Screen view your images. The toolbar includes buttons for creating versions and working with stacks, as well as a full set of image adjustment tools. Use the filmstrip - Apple MB673Z/A | User Manual - Page 209
can use the filmstrip's controls to move through, rotate, view, and rate your images. Viewing Images with the Filmstrip You can easily view images in Full Screen view by selecting them in the filmstrip. To view an image that's in the filmstrip: m Select an image displayed in the filmstrip by - Apple MB673Z/A | User Manual - Page 210
move the filmstrip to the left, bottom, and right sides of your main display. But there are times, especially when viewing an image at full resolution, that you cannot keep the filmstrip from overlapping your image. The filmstrip includes controls that let you define when the filmstrip appears. You - Apple MB673Z/A | User Manual - Page 211
Duplicate Version New Version From Master  Duplicate Version: Click this button to create a new version of the selected image.  New Version From Master: Click this button to create a version from the original master. A duplicate of the master image is created. Chapter 7 Viewing Images in Full - Apple MB673Z/A | User Manual - Page 212
item farther from the stack's pick. Â Album Pick: Select an image version to represent a stack, then click this button to select the image as set of adjustments to one or several images. Â Straighten: Use this tool to manually rotate an image so that it's straight in relation to a virtual horizon. Â - Apple MB673Z/A | User Manual - Page 213
subject's retinas reflect light from your camera's flash. Display Controls Zoom Viewer button Viewer Mode again to switch the view back to the current version. Â Zoom Viewer: Click this button to Browser. Other Buttons Keywords HUD Exit Full Screen Loupe Always Show Toolbar Inspector HUD - Apple MB673Z/A | User Manual - Page 214
HUD to create and organize keywords and to add keywords to your images. To show the Keywords HUD: m Press Shift-H. Use the Keywords HUD in Full Screen view to quickly add keywords to your images. For more information about using the Keywords HUD, see Chapter 10, "Applying Keywords to Images," on - Apple MB673Z/A | User Manual - Page 215
navigate through the library, modify metadata in your images, and perform adjustments. To show the Inspector HUD: m Press H. Use the Inspector HUD in Full Screen view to open the Projects pane, Metadata pane, or Adjustments pane when working with images. Tool HUDs Many of the adjustment tools work - Apple MB673Z/A | User Manual - Page 216
more information about setting the display of metadata, see Chapter 11, "Working with Metadata," on page 269. Although the menus are not available in Full Screen view, you can change the display of metadata using the same keyboard shortcuts used to change the display of metadata in the Browser and - Apple MB673Z/A | User Manual - Page 217
Screen View Here are several useful keyboard shortcuts you can use in Full Screen view. Keyboard shortcut Function Go to next image Go to previous image J K L H shift H E the Command Editor by choosing Aperture > Commands > Customize. Chapter 7 Viewing Images in Full Screen View 217 - Apple MB673Z/A | User Manual - Page 218
Screen view, you can also access commands via a shortcut menu. To view the shortcut menu: m Position the pointer anywhere in the Full Screen view screen except the filmstrip or toolbar, then Control-click (press the Control key and click). Note: Although accessing commands from shortcut menus can - Apple MB673Z/A | User Manual - Page 219
series. This chapter explains how you can easily group related images into sets, called stacks, that are easy to review, work with, and select final picks from. This chapter covers: Â An Overview of Stacking Images (p. 219) or memory card. You can also select images and create stacks manually. 219 - Apple MB673Z/A | User Manual - Page 220
A stack appears in the Browser as a group of images. The image that represents the stack, called the pick, is selected and displayed on the left. You can select any image in the stack as the pick, and it moves to the leftmost position in the stack. You can rearrange the order of images in a stack. - Apple MB673Z/A | User Manual - Page 221
II Creating Stacks When you import your images, you can specify that Aperture create stacks automatically. For example, if you shoot a series of images in quick succession (such as at a sports event) or if you bracket images to allow for differences in lighting or exposure, you most likely will want - Apple MB673Z/A | User Manual - Page 222
the time interval should be shortened or lengthened. Note: You can also manually select images in the Import dialog and stack and unstack them using the page 109. After Aperture imports and stacks your images, you can review each stack to determine if the automatic stacking meets your approval. If - Apple MB673Z/A | User Manual - Page 223
set up the stacked images for comparison. The pick of the stack is set as the "compare" image. This stack viewing feature also works in Full Screen view. To set the Viewer to automatically open and compare the images in stacks, do one of the following: m Choose View > Main Viewer > Stack - Apple MB673Z/A | User Manual - Page 224
After importing photos, you may want to quickly review them and delete those that you immediately see have technical or content flaws. You may then want to group the remaining images into stacks before rating them. Stacking images manually can help provide an initial organization and an overview - Apple MB673Z/A | User Manual - Page 225
 Add images to and remove images from stacks  Split stacks  Drag stacks to new locations  Work with stacks in list view  Work with stacks in Full Screen view Chapter 8 Stacking Images and Making Picks 225 - Apple MB673Z/A | User Manual - Page 226
stack. You can set the image you like best as the pick, or Aperture can set the pick automatically. When you select and stack images manually in the Browser, the leftmost image becomes the pick. You can change the pick whenever you wish. To set an image as the pick, do - Apple MB673Z/A | User Manual - Page 227
II Designating an Album Pick for a Stack The same stack may appear in several albums. Depending on the purpose of the album, you may want a different pick image for each album. For example, a stack in a webpage album may have one pick image, and the same stack in a book album may have a different - Apple MB673Z/A | User Manual - Page 228
Adding Images to and Removing Images from Stacks You can add images to and remove images from stacks at any time. You can drag images into or out of a stack, as well as drag images from one stack to another. To add an image to a stack, do one of the following: m Select images in a stack and the - Apple MB673Z/A | User Manual - Page 229
a stack to a new location. When a stack is closed, dragging the stack moves the entire stack. When a stack is open, you can drag individual versions to new locations in the Browser. You can also drag images into a stack. If you drag a stacked image into a different project, however, the entire - Apple MB673Z/A | User Manual - Page 230
Working with Stacks in Full Screen View You can also review stacks using the filmstrip in Full Screen view. A stack appears marked with a Stack button. You can open or close stacks to review the contents of a stack or compare images within stacks. You can reorder images in a stack or change a stack - Apple MB673Z/A | User Manual - Page 231
II Keyboard Shortcuts for Working with Stacks Aperture provides the following keyboard shortcuts for efficiently working with stacks. Keyboard shortcut option page up option page down shift K Function Go to previous stack Go to next stack Open/Close stack ' option Open all stacks option ; - Apple MB673Z/A | User Manual - Page 232
- Apple MB673Z/A | User Manual - Page 233
images later. This chapter explains how to quickly assign image ratings and use them to sort and review images. This chapter covers: Â An Overview of the Aperture Rating System (p. 234) Â Rating Images (p. 236) Â Sorting Images by Rating (p. 238) Â Including Image Rating in Your Workflow (p. 239 - Apple MB673Z/A | User Manual - Page 234
variations, photographers need an organized method of noting which images are superior shots, which deserve further review, and which are poor quality or rejects. A simple and effective rating system can help photographers quickly narrow the focus of the selection process. Rating is a simple process - Apple MB673Z/A | User Manual - Page 235
after another with speed and efficiency. You can also select and rate multiple images at once. You can review and rate images in the Viewer, Browser, and Light Table, as well as in Full Screen view. When you've finished rating images, Aperture allows you to sort images according to their ratings - Apple MB673Z/A | User Manual - Page 236
Rating Images Aperture provides a set of seven possible image ratings:  Five stars, or Select  Four stars  Three stars  Two stars  One star  Unrated, or neutral  Reject Rejected images appear with a white X overlay. Positive ratings appear with white star overlays. If no overlays are - Apple MB673Z/A | User Manual - Page 237
II Keyboard Shortcuts for Rating Images For quick and efficient rating, use the arrow keys to select images, and use the following keyboard shortcuts to apply ratings. Keyboard shortcut + Function Increase rating Decrease rating - Apply Reject 9 Apply one star 1 Apply two stars 2 Apply three - Apple MB673Z/A | User Manual - Page 238
Sorting Images by Rating After you've rated your images, you can sort images according to a specific rating. For example, after an initial rating pass, you can choose to show only those images rated Select, with five stars. You can then closely inspect and further refine your selection or begin - Apple MB673Z/A | User Manual - Page 239
II Including Image Rating in Your Workflow You can use image rating as part of your workflow to help reduce a large group of images to a smaller group of preferred images. Sometimes you can accomplish the selection process in one pass, especially if the group of images is small. If the group is - Apple MB673Z/A | User Manual - Page 240
10 In the next pass, assign a rating of five stars, or Select, to your best images. 11 Specify a rating that is equal to five stars in the Query HUD. Only the images rated Select remain visible in the Browser. Comparing and Rating Images For those really tough decisions, Aperture allows you to - Apple MB673Z/A | User Manual - Page 241
choice or has the best rating, you can make it the compare image by pressing Return or choosing Edit > Set Compare Item. You can then review and compare your alternates against this image to confirm it as the best image. ∏ Tip: To quickly turn off the comparison feature, press Command-Return - Apple MB673Z/A | User Manual - Page 242
Keyboard Shortcuts for Displaying Images with Specific Ratings To quickly display images with a certain rating level or better, use the following keyboard shortcuts. Keyboard shortcut control Function Show unrated images or better control 1 Show images rated one star or better control 2 Show - Apple MB673Z/A | User Manual - Page 243
Applying Keywords to Images 10 10 Adding keywords to your images helps you organize your images and quickly locate specific images. This chapter provides information about adding keywords to images and using these keywords to help define and organize your images. This chapter covers: Â An Overview - Apple MB673Z/A | User Manual - Page 244
Overview of Keywords Keywords are descriptive words assigned to image versions and saved as metadata. For example, a family portrait Webpage Album that gathers images that have a For web keyword applied. As you're reviewing your images, apply the keyword For web to any image you think is worthy of - Apple MB673Z/A | User Manual - Page 245
phrases are no more than 64 characters in length. Longer keyword phrases may not be displayed properly in other IPTC editors or operating systems. There are several ways to apply keywords:  Using the Keywords HUD  Using keyword controls and presets in the control bar Keyword controls  Using - Apple MB673Z/A | User Manual - Page 246
 Using the Metadata inspector Add keywords here. Viewing Keywords Applied to Images You can view the keywords applied to an image version in several areas:  In overlays that appear on or below images in the Browser or Viewer  In the Metadata inspector  In the Keywords column of - Apple MB673Z/A | User Manual - Page 247
II To display keywords using overlays: 1 Do one of the following: Â Choose View > Metadata > Customize (or press Command-J). Â Choose Aperture > Preferences, or press Command-Comma (,), then click Metadata. The Metadata pane of the Preferences window appears. 2 To display keywords in the Viewer, - Apple MB673Z/A | User Manual - Page 248
To hide or show overlays in the Viewer or Browser, do one of the following: m To hide or show overlays in the Viewer: Choose View > Metadata > Viewer (or press the Y key). The captions and keywords appear in the area you specified. m To hide or show overlays in the Browser: Choose View > Metadata > - Apple MB673Z/A | User Manual - Page 249
II To view an image's keywords using the Metadata pane of the Inspector HUD: 1 If necessary, show the Metadata pane of the Inspector HUD by choosing Window > Show Inspector HUD (or pressing H), then click the Metadata button. 2 Choose a metadata view that includes keywords, such as General or - Apple MB673Z/A | User Manual - Page 250
assigned. Keyword group Keyword list You can use the Keywords HUD in the Browser in grid and list views, in the Light Table, and in Full Screen view. You can also use the Keywords HUD when working with book albums in the Book Layout Editor and when working with webpage and - Apple MB673Z/A | User Manual - Page 251
II Controls in the Keywords HUD The following controls are found in the Keywords HUD: Close button Disclosure triangle Keyword group Search field Keyword list Remove Keyword button Lock button Add Keyword button Add Subordinate Keyword button  Close button: Click this button to close the - Apple MB673Z/A | User Manual - Page 252
Keywords column may not appear. For more information, see "Viewing Keywords in the Browser in List View" on page 250. Â If Aperture is set to Full Screen view: Drag a keyword or keyword group from the Keywords HUD to an image or selected images. The keyword is applied to the image or - Apple MB673Z/A | User Manual - Page 253
image or selection of images in the Browser, in the Viewer, or in Full Screen view. The keywords are assigned to the image or selection of images appears. 2 Do one of the following: Â Scroll up and down to review the keywords, and click the disclosure triangles to reveal the keywords in each keyword - Apple MB673Z/A | User Manual - Page 254
 Type the keyword you're looking for in the Keywords HUD search field. Enter a keyword in the search field. The keyword list updates to reveal all instances of the keyword you entered. Adding Keywords to the Keywords HUD You can add new keywords to the keyword library of the Keywords HUD. To add - Apple MB673Z/A | User Manual - Page 255
II 3 Type the new keyword, then press Return. The new keyword is added to the keyword library and is sorted alphabetically. To add keywords to a keyword group: 1 To show the Keywords HUD, do one of the following: Â Choose Window > Show Keywords HUD (or press Shift-H). Â Click the Keywords HUD button - Apple MB673Z/A | User Manual - Page 256
To create a new keyword group with keywords in it: 1 To show the Keywords HUD, do one of the following: Â Choose Window > Show Keywords HUD (or press Shift-H). Â Click the Keywords HUD button in the toolbar. The Keywords HUD appears. 2 Click the Add Keyword button, then type a name for the new - Apple MB673Z/A | User Manual - Page 257
II Applying Keywords Using Keyword Controls and Keyword Presets One way to apply keywords is to use the keyword controls located in the control bar. You can add new keywords to images or apply preset keywords that are part of a keyword group. Keyword controls About the Keyword Controls in the - Apple MB673Z/A | User Manual - Page 258
 Add Keyword field: Type a new keyword in this field and press Return to add it to a selected image. To remove a keyword you've just applied, type the keyword again and press Shift-Return. If the Keywords HUD is locked, you are asked whether you want to unlock the Keywords HUD and add the keyword - Apple MB673Z/A | User Manual - Page 259
II Choosing a Keyword Preset Group Aperture provides groups of related keywords in sets that you can easily select and use. A group of related keywords is called a keyword preset group. You can select a keyword preset group whenever you need it, and you can create your own keyword preset groups that - Apple MB673Z/A | User Manual - Page 260
Creating a Keyword Preset Group You can create new keyword preset groups when you need them. To create a keyword preset group and assign keywords to it: 1 In the control bar, choose Edit Buttons from the Keyword Preset Group pop-up menu. Choose Edit Buttons to add a new keyword preset group. The - Apple MB673Z/A | User Manual - Page 261
II 2 To create a new keyword preset group, click the Add (+) button. An untitled preset group appears in the Name column. A new, untitled preset group appears in this list. Click the Add button to add a keyword preset group. 3 Type a name for the new keyword preset group, then press Return. 4 Drag - Apple MB673Z/A | User Manual - Page 262
335. The Lift and Stamp tools have a corresponding HUD you can use in the Browser, the Viewer, and the Light Table, as well as in Full Screen view. To lift all the keywords from an image and stamp them on another image or group of images: 1 Click an image. 2 Select the - Apple MB673Z/A | User Manual - Page 263
II The Lift & Stamp HUD appears. All information for the selected image appears here. All the image's metadata, such as applied adjustments, rating, and keywords, appears in the Lift & Stamp HUD. 3 Deselect the metadata checkboxes except for Keywords, or select items in the HUD and press Delete to - Apple MB673Z/A | User Manual - Page 264
To stamp keywords on a selection of images at once using the Lift & Stamp HUD: 1 Select an image. 2 Select the Lift tool (or press O). The Lift & Stamp HUD appears, displaying all the image's metadata, such as applied adjustments, rating, and keywords. 3 In the Lift & Stamp HUD, deselect the - Apple MB673Z/A | User Manual - Page 265
II 6 Select an image or group of images, then select the Stamp tool to apply the keywords. The reduced selection of keywords is applied to the selected image or group of images. You can quickly lift and stamp the keywords and all other metadata and adjustments from one image to another using - Apple MB673Z/A | User Manual - Page 266
Applying Keywords Using the Metadata Inspector When you select an image, you can use the Metadata inspector to see the image's keywords and add new keywords, if needed. To apply keywords using the Metadata inspector: 1 Select an image, 2 Choose Window > Show Inspector (or press I), then click - Apple MB673Z/A | User Manual - Page 267
II Applying Keywords to Images in the Light Table You can use the Light Table to arrange your image selection in a freeform manner. After arranging your images into groups, you can apply keywords to groups at once. For example, if you make a Light Table album consisting of the selects from your - Apple MB673Z/A | User Manual - Page 268
the location you chose. Once you have an exported keyword list, you can transfer the file to another Aperture system and import it. You can also manually create or edit keyword lists using other applications, such as TextEdit, and you can import the lists into Aperture as long as they follow a tab - Apple MB673Z/A | User Manual - Page 269
Working with Metadata 11 11 You can display different combinations of metadata, such as version names, captions, ratings, keywords, and IPTC information, with your images. This chapter explains how to set the display of metadata with your images using the - Apple MB673Z/A | User Manual - Page 270
your images in the Viewer and Browser, as well as in Full Screen view. Aperture provides many metadata views that represent specific combinations of For example, you can choose a basic metadata view that shows an image's version name and caption. Or, you can choose an expanded metadata view that - Apple MB673Z/A | User Manual - Page 271
II To show the Metadata inspector, do one of the following: m Choose Window > Show Inspector (or press I), then click the Metadata tab. m Click the Inspector button in the toolbar, then click the Metadata tab. Choose a metadata view from the Metadata View pop-up menu. Edit and arrange your - Apple MB673Z/A | User Manual - Page 272
you have a specific combination of metadata that one of your services always requires, you can create a metadata preset just for that service. Then whenever you import images destined for that service or prepare images to send to that service, you can apply the metadata you need using the preset you - Apple MB673Z/A | User Manual - Page 273
Only Name & Rating Name & Caption Ratings Caption & Keywords Caption & Credits File Info Information displayed All IPTC fields Rating, badges, caption, version name, image date, aperture, shutter speed, exposure bias, ISO speed rating, focal length (35mm), focal length, pixel size, filename, file - Apple MB673Z/A | User Manual - Page 274
exposure mode, flash, serial number, lens minimum (mm), maximum lens aperture, lens maximum (mm), color model, profile name, and badges Version name, name, special instructions, byline, category, date created, headline, source, and keywords Badges and rating Badges, rating, and version name Badges - Apple MB673Z/A | User Manual - Page 275
II To set the display of metadata in the Viewer: 1 Do one of the following: Â Choose View > Metadata > Customize (or press Command-J). Â Choose Aperture > Preferences, or press Command-Comma (,), then click Metadata. 2 Select the Viewer checkbox. Select this checkbox to turn on the display of - Apple MB673Z/A | User Manual - Page 276
To set the display of metadata in the Browser in grid view: 1 Do one of the following: Â Choose View > Metadata > Customize (or press Command-J). Â Choose Aperture > Preferences, or press Command-Comma (,), then click Metadata. 2 Select the Browser checkbox. 3 In the Browser area, choose the - Apple MB673Z/A | User Manual - Page 277
II Turning the Display of Metadata On or Off After choosing a metadata view, you can turn the display of metadata on and off and switch between metadata views. To hide or show metadata in the Viewer, do one of the following: m Choose View > Metadata > Viewer (or press Y). m Choose Aperture > - Apple MB673Z/A | User Manual - Page 278
Viewing and Changing Metadata in the Metadata Inspector and Inspector HUD You can view or change the metadata for a selected image in the Metadata inspector and the Metadata pane of the Inspector HUD. The selected image's metadata appears in text fields. You can change the metadata categories shown - Apple MB673Z/A | User Manual - Page 279
II To view and change metadata in the Metadata inspector and Inspector HUD: 1 Select an image. 2 Do one of the following: Â To show the Metadata inspector: Click the Inspector button in the toolbar (or press I), then click the Metadata tab. Â To show the Metadata pane of the Inspector HUD: Choose - Apple MB673Z/A | User Manual - Page 280
To set up autofill entries in the AutoFill Editor: 1 Choose Metadata > Edit AutoFill List. 2 To edit the list, do one of the following: Â To add an entry: Select the metadata type you want to change, click the Add (+) button, and enter the text you want. Â To change an entry: Click the disclosure - Apple MB673Z/A | User Manual - Page 281
II Working with Metadata Views You can create your own combinations of metadata to display with your images, called metadata views. You can modify the metadata views that come with Aperture. Using the Metadata inspector, you can:  Create new metadata views  Modify existing metadata views  Arrange - Apple MB673Z/A | User Manual - Page 282
4 To add metadata categories to your metadata view, do any of the following: Â To add a keywords field to the metadata view: Click the Keywords button and select the Include in Summary checkbox. Â To add EXIF fields to the metadata view: Click the EXIF button and select the checkboxes for the EXIF - Apple MB673Z/A | User Manual - Page 283
II 4 To add or remove categories of metadata that appear in the metadata view, do any of the following: Â To add or remove a keywords field: Click the Keywords button and select or deselect the Include in Summary checkbox. Â To add or remove EXIF fields: Click the EXIF button and select or deselect - Apple MB673Z/A | User Manual - Page 284
To rename a metadata view: m Double-click the metadata view name, then type a new name in the field that appears. To add a duplicate metadata view: m Select a metadata view, then click the Add (+) button. To delete a metadata view: m Select a metadata view, then click the Delete (-) button. Working - Apple MB673Z/A | User Manual - Page 285
II To modify an existing metadata preset: 1 To show the Metadata inspector, click the Inspector button in the toolbar (or press I), then click the Metadata tab. 2 Choose the metadata view that you want to use for the preset from the Metadata View pop-up menu. 3 Choose Replace with Preset from the - Apple MB673Z/A | User Manual - Page 286
To apply a metadata preset when changing images with the Batch Change dialog: 1 Select the images you want to change. 2 Do one of the following: Â Choose Metadata > Batch Change. Â Show the Metadata inspector by clicking the Inspector button in the toolbar (or pressing I), click the Metadata tab, - Apple MB673Z/A | User Manual - Page 287
: m Select a metadata preset, then press the Delete key. When you work with other Aperture users, you can share your metadata presets to ensure a consistent application of metadata to all the images. You can export metadata presets for others to use and import presets when you need them. To export - Apple MB673Z/A | User Manual - Page 288
to all the images at once. For example, if you need to add the same set of keywords to a selection of images, or change the version name format, you can select the images and use the Batch Change dialog to change them. To change the metadata associated with a selection of images - Apple MB673Z/A | User Manual - Page 289
in other IPTC editors or operating systems. Here are some examples of characters Special instructions 256 characters Politician, Mayor, Futbol, Soccer, News, Game, Team, San Jose Photographer's name and/ the image was captured. Example: USA Applicable restrictions, rights, or embargo information. - Apple MB673Z/A | User Manual - Page 290
image with a badge overlay. Badges can appear on images in the Viewer, the Browser, and the Light Table, in book pages and webpages, and in Full Screen view. Keywords have been applied to this image. 290 Part II Photo Editing - Apple MB673Z/A | User Manual - Page 291
overlays; you can also control whether badge overlays are visible by turning metadata views on or off. Important: Badge overlays appear only in the Aperture application; they do not appear on images exported or printed from Aperture. Chapter 11 Working with Metadata 291 - Apple MB673Z/A | User Manual - Page 292
To display badge overlays on images in the Viewer: 1 Do one of the following: Â Choose View > Metadata > Customize (or press Command-J). Â Choose Aperture > Preferences, then click Metadata. 2 Select the Viewer checkbox. 3 From the Viewer Set 1 pop-up menu, choose a metadata view that includes badge - Apple MB673Z/A | User Manual - Page 293
of the master or masters, select the "Modify N original master files" checkbox. 5 Click the Adjust button. The creation date and time of the version or versions has changed. If you selected the "Modify N original master files" checkbox, the date and time adjustment has been applied to the masters as - Apple MB673Z/A | User Manual - Page 294
- Apple MB673Z/A | User Manual - Page 295
Searching for 12 and Displaying Images 12 Aperture allows you to easily search for and gather images in a variety of locations. You can perform complex searches and save your search results. This chapter provides information about using the Query HUD to search for images using a wide variety of - Apple MB673Z/A | User Manual - Page 296
text search does include keywords, aspect ratio, filename, rating, version name, orientation, pixel size, processed pixel size, master location limited text search provides faster results. You can set your preference for a full or limited text search using the Search Scope pop-up menu in the - Apple MB673Z/A | User Manual - Page 297
II The Query HUD is an easy-to-use window with options for specifying search criteria. For example, you might enter the text "finch" in the Query HUD, and Aperture locates files that include that text in their metadata. To show the Query HUD for a selected project, you click the Query HUD button ( - Apple MB673Z/A | User Manual - Page 298
by searching for the metadata. In addition, you can search for images based on the type of adjustment applied to them as well as the version of the RAW decoding process used to decode the RAW master. 298 Part II Photo Editing - Apple MB673Z/A | User Manual - Page 299
checkbox. Select the dates you want to search by. The images taken on the dates you specified are displayed in the Browser, where you can review and work with them. You can also create complex searches by adding search criteria options to the Query HUD. To show the Query HUD, do - Apple MB673Z/A | User Manual - Page 300
Controls in the Query HUD The Query HUD has the following controls: "Include if" pop-up menu Close button Search criteria "Stack picks only" checkbox Match pop-up menu Search field New Smart Album button Add Filter pop-up menu Reset button Query HUD Action pop-up menu New Album With Current - Apple MB673Z/A | User Manual - Page 301
II Searching Across the Entire Library At times, you may want to search for images that reside in many different projects. For example, you might want to locate all your select photos for an entire year or for a particular month. To search across the library, you click the Query HUD button beside - Apple MB673Z/A | User Manual - Page 302
Searching by Image Name, Caption, or Other Text You can search for images using any text that you've associated with an image. For example, you might search for images based on text in an image's caption or keywords, or in any other text entry. You can also search by multiple text entries. To search - Apple MB673Z/A | User Manual - Page 303
II 4 Select the Text checkboxes and enter text in each field to locate the images you want. Select the Text checkboxes and enter text in each text field you added. 5 Choose "any" from the Match pop-up menu to locate images that have matches for any of the text entries, or choose "all" to locate - Apple MB673Z/A | User Manual - Page 304
3 In the Query HUD, select the Keywords checkbox. Note: The Keywords checkbox is dimmed if no keywords have been applied to the images in the selected project or album. Select the Keywords checkbox. Choose an option from the Keywords pop-up menu. Select the checkbox next to each keyword you want - Apple MB673Z/A | User Manual - Page 305
II Searching by Date You can search for and locate images by the date they were taken. For example, you might locate any images taken during a trip between May 16, 2005, and May 20, 2005. To search for images by date, you use the Calendar search options. When the calendar appears, any dates that - Apple MB673Z/A | User Manual - Page 306
To search for images by creation date: 1 In the Projects inspector, select a project or an album you want to search. 2 Click the Query HUD button beside the search field in the Browser (or press Command-F). 3 In the Query HUD, choose Date from the Add Filter pop-up menu. 4 Select the Date checkbox, - Apple MB673Z/A | User Manual - Page 307
II Searching by Rating You can use the Query HUD to see all images with a certain rating. For example, you can search for all the images in a project that have a rating of five stars. You can show images with a specific rating, images rated at or below a specific rating, or images rated at or above - Apple MB673Z/A | User Manual - Page 308
Searching by IPTC Information You can now search for and locate images using any IPTC information that you've assigned using enhanced search qualifiers. For example, you might locate any images that have IPTC keywords assigned to them. To search for images by IPTC information, you use the IPTC - Apple MB673Z/A | User Manual - Page 309
II Â To specify the characters that the IPTC field should end with: Choose "ends with". Â To specify that the IPTC field should hold no entry: Choose "is empty". Â To specify that the IPTC field can be any entry as long as the field is not empty: Choose "is not empty". 6 Enter an IPTC value you want - Apple MB673Z/A | User Manual - Page 310
Searching by Adjustments You can search for and identify images based on the type of adjustment that has been applied to them. To search for images based on a specific adjustment, you use the Adjustment search options. You can also search for images that do not have a specific type of adjustment - Apple MB673Z/A | User Manual - Page 311
II Searching by Import Session At times, you may want to locate images that were imported at a specific time or date. Aperture keeps track of your import sessions and can identify images that were imported at the same time. To search for images based on their import session, you use the Import - Apple MB673Z/A | User Manual - Page 312
images using the following kinds of metadata:  Aspect ratio  Camera time zone  Filename  File size  Master pixel size  Orientation  Picture time zone  Pixel size  Project  Version name 312 Part II Photo Editing - Apple MB673Z/A | User Manual - Page 313
II To search for images by metadata other than IPTC or EXIF information, you use the Other Metadata search options. To search for images by metadata: 1 In the Projects inspector, select a project or an album you want to search. 2 Click the Query HUD button beside the search field in the Browser (or - Apple MB673Z/A | User Manual - Page 314
4 Select the checkboxes beside the criteria you want to use, and specify the search criteria. To add additional search options, choose them from this pop-up menu. Select the checkboxes for the items you want to search by. Specify your search criteria. 5 Do one of the following: Â To specify that - Apple MB673Z/A | User Manual - Page 315
II Saving Your Search Results When you perform a search using the Query HUD, you can choose to save your results in several ways. You can create a new Smart Album that locates images that match the search criteria. You can also save the search results themselves into a new album, Light Table album, - Apple MB673Z/A | User Manual - Page 316
- Apple MB673Z/A | User Manual - Page 317
you need to group certain types of images, either temporarily or permanently, you can use a Smart Album to gather the images. This chapter provides instructions for using the Aperture Smart Album feature. You can create a Smart Album and specify search criteria that identify the images you want, and - Apple MB673Z/A | User Manual - Page 318
An Overview of Smart Albums Unlike a standard project into which you import images, a Smart Album's contents are controlled by the criteria you specify in the Smart Album's Query HUD. When you change a Smart Album's search criteria, the contents of the Smart Album change. Aperture comes with a - Apple MB673Z/A | User Manual - Page 319
applied to it, such as Vignette. You can quickly create a Smart Album to review images and then delete it. Or, you can create Smart Albums that hold permanent to relieve yourself from slow reviews of images that you are required to track periodically. Chapter 13 Grouping Images with Smart Albums - Apple MB673Z/A | User Manual - Page 320
Collecting Images in a New Smart Album You can collect images based on any of the information you can search for using the Query HUD. For example, you can create a Smart Album that gathers images based on a specific keyword or a combination of keywords, ratings, dates, or other metadata. You can - Apple MB673Z/A | User Manual - Page 321
Query HUD's close button. Aperture finds the images matching the specified search criteria and displays them in the Browser. You can now work with these versions of your images in the same way you work with images in any project or album. Searching Within a Smart Album After creating a Smart Album - Apple MB673Z/A | User Manual - Page 322
To change the contents of a Smart Album, you change the search criteria for the Smart Album. You can manually select individual images and delete them, but the deletion removes both the version and the master wherever it exists in the original project. Similarly, you cannot simply drag images into - Apple MB673Z/A | User Manual - Page 323
II Transferring Smart Album Images to Another Project or Album You can transfer images from a Smart Album to another project or album, including MobileMe albums, webpage albums, and book albums. You transfer images by selecting the images in the Smart Album and dragging or copying them into another - Apple MB673Z/A | User Manual - Page 324
Deleting a Smart Album You can delete a Smart Album at any time, and none of the images gathered from the library are deleted. If you've transferred images from a Smart Album to another album, the images in the other album are also not deleted when you delete the Smart Album. To delete a Smart Album - Apple MB673Z/A | User Manual - Page 325
Part III: Performing Image Adjustments III Chapter 14 Chapter 15 This section provides information about applying adjustments to images, working with adjustment presets, using the Color meter, and using the RAW Fine Tuning controls. An Overview of Image Adjustments Making Image Adjustments - Apple MB673Z/A | User Manual - Page 326
- Apple MB673Z/A | User Manual - Page 327
in Aperture (p. 328) Â Using the Adjustment Controls (p. 332) Â Working with Adjustment Tools in the Viewer (p. 333) Â Performing Adjustments in Full Screen View (p. 334) Â Applying Adjustments to a Group of Images (p. 335) Â Working with Adjustment Presets (p. 337) Â Remove Adjustments Command - Apple MB673Z/A | User Manual - Page 328
HUD. The controls are the same in each. The Inspector pane is shown on the left side of the screen. The Inspector HUD is a floating version of the inspectors that can be placed anywhere onscreen, allowing you the most flexibility in how you use your screen workspace. You can make the - Apple MB673Z/A | User Manual - Page 329
III Showing the Adjustment Controls You can use menu commands, keyboard shortcuts, or the buttons on the right side of the toolbar to show and hide the Inspector pane containing the adjustment controls. Inspector button To show the Adjustments inspector, do one of the following: m Choose Window > - Apple MB673Z/A | User Manual - Page 330
using the adjustment controls to change parameter values, see "Using the Adjustment Controls" on page 332. You can use menu commands and buttons in the Full Screen view toolbar to show or hide the Inspector HUD. To show the Adjustments pane of the Inspector HUD, do one of the following: m Choose - Apple MB673Z/A | User Manual - Page 331
option from the Histogram Options section of the Adjustment Action pop-up menu. Note: The histogram updates in real time in the Viewer and in Full Screen view, but it is slightly delayed in the Book Layout Editor, the Webpage Editor, and the Light Table. For more information about how to - Apple MB673Z/A | User Manual - Page 332
button again to return to the previous view. m If you have a system with more than one display, choose Alternate from the Viewer Mode pop-up menu in the Viewer tool strip or the Full Screen view toolbar, then perform the adjustments on the second display. For - Apple MB673Z/A | User Manual - Page 333
III To change values in small increments: m Option-drag in the value field. To change values in large increments: m Shift-drag in the value field. Resetting Parameter Values You can reset all of the parameters for an adjustment to their default values. To reset all parameter values for an adjustment - Apple MB673Z/A | User Manual - Page 334
the control bar. To switch back to the Aperture main window, do one of the following: m Click the Exit Full Screen button in the toolbar (or press F or the Escape key). In Full Screen view, you have access to all the tools you need to perform adjustments to your images. To show - Apple MB673Z/A | User Manual - Page 335
III Applying Adjustments to a Group of Images You can apply an adjustment or group of adjustments to a range of images by first applying the adjustments to one image and then lifting the adjustments from the first image and stamping them on the other images. You do this by using the Lift and Stamp - Apple MB673Z/A | User Manual - Page 336
3 Deselect the IPTC and Keywords checkboxes to prevent Aperture from copying IPTC metadata and keywords from the selected image. Deselect a checkbox to prevent Aperture from copying the item from the selected image. 4 If necessary, remove any unwanted adjustments by clicking the Adjustments - Apple MB673Z/A | User Manual - Page 337
III 6 Do one of the following  In the tool strip, select the Stamp tool.  In the Lift & Stamp HUD, click the Stamp Selected Images button. Click the Stamp Selected Images button to apply the adjustments to the selected images. The adjustments copied from the first image are applied to the selected - Apple MB673Z/A | User Manual - Page 338
Creating Adjustment Presets Creating an adjustment preset is as simple as saving the adjustment parameter settings and naming them using the Preset Action pop-up menu. To create an adjustment preset: 1 Select an image with the adjustment parameter settings you want to save. 2 In the Adjustments - Apple MB673Z/A | User Manual - Page 339
III Applying Adjustment Presets Applying an adjustment preset to an image is as simple as selecting the image and choosing the adjustment preset from the Preset Action pop-up menu. When you apply an adjustment preset to an image, the adjustment controls and parameter values update to reflect the - Apple MB673Z/A | User Manual - Page 340
Renaming Adjustment Presets You can rename an adjustment preset at any time. To rename an adjustment preset: 1 In the Adjustments inspector or the Adjustments pane of the Inspector HUD, choose Manage Presets from the Preset Action pop-up menu for the adjustment. You can rename an adjustment preset, - Apple MB673Z/A | User Manual - Page 341
III Organizing Adjustment Presets Each time you create an adjustment preset, it is added to the bottom of the list of presets in the Adjustment Presets dialog and Preset Action pop-up menu. As this list grows, it can become difficult to locate a specific adjustment preset in a long list of presets. - Apple MB673Z/A | User Manual - Page 342
Deleting Adjustment Presets You can delete an adjustment preset at any time. Any adjustments that were previously applied using the deleted preset are unaffected. To delete an adjustment preset: 1 In the Adjustments inspector or the Adjustments pane of the Inspector HUD, choose Manage Presets from - Apple MB673Z/A | User Manual - Page 343
III Identifying Color Channel Clipping When performing adjustments, it's useful to know if you're clipping one or more color channels and thereby losing important image details. To identify color channel clipping: m Press Command while dragging the following sliders: Â Exposure slider (Exposure - Apple MB673Z/A | User Manual - Page 344
Understanding Color Channel Clipping Overlay Colors The color of the color channel clipping overlay indicates which color channel or combination of color channels are clipped. In addition, Aperture gives you the option of choosing color or monochromatic overlays to indicate clipping. To set the - Apple MB673Z/A | User Manual - Page 345
III Adjustment Black Point slider (Exposure adjustment controls) Black Levels slider (Levels adjustment controls) White Levels slider (Levels adjustment controls) Color clipping information Red: Indicates shadow clipping in the red color channel. Green: Indicates shadow clipping in the green color - Apple MB673Z/A | User Manual - Page 346
Monochrome Overlay Descriptions The following table lists the monochrome overlays and the corresponding color channels that have been clipped by the adjustment slider setting. Adjustment Exposure slider (Exposure adjustment controls) Recovery slider (Exposure adjustment controls) Black Point slider - Apple MB673Z/A | User Manual - Page 347
III Sampling Color Values The Color meter displays the color values of the pixels in the image beneath the pointer or the target area of the Loupe. To use the pointer to sample the color values in an image: m Place the pointer over the area of the image where you want to sample the color values, and - Apple MB673Z/A | User Manual - Page 348
Choosing a Color Value Option In Aperture, you can set the Color meter to display RGB, Lab, CMYK, HSB, or HSL color values. To choose a color value option for the Color meter: m In the Adjustments inspector or the Adjustments pane of the Inspector HUD, choose a color value option from the Adjustment - Apple MB673Z/A | User Manual - Page 349
III Choosing a Color Value Sample Size You can also set the sample size (pixel area) Aperture uses to determine color values. To choose a color value sample size for the Color meter: m In the Adjustments inspector or the Adjustments pane of the Inspector HUD, choose an appropriate color value sample - Apple MB673Z/A | User Manual - Page 350
external editor for use within Aperture. First you have to specify which application Aperture should use and the 16-bit file format (TIFF or PSD an image and choose a menu command to have the image open in the application designated as the external editor. To set an external editor in Aperture: 1 - Apple MB673Z/A | User Manual - Page 351
supported by Aperture. This calibration data usually results in the optimal decoding of the RAW image files for that camera. However, certain types of images require pixel removal, that are automatically applied to the image. RAW Decode Version pop-up menu Note: Some controls in the RAW Fine Tuning - Apple MB673Z/A | User Manual - Page 352
image imported with or migrated to Aperture 2.0 or later. The version is indicated by the RAW Decode Version pop-up menu. 2 In the Adjustments inspector or the Adjustments . A value of 1.00 applies the full Apple-recommended contrast adjustment for the specific camera model. 352 Part - Apple MB673Z/A | User Manual - Page 353
contrast) during the RAW decoding process. A value greater than 0.00 increases the hue adjustment to the image. A value of 1.00 applies the full Apple-recommended hue adjustment for the specific camera model. Using the Sharpening Controls You can turn on sharpening during the RAW decoding process by - Apple MB673Z/A | User Manual - Page 354
the sharpening applied during the RAW decoding process: 1 Select a RAW image imported with or migrated to Aperture 2.0 or later. The version is indicated by the RAW Decode Version pop-up menu. 2 Adjust the strength of the sharpening effect by doing one of the following: Use the Sharpening slider and - Apple MB673Z/A | User Manual - Page 355
adjusts the pixel area (visual threshold) the adjustment is applied to. Note: The Moire controls replace the Chroma Blur controls found in previous versions of Aperture. For more information, see "Using the Chroma Blur Controls from Aperture 1.1" on page 359. Chapter 14 An Overview of Image - Apple MB673Z/A | User Manual - Page 356
To adjust the Moire and Radius parameters: 1 Select a RAW image imported with or migrated to Aperture 2.0 or later. The version is indicated by the RAW Decode Version pop-up menu. 2 Adjust the amount of signal to apply the Moire adjustment to by doing one of the following: Use the Moire slider and - Apple MB673Z/A | User Manual - Page 357
decoded to Aperture 2.0 or later. The version is indicated by the RAW Decode Version pop-up menu. 2 If the camera is supported by Aperture, the RAW Decode Version pop-up menu displays "2.0." If the camera is not supported by Aperture, the RAW Decode Version pop-up menu displays "2.0 DNG." 3 Adjust - Apple MB673Z/A | User Manual - Page 358
presets, see "Deleting Adjustment Presets" on page 342. You can also set the RAW Fine Tuning controls to use the Apple-recommended RAW decoding settings. To use the Apple-recommended camera default settings: m In the RAW Fine Tuning area of the Adjustments inspector or the Adjustments pane of the - Apple MB673Z/A | User Manual - Page 359
own chroma blur value. To adjust the Chroma Blur parameter: 1 Select a RAW image imported with or migrated to Aperture 1.1. The version is indicated by the RAW Decode Version pop-up menu. 2 In the Adjustments inspector or the Adjustments pane of the Inspector HUD, select the Chroma Blur checkbox - Apple MB673Z/A | User Manual - Page 360
Understanding How to Read Histograms The histogram is a graph that displays relative brightness in an image, from pure black to pure white. The area under the graph represents all the pixels in the image. From left to right, the histogram describes the range of dark pixels (shadows), gray pixels ( - Apple MB673Z/A | User Manual - Page 361
III A series of peaks in the center of the histogram often indicates a balanced exposure because a majority of the pixels are concentrated within the midtones of the histogram. They're not too dark or too bright. However, a series of peaks in the brighter side of the histogram often indicates an - Apple MB673Z/A | User Manual - Page 362
Likewise, images of bright scenes, such as snow or light reflecting off the ocean, have a majority of their peaks in the brighter side of the histogram. Histograms can also depict contrast in an image. For example, this silhouette of the man in the hammock in front of the sunset consists of a - Apple MB673Z/A | User Manual - Page 363
and printers are calibrated and their profiles are up to date. For more information about calibrating and profiling your Aperture system, see Appendix B, "Calibrating Your Aperture System," on page 635. Â Reduce the ambient light in the room you are working in to prevent the light from skewing - Apple MB673Z/A | User Manual - Page 364
- Apple MB673Z/A | User Manual - Page 365
Making Image Adjustments 15 15 You use adjustment controls when you want to perfect an image. The type of adjustment control you use depends on the aspect of the image you are trying to change. This chapter provides detailed information about using adjustment controls to perfect your image. This - Apple MB673Z/A | User Manual - Page 366
based on that analysis. This is a good way to make a quick correction to an image before fine-tuning the adjustment with the manual adjustment controls. Auto Exposure Auto Levels Separate Auto Levels Combined The automatic adjustments include: Â Auto Exposure button: Click the button to have - Apple MB673Z/A | User Manual - Page 367
image's exposure setting using the Exposure controls. For more information about manually adjusting the exposure of an image, see "Working with the Exposure For a list of supported RAW file types, go to the Apple website at http://www.apple.com/aperture/raw. Chapter 15 Making Image Adjustments 367 - Apple MB673Z/A | User Manual - Page 368
To automatically correct the exposure of a RAW image: 1 Select an image. 2 In either the Adjustments inspector or the Adjustments pane of the Inspector HUD, click the Auto Exposure button. Click the Auto Exposure button to automatically set the exposure for the image. The exposure of the image is - Apple MB673Z/A | User Manual - Page 369
III Using the Auto Levels Combined Button When you want to quickly adjust the levels of an image based on total luminance values-red, green, and blue channels combined-you use the Auto Levels Combined button. Red, green, and blue channels are adjusted by the same amount based on the total luminance. - Apple MB673Z/A | User Manual - Page 370
Using the Auto Levels Separate Button When you want to automatically adjust the levels of an image based on individual evaluations of the red, green, and blue channels, you use the Auto Levels Separate button. Red, green, and blue channels are adjusted based on the evaluation of each channel. You - Apple MB673Z/A | User Manual - Page 371
III Setting the Auto Levels Options Aperture provides the option to set both the black and white clipping point parameters for the Auto Levels adjustments. Modifying the black and white clipping points from their default value of 0% expands the tonal range of the image. One reason for expanding the - Apple MB673Z/A | User Manual - Page 372
To adjust the white clipping point: 1 Choose Aperture > Preferences, then click General. Use the Auto Adjust White Clip slider and value slider to add tolerance to Auto Levels adjustments when evaluating colors beyond white. Â By default, the Auto Adjust White Clip slider is set to the left side of - Apple MB673Z/A | User Manual - Page 373
an image. 2 It's a good idea to set the image to appear at full size (100 percent) to prevent image scaling from obscuring details. To display images at full size, click the Zoom Viewer button in the tool strip or the Full Screen view toolbar (or press Z). 3 Select the Red Eye tool in the - Apple MB673Z/A | User Manual - Page 374
4 Click a red eye in the image to place a Red Eye target overlay on it. The Red Eye target overlay is placed over the red eye, and the red pixels within the Red Eye target overlay are desaturated. 5 Repeat step 4 until all of the red eyes in your image are corrected. Adjusting the Size of Red Eye - Apple MB673Z/A | User Manual - Page 375
on an image. To change the size of an existing Red Eye target overlay: 1 Display the image at full size (100 percent) by clicking the Zoom Viewer button in the tool strip or the Full Screen view toolbar (or pressing Z). 2 Click the Red Eye target overlay to select it. The Red Eye - Apple MB673Z/A | User Manual - Page 376
3 If necessary, click the Inspector button (or press I) to show the Inspector pane, or press H to show the Inspector HUD. 4 In the Red Eye Correction area of the Adjustments inspector or the Adjustments pane of the Inspector HUD, adjust the Radius parameter by doing one of the following: Drag the - Apple MB673Z/A | User Manual - Page 377
III Adjusting the Sensitivity of Red Eye Target Overlays When you select a red eye in a picture, Aperture automatically chooses the area within the target overlay circle where the desaturation is applied. In a few cases, the area chosen by Aperture might be either slightly too wide or slightly too - Apple MB673Z/A | User Manual - Page 378
turned off. To view the corrected image with the Red Eye target overlays turned off: m Select the Selection tool in the tool strip or the Full Screen view toolbar (or press A). The Red Eye target overlays disappear, but the effect of the red-eye adjustment remains visible. Note: You can still - Apple MB673Z/A | User Manual - Page 379
III To turn the Red Eye target overlays on again: m Select the Red Eye tool in the tool strip or the Full Screen view toolbar (or press E). The Red Eye target overlays reappear. Moving Red Eye Target Overlays Once placed, a Red Eye target overlay can always be - Apple MB673Z/A | User Manual - Page 380
Deleting Red Eye Target Overlays You can always delete a Red Eye target overlay. To delete a Red Eye target overlay, do one of the following: m Select a Red Eye target overlay in the image, then click the Delete button in the Red Eye Correction area of the Adjustments inspector or the Adjustments - Apple MB673Z/A | User Manual - Page 381
in order to retain the integrity of images that were adjusted with earlier versions of Aperture. In many cases, image repairs might even be improved by removing another. If the area you need to repair has a hard edge near the problem area, you use the "repair" method. You also use the repair method - Apple MB673Z/A | User Manual - Page 382
an image. 2 It's a good idea to set the image to appear at full size (100 percent) to prevent image scaling from obscuring details. To display images at full size, click the Zoom Viewer button in the tool strip or the Full Screen view toolbar (or press Z). 3 Select the Retouch tool in the tool - Apple MB673Z/A | User Manual - Page 383
III 4 In the Retouch HUD, do the following: Â Click the Repair button. Â Set the radius of the brush by dragging the Radius slider or entering a value in the Radius value slider. Â Set the softness of the brush by dragging the Softness slider or entering a value in the Softness value slider. Â Set - Apple MB673Z/A | User Manual - Page 384
an image. 2 It's a good idea to set the image to appear at full size (100 percent) to prevent image scaling from obscuring details. To display images at full size, click the Zoom Viewer button in the tool strip or the Full Screen view toolbar (or press Z). 3 Select the Retouch tool in the tool - Apple MB673Z/A | User Manual - Page 385
III 4 In the Retouch HUD, do the following: Â Select the Clone button. Â Set the radius of the brush by dragging the Radius slider or entering a value in the Radius value slider. Â Set the softness of the brush by dragging the Softness slider or entering a value in the Softness value slider. Â Set - Apple MB673Z/A | User Manual - Page 386
You use the Spot & Patch tool and adjustment controls when you need to modify Spot & Patch parameter settings that were applied using previous versions of Aperture. Spotting Your Images When the area around the blemish is continuous (such as a solid color) and doesn't contain a distinct texture, you - Apple MB673Z/A | User Manual - Page 387
prevent image scaling from obscuring details. To display an image at full size, click the Zoom Viewer button in the tool strip or the Full Screen view toolbar (or press Z). 3 Select the Spot & Patch tool in the tool strip or the Full Screen view toolbar. The pointer changes to a target, and the Spot - Apple MB673Z/A | User Manual - Page 388
an image. 2 It's a good idea to set the image to appear at full size (100 percent) to prevent image scaling from obscuring details. To display an image at full size, click the Zoom Viewer button in the tool strip or the Full Screen view toolbar (or press Z). 3 Select the Spot & Patch tool in - Apple MB673Z/A | User Manual - Page 389
III 4 Click the blemish area to place a Spot & Patch target overlay on it. Click a blemish to place a Spot & Patch target overlay on it. A yellow target overlay is placed over the blemish, and the blemish is replaced by the pixels that surround it. This yellow target overlay is the destination - Apple MB673Z/A | User Manual - Page 390
You can adjust the angle of the cloned pixels within the destination target overlay. Adjusting the angle rotates the cloned pixels over the destination area. This is particularly useful if you're cloning an area that has visual elements, such as a pattern or line, that are at a different angle from - Apple MB673Z/A | User Manual - Page 391
III Using the Spot & Patch Controls When using the Spot & Patch tool to spot or patch your images, you can modify the appearance of the pixels within the target overlays using the Spot & Patch adjustment controls. You can also adjust the size of Spot & Patch target overlays. Adjusting the Size of - Apple MB673Z/A | User Manual - Page 392
To change the size of an existing Spot & Patch target overlay: 1 Display the image at full size (100 percent) by clicking the Zoom Viewer button in the tool strip or the Full Screen view toolbar (or pressing Z). 2 Click a Spot & Patch target overlay to select it. A hand icon appears to indicate that - Apple MB673Z/A | User Manual - Page 393
III Adjusting the Softness Within Spot & Patch Target Overlays You can also change the "softness" of cloned pixels within Spot & Patch target overlays. Softness describes how well the area within the target overlay blends in with the surrounding image area. The Softness parameter controls the - Apple MB673Z/A | User Manual - Page 394
Adjusting the Opacity Within Spot & Patch Target Overlays Another method of modifying Spot & Patch target overlays to make cloned pixels blend in better with surrounding pixels is to adjust the opacity of pixels in the target overlay. The higher the Opacity parameter value, the more the cloned - Apple MB673Z/A | User Manual - Page 395
III Adjusting the Detail Within Spot & Patch Overlays In addition to adjusting softness and opacity in Spot & Patch target overlays, you can adjust the amount of detail, such as texture or grain, that is preserved in the cloned pixels. You can adjust the amount of detail in the cloned pixels. To - Apple MB673Z/A | User Manual - Page 396
overlays turned off: m Select the Selection tool in the tool strip or the Full Screen view toolbar (or press A). The Spot & Patch target overlays disappear, : m Select the Spot & Patch tool in the tool strip or the Full Screen view toolbar. The Spot & Patch target overlays reappear. Moving Spot & - Apple MB673Z/A | User Manual - Page 397
III Deleting Spot & Patch Target Overlays You can delete a Spot & Patch target overlay at any time. To delete a Spot & Patch target overlay: m Select a Spot & Patch target overlay in the image, then click the Delete button in the Spot & Patch area of the Adjustments inspector or the Adjustments pane - Apple MB673Z/A | User Manual - Page 398
Working with the Devignette Controls You use the Devignette controls to correct a vignette that was applied to an image as it was shot. The term vignette describes an image whose brightness fades to its periphery from its center. Vignettes are usually caused by poor lens design, stacked filters, - Apple MB673Z/A | User Manual - Page 399
III 3 To adjust the distance Aperture goes from the edge of the image, in pixels, to apply the devignette adjustment, do one of the following: Use the Size slider and value slider to adjust the size of the area over which the devignette adjustment is applied. Â Drag the Size slider to the right to - Apple MB673Z/A | User Manual - Page 400
Select an image. 2 Select the Straighten tool in the tool strip or the Full Screen view toolbar (or press G). The Selection tool changes to the Straighten good idea to turn zooming off when straightening an image, so that the full image fits within the Viewer. If an image is zoomed in to actual - Apple MB673Z/A | User Manual - Page 401
prevent gaps from appearing in the corners of the image. Note: It's a good idea to turn zooming off when straightening an image, so that the full image fits within the Viewer. If an image is zoomed in to actual size, you can turn off zooming by clicking the Zoom Viewer button - Apple MB673Z/A | User Manual - Page 402
two methods for cropping an image: you can either use the Crop tool to manually crop the image, or you can use the Crop adjustment controls. The method you choose is determined by the level of precision you require. The Crop tool provides a fast freehand method and works in conjunction with a Crop - Apple MB673Z/A | User Manual - Page 403
1 Select an image. 2 Select the Crop tool in the tool strip or the Full Screen view toolbar (or press C). The Selection tool changes to the Crop tool, and When you release the mouse button, the image is cropped. For instructions on viewing the cropped image without the Crop overlay, see "Displaying - Apple MB673Z/A | User Manual - Page 404
After adding a Crop overlay to an image, you can always change its size and shape. To change the size and shape of a Crop overlay: m Drag a resize handle on the Crop overlay to change the size of the crop. Drag a resize handle to resize the Crop overlay. You can adjust the placement of the crop by - Apple MB673Z/A | User Manual - Page 405
III To set the aspect ratio of the Crop overlay: 1 In the Crop HUD, choose an aspect ratio from the Master Aspect Ratio pop-up menu. Choose a standard aspect ratio for the crop from the Master Aspect Ratio pop-up menu. The Crop overlay updates to match the chosen aspect ratio. The "Constrain - Apple MB673Z/A | User Manual - Page 406
m Select another tool in the tool strip or the Full Screen view toolbar, such as the Selection tool (or controls when an extra level of precision is required. For example, if a client wants an the Crop controls. Aperture uses a simple coordinate system to position the Crop overlay on the image. You - Apple MB673Z/A | User Manual - Page 407
III 4 In the Crop area of the Adjustments inspector or the Adjustments pane of the Inspector HUD, click the X value slider's left or right arrow, or double-click the number and enter a new number, to set the horizontal position of the bottom-left corner of the crop. Use the Width and Height value - Apple MB673Z/A | User Manual - Page 408
you can use the White Balance eyedropper to automatically adjust the color temperature and tint, or you can adjust the color temperature and tint manually. In most cases, the automatic adjustment succeeds in removing the color cast from the image. If the White Balance eyedropper does not completely - Apple MB673Z/A | User Manual - Page 409
changes to the Loupe, showing a magnified view of the target area. By default, the Loupe is set to magnify the image to 100 percent (full size). If necessary, you can increase the magnification of the Loupe by pressing Command-Shift-Plus Sign (+). For more information about the Loupe, see "Viewing - Apple MB673Z/A | User Manual - Page 410
the assigned temperature of light. The purpose of adjusting the color temperature of an image is to make colors look as natural as possible. To manually adjust the color temperature of an image: 1 Select an image. 2 In the White Balance area of the Adjustments inspector or the Adjustments pane of - Apple MB673Z/A | User Manual - Page 411
. You use the Tint parameter controls when you need to fine-tune the white balance adjustment by neutralizing the remaining green or magenta tint. To manually adjust the tint of your image: 1 Select an image. 2 In the White Balance area of the Adjustments inspector or the Adjustments pane of the - Apple MB673Z/A | User Manual - Page 412
Working with the Exposure Controls You use the Exposure adjustment controls to set the exposure, recovery, black point, and brightness values. Correcting Exposure in the Image If you've over- or underexposed an image, you can correct it by adjusting the Exposure parameter. The amount of latitude you - Apple MB673Z/A | User Manual - Page 413
appears lost or blown out in the most extreme highlight areas of the image. Note: The Recovery slider is not available for RAW decoding versions 1.0 and 1.1. To make the Recovery slider available, migrate the image to Aperture 2.0 or later. For more information, see "Working with the RAW Fine Tuning - Apple MB673Z/A | User Manual - Page 414
of shadow details in the image as well as crush the blacks when necessary. Note: The Black Point slider is not available for RAW decoding versions 1.0 and 1.1. To make the Black Point slider available, migrate the image to Aperture 2.0 or later. For more information, see "Working with the RAW Fine - Apple MB673Z/A | User Manual - Page 415
III To set the black point of the image: 1 Select an image. 2 In the Exposure area of the Adjustments inspector or the Adjustments pane of the Inspector HUD, adjust the Black Point parameter by doing one of the following: Use the Black Point slider and value slider to set pure black in the image. Â - Apple MB673Z/A | User Manual - Page 416
Adjusting Brightness in the Image You can adjust the Brightness parameter when you want to lighten or darken your image. When you make a brightness adjustment, the brightness values of the midtone pixels in the image change the most. You can change the brightness of the image temporarily to see how - Apple MB673Z/A | User Manual - Page 417
III Working with the Enhance Controls You use the Enhance adjustment controls to set the contrast, definition, saturation, and vibrancy, as well as the black, gray, and white tint values. Adjusting Contrast in the Image If you want to adjust the difference between the dark and bright areas of the - Apple MB673Z/A | User Manual - Page 418
To adjust the contrast in an image: 1 Select an image. 2 In the Enhance area of the Adjustments inspector or the Adjustments pane of the Inspector HUD, adjust the Contrast parameter by doing one of the following: Use the Contrast slider and value slider to modify the contrast between light and dark - Apple MB673Z/A | User Manual - Page 419
III Adjusting Definition in the Image When you want to add a little clarity and definition to an image without adding too much contrast, you use the Definition parameter controls. The Definition parameter is useful for adding local contrast (adding contrast to areas of the image that are improved by - Apple MB673Z/A | User Manual - Page 420
Adjusting Saturation in the Image You can change the value for the Saturation parameter to either give your image an extra burst of color or tone down the color palette by desaturating the image. Before Saturation adjustment After Saturation adjustment To change the saturation of an image: 1 - Apple MB673Z/A | User Manual - Page 421
III A Little Saturation Goes a Long Way Increasing the saturation of an image can make the colors appear more pure, and many people like the effect of an image whose colors are more saturated than they would appear naturally. However, you can easily oversaturate an image. In the process of making - Apple MB673Z/A | User Manual - Page 422
To adjust vibrancy in an image: 1 Select an image. 2 In the Enhance area of the Adjustments inspector or the Adjustments pane of the Inspector HUD, adjust the Vibrancy parameter by doing one of the following: Use the Vibrancy slider and value slider to add smart saturation to the image. Â Drag the - Apple MB673Z/A | User Manual - Page 423
color values, or you can use the Black Tint, Gray Tint, and White Tint color wheels to manually adjust the tint values. The method you choose is determined by the level of precision you require. The eyedroppers provide an accurate means of identifying the color cast within the tonal range of each - Apple MB673Z/A | User Manual - Page 424
changes to the Loupe, showing a magnified view of the target area. By default, the Loupe is set to magnify the image to 100 percent (full size). If necessary, you can increase the magnification of the Loupe by pressing Command-Shift-Plus Sign (+). For more information about the Loupe, see "Viewing - Apple MB673Z/A | User Manual - Page 425
changes to the Loupe, showing a magnified view of the target area. By default, the Loupe is set to magnify the image to 100 percent (full size). If necessary, you can increase the magnification of the Loupe by pressing Command-Shift-Plus Sign (+). For more information about the Loupe, see "Viewing - Apple MB673Z/A | User Manual - Page 426
3 Position the target area of the Loupe over a midrange color that is as close as possible to medium gray, then click. The tint (hue and saturation) of the gray values in the image is set to remove the color cast in the midtones. Correcting the Tint of the Highlights with the White Tint Eyedropper - Apple MB673Z/A | User Manual - Page 427
changes to the Loupe, showing a magnified view of the target area. By default, the Loupe is set to magnify the image to 100 percent (full size). If necessary, you can increase the magnification of the Loupe by pressing Command-Shift-Plus Sign (+). For more information about the Loupe, see "Viewing - Apple MB673Z/A | User Manual - Page 428
adjust the tint of the shadow, midtone, and highlight values in the image using the Black Tint, Gray Tint, and White Tint color wheels. To manually adjust the tint of the shadow, midtone, and highlight values in an image: 1 Select an image. 2 In the Enhance area of the Adjustments inspector or - Apple MB673Z/A | User Manual - Page 429
III Working with the Levels Controls You use the Levels adjustment controls when you want to manually set the tonal values of the shadows, midtones, and highlights in an image. By default, Aperture sets 0 as pure black and 1 as pure white. Constraining - Apple MB673Z/A | User Manual - Page 430
To adjust levels in an image based on luminance: 1 Select an image. 2 Show the Adjustments inspector or the Adjustments pane of the Inspector HUD. 3 By default, the Levels histogram is off. Turn it on by selecting the Levels checkbox. Black Levels slider White Levels slider The Levels histogram - Apple MB673Z/A | User Manual - Page 431
III You can also use the Gray Levels slider if you need to adjust the brightness values of the midtones while limiting the brightening effect in the black and white points. The brighter areas of shadows and darker areas of highlights are affected, but the effect tapers off as it nears the dark - Apple MB673Z/A | User Manual - Page 432
Showing Quarter-Tone Levels Controls When you need additional control over tonal values between the midtones and shadows as well as the midtones and highlights, you use the Quarter-Tone controls. For example, if you need to add contrast to the midtone values independently of the black and white - Apple MB673Z/A | User Manual - Page 433
III Selectively Adjusting the Brightness of an Image with the Shadow Brightness Levels and Highlight Brightness Levels Sliders You can selectively adjust the brightness of the shadows and highlights in the image using the Shadow Brightness Levels and Highlight Brightness Levels sliders. To - Apple MB673Z/A | User Manual - Page 434
Adjusting the Levels of the Red Color Channel You adjust the levels of the red color channel when you want to remove red and cyan color casts in the image. Before Red Levels adjustment After Red Levels adjustment (moved Gray Levels slider right) Red adjustments Move Black Levels slider right Move - Apple MB673Z/A | User Manual - Page 435
Green adjustments Move Gray Levels slider right Move White Levels slider left III Effect Adds magenta to the midtones, removing green. Adds green to the highlights, removing magenta. Adjusting the Levels of the Blue Color Channel You adjust the levels of the blue color channel when you want to - Apple MB673Z/A | User Manual - Page 436
Adjusting Brightness Values in the Highlight Areas of the Image When you want to adjust the brightness values in the highlight areas of the image without affecting the midtones and shadows, you can adjust the Highlights parameter. Although the human eye is more sensitive to details in shadow areas - Apple MB673Z/A | User Manual - Page 437
III To adjust the highlights in an image: 1 Select an image. 2 In the Highlights & Shadows area of the Adjustments inspector or the Adjustments pane of the Inspector HUD, adjust the Highlights parameter by doing one of the following: Use the Highlights slider and value slider to adjust the - Apple MB673Z/A | User Manual - Page 438
To adjust the shadows in an image: 1 Select an image. 2 In the Highlights & Shadows area of the Adjustments inspector or the Adjustments pane of the Inspector HUD, adjust the Shadows parameter by doing one of the following: Use the Shadows slider and value slider to adjust the brightness values in - Apple MB673Z/A | User Manual - Page 439
side of the slider control. Drag the slider to the right to increase the radius of the area Aperture uses to assess whether the pixel requires a highlights or shadows adjustment, and drag the slider back to the left to reduce the radius. Â Click the left or right arrow in the Radius - Apple MB673Z/A | User Manual - Page 440
Adjusting the Color Correction for the Highlights & Shadows Controls You use the Color Correction parameter controls to adjust the amount of saturation applied during shadows and highlights adjustments. However, the saturation adjustment is most noticeable in the shadows. Before Highlights & - Apple MB673Z/A | User Manual - Page 441
III Adjusting the High Tonal Width of the Highlights & Shadows Controls You use the High Tonal Width parameter controls to set the range of highlights that Aperture adjusts with the Highlights controls. Increasing the High Tonal Width parameter value widens the range of highlight tonal values that - Apple MB673Z/A | User Manual - Page 442
To adjust the high tonal width of the Highlights & Shadows controls: 1 If necessary, click the Advanced disclosure triangle to show the advanced Highlights & Shadows controls. Use the High Tonal Width slider and value slider to adjust the range of highlight tonal values affected by a highlights - Apple MB673Z/A | User Manual - Page 443
III Adjusting the Midtone Contrast of the Highlights & Shadows Controls You use the Mid Contrast parameter controls to adjust the contrast of the midtones. To adjust the midtone contrast of the Highlights & Shadows controls: 1 If necessary, click the Advanced disclosure triangle to show the advanced - Apple MB673Z/A | User Manual - Page 444
To adjust the low tonal width of the Highlights & Shadows controls: 1 If necessary, click the Advanced disclosure triangle to show the advanced Highlights & Shadows controls. Use the Low Tonal Width slider and value slider to adjust the range of shadow tonal values affected by a shadows adjustment. - Apple MB673Z/A | User Manual - Page 445
III Working with the Color Controls You use the Color controls to selectively adjust the red, green, blue, cyan, magenta, and yellow colors in an image using the Color controls in the Adjustments inspector or the Adjustments pane of the Inspector HUD. Each color has individual Hue, Saturation, and - Apple MB673Z/A | User Manual - Page 446
About Hue, Saturation, and Luminance Hue (H) describes the actual color itself. Hue is measured as an angle on a color wheel. Moving a Hue slider in Aperture remaps the color from its original position on the color wheel to the new position indicated by the slider. Hue adjustments are often made to - Apple MB673Z/A | User Manual - Page 447
III Adjusting the Color of the Image with the Color Controls When you want to adjust the color values in an image, you must first identify the colors that have the most influence on the colors you want to change. It's important to understand that you're adjusting the colors of the image within the - Apple MB673Z/A | User Manual - Page 448
Note: You can also click the Expanded View button to expand the Color area to show the controls for all colors at the same time. Click the Expanded View button to view the controls for all colors at the same time. 3 If necessary, adjust the Hue parameter by doing one of the following: Use the Hue - Apple MB673Z/A | User Manual - Page 449
III The right arrow remaps the hue in the following ways: Â Red hue moves toward yellow. Â Yellow hue moves toward green. Â Green hue moves toward cyan. Â Cyan hue moves toward blue. Â Blue hue moves toward magenta. Â Magenta hue moves toward red. Â By default, the Hue value slider is set to 0.0. - Apple MB673Z/A | User Manual - Page 450
6 The Range parameter limits or expands the chromatic range of the adjustment. Adjust the Range parameter by doing one of the following: Use the Range slider and value slider to adjust the chromatic range of the color adjustment. Â By default, the Range slider is set to the center of the slider - Apple MB673Z/A | User Manual - Page 451
Adjusting Custom Colors Using the Color Eyedropper If you require a more specific hue as a starting point for the target area. By default, the Loupe is set to magnify the image to 100 percent (full size). If necessary, you can increase the magnification of the Loupe by pressing Command-Shift-Plus - Apple MB673Z/A | User Manual - Page 452
Working with the Monochrome Mixer Controls You use the Monochrome Mixer adjustment controls when you want more control over converting your image from color to black and white than simply desaturating it gives you. The Monochrome Mixer allows you to adjust tonal relationships and contrast in an - Apple MB673Z/A | User Manual - Page 453
III To convert a color image to black and white using a Monochrome Mixer preset: 1 Select an image. 2 If the Monochrome Mixer controls are not shown in the Adjustments inspector or the Adjustments pane of the Inspector HUD, choose Monochrome Mixer from the Add Adjustments pop-up menu (or press - Apple MB673Z/A | User Manual - Page 454
the mixture of red, green, and blue channels by doing one of the following: Use the Red, Green, and Blue sliders and value sliders to manually adjust the mix of color channels. Â Drag a color slider to the left to decrease its percentage in the color mix, or drag the color slider - Apple MB673Z/A | User Manual - Page 455
III Working with the Color Monochrome Controls The Color Monochrome adjustment controls are useful when you want to perform a basic conversion from color to black and white while simultaneously applying a color tint to the image's midtones. Before Color Monochrome adjustment After Color Monochrome - Apple MB673Z/A | User Manual - Page 456
Working with the Sepia Tone Controls The Sepia Tone adjustment controls behave similarly to the Color Monochrome controls, except that the sepia color is already selected. Before Sepia Tone adjustment After Sepia Tone adjustment To apply a sepia tone to an image: 1 Select an image. 2 If the Sepia - Apple MB673Z/A | User Manual - Page 457
III Working with the Noise Reduction Controls You use the Noise Reduction adjustment controls when you need to reduce digital noise in an image. Digital noise is often caused by shooting at high ISO settings in low-light conditions. When you reduce noise in an image, you often have to sharpen the - Apple MB673Z/A | User Manual - Page 458
the detail in your image: Sharpen and Edge Sharpen. Which Sharpen Tool Should You Use? If you've already applied sharpening in a previous version of Aperture using the Sharpen adjustment controls, the Sharpen adjustment controls are still there so that your adjustments remain intact and unchanged - Apple MB673Z/A | User Manual - Page 459
III Working with the Edge Sharpen Controls You use the Edge Sharpen controls when you want to sharpen the detail in your image. The Edge Sharpen controls adjust the luminance values in the image, increasing the contrast between light and dark pixels that touch, creating an "edge." Increasing the - Apple MB673Z/A | User Manual - Page 460
To sharpen an image using the Edge Sharpen controls: 1 Select an image. 2 If the Edge Sharpen controls are not shown in the Adjustments inspector or the Adjustments pane of the Inspector HUD, choose Edge Sharpen from the Add Adjustments pop-up menu (or press Control-S). 3 Sharpen the image by doing - Apple MB673Z/A | User Manual - Page 461
III 5 For maximum accuracy, the Edge Sharpen adjustment sharpens the image in three passes that appear to occur simultaneously-an initial sharpening pass, where a majority of the sharpening occurs, followed by two subsequent sharpening passes. These subsequent passes are called falloff. Adjust the - Apple MB673Z/A | User Manual - Page 462
You use the Sharpen adjustment controls when you need to modify Sharpen adjustment control parameters that were applied to an image in a previous version of Aperture. To sharpen an image using the Sharpen controls: 1 Select an image. 2 If the Sharpen controls are not shown in the Adjustments - Apple MB673Z/A | User Manual - Page 463
III Â Click the left or right arrow in the Intensity value slider to adjust the sharpening by 2 percent increments, or drag in the value field. The left arrow decreases the sharpening effect on the image, and the right arrow increases it. Â Double-click the number in the Intensity value slider, then - Apple MB673Z/A | User Manual - Page 464
Applying an Exposure Vignette You use the Exposure vignette when you want to apply the effect of a traditional lens-created vignette. Before Exposure Vignette adjustment After Exposure Vignette adjustment To apply an Exposure vignette to an image: 1 Select an image. 2 If the Vignette controls are - Apple MB673Z/A | User Manual - Page 465
III 5 To adjust the distance Aperture goes from the edge of the image, in pixels, to apply the vignette adjustment, do one of the following: Use the Size slider and value slider to adjust the size of the area over which the vignette adjustment is applied. Â Drag the Size slider to the right to - Apple MB673Z/A | User Manual - Page 466
4 Adjust the amount of vignette to apply to the image by doing one of the following: Use the Amount slider and value slider to adjust the amount of brightness removed from the edges of the image. Â Drag the Amount slider to the left to decrease the amount of dark shading applied to the edges of the - Apple MB673Z/A | User Manual - Page 467
III Switching Vignette Types You can switch the type of vignette that's applied to an image and maintain the Amount and Size parameter values you set using the previous vignette type. To switch vignette types: m Select the other kind of vignette from the Type pop-up menu. The other type of vignette - Apple MB673Z/A | User Manual - Page 468
- Apple MB673Z/A | User Manual - Page 469
of printing, exporting, and publishing your images for viewing. It also provides information about setting up and maintaining your backup systems. Printing Your Images Exporting Your Images Creating Slideshow Presentations Using the Light Table Creating Webpages Creating Books Backing Up Your Images - Apple MB673Z/A | User Manual - Page 470
- Apple MB673Z/A | User Manual - Page 471
provides information about several methods for printing your images, including creating PDF files that you can easily transfer to clients for review. This chapter covers: Â An Overview of Printing (p. 472) Â Controls in the Print Dialog (p. 474) Â Printing a Single Image (p. 477) Â Printing a Series - Apple MB673Z/A | User Manual - Page 472
An Overview of Printing Aperture allows you to print your photos as high-resolution single images and multi-image contact sheets. You can also print books and Light Table arrangements created in Aperture. Aperture offers a variety of printing options, including using a standard or custom paper size - Apple MB673Z/A | User Manual - Page 473
compressed in another application, Aperture cannot increase , locate the original full-resolution image file, supports 16-bit printing provides the widest color gamut for your prints. 16-bit printers have a wider range of colors, resulting in less color clipping. Â Color calibrate your Aperture system - Apple MB673Z/A | User Manual - Page 474
Controls in the Print Dialog Whether you're printing a single high-resolution print, a series of contact sheets, or your latest travelogue book, you use the Print dialog to print your work. To open the Print dialog: m Select an image in the Browser, then choose File > Print Image (or press Command - Apple MB673Z/A | User Manual - Page 475
and choose Color Management from the third pop-up menu from the top of the dialog, then select No Color Adjustment to turn off system-level color management. Aperture can then control color management using an ICC profile selected for your printer and paper. Â Calibrate button: Click this button - Apple MB673Z/A | User Manual - Page 476
button to display or hide the Loupe. Â Save as PDF button: Click this button to create a PDF. Â Preview button: Click this button to view a PDF version of your print request in Preview. Â Cancel button: Click this button to close the Print dialog. Â Print button: Click this button to send your print - Apple MB673Z/A | User Manual - Page 477
your printer does not appear in the Printer pop-up menu when you click the Printer Settings button, visit your printer manufacturer's website and download the latest drivers. Printing a Single Image When you want to print a single image on a single sheet of paper, you use a single-image preset. To - Apple MB673Z/A | User Manual - Page 478
the more columns and rows, the smaller the images. Â Verify the layout of your contact sheet in the preview area. Â For printers incapable of printing full bleeds, select the "Show crop marks" checkbox in the Border Options area. 4 After you've verified that all the settings in the Print dialog are - Apple MB673Z/A | User Manual - Page 479
IV Printing a Book You can print a book to check the final format and look of it before having it printed by a professional printer, ordering a printed copy online, or distributing copies to others. To print a book: 1 Select a book album in the Projects inspector. The book appears in the Book Layout - Apple MB673Z/A | User Manual - Page 480
bottom-left side of the dialog. A new preset appears in the Preset Name list. 3 Enter a new name for the preset. 4 Change the print settings as required, then click OK. You can now select this preset whenever you need to use these print settings. 480 Part IV Distribution and Backup - Apple MB673Z/A | User Manual - Page 481
preset, based on the currently selected print preset, appears in the Preset Name list. 3 Enter a new name for the preset. 4 Change the print settings as required. You can now select this preset whenever you need to use these print settings. Chapter 16 Printing Your Images 481 - Apple MB673Z/A | User Manual - Page 482
Up the Viewer for Onscreen Proofing" on page 192. For more information about ColorSync profiles and color calibrating your computer, see Appendix B, "Calibrating Your Aperture System," on page 635. 482 Part IV Distribution and Backup - Apple MB673Z/A | User Manual - Page 483
IV Calibrating Your Printer Using the Aperture Print dialog, you can print a calibration page on your printer to verify that the margins are set correctly. If the margins are not set correctly, printing your image off-center, you can use the Calibrate button to adjust the placement of the image on - Apple MB673Z/A | User Manual - Page 484
Turning Off Color Management in Your Printer For best results, you should turn off color management in your printer when printing an image using Aperture. By default, most printers are set to convert the image to the printer's color space. However, Aperture is designed to perform this conversion - Apple MB673Z/A | User Manual - Page 485
IV To turn off color management in a Canon i9100 printer: 1 In Aperture, choose File > Print Images (or press Command-P). The Print dialog appears. 2 Click the Printer Settings button. 3 In the dialog that appears, choose Color Options from the third pop-up menu from the top of the dialog, and - Apple MB673Z/A | User Manual - Page 486
dialog that appears, choose Paper Type/Quality from the third pop-up menu from the top of the dialog, click the Paper button, then choose Application Managed Color from the Color pop-up menu. 4 Make sure the other printer settings are correct, then click Done. 486 Part IV Distribution and Backup - Apple MB673Z/A | User Manual - Page 487
them as files. You can export these files to another application, send them to a printing service or to your clients via email, or publish them on Aperture, you can export copies of masters, as well as versions that you've created. When you export versions, you can export them in JPEG, TIFF, PNG, and - Apple MB673Z/A | User Manual - Page 488
your image editing sometimes requires one or more of the specialized tools available in Adobe Photoshop, you can select Photoshop as your external editor. You can then select an image and choose Images > Edit With > [Application Name]. Aperture makes a new master and version of your image and opens - Apple MB673Z/A | User Manual - Page 489
IV Exporting Copies of Masters When you export masters, duplicates of the files that were imported from your camera or other source are created; no adjustments, file modifications, or any other changes are exported with the file. To export copies of masters: 1 Select an image or images in the - Apple MB673Z/A | User Manual - Page 490
name elements you want in the Folder Naming Presets dialog. You can compose subfolder name formats that combine the following name elements:  Version Name  Master Filename  Sequence Number (1 of 3, 2 of 3, 3 of 3, and so on)  Image Year  Image Month  Image Day  Image Date  Image Time  Index - Apple MB673Z/A | User Manual - Page 491
IV  Current Month  Current Day  Project Name  / (slash) You can specify a combination of name elements to create the custom folder names you want. You can also create a hierarchy of folders within folders. For example, you can specify that Aperture place your images in a subfolder named Date, - Apple MB673Z/A | User Manual - Page 492
them, make minor adjustments on export, add watermarks, and export images with metadata. You can also quickly export images to your email application to send them to others. When you export image versions, you can specify settings for the exported files, such as format, size, and filename. To export - Apple MB673Z/A | User Manual - Page 493
when the export process is complete, select the "Show alert when finished" checkbox. 8 When you're ready to export files, click Export Versions. The images you selected are exported to the location you specified. If you selected the "Show alert when finished" checkbox, a dialog appears displaying - Apple MB673Z/A | User Manual - Page 494
To specify the dpi setting for exported images in an export preset: 1 Select the image or images you want to export. 2 Choose File > Export > Versions (or press Command-Shift-E). 3 Navigate to the location where you want the exported images placed. 4 Choose Edit from the Export Preset pop-up menu. - Apple MB673Z/A | User Manual - Page 495
IV To export images constrained to a specific size: 1 Select the image or images you want to export. 2 Choose File > Export > Versions (or press Command-Shift-E). 3 Navigate to the location where you want the exported images placed. 4 Choose Edit from the Export Preset pop-up menu. Choose a - Apple MB673Z/A | User Manual - Page 496
the image or images you want to export. 2 Choose File > Export > Versions (or press Command-Shift-E). 3 Navigate to the location where you want the exported Name field. 5 When you're ready to export files, click Export Versions. The files are exported with the name format you specified. If none - Apple MB673Z/A | User Manual - Page 497
IV To create a new name format: 1 Select an image in the Browser. 2 Choose File > Export > Version (or press Command-Shift-E). 3 Choose Edit from the Name Format pop-up menu. The Naming Presets dialog appears. 4 In the Name list, select an existing - Apple MB673Z/A | User Manual - Page 498
specific uses, such as for use on websites, you may need to use filenames without spaces so that the filenames are compatible with the intended application or website. Aperture adds spaces to filenames depending on the name format you use. You can easily modify name formats to remove spaces from - Apple MB673Z/A | User Manual - Page 499
IV To modify a name format to remove spaces: 1 Choose Aperture > Presets > File Naming. 2 In the Naming Presets dialog, select the preset name format you want to modify. Select the space between name elements and delete it. Select the name format you want to modify. 3 In the Format field, select and - Apple MB673Z/A | User Manual - Page 500
"Working with Export Presets" on page 505. To adjust images at export: 1 Select the image or images you want to export. 2 Choose File > Export > Versions (or press Command-Shift-E). 3 Navigate to the location where you want the exported images placed. 4 Choose Edit from the Export Preset pop-up menu - Apple MB673Z/A | User Manual - Page 501
to your images as a watermark. To add a watermark image to your exported images: 1 Select the images you want to export. 2 Choose File > Export > Versions (or press Command-Shift-E). 3 In the dialog that appears, choose Edit from the Export Preset pop-up menu. 4 In the Export Presets dialog, select - Apple MB673Z/A | User Manual - Page 502
applies all the metadata attached to your image. If your image version has metadata that you don't want exported, create an image version that includes only the metadata intended for export. Note: The PNG file format does not support the inclusion of metadata. To include metadata with images at - Apple MB673Z/A | User Manual - Page 503
text file lists the version names, ratings, keywords, application or service requires. For example, a stock photography service or print lab may require service or application vendor and install it. Third-party plug-ins for Aperture are stored in the following location: /Library/Application Support - Apple MB673Z/A | User Manual - Page 504
directly to your email application. Note: Before you attempt to email an image, find out the maximum file size your email client supports. If your exported files, click Export Versions. You can now open your email application and attach the exported files. 504 Part IV Distribution and Backup - Apple MB673Z/A | User Manual - Page 505
view the settings for an export preset, do one of the following: m Choose Aperture > Presets > Image Export. m With an image selected, choose File > Export > Version (or press Command-Shift-E) and in the dialog that appears, choose Edit from the Export Preset pop-up menu. The Export Presets dialog - Apple MB673Z/A | User Manual - Page 506
gamma adjustment to your exported images. Â ColorSync Profile pop-up menu: Choosing a ColorSync profile ensures consistent color reproduction on other systems and in the printed image. Aperture provides a large selection of profiles, and any custom profiles you've saved during calibration are - Apple MB673Z/A | User Manual - Page 507
the Add (+) button. A new preset appears highlighted in the Export Preset Name list. 3 Enter a new name for the preset. 4 Change the export settings as required, then click OK. Modifying an Export Preset You can modify existing presets when you need to. The next time you export using that preset - Apple MB673Z/A | User Manual - Page 508
Deleting an Export Preset You can delete an export preset when you no longer need it. To delete an export preset in the Export Presets dialog: 1 Select the preset, then click the Delete (-) button. Click the Delete button to delete the selected preset. The preset disappears from the preset list. 2 - Apple MB673Z/A | User Manual - Page 509
18 Creating Slideshow Presentations 18 With Aperture, you can easily create and present slideshows of your images. You can use slideshows to review images with clients, present a series of final select images, or present your images to audiences complete with background music. This chapter explains - Apple MB673Z/A | User Manual - Page 510
control them using keyboard shortcuts, displaying images one by one as you review them with a client. To create a slideshow, you select a project a black background for 3 seconds, with a 2-second cross fade. Â Manual: You control this slideshow's progression with the Right Arrow and Left Arrow keys - Apple MB673Z/A | User Manual - Page 511
: one for your presentation and the other for your question and answer period. The presentation slideshow can show one image at a time and be manually controlled, so you can move through the images at your own pace. Your second slideshow preset, to be used during the question and answer period - Apple MB673Z/A | User Manual - Page 512
3 seconds, with a 2-second cross fade. Â Fade through Black: Displays each image on a black background for 3 seconds, with a 2-second cross fade. Â Manual: You control this slideshow's progression with the Right Arrow and Left Arrow keys. Â Slow Dissolve: Displays each image for 5.1 seconds, with - Apple MB673Z/A | User Manual - Page 513
save a slideshow's images by creating an album and then placing the image versions for your slideshow in it. You can also apply a keyword such as play your slideshow by following the instructions in the previous section, "Controlling a Slideshow." Chapter 18 Creating Slideshow Presentations - Apple MB673Z/A | User Manual - Page 514
duration is determined: by fitting the slideshow to the duration of the music, by showing each image for a fixed time, or by advancing images manually. Â Duration slider: Determines the amount of time each image will be shown. Drag the slider to the right to increase each image's display time - Apple MB673Z/A | User Manual - Page 515
slideshow manually by pressing Esc. Â Quality buttons: Select a button to specify either Best or Good image quality. Selecting Best displays full-size images. Select Good for faster display. Â "Play slideshow on main display only" checkbox: If you use a dual-display system and - Apple MB673Z/A | User Manual - Page 516
Creating Slideshow Presets It's easiest to create a new slideshow preset by duplicating an existing preset and modifying it. First, identify which existing preset you want to model your new preset on. After duplicating the preset and renaming the duplicate, you can easily customize your new - Apple MB673Z/A | User Manual - Page 517
IV Modifying Slideshow Presets You can modify slideshow presets to create custom slideshows for any presentation. To modify an existing preset: 1 Choose Aperture > Presets > Slideshow. The Slideshow Presets dialog appears. 2 Select the preset you want to modify in the Presets list. 3 Modify the - Apple MB673Z/A | User Manual - Page 518
Creating a Growing Grid of Images Most slideshow presets are set to replace one image with another. You can create a slideshow that successively adds images to your screen in a grid pattern. To display images in a grid: 1 Select a set of images to be displayed in your slideshow. 2 Choose File > - Apple MB673Z/A | User Manual - Page 519
IV Playing Your Slideshow on Your Main Display Only Your slideshow automatically plays according to your default display setup. If you use a dual-display system but want to view a slideshow only on your main display, you can easily make that change in the Slideshow Presets dialog. To play your - Apple MB673Z/A | User Manual - Page 520
Displaying Your Images to Music Adding music to your slideshow can increase your audience's enthusiasm and participation. You can easily add music from your iTunes music library to accompany your slideshow. To add music to your slideshow presentation: 1 Select a set of images to be displayed in your - Apple MB673Z/A | User Manual - Page 521
IV 8 If you want the image display time to be adjusted so that your slideshow is the same duration as the song, choose "Fit to music" from the Timing pop-up menu. Aperture adjusts the amount of time each image is displayed to fit the duration of the selected song. 9 If you are satisfied with your - Apple MB673Z/A | User Manual - Page 522
- Apple MB673Z/A | User Manual - Page 523
large, open space where you can freely resize, group, and rearrange images. This chapter provides instructions for using the Light Table. You can place a selection of images in the Light Table for review and drag them to new positions, group them in different combinations, and resize them as needed - Apple MB673Z/A | User Manual - Page 524
the Light Table just as you would work with slides on a physical light table. You can place a selection of images in the Light Table for review and drag them to new positions, arranging, grouping, and resizing them in different combinations to see how they might look on webpages or book pages - Apple MB673Z/A | User Manual - Page 525
IV Creating a Light Table Album To view images in the Light Table, you first create a Light Table album. You can create a new, empty album and drag or import images into it, or you can select images in a project and create a Light Table album to hold them. To create a new, empty Light Table album: 1 - Apple MB673Z/A | User Manual - Page 526
3 Enter a new name for the Light Table album. If necessary, you can drag additional images from the Browser to the Light Table album in the Projects inspector. Placing and Viewing Images in the Light Table After adding images to the Light Table album, you can select the ones you want to work with - Apple MB673Z/A | User Manual - Page 527
IV If you have many images in a Light Table album, it may be difficult to remember which images you haven't yet placed in the Light Table. You can set the Browser to show only those images that haven't been placed in the Light Table. To see only images in the Browser that remain unplaced: m Click - Apple MB673Z/A | User Manual - Page 528
To change an image's size: 1 Select the image in the Light Table. 2 Position the pointer over the image, then drag a resize handle to change the image's size. Move the pointer over the image to show resize handles, then drag to change the image's size. To reset an image to its previous size: m - Apple MB673Z/A | User Manual - Page 529
IV To manually align images: 1 In the Light Table, select the images you want to align, making sure that the image or group of images you want to - Apple MB673Z/A | User Manual - Page 530
To reveal images in the Light Table that are covered by other images: 1 Select the top image in the group. The top image is selected. 2 Click the Uncover button (or press Shift-X). Click the Uncover button to reveal all images under the selected image. 3 Select an uncovered image. The images are - Apple MB673Z/A | User Manual - Page 531
IV Adjusting the Light Table View You can adjust the Light Table view to better view and work with images. This is particularly useful when the Light Table is larger than your screen size. You can also increase the area of the Light Table. To zoom in to or out of the Light Table: m Drag the Light - Apple MB673Z/A | User Manual - Page 532
Setting View Options for the Light Table You can set the view options for the Light Table to display badge and metadata overlays, such as ratings, on your images. To change the display of image information in the Light Table: 1 Choose Aperture > Preferences, or press Command-Comma (,), then click - Apple MB673Z/A | User Manual - Page 533
IV Printing a Light Table Arrangement After arranging your images, you can print the image arrangement for further review. To print a Light Table arrangement: 1 Select the images in the Light Table that you want to print by dragging a selection rectangle around them. If no - Apple MB673Z/A | User Manual - Page 534
from the Light Table album to other projects or albums, the images in the other projects and albums remain unchanged, even though the Light Table versions are gone. To delete a Light Table album: 1 Select the Light Table album in the Projects inspector. 2 Choose File > Delete Light Table (or press - Apple MB673Z/A | User Manual - Page 535
images that you can post to your MobileMe account homepage or to your own website. Then clients can conveniently review your work via the Internet. This chapter provides instructions for creating and posting webpages of your images. Using the built-in Aperture webpage themes, or designs, you can - Apple MB673Z/A | User Manual - Page 536
An Overview of Creating Webpages Web delivery is convenient when time won't allow office visits or delivery of prints to clients. Photographers around the world currently benefit from web distribution of their works, providing clients with online access to galleries of their best images. Building a - Apple MB673Z/A | User Manual - Page 537
the page. Web journals are ideal for projects in which you show photos with narrative to support them. When working with web journals, you manually add pages, images, and text to your web journal. You can choose a theme to apply to all your pages, and you can change the layout - Apple MB673Z/A | User Manual - Page 538
. People who access your MobileMe galleries can view the posted albums, inspect large versions of the images, and subscribe to your website. If you choose, you can also set up your MobileMe galleries to allow others to download images, send the photo album to others via email, and send out email - Apple MB673Z/A | User Manual - Page 539
The new album contains the selected images. The new album you created appears in the Projects inspector. IV The Webpage Editor appears with the selected images. You can also create an empty webpage album and then drag images into the album. To create a new, empty webpage album: 1 Do one of the - Apple MB673Z/A | User Manual - Page 540
Creating Smart Webpage Albums You can use the Aperture Smart Album feature to gather images from the library or from projects and place them automatically in webpages. Smart Albums gather images based on search criteria that you specify. For example, you can create a Smart Webpage Album that gathers - Apple MB673Z/A | User Manual - Page 541
a theme, or layout, for your webpage. Â Gallery Pages pane: Click here to see a specific webpage. Â Detail Images pane: Click here to see the enlarged version of a selected image in a webpage. Â Metadata View pop-up menu: Choose the type of metadata that is included with each image in the webpage - Apple MB673Z/A | User Manual - Page 542
Editor. Creating Web Journals Web journals provide a great way to mix images and text to chronicle trips and explain images on the web. You can manually add and arrange images and text in your web journal. Creating Web Journal Albums To create a web journal, you must first create an album that - Apple MB673Z/A | User Manual - Page 543
, for your webpage. Â Journal Pages pane: Click here to see a specific page of the web journal. Â Detail Images pane: Click here to see the enlarged version of a selected image in a web journal. Â Add Page button: Click this button to add a page to your web journal. Â Remove Page button: Click this - Apple MB673Z/A | User Manual - Page 544
some easy ways to view and navigate through your pages. Select the page you want to work on here. Click here to see the enlarged version of the selected image. 544 Part IV Distribution and Backup Previous Page button Next Page button - Apple MB673Z/A | User Manual - Page 545
IV To view a particular webpage, do one of the following: m Use the scroll bar in the Gallery Pages pane (for a webpage) or the Journal Pages pane (for a web journal) to locate the page, then click the page. m Click the Previous Page or Next Page button to display a different page. When someone - Apple MB673Z/A | User Manual - Page 546
value slider Left and right arrows Note: When a web journal is open in the Webpage Editor, only the Columns value slider is available. You can manually add as many rows of images to a page as you need. To change the number of columns and rows of images on the page: m Double - Apple MB673Z/A | User Manual - Page 547
IV Resizing the Images on Webpages You can increase or decrease the size of images on your pages. To change the size of images on the page: 1 From the "Fit images within" pop-up menu, choose whether you want the images to be spaced according to their longest edge or both edges. 2 To increase or - Apple MB673Z/A | User Manual - Page 548
Changing Copyright Information Webpages and web journals also appear with copyright information on the page. You can select the copyright text on the page and change it. You can also specify the copyright information you want for all your pages in the Preferences window. To change the copyright - Apple MB673Z/A | User Manual - Page 549
, delete pages, and change the page order. Adding, Arranging, and Deleting Images and Text on Web Journal Pages When you create a web journal, you must manually place your images and add text. To add images to a web journal page: m Drag images from the Browser to the page in the Webpage Editor - Apple MB673Z/A | User Manual - Page 550
To remove a text box from a web journal page: 1 Click the text box to select it. 2 Click the Remove button (with a minus sign) to remove the selected text box. Adding Pages to a Web Journal You can add pages to your web journal as you need them. To add a page to a web journal: 1 Select a page in the - Apple MB673Z/A | User Manual - Page 551
. 2 Choose either Header with Text or Header with Image from the Page Template pop-up menu. Note: The theme applied to the web journal must support images in the header. Deleting Pages from a Web Journal When you no longer need a page, you can delete it from the web journal. To delete - Apple MB673Z/A | User Manual - Page 552
Exporting to MobileMe The easiest way to transfer files to the Internet is to have Aperture automatically copy the files to your MobileMe account. With a few clicks, you can have Aperture open your MobileMe account, transfer the files with links intact, and create the Internet addresses that others - Apple MB673Z/A | User Manual - Page 553
IV To link your webpage or web journal to your MobileMe homepage: 1 Go to http://www.me.com, then click the HomePage link at the top of the screen. 2 If you haven't already done so, log in. 3 If you don't have a menu page, create one. 4 In the Pages list, select the menu page, then click Edit. The - Apple MB673Z/A | User Manual - Page 554
can also open your webpages in a standard HTML editor and make the changes required for them to work in your site. You can add and revise the web server or Internet service provider using a copying method such as FTP, or using the transfer features of your webpage service. You can export webpages - Apple MB673Z/A | User Manual - Page 555
IV 6 If you would like to be notified when the export process is complete, select the "Show alert when finished" checkbox. 7 When you're ready to export your webpages, click Export. The images you selected are exported to the location you specified. Note: If you would like to check on the progress - Apple MB673Z/A | User Manual - Page 556
apply a uniform gamma adjustment to your exported images. Â ColorSync Profile pop-up menu: Choosing a ColorSync profile ensures consistent color reproduction on other systems and in the printed image. Aperture provides a large selection of profiles, as well as any custom profiles you've saved during - Apple MB673Z/A | User Manual - Page 557
the export preset you selected, appears highlighted in the Web Export Preset Name list. 3 Enter a new name for the preset. 4 Change the export criteria as required, then click OK. Chapter 20 Creating Webpages 557 - Apple MB673Z/A | User Manual - Page 558
Modifying Web Export Presets After examining a selected preset's settings, you may want to change something about the preset. To modify a selected preset, you can simply change the necessary settings and click OK. The next time you export using that preset, Aperture remembers your modified settings - Apple MB673Z/A | User Manual - Page 559
IV Adding Watermarks to Webpage Images You can add a graphics file to your images as a watermark to discourage others from using your images without your permission. Watermarks are especially useful when applied to images posted on the web. To create a preset that adds a watermark to your exported - Apple MB673Z/A | User Manual - Page 560
have one already)  Set your MobileMe preferences in System Preferences  Select images and create a MobileMe album by visiting the MobileMe website at: http://www.apple.com/mobileme Note: If you already have users, review pricing, and even sign up for a free trial. Follow the instructions on this - Apple MB673Z/A | User Manual - Page 561
to your MobileMe account. To set up your MobileMe preferences: 1 Choose Apple > System Preferences, or click the System Preferences icon in the Dock. 2 Click the MobileMe icon in the Internet & Network area of the System Preferences window. 3 Click the Account button, if necessary, and enter your - Apple MB673Z/A | User Manual - Page 562
 To allow visitors to download full-size JPEG images: Choose Actual Size.  To allow visitors to download both optimized JPEG images for album on my Gallery page" checkbox.  To display version names below the images: Select the "Show version name" checkbox.  To display an email address visitors - Apple MB673Z/A | User Manual - Page 563
feature of the album to send the address link to the people you want to review the album, or you can copy the URL site location from the browser and also check to see whether images have been uploaded to your albums and download new or changed images to your MobileMe album in the Projects inspector. - Apple MB673Z/A | User Manual - Page 564
The MobileMe pane of the Preferences window provides access to your MobileMe gallery controls and options. You can schedule updates with the "Check for new photos" pop-up menu. Enter a title for your MobileMe gallery in the Gallery Title field. A list of the MobileMe albums that you've published to - Apple MB673Z/A | User Manual - Page 565
Aperture > Preferences, then click MobileMe. To update and review an individual MobileMe gallery album's settings: m Choose Settings the "Check for new photos" pop-up menu. To update your MobileMe account manually: m Choose Manually from the "Check for new photos" pop-up menu and click Check Now. - Apple MB673Z/A | User Manual - Page 566
- Apple MB673Z/A | User Manual - Page 567
or your own printer. This chapter provides instructions for using the selection of book designs and page layouts included in Aperture to create impressive books of your images. You can order printed books using Apple's print vendor service which provides excellent printed results and direct delivery - Apple MB673Z/A | User Manual - Page 568
An Overview of Creating Books Aperture provides options for creating a print book to suit a variety of needs. When you select or create a book album in the Projects inspector, the Book Layout Editor appears along with the Browser. You use the Book Layout Editor to set up the page structure of your - Apple MB673Z/A | User Manual - Page 569
IV The Pages pane on the left shows thumbnails of your book pages. You can scroll through the thumbnails and click one to select a page of your book to work on. A larger view of the selected page appears on the right. Selected page Select the page you want to work on here. A larger view of the - Apple MB673Z/A | User Manual - Page 570
When you choose a theme, the Book Layout Editor provides a professionally designed set of master pages that determine how you mix text and images on the page. For example, you can choose among master pages that create a cover page, pages of text in columns of various sizes, pages of images in - Apple MB673Z/A | User Manual - Page 571
a text box and type or paste text into it. If you wish, you can also place metadata boxes next to images to display an image's version name, caption, keywords, and other metadata. Photo box holding an image Text box holding text If you prefer, you can build a book page by page - Apple MB673Z/A | User Manual - Page 572
To change the design of a page, click the Edit Layout button. You can then work with the photo boxes and text boxes that appear on the page, resizing and rearranging them. The Book Layout Editor automatically displays yellow guidelines that show you how the item you're working with aligns with other - Apple MB673Z/A | User Manual - Page 573
are too many pages. If you plan to print a book using the Apple print vendor, make sure to keep the number of pages at or below the other hand, producing a large book, such as a coffee table book, may require a good deal of planning, writing, design, page composition, proofing, and production work - Apple MB673Z/A | User Manual - Page 574
. 13 Print a proof and carefully review the text and layout of the book. 14 Send the book to be printed using Apple's print vendor or create a PDF such as the choice of paper stock, the use of inks and varnishes, review of bluelines, binding, packaging, shipping, and pricing. If you routinely produce - Apple MB673Z/A | User Manual - Page 575
IV Creating a Book Album You can create a book album two ways: Â Select the images you want in the book and then create a new album holding the selection. Â Create a new book album and then drag the images you want into it. To create a book album from a selection of images: 1 Select the images you - Apple MB673Z/A | User Manual - Page 576
Controls in the Book Layout Editor The Book Layout Editor is where you design the layout of pages in your book and add images and text to pages. The Book Layout Editor is where you design your book. The following controls are available for working with books in the Book Layout Editor. Edit Content - Apple MB673Z/A | User Manual - Page 577
IV Â Pages pane: Click here to see an individual page in the book. Â Add Pages pop-up menu: Choose an option from this pop-up menu to add a page or pages to the book. Â Delete Pages button: Click this button to delete the selected page or pages from your book. Â Set Master Page pop-up menu: Choose - Apple MB673Z/A | User Manual - Page 578
button to specify your book format as a large softcover book. Â Show Full Spreads button: Click this button to display two facing pages in the Book pages. Â Buy Book button: Click this button to purchase your book from Apple's print vendor. Â Previous Page button: Click this button to see the - Apple MB673Z/A | User Manual - Page 579
best suited to a project. You can also create your own custom theme with the dimensions of your choosing. However, you can't order books from Apple created with custom themes. For more information about creating custom themes, see "Working with Custom Themes" on page 607. It's important to choose - Apple MB673Z/A | User Manual - Page 580
Viewing Pages As you work on a book, you can select and view particular pages, and you can change your view of the pages. You can display your pages laid out singly or side by side, and you can enlarge or reduce your view of book pages. Navigating to Book Pages You can navigate to pages in your book - Apple MB673Z/A | User Manual - Page 581
side: m Click the Show Single Pages or Show Full Spreads button. Note: Printing single- or double-sided pages is a function of your printer and the options available in the printer's Print dialog. If you're purchasing printed books from Apple's print vendor, your book is automatically printed double - Apple MB673Z/A | User Manual - Page 582
pages, or have Aperture automatically fill your pages with the images in a book album. Placing Images Manually You can place images in a book manually by dragging them in one at a time. To add images to the book manually: m Drag an image from the Browser to a photo box on the page. Viewing Images to - Apple MB673Z/A | User Manual - Page 583
IV To inspect selected images in detail, you can also quickly display them in a standard Viewer. When the Book Layout Editor is open, the Browser provides a button for quickly switching to a standard Viewer. Show Viewer button To display a selection of images in a book album in a standard Viewer: 1 - Apple MB673Z/A | User Manual - Page 584
Flowing Unplaced Images When you create a structure of pages to hold your images, you can have Aperture flow in unplaced images. If more pages are required to hold your images than your book currently has, Aperture creates more pages. If you've already placed some images on pages in the book, - Apple MB673Z/A | User Manual - Page 585
IV Adding Individual Pages to a Book As you create a book, you can create new pages one by one and add them to your book. To add a single page to your book: 1 Select a page in the Pages pane where the new page should appear. The new page will appear just after the selected page. 2 Choose Add New - Apple MB673Z/A | User Manual - Page 586
Automatically Creating New Pages You can have Aperture automatically add pages to your book containing unplaced images in the book album. Aperture creates the number of pages needed to hold the remaining unplaced images. Add Pages pop-up menu Book Action pop-up menu Delete Pages button Set - Apple MB673Z/A | User Manual - Page 587
IV To add a selection of images to new pages in your book: 1 Select the images you want in the Browser. 2 Select a page in the Pages pane where the new pages should appear. The new pages will appear just after the selected page. 3 Choose Add New Pages > With Selected Images from the Add Pages pop-up - Apple MB673Z/A | User Manual - Page 588
-up menu. All the selected images are flowed into the photo boxes on the index pages. You can also drag images into the index pages manually. If you want the index pages to appear in a different position in your book, you can drag them in the Pages pane. You can also - Apple MB673Z/A | User Manual - Page 589
IV To add a metadata index to your book. m Choose Create Index from the Book Action pop-up menu. Aperture adds index pages to the end of your book and updates the index with the metadata information from your images. You can change the metadata that appears in the index by selecting metadata boxes - Apple MB673Z/A | User Manual - Page 590
you select a hardcover design and purchase printed copies of the book from Apple's print vendor, you can choose from a selection of hardcover colors. images or text on the spine or back cover when purchasing books from Apple's print vendor. Book cover page Cover page showing a hardcover design To - Apple MB673Z/A | User Manual - Page 591
button. If you don't plan to purchase printed books from the Apple print vendor, you may want to employ a graphic designer to create the front and back cover for you, or design the cover yourself using a graphics application. Choosing a Master Page Layout You select a design for your page by - Apple MB673Z/A | User Manual - Page 592
Removing Pages from a Book You can remove pages from a book. Removing pages removes the contents of the page, and remaining pages simply reflow to fill the deletion. You cannot remove the cover page of a book. To remove pages from your book: 1 Select the page or pages you want to remove in the Pages - Apple MB673Z/A | User Manual - Page 593
IV To turn off page numbering: m Choose Page Numbers > Off from the Book Action pop-up menu. Rebuilding a Book If you've made modifications to the design of a book and you want to start over with an unmodified design, you can have Aperture rebuild your book. Aperture rebuilds the book structure - Apple MB673Z/A | User Manual - Page 594
Changing How an Image Fills a Photo Box Aperture is preset to scale images to fill a photo box. You can change the position of an image within a photo box, making it appear centered or aligned on the right or left edge. To change how an image fills a box: 1 Click the Edit Layout button, if it's not - Apple MB673Z/A | User Manual - Page 595
IV Changing the Aspect Ratio for a Photo Box Pages hold photo boxes with specific sizes and aspect ratios. You can select a box and change the aspect ratio to fit the image. For example, you can change a box with a landscape orientation to one with a portrait orientation. Aperture provides commands - Apple MB673Z/A | User Manual - Page 596
Copying, Pasting, Cutting, and Removing Images from Photo Boxes After you place images in photo boxes on your pages, you can select a box or group of boxes and copy and paste the contents, or cut or remove the images from boxes. To copy and paste the contents of selected boxes: 1 Click the Edit - Apple MB673Z/A | User Manual - Page 597
IV Stacking Photo Boxes in a Specific Order As you arrange boxes on the page, perhaps overlapping them to create a certain look, you may want to change their stacking order. For example, you might want to place three images on top of one another in a specific order. To change the stacking order of - Apple MB673Z/A | User Manual - Page 598
To apply a filter to a photo box: 1 Select the photo box that contains the image you want to change. 2 Choose the filter style you want from the Set Photo Filter pop-up menu. Note: When you apply a filter to an image in a book and then examine the image with the Loupe, the image appears without the - Apple MB673Z/A | User Manual - Page 599
IV Adding Text Boxes to a Page When you want to add text to a page and need another text box, you can add one and position it where you want. To add a text box to a page: 1 In the Pages pane, select the page to which you want to add text. 2 Click the Edit Layout button. Click the Edit Layout button - Apple MB673Z/A | User Manual - Page 600
4 Click the Add Metadata Box button. Add Metadata Box button A new metadata box appears on the page. 5 Drag the new metadata box to the location you want. You can resize a metadata box by dragging its resize handles. 6 Choose the type of metadata you want displayed in the box from the Metadata - Apple MB673Z/A | User Manual - Page 601
the font, font size, font color, and more. Important: Aperture follows the text-smoothing preferences you have set up in the Appearance pane of System Preferences. The default setting for Mac OS X doesn't smooth fonts that are 8 points in size or smaller. This setting only affects the appearance of - Apple MB673Z/A | User Manual - Page 602
to remove one or more text boxes from the page. You can choose a different master page design that has fewer text boxes, or you can manually select and remove text boxes. To remove text or metadata boxes from a page: 1 Click the Edit Layout button. 2 Select the text or metadata box you - Apple MB673Z/A | User Manual - Page 603
Working with the Layout Options Inspector You can select an item on a page and view its geometry using the Layout Options inspector. Some printers require precise layout dimensions; you can use the Layout Options inspector to accurately place all items on the page by entering new dimensions in the - Apple MB673Z/A | User Manual - Page 604
View master pages  Create new master page designs or modify existing master page designs  Create left and right (facing page) versions of a master page, or combine left and right versions into one page  Update your book with changes made to the master pages on which the book pages are based 604 - Apple MB673Z/A | User Manual - Page 605
pages and modify them. For example, if you decide to customize a two-photo layout from an original master page design, you can save the customized version and have multiple two-photo layouts that you can choose. Once you create a new master page, the master page name appears in the Set Master - Apple MB673Z/A | User Manual - Page 606
pop-up menu. Aperture updates the original master page with your design changes. Unifying and Splitting Master Pages Some master pages have left and right versions to match the book margins on the left and right facing pages. You can select a left or right master page and consolidate the two - Apple MB673Z/A | User Manual - Page 607
different from those of the Small, Medium, and Large format books, you can create a custom theme with the precise dimensions you require. Setting the dimensions in a custom theme provides the precision demanded by professional printers. Creating Custom Themes You create custom themes in the - Apple MB673Z/A | User Manual - Page 608
can share your custom themes with other Aperture systems. By default, Aperture saves custom themes in the following location in the Finder: /Users/username/Library/Application Support/Aperture2/Book Themes/ To share custom themes with another Aperture system: m Copy the themes you wish to share from - Apple MB673Z/A | User Manual - Page 609
IV Printing Books After you've created your book, you can purchase printed and bound copies from Apple's print vendor. You can also print your book using your own printer or create PDF files that you can send to clients or your own - Apple MB673Z/A | User Manual - Page 610
- Apple MB673Z/A | User Manual - Page 611
Images 22 22 To safeguard your photography portfolio, it's important to establish a reliable backup system and back up regularly. This chapter provides instructions for using the Aperture backup system to back up the entire Aperture library on a regular basis. Aperture clearly indicates how up - Apple MB673Z/A | User Manual - Page 612
to keep a historical archive of the library, you'll need to devise a system of storing separate backups in some regular chronological order. You set Aperture to back all versions, and all metadata, previews, and adjustment information associated with your images are backed up. The versions, previews - Apple MB673Z/A | User Manual - Page 613
the Vault Pane button to show the Vault pane. Planning Your Backup System As you begin working with Aperture, it's important to perform regular copies safely stored. As you routinely work with Aperture, creating new image versions and making adjustments, you'll want to make sure your work is copied - Apple MB673Z/A | User Manual - Page 614
of space you might need for new projects. For example, RAW images typically require 8 to 18 MB of disk space per file. Estimating the number of For step-by-step instructions for initially setting up your hard disks and backup system, see Appendix A, "Setting Up an Aperture System," on page 625. - Apple MB673Z/A | User Manual - Page 615
: Â Black: The vault is up to date. Â Yellow: All masters in the library have been backed up, but a change has occurred to at least one version (such as an adjustment) that has not been backed up. The vault should be updated to safeguard your work. Â Red: At least one master in - Apple MB673Z/A | User Manual - Page 616
Creating Vaults Before you can back up your files, you must create a vault and assign a hard disk to it. After you assign a disk to the vault, Aperture uses the vault to back up the entire library. You can create additional vaults and assign hard disks to them, and each additional vault also records - Apple MB673Z/A | User Manual - Page 617
IV Updating Vaults You can have Aperture update your vaults at any time. You can tell which vaults need to be updated by the color of the Vault Status button next to each vault. You can have Aperture update a particular vault or all of your vaults at once. After you import new images into Aperture, - Apple MB673Z/A | User Manual - Page 618
select the disk in the sidebar and click the Eject button. 2 Disconnect the hard disk drive from your computer. Reconnecting a Vault's Hard Drive to your System If you keep a backup of the Aperture library on an offsite hard disk drive, you'll occasionally need to bring it in for updating. Aperture - Apple MB673Z/A | User Manual - Page 619
IV Deleting a Vault Permanently You can delete an entire vault and all the images on it when you need to reconfigure your backup system. This is useful when you have moved your backup vault to a larger-capacity hard disk and you want to delete the vault information from the - Apple MB673Z/A | User Manual - Page 620
the export process is complete, select "Show alert when finished" checkbox. 7 Click Save. After exporting your project, you can transfer it to your main Aperture system in a variety of ways. One way is to transfer the project to an external hard disk. You can then connect the hard disk to your - Apple MB673Z/A | User Manual - Page 621
If you buy a new computer or use another system at a different location and want access to the Aperture library, you can install Aperture and then transfer the library from your vault (on your backup - Apple MB673Z/A | User Manual - Page 622
- Apple MB673Z/A | User Manual - Page 623
Part V: Appendixes and Glossary V Appendix A Appendix B This section describes the procedures for setting up and color calibrating your Aperture system, and provides a glossary of photography and color management terms. Setting Up an Aperture System Calibrating Your Aperture System Glossary Index - Apple MB673Z/A | User Manual - Page 624
- Apple MB673Z/A | User Manual - Page 625
up your computer system to use Aperture. It provides instructions for setting up a basic system, explains optional equipment that you might consider to enhance your system, and explains how to set up additional displays. For information about software and hardware requirements for using Aperture - Apple MB673Z/A | User Manual - Page 626
Setting Up a Basic System The following are basic instructions for connecting a digital camera or card reader to your computer. Computer Camera Card reader A basic Aperture system consists of the following equipment:  A computer and display  A digital camera or card reader (because of their - Apple MB673Z/A | User Manual - Page 627
with the minimum required amount of RAM, more RAM will make Aperture faster. If you plan to work on large projects or have multiple applications open at one , the hard disk that contains the operating system. Even high-resolution JPEG files require a lot of space. Aperture uses external FireWire - Apple MB673Z/A | User Manual - Page 628
itself via pins on the full-sized 6-pin FireWire connector. may not be bus-powered, however, requiring you to plug them into a wall manual or the instructions that came with the PCI expansion card. For information about supported graphics cards, visit the Apple Aperture website at http://www.apple - Apple MB673Z/A | User Manual - Page 629
, play slideshows, and present your full-size, full-color images. For connecting a second display, you'll need the following:  Power adapter for the display  Display cable to connect the display to the graphics card on your computer Power adapter Apple Cinema Display cable connectors £ DVI - Apple MB673Z/A | User Manual - Page 630
(ADC) ports to connect ADC displays, and Digital Visual Interface (DVI) ports to connect digital displays that have DVI connectors (such as a flat-panel Apple Cinema Display). DVI display port ADC display port  If your second display is an ADC display: Connect it to an available ADC display port - Apple MB673Z/A | User Manual - Page 631
to a computer. Power Mac G5 Apple Cinema Display £ ADC to DVI adapter plug Power outlet Power adapter AC plug DC plug Second Apple Cinema Display HFireWire connector (not used) 3 Turn on must keep your computer in this mode for the application to operate properly. If you work in mirroring - Apple MB673Z/A | User Manual - Page 632
the left, so that your desktop extends out to the right on the rightmost display. To rearrange the position of the displays: 1 Choose Apple menu > System Preferences. 2 Click Displays, then click Arrangement. Note: If the Arrangement button does not appear, click the Detect Displays button. If the - Apple MB673Z/A | User Manual - Page 633
the new position of the menu bar. To ensure proper color management from the time you download your images until the time you print them or send them to a professional lab, it is your displays, see Appendix B, "Calibrating Your Aperture System," on page 635. Appendix A Setting Up an Aperture - Apple MB673Z/A | User Manual - Page 634
- Apple MB673Z/A | User Manual - Page 635
Appendix B Calibrating Your Aperture System B The accuracy of your display and printer's ColorSync profile is critical to ensuring accurate color reproduction. Aperture is a powerful digital image adjustment application, but its power is limited to the accuracy of the devices that display and print - Apple MB673Z/A | User Manual - Page 636
on the display's gamut, some of the display's colors fall outside the range of the printer's gamut. The printer is incapable of reproducing the full range of colors in the image displayed onscreen because of the printer's smaller gamut. Color values that are contingent upon the ability of a device - Apple MB673Z/A | User Manual - Page 637
the small gamuts of the devices, mathematical models are used to simulate the full spectrum of light within the gamuts of the devices. These models are known as management system used by Mac OS X. ColorSync is completely integrated with Mac OS X and available to all native Mac OS X applications, - Apple MB673Z/A | User Manual - Page 638
What Is a Device Profile? ColorSync and other color management systems use device profiles to identify and transfer color data from one device-dependent color space, such as a camera, to another device-dependent color space, such - Apple MB673Z/A | User Manual - Page 639
best profiling package you can afford, or use a generic profile, such as sRGB. Shooting RAW Files Requires No Camera Profile Whether you need to profile your camera depends on your workflow. If you shoot JPEG a custom profile for these cameras. Appendix B Calibrating Your Aperture System 639 - Apple MB673Z/A | User Manual - Page 640
. 3 Attach the optical device to your display, and follow the instructions that came with your color management system. Apple Cinema Display Color calibration device When the application has finished calibrating your display, it asks you to save the custom ICC profile created during the - Apple MB673Z/A | User Manual - Page 641
and profile your second display: 1 Drag the application to the second display, then attach the optical device. Apple Cinema Display Apple Cinema Display Drag the color calibration window to the adjustment professionals profile their displays daily. Appendix B Calibrating Your Aperture System 641 - Apple MB673Z/A | User Manual - Page 642
calibrate and profile your printer: 1 If you haven't already done so, install the software that came with your color management system. 2 Open the color calibration software application. 3 Follow the onscreen instructions to print the color chart using the printer you want to profile. 4 Follow the - Apple MB673Z/A | User Manual - Page 643
A commonly used color profile often used for printing. See also color space. album A type of container in the Aperture library that holds only versions. You can create albums at either the project level or within a project. There are specialized types of albums, including book, Light Table, webpage - Apple MB673Z/A | User Manual - Page 644
to width of the dimensions of a photograph. Common North American aspect ratios are 3.5 x 5, 4 x 6, 5 x 7, 11 x 14, and 16 x 20 inches. auto focus The system within the camera that automatically focuses the lens on a specific portion of the subject or scene. automatic bracketing A setting on many - Apple MB673Z/A | User Manual - Page 645
lighting Natural and unnatural light sources (flash and tungsten) redirected toward the subject using the Viewer is hidden. See also Browser, Browser & Viewer view, Full Screen view, Viewer, Viewer Only view. Bulb (B) A manual shutter speed setting on many cameras used for timed exposures. When the - Apple MB673Z/A | User Manual - Page 646
capture a. The process of taking the image received by the digital image sensor and camera processor and storing that information on the memory card in the camera. b. The process of recording an image in Aperture at the moment it is shot via a tethered camera. See also camera, digital image sensor, - Apple MB673Z/A | User Manual - Page 647
but require more storage space. See also bit depth, color channels, grayscale. color interpolation The process of calculating additional color values from light captured via the red, green, and blue elements on the digital image sensor. color management system (CMS) An application that controls - Apple MB673Z/A | User Manual - Page 648
compare image In Aperture, an image set to remain onscreen while other images are viewed against it. The compare image is indicated by a green border. See also image. complementary metal oxide semiconductor (CMOS) A type of digital image sensor that is capable of recording the entire image provided - Apple MB673Z/A | User Manual - Page 649
See also Enhance adjustment. demote In Aperture, the process of moving an image in a stack away from the pick position. See also Full Screen view toolbar, image, pick, promote, stack. densitometer An instrument designed to measure the optical density of photographs. See also device characterization - Apple MB673Z/A | User Manual - Page 650
ISO speed, noise reduction. digital point-and-shoot camera A lightweight digital camera with a built-in autofocus feature, aptly named for the two steps required of the photographer to capture an image. The lens, aperture, and shutter are one assembly that is usually irremovable from the camera. See - Apple MB673Z/A | User Manual - Page 651
RAW image format designed by Adobe Systems Incorporated. See also format, RAW. Version button A button in the Full Screen view toolbar that duplicates the selected image version with all applied metadata and adjustments. See also adjustment, Full Screen view toolbar, image, metadata, toolbar, version - Apple MB673Z/A | User Manual - Page 652
, TIFF, PNG, and PDF file formats support embedded profiles. See also device characterization, profile in such a way that it can be understood by other applications. In Aperture, images can be exported in their native RAW extended desktop mode A setting in System Preferences that allows the Mac OS - Apple MB673Z/A | User Manual - Page 653
flash A type of flash connected to the camera via the hot-shoe bracket or PC terminal. Using an external flash Full Screen view that allows you to scroll through, rate, rotate, and search for images. See also Full system software that keeps track of files, applications FireWire The Apple trademark name - Apple MB673Z/A | User Manual - Page 654
light situations. See also exposure, external flash, fill-in lighting, hot shoe. flat hard disk or other storage medium for use with a file system. For example, disk drives used with Mac OS X use . Full Screen view A workspace view in Aperture with minimal user interface, used to view full-screen - Apple MB673Z/A | User Manual - Page 655
because less information is required to display a the portable flash. See also external flash, flash. HUD Short Full Screen view, image. importing The process of bringing digital image files of various types into a project in Aperture. Imported files can be created in another application, downloaded - Apple MB673Z/A | User Manual - Page 656
in the image files themselves. Large publishers typically use image management systems to quickly identify images based on the IPTC information embedded in words about the subject in the image that are added to image versions and saved as metadata. See also control bar, Keywords HUD, metadata - Apple MB673Z/A | User Manual - Page 657
, a container file that holds projects, folders, albums, masters, and versions. You organize elements in the library, rename items, sort items, and large open space where you can place a large selection of images for review and drag them to new positions, group them in different combinations, and - Apple MB673Z/A | User Manual - Page 658
For systems with multiple displays, the Main Viewer is used for displaying the Aperture application. that change is applied to the version. See also memory card, project, version. megapixel One million pixels. For to track specific forms of data. Aperture supports both EXIF and IPTC metadata. See - Apple MB673Z/A | User Manual - Page 659
also dust and scratch removal, emulsion, film, positive. New Version From Master button A button in the Full Screen view toolbar that creates a new version from a selected image's master. See Full Screen view toolbar, image, toolbar, version. noise See digital noise. noise reduction The process of - Apple MB673Z/A | User Manual - Page 660
online Images whose masters are currently available to Aperture. See also offline. opacity The level of an image's transparency. optical zoom lens See zoom lens. overexposure The result of exposing a scene too long. Overexposed scenes appear too bright and lack adequate details in the shadows. See - Apple MB673Z/A | User Manual - Page 661
by Aperture that represent the original master with any applied adjustments and associated metadata. Preview images are designed to be shared with other applications, such as iWeb, and used in place of the masters when they are offline. See also adjustment, JPEG, metadata, offline. primary selection - Apple MB673Z/A | User Manual - Page 662
version. promote The process of moving an image in a stack closer to the pick position. See also demote, Full Screen view toolbar, image, pick, stack. PSD Short for Photoshop Document. PSD files are proprietary graphics files for Adobe Systems by Apple. Widely input from applications and - Apple MB673Z/A | User Manual - Page 663
phenomenon that gives people glowing red eyes in photographs. Redeye is caused by the close proximity of the flash to the lens (especially built-in flash). See also external flash, Red Eye Correction adjustment. Red Eye Correction adjustment An adjustment in Aperture that replaces red pixels with - Apple MB673Z/A | User Manual - Page 664
in searches. See also EXIF. Secondary Viewer The Secondary Viewer is used to present images on multiple displays separately from the application workspace. The Secondary Viewer has five settings: Desktop, Blank, Mirror, Alternate, and Span. See also Alternate setting, Blank setting, Desktop setting - Apple MB673Z/A | User Manual - Page 665
1/250. See also shutter. Shuttle control A control in the Browser filmstrip view and the Full Screen view filmstrip that allows you to quickly advance through the images in the filmstrip. See Aperture used to organize images by gathering versions based on search criteria. See also album, Query HUD - Apple MB673Z/A | User Manual - Page 666
soft proof The onscreen simulation by a display of the expected output from a printer or press. Sorting pop-up menu Used to arrange images in the Browser based on a variety of sort properties or custom sort criteria. See also Browser, image. source image file See master. source profile The profile - Apple MB673Z/A | User Manual - Page 667
cast, exposure. toolbar A collection of buttons and tools, grouped by function, located at the top of the Aperture main window. See also Full Screen view toolbar. transition A visual effect applied between images in a slideshow. In Aperture, you can choose the duration of the cross fade between - Apple MB673Z/A | User Manual - Page 668
, library. version The file containing all the metadata and adjustment information applied to an image. In Aperture, only versions are changed. is hidden. See also Browser, Browser & Viewer view, Browser Only view, Full Screen view, Viewer. viewfinder The part of the camera designed to preview the - Apple MB673Z/A | User Manual - Page 669
are based either on color space profiles such as Apple RGB or on device profiles. workspace views The Systems Incorporated that is used for defining metadata sets for photo editing applications. Viewer button A button in the Viewer and the Full Screen view toolbar that alternates the display of the - Apple MB673Z/A | User Manual - Page 670
- Apple MB673Z/A | User Manual - Page 671
Index Index 2-page spreads 581 2:3 portrait aspect ratio 595 3:2 landscape aspect ratio 595 3:4 portrait aspect ratio 595 4-Up Fast or Slow slideshow preset 510, 512 4:3 landscape aspect ratio 595 100% view 531 A Actual Size button 68, 578, 581 actual size display 68, 578, 581 Actual Time Zone pop - Apple MB673Z/A | User Manual - Page 672
adjustment controls 328 controls 35 displaying in Full Screen view 334 opening 215, 330 ANPA codes 289, 502 Aperture files outside of application 144 overview 18 Aperture Library file 144 aperture priority defined 643 in metadata 273 Appearance button 86 Apple Display Connector (ADC) ports 630 applying - Apple MB673Z/A | User Manual - Page 673
vaults 616 functions and controls 615 overview 41, 612 planning systems for 613 reconnecting hard disks 618 restoring files 612 restoring library search results in albums 315 shortcut keys for turning pages 580 single-page or full-spread view 578, 581 text boxes 598 text on pages 572, 577 themes - Apple MB673Z/A | User Manual - Page 674
68, 578, 597 Browser 46, 332 badge overlays 290 creating versions in 165-166 darkening or lightening background 157 deleting images 105, images 117 metadata 273 resolution settings 473 shutter speeds and settings 58 supported digital cameras 22 cameras, exposure and 412 camera shake 645 Camera Time - Apple MB673Z/A | User Manual - Page 675
metal oxide semiconductor) 648 CMS (color management systems) 647 CMYK color space 637, 646 Cold See color casts, correcting color desaturating 328 Full Screen view and 334 levels adjustments 429 temperature. 434 resetting color wheels 428 setting manually with color wheels 428 color channel - Apple MB673Z/A | User Manual - Page 676
up menu 405 compare images 154, 184, 240 comparing images Light Table review 37 to originals 192 overview 29 rating process and 240 selecting compare Content command 596 copying book albums 608 duplicating images 168 duplicating versions 211 image adjustments 212, 335 images from projects or albums - Apple MB673Z/A | User Manual - Page 677
592 Delete Project command 105 Delete Smart Album command 324 Delete Version command 167 deleting. See removing deleting Retouch brush strokes 385 presets 505, 555 favorite projects 104 filmstrip 209, 210 full-resolution images 181, 191 Full Screen view 208, 334 hot areas 190 images without overlays - Apple MB673Z/A | User Manual - Page 678
512 distorting adjustments 651 distributing images Light Table review 37 methods 35 printing books 39 slideshows 36 , 629-633 calibrating 641 configuring 631-633 Full Screen view and 25, 208 Main and Secondary 586, 587, 588, 591, 605 Duplicate Version button 166, 211 duplicating. See copying Duration - Apple MB673Z/A | User Manual - Page 679
exporting 487 fields in 273 finding images with 309 EXIF button 282 Exit Full Screen button 56, 213 Export button 76, 86 Export dialog 489 Exported 479 projects 143, 620 renaming files during export 496 using plug-ins 503 versions 492, 554 watermarks 501, 559 web export presets 554, 555 web journal - Apple MB673Z/A | User Manual - Page 680
to 612 disconnecting 618 identifying 616 offsite storage 618 planning backup systems 614 reconnecting 618 restoring from 621 space on 614, 615 fitting pages onscreen 581 fitting slideshows to music 521 fixed lenses 653 flashes 58, 654 flat images 417, 654 Flip adjustments 328 flowing unplaced images - Apple MB673Z/A | User Manual - Page 681
654 frontlighting 654 f-stops 412, 654 full-page spreads 581 full-resolution display 191 Full Screen button 50, 62, 209 Full Screen view 51, 77, 334 badge 628 device profiles 638 disk drive considerations 627 multiple-display systems 628 See also specific types of hardware header styles 551 - Apple MB673Z/A | User Manual - Page 682
exporting 551, 554 saving webpages or journals 538 HUDs (heads-up displays) using in Full Screen view 214 functions and controls 74 working with 25 Hue Boost parameter 352 I other applications 350 editing in external editors 350 editing prior adjustments 61 exposure adjustments 412-428 in Full Screen - Apple MB673Z/A | User Manual - Page 683
slideshows sorting. See sorting images stacks. See stacks storage space for 614 versions. See versions Image Scale slider 594 image tooltips 270, 277 Image Tooltips area 91 58, 59 hiding 77 overview 26 Inspectors button 58, 59, 60 instructions in metadata 274, 289 Intensity slider 455, 456, 460, 462 - Apple MB673Z/A | User Manual - Page 684
262 customizing 80 displaying images 242 exporting a command set 85 Full Screen view 217 importing a command set 85 lifting and stamping 224 shuttling through images 155, 156 slideshows 513 stack commands 231 stacks 231 versions 165 viewing by group 82 keyword buttons 257 keyword controls 32, 63, 77 - Apple MB673Z/A | User Manual - Page 685
430 library adding items to 101 backing up to vaults 612 copying 619 defined 94, 98, 657 finding images in 301 overview 612 planning backup systems 613 restoring 612, 621 searching 297 updating vaults 617 vaults and 100 working with multiple computers 619 Library Location field 87 Lift & Stamp HUD - Apple MB673Z/A | User Manual - Page 686
adding 434 neutralizing 411 removing 434 magnifying full-resolution view 191 images on webpages 545 main window 44 managed images 94, 98 location 144 Manual slideshow preset 510, 512 master defined 94 master pixel size 175, 312 masters copying versions of 165 creating projects 96 creation dates - Apple MB673Z/A | User Manual - Page 687
keywords in 244 labels for 275 Light Table display 532 overview 270 positioning display 273 preset displays 194 Query HUD and 298 searchable data fields 175, 312 sets of. See metadata sets switching sets 276, 277 Viewer display 275 in web journals 544 webpage display 547 in webpages 541 Metadata - Apple MB673Z/A | User Manual - Page 688
automatically generate previews" checkbox 90 New Smart Album button 76, 300, 321 New Smart Webpage command 540 Newspaper Association of America 502 New Version From Master button 54, 165, 211 New Web Journal From Selection command 542 New Webpage command 539, 543 New Webpage From Selection command - Apple MB673Z/A | User Manual - Page 689
176 projects 103 Query HUD 297 stacks 133, 220, 226, 336 Viewer 182 Webpage Editor 537 Open with External Editor command 350 operating system naming conventions 129 operator characters 129 optical zoom lenses 660 orange borders 240 orange filter preset 453 ordering books 573, 578, 609 organizing - Apple MB673Z/A | User Manual - Page 690
Placement pop-up menu 273 placing images 527, 584, 586, 587 placing metadata 273 planning backup systems 613 book layout 573 platform naming conventions 129 playing slideshows 510, 519 PNG files 22, 94, 635 double-sided functionality 581 gamut 636 settings 475 troubleshooting 477 690 Index - Apple MB673Z/A | User Manual - Page 691
profiles 482 province/state names in metadata 274, 289 proxy-image slideshows 515 PSD files defined 662 exporting 487 importing 111 metadata 502 supported formats 22 watermarks 502 PTP mode 114 Publish Album As option 552 Publish Complete dialog 552 publishing in a gallery in a MobileMe account 538 - Apple MB673Z/A | User Manual - Page 692
239 Rating pop-up menu 307 RAW files color spaces and 639 defined 663 file size 614 importing 111 masters 94 resolution and 473 supported formats 22 RAW Fine Tuning controls 351 RAW images Auto Exposure adjustments 367 exposure 412 reapplying master page layouts 591, 607 Reapply Master command - Apple MB673Z/A | User Manual - Page 693
596 images from slideshows 513 images from Smart Albums 322 images from stacks 228 images from web journals 549 images from webpages 548 image versions 105 items from projects 105 keywords 256, 260, 267 Light Table albums 534 masters 166, 167 metadata boxes 602 metadata categories 282 noise 457 - Apple MB673Z/A | User Manual - Page 694
overlays 374, 391, 404 watermarks 502, 560 webpage images 547 resolution 363 camera settings 473 defined 664 DPI setting 506 full-resolution display 181, 191 printing and 473 Restore Library dialog 621 restoring last sorting arrangement 162 master page layouts 591 toolbar 79 Retouch controls 381 - Apple MB673Z/A | User Manual - Page 695
tint of highlight values 427 setting up systems 626-633 Shadow Brightness Levels 433 shortcut 217 "Show crop marks" option 476 Show Full Spreads button 69, 578, 581 showing the hot 213 Show Master Pages command 587, 605 "Show number of versions for projects and albums" checkbox 88 Show Red Eye HUD - Apple MB673Z/A | User Manual - Page 696
vaults 621 space characters 129 spacing between images in slideshows 515 Span option (multiple displays) 193 special characters in filenames 129 special instructions in metadata 274, 289 spectrophotometers 666 Split Stack command 228 Split Stacks button 133 splitting master pages 606 stacks 133, 228 - Apple MB673Z/A | User Manual - Page 697
images in 229 dragging stacks 229 Full Screen view 230 importing images automatically filenames 129 synchronizing vaults and backup files 100 system setup 626-631 T tab-delimited keyword lists glossary of 643-669 tethered shooting 135 cameras supported 135 Tether HUD 137 text adding to books - Apple MB673Z/A | User Manual - Page 698
removing 422 resetting color wheels 428 setting manually with color wheels 428 Tint parameter 411 tools to 79 customizing 78 displaying 78 in Full Screen view 208, 211, 334 hiding 78 illustrated 18 pictures. See crop adjustments tripods 667 troubleshooting printers 477 tungsten lighting 422 tungsten - Apple MB673Z/A | User Manual - Page 699
and unlocking 619 overview 41 planning backup systems 614 reconnecting hard disks 618 restoring images duplicating 211 exporting 492, 554 incremental versions 165 moving into other projects or albums 668 displaying metadata 195 displaying or hiding 182 full-resolution image display 191 hot areas in - Apple MB673Z/A | User Manual - Page 700
W warm tonality 410 watermarks defined 668 displaying 506 exporting images with 487, 556 opacity 506, 559 resizing 560 tips for 502 webpage images 559 Web Copyright field 89, 548 Web Export command 555, 557, 558 web export presets creating 557 deleting 558 editing 558 selecting 554 watermarks 559 - Apple MB673Z/A | User Manual - Page 701
files 487 X ratings 234 X value slider 407 Y yellow filter preset 453 yellow tones 422, 435 yellow Vault Status buttons 615 Y value slider 407 Z zooming full-resolution view 191 viewing book pages 578, 581 viewing images at 100% 213 viewing images in Light Table 531 zoom lenses 669 Zoom to 100
-
 1
1 -
 2
2 -
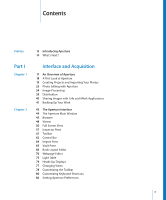 3
3 -
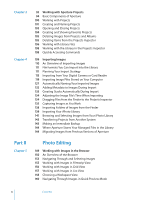 4
4 -
 5
5 -
 6
6 -
 7
7 -
8
-
9
-
10
-
11
-
12
-
13
-
14
-
15
-
16
-
17
-
18
-
19
-
20
-
21
-
22
-
23
-
24
-
25
-
26
-
27
-
28
-
29
-
30
-
31
-
32
-
33
-
34
-
35
-
36
-
37
-
38
-
39
-
40
-
41
-
42
-
43
-
44
-
45
-
46
-
47
-
48
-
49
-
50
-
51
-
52
-
53
-
54
-
55
-
56
-
57
-
58
-
59
-
60
-
61
-
62
-
63
-
64
-
65
-
66
-
67
-
68
-
69
-
70
-
71
-
72
-
73
-
74
-
75
-
76
-
77
-
78
-
79
-
80
-
81
-
82
-
83
-
84
-
85
-
86
-
87
-
88
-
89
-
90
-
91
-
92
-
93
-
94
-
95
-
96
-
97
-
98
-
99
-
100
-
101
-
102
-
103
-
104
-
105
-
106
-
107
-
108
-
109
-
110
-
111
-
112
-
113
-
114
-
115
-
116
-
117
-
118
-
119
-
120
-
121
-
122
-
123
-
124
-
125
-
126
-
127
-
128
-
129
-
130
-
131
-
132
-
133
-
134
-
135
-
136
-
137
-
138
-
139
-
140
-
141
-
142
-
143
-
144
-
145
-
146
-
147
-
148
-
149
-
150
-
151
-
152
-
153
-
154
-
155
-
156
-
157
-
158
-
159
-
160
-
161
-
162
-
163
-
164
-
165
-
166
-
167
-
168
-
169
-
170
-
171
-
172
-
173
-
174
-
175
-
176
-
177
-
178
-
179
-
180
-
181
-
182
-
183
-
184
-
185
-
186
-
187
-
188
-
189
-
190
-
191
-
192
-
193
-
194
-
195
-
196
-
197
-
198
-
199
-
200
-
201
-
202
-
203
-
204
-
205
-
206
-
207
-
208
-
209
-
210
-
211
-
212
-
213
-
214
-
215
-
216
-
217
-
218
-
219
-
220
-
221
-
222
-
223
-
224
-
225
-
226
-
227
-
228
-
229
-
230
-
231
-
232
-
233
-
234
-
235
-
236
-
237
-
238
-
239
-
240
-
241
-
242
-
243
-
244
-
245
-
246
-
247
-
248
-
249
-
250
-
251
-
252
-
253
-
254
-
255
-
256
-
257
-
258
-
259
-
260
-
261
-
262
-
263
-
264
-
265
-
266
-
267
-
268
-
269
-
270
-
271
-
272
-
273
-
274
-
275
-
276
-
277
-
278
-
279
-
280
-
281
-
282
-
283
-
284
-
285
-
286
-
287
-
288
-
289
-
290
-
291
-
292
-
293
-
294
-
295
-
296
-
297
-
298
-
299
-
300
-
301
-
302
-
303
-
304
-
305
-
306
-
307
-
308
-
309
-
310
-
311
-
312
-
313
-
314
-
315
-
316
-
317
-
318
-
319
-
320
-
321
-
322
-
323
-
324
-
325
-
326
-
327
-
328
-
329
-
330
-
331
-
332
-
333
-
334
-
335
-
336
-
337
-
338
-
339
-
340
-
341
-
342
-
343
-
344
-
345
-
346
-
347
-
348
-
349
-
350
-
351
-
352
-
353
-
354
-
355
-
356
-
357
-
358
-
359
-
360
-
361
-
362
-
363
-
364
-
365
-
366
-
367
-
368
-
369
-
370
-
371
-
372
-
373
-
374
-
375
-
376
-
377
-
378
-
379
-
380
-
381
-
382
-
383
-
384
-
385
-
386
-
387
-
388
-
389
-
390
-
391
-
392
-
393
-
394
-
395
-
396
-
397
-
398
-
399
-
400
-
401
-
402
-
403
-
404
-
405
-
406
-
407
-
408
-
409
-
410
-
411
-
412
-
413
-
414
-
415
-
416
-
417
-
418
-
419
-
420
-
421
-
422
-
423
-
424
-
425
-
426
-
427
-
428
-
429
-
430
-
431
-
432
-
433
-
434
-
435
-
436
-
437
-
438
-
439
-
440
-
441
-
442
-
443
-
444
-
445
-
446
-
447
-
448
-
449
-
450
-
451
-
452
-
453
-
454
-
455
-
456
-
457
-
458
-
459
-
460
-
461
-
462
-
463
-
464
-
465
-
466
-
467
-
468
-
469
-
470
-
471
-
472
-
473
-
474
-
475
-
476
-
477
-
478
-
479
-
480
-
481
-
482
-
483
-
484
-
485
-
486
-
487
-
488
-
489
-
490
-
491
-
492
-
493
-
494
-
495
-
496
-
497
-
498
-
499
-
500
-
501
-
502
-
503
-
504
-
505
-
506
-
507
-
508
-
509
-
510
-
511
-
512
-
513
-
514
-
515
-
516
-
517
-
518
-
519
-
520
-
521
-
522
-
523
-
524
-
525
-
526
-
527
-
528
-
529
-
530
-
531
-
532
-
533
-
534
-
535
-
536
-
537
-
538
-
539
-
540
-
541
-
542
-
543
-
544
-
545
-
546
-
547
-
548
-
549
-
550
-
551
-
552
-
553
-
554
-
555
-
556
-
557
-
558
-
559
-
560
-
561
-
562
-
563
-
564
-
565
-
566
-
567
-
568
-
569
-
570
-
571
-
572
-
573
-
574
-
575
-
576
-
577
-
578
-
579
-
580
-
581
-
582
-
583
-
584
-
585
-
586
-
587
-
588
-
589
-
590
-
591
-
592
-
593
-
594
-
595
-
596
-
597
-
598
-
599
-
600
-
601
-
602
-
603
-
604
-
605
-
606
-
607
-
608
-
609
-
610
-
611
-
612
-
613
-
614
-
615
-
616
-
617
-
618
-
619
-
620
-
621
-
622
-
623
-
624
-
625
-
626
-
627
-
628
-
629
-
630
-
631
-
632
-
633
-
634
-
635
-
636
-
637
-
638
-
639
-
640
-
641
-
642
-
643
-
644
-
645
-
646
-
647
-
648
-
649
-
650
-
651
-
652
-
653
-
654
-
655
-
656
-
657
-
658
-
659
-
660
-
661
-
662
-
663
-
664
-
665
-
666
-
667
-
668
-
669
-
670
-
671
-
672
-
673
-
674
-
675
-
676
-
677
-
678
-
679
-
680
-
681
-
682
-
683
-
684
-
685
-
686
-
687
-
688
-
689
-
690
-
691
-
692
-
693
-
694
-
695
-
696
-
697
-
698
-
699
-
700
-
701
 |
 |
Aperture 2
User Manual