Asus ASUSPRO ADVANCED B551LG Users Manual - Page 129
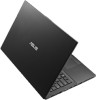
slide the drive towards the drive connector., Carefully place the new HDD or SSD into the module bay
 |
View all Asus ASUSPRO ADVANCED B551LG manuals
Add to My Manuals
Save this manual to your list of manuals |
Page 129 highlights
7. Carefully slide the old HDD or SSD from the drive connector, then remove it from the module bay. old HDD or SSD drive connector 8. Carefully place the new HDD or SSD into the module bay, then slide the drive towards the drive connector. new HDD or SSD drive connector Notebook PC E-Manual 129
-
 1
1 -
2
-
3
-
4
-
5
-
6
-
7
-
8
-
9
-
10
-
11
-
12
-
13
-
14
-
15
-
16
-
17
-
18
-
19
-
20
-
21
-
22
-
23
-
24
-
25
-
26
-
27
-
28
-
29
-
30
-
31
-
32
-
33
-
34
-
35
-
36
-
37
-
38
-
39
-
40
-
41
-
42
-
43
-
44
-
45
-
46
-
47
-
48
-
49
-
50
-
51
-
52
-
53
-
54
-
55
-
56
-
57
-
58
-
59
-
60
-
61
-
62
-
63
-
64
-
65
-
66
-
67
-
68
-
69
-
70
-
71
-
72
-
73
-
74
-
75
-
76
-
77
-
78
-
79
-
80
-
81
-
82
-
83
-
84
-
85
-
86
-
87
-
88
-
89
-
90
-
91
-
92
-
93
-
94
-
95
-
96
-
97
-
98
-
99
-
100
-
101
-
102
-
103
-
104
-
105
-
106
-
107
-
108
-
109
-
110
-
111
-
112
-
113
-
114
-
115
-
116
-
117
-
118
-
119
-
120
-
121
-
122
-
123
-
 124
124 -
 125
125 -
 126
126 -
 127
127 -
 128
128 -
 129
129 -
 130
130 -
 131
131 -
 132
132 -
 133
133 -
 134
134 -
135
-
136
-
137
-
138
-
139
-
140
-
141
-
142
-
143
-
144
-
145
-
146
-
147
-
148
-
149
-
150
-
151
-
152
-
153
-
154
-
155
-
156
-
157
-
158
-
159
-
160
 |
 |

Notebook PC E-Manual
1±
µ.
Carefully slide the old HDD or SSD from the drive connector, then
remove it from the module bay.
old HDD or SSD
8.
Carefully place the new HDD or SSD into the module bay, then
slide the drive towards the drive connector.
drive connector
new HDD or SSD
drive connector