Asus C623AQR User Guide - Page 16
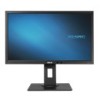
C422A/C423A/C424A, C620A/C622A/C623A/C624A/C624B, the hinge.
 |
View all Asus C623AQR manuals
Add to My Manuals
Save this manual to your list of manuals |
Page 16 highlights
C422A/C423A/C424A 1. Have the front of the monitor face down on a table. 2. Remove the rubbers in the four screw holes. (Figure 1) 3. Remove the base (Figure 2). 4. Use a screwdriver to remove the screw on the hinge (Figure 3), then remove the hinge. 1 2 (Figure 1) 1 2 (Figure 2) (Figure 3) C620A/C622A/C623A/C624A/C624B 5. 1. Have the front of the monitor face down on a table. 6. 2. Press the release button, and then detach the arm/base from the monitor (Figure 2). 2 (Figure 1) 7. 1 (Figure 2) 2-2 Chapter 2: Setup
-
 1
1 -
2
-
3
-
4
-
5
-
6
-
7
-
8
-
9
-
10
-
 11
11 -
 12
12 -
 13
13 -
 14
14 -
 15
15 -
 16
16 -
 17
17 -
 18
18 -
 19
19 -
 20
20 -
 21
21 -
22
-
23
-
24
-
25
-
26
-
27
-
28
-
29
-
30
-
31
-
32
-
33
-
34
-
35
 |
 |

2-2
Chapter 2: Setup
C422A/C423A/C424A
1.
Have the front of the monitor face down on a table.
2.
Remove the rubbers in the four screw holes. (Figure 1)
3.
Remove the base (Figure 2).
4.
Use a screwdriver to remove the screw on the hinge (Figure 3), then remove
the hinge.
1
2
(Figure 1)
(Figure 2)
1
2
(Figure 3)
C620A/C622A/C623A/C624A/C624B
5.
1.
Have the front of the monitor face down on a table.
6.
2.
Press the release button, and then detach the arm/base from the monitor
(Figure 2).
7.
2
1
(Figure 1)
(Figure 2)