Asus HHHadas Install Manual
Asus HHHadas Manual
 |
View all Asus HHHadas manuals
Add to My Manuals
Save this manual to your list of manuals |
Asus HHHadas manual content summary:
- Asus HHHadas | Install Manual - Page 1
DVD-E616P1 DVD-ROM Drive User Manual 1 - Asus HHHadas | Install Manual - Page 2
manual revision number. Manual updates are represented by the third digit in the manual revision number. SPECIFICATIONS AND INFORMATION CONTAINED IN THIS MANUAL infringe. Product Name: Manual Version: Release Date: ASUS DVD-E616P1 First Edition V1 E1305 June 2003 2 ASUS DVD-E616P1 User Manual - Asus HHHadas | Install Manual - Page 3
the Drive 17 Using the Emergency Eject Pinhole 18 Using Compact Discs 19 Cleaning a Disc 19 Handling a Disc 19 Technical Information 20 Environmental Specifications 20 Electrical and Audio Specifications 20 DVD Region Codes 21 Quick Installation Guide 23 ASUS DVD-E616P1 User Manual 3 - Asus HHHadas | Install Manual - Page 4
radio frequency energy and, if not installed and used in accordance with manufacturer's instructions, may cause harmful interference to radio communications. However, there is no guarantee that . This class B digital apparatus complies with Canadian ICES-003. 4 ASUS DVD-E616P1 User Manual - Asus HHHadas | Install Manual - Page 5
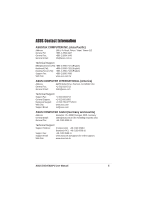
requests only) General Fax: +49-2102-9599-31 Technical Support Support Hotlines: (Components) +49-2102-9599-0 (Notebook PC) +49-2102-9599-10 Support Fax: +49-2102-9599-11 Support Email: www.asuscom.de/support (for online support) Web Site: www.asuscom.de ASUS DVD-E616P1 User Manual 5 - Asus HHHadas | Install Manual - Page 6
Safety Information Observe the following precautions before installing and using the ASUS DVD-E616P1 Installation Notices Do not place this device in an unstable position, or on disassemble or repair the drive. Opening the drive may result to laser radiation exposure. 6 ASUS DVD-E616P1 User Manual - Asus HHHadas | Install Manual - Page 7
temperature. Conventions used in this guide To make sure that you perform certain tasks properly, take note of the following symbols used throughout this manual. WARNING/DANGER: Information to prevent . NOTE: Tips and additional information to aid in completing a task. ASUS DVD-E616P1 User Manual 7 - Asus HHHadas | Install Manual - Page 8
items is damaged or missing, contact your retailer immediately. • ASUS DVD-E616P1 DVD-ROM Drive • Audio cable • Mounting screw package • DVD-ROM driver disc • User Manual (English) with 12-Language Quick Installation Guide • DVD playback software CD The above items are available in retail boxes only - Asus HHHadas | Install Manual - Page 9
for buying the ASUS DVD-E616P1 Drive! To ensure proper installation and use of this device, read the instructions and other important information contained in this manual. Product Introduction Specifications The DVD-E616P1 has the following specifications: • Sustained Transfer Rate DVD 16x max - Asus HHHadas | Install Manual - Page 10
or software problems, insert a pin or a paper clip into this hole to manually eject the DVD with the label side up. Press the Eject Button or push the front part of the tray to load the tray back in place. 4. Eject Button Press this button to load or unload a disc. 10 ASUS DVD-E616P1 User Manual - Asus HHHadas | Install Manual - Page 11
Configuration Jumper These pins allow you to select either Master, Slave, or Cable Select mode for the DVD-ROM device. (Refer to page 12 for jumber settings.) Pin Name Switch Status Description 1 MA ON for a 4-pin power cable from the system power supply. ASUS DVD-E616P1 User Manual 11 - Asus HHHadas | Install Manual - Page 12
Slave. PIN 1 SL Cable Select Mode RESERVED PIN 1 Cover the two pins labeled CS (see illustration) if CS your computer supports a Cable Select (CSEL) signal. You need an exclusive interface cable for this setting. Refer to your computer manual for details. 12 ASUS DVD-E616P1 User Manual - Asus HHHadas | Install Manual - Page 13
install the drive into the computer chassis. Refer to your computer manual for specific instructions on opening the chassis and installing drives. 1. Remove the cover of an empty 5.25-inch external drive bay. 2. Carefully insert the DVD-ROM drive into the bay and push it inward until it is flushed - Asus HHHadas | Install Manual - Page 14
to connect the drive cables before securing the drive into the chassis. For cable connections, proceed to the following section, "Connecting the Drive Cables." 14 ASUS DVD-E616P1 User Manual - Asus HHHadas | Install Manual - Page 15
NOT apply too much force when fitting the cable plugs. Power Cable 4-pin Audio Cable IDE Cable Replace the computer cover according to your computer manual. ASUS DVD-E616P1 User Manual 15 - Asus HHHadas | Install Manual - Page 16
DVD-ROM Drive Basics Placing a Disc into the Drive 1. Press the eject button on the front of the drive to eject the tray. 2. When the drive tray ejects out of the drive, place the disc on the tray with the label (printed) side up. 16 ASUS DVD-E616P1 User Manual - Asus HHHadas | Install Manual - Page 17
from the tray. 3. Press the drive eject button or lightly push the center of the drive tray to load the tray back into the drive. ASUS DVD-E616P1 User Manual 17 - Asus HHHadas | Install Manual - Page 18
supply of power to the computer is cut due to electrical power outage • the drive malfunctions. Use the manual method only as a last resort when the eject button does not work. Make sure that you have turned has dislodged the tray to avoid breaking the tray panel. 18 ASUS DVD-E616P1 User Manual - Asus HHHadas | Install Manual - Page 19
. These instructions will help you avoid damaging the discs and your DVD-ROM drive. Cleaning a Disc Spray the disc with compressed air for about five seconds to get rid of the dust on a disc. Handling a Disc Hold a disc by the edges. Do not touch the disc surface. ASUS DVD-E616P1 User Manual 19 - Asus HHHadas | Install Manual - Page 20
MTBF: 100,000 power on hours Mean Time To Repair (MTTR) 30 minutes Electrical and Audio Specifications Power Source I/O Terminal Audio Voltage Tolerance +5V DC +/- 5% +12V DC +/- 10% Power . (at 1 kHz) S/N ratio 70 dB Output: Line Out 0.7 V rms (typical) 20 ASUS DVD-E616P1 User Manual - Asus HHHadas | Install Manual - Page 21
DVD standard. However, Region code on DVD discs are optional. DVD discs with no specified region code can be played on all DVD players. The world is set up into regions according to DVD Islands 5 (former Russia),Eastern Europe, India, Africa, North Korea 6 China ASUS DVD-E616P1 User Manual 21 - Asus HHHadas | Install Manual - Page 22
22 ASUS DVD-E616P1 User Manual - Asus HHHadas | Install Manual - Page 23
DVD-E616P1 DVD-ROM Drive Quick Installation Guide In 12 Languages 23 - Asus HHHadas | Install Manual - Page 24
Guide the DVD-ROM drive jumpers DVD-ROM drive. 7. Connect one end of the IDE ribbon cable to the IDE connector at the back of the DVD-ROM of the DVD-ROM drive. Connect DVD-ROM drive into the bay and secure it with four screws. 10. Replace the computer cover. 11. Turn on your computer. Software - Asus HHHadas | Install Manual - Page 25
Français Guide d'Installation Rapide Installation Matérielle 1. Eteignez votre ordinateur et re. 8. Connectez une extrémité du câble audio 4-broches au connecteur de sortie audio du lecteur de DVD-ROM. Connectez l'autre extrémité du câble au connecteur audio de la carte son installée, ou à celui de - Asus HHHadas | Install Manual - Page 26
das Netzteilgehäuse, bevor Sie das Gerät in die Hand nehmen. 3. Entfernen Sie die Abdeckung des Computers. 4. Konfigurieren Sie vor dem Einbau des DVD-ROM-Laufwerks ins Computergehäuse den Jumper, um das Laufwerk als Master oder Slave zu verwenden. Stecken Sie die Jumpersteckbrücke über die Pole - Asus HHHadas | Install Manual - Page 27
Far scorrere l'unità DVD-ROM nella nicchia e fissarla con le quattro viti. 10. Rimettere la copertura del computer. 11. Accendere il computer. Istallazione del software Windows® 98SE/2000/ME/XP rileva automaticamente le impostazioni attuali dell'unità ed installa i driver appropriati. 27 Italiano - Asus HHHadas | Install Manual - Page 28
situado en la placa base, si estuviera disponible. 9. Deslice la unidad DVD-ROM dentro de la bahía y fíjela con cuatro tornillos. 10. Vuelva a colocar la tapa del equipo. 11. Encienda el equipo. Instalación del software Windows® 98SE/2000/ME/XP detecta automáticamente la configuración actual para - Asus HHHadas | Install Manual - Page 29
29 - Asus HHHadas | Install Manual - Page 30
30 - Asus HHHadas | Install Manual - Page 31
® 31 - Asus HHHadas | Install Manual - Page 32
, of op de audioaansluiting van het moederbord. 9. Schuif de dvd-lezer op zijn plaats en zet hem met vier schroeven vast. 10. Sluit de behuizing van de computer 11. Zet de computer aan. Software-installatie Windows® 98Se/2000/Me/XP zal de dvd-lezer automatisch herkennen en de juiste stuurprogramma - Asus HHHadas | Install Manual - Page 33
усский DVD 1 2 3 4 DVD master или slave 13. 5 DVD 5,25 6 7 IDE IDE 1 IDE IDE 8 9 DVD 10 11 Windows® 98SE/2000/ME/XP 33 - Asus HHHadas | Install Manual - Page 34
öremål som t ex strömkällans hölje, innan du hanterar enheten för att inte skada den med statisk elektricitet. 3. Ta bort datorns kåpa. 4. Konfigurera DVD-ROM-enhetens byglar för att försätta enheten i master(primärt) eller slavläge (sekundärt ) innan den monteras i datorn. Använd bygelblock för att - Asus HHHadas | Install Manual - Page 35
ndaki IDE konnektörüne baðlayýn. IDE kablosu diðer ucunu anakart üzerindeki IDE konnektörüne baðlayýn.. 8. 4-pin ses (audio) kablosunun bir ucunu DVD-ROM sürücünün ses çýkýþ konnektörüne baðlayýn. Diðer ucunu, varsa anakart üzerindeki ses konnektörüne veya kurulu bir ses kartýnýn ses konnektörüne ba - Asus HHHadas | Install Manual - Page 36
-
 1
1 -
 2
2 -
 3
3 -
 4
4 -
 5
5 -
 6
6 -
 7
7 -
8
-
9
-
10
-
11
-
12
-
13
-
14
-
15
-
16
-
17
-
18
-
19
-
20
-
21
-
22
-
23
-
24
-
25
-
26
-
27
-
28
-
29
-
30
-
31
-
32
-
33
-
34
-
35
-
36
 |
 |

1
DVD-E616P1
DVD-ROM Drive
User Manual