Asus Mini PC PN60 PN40 Users Manual English - Page 31
Replacing the bottom cover
 |
View all Asus Mini PC PN60 manuals
Add to My Manuals
Save this manual to your list of manuals |
Page 31 highlights
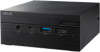
3. Remove the four (4) screws from the bottom cover (A), then push the bottom cover towards the left to remove the bottom cover (B). Replacing the bottom cover 1. Push the bottom cover from the left side towards the right side of the Mini PC (A), then secure it using the four (4) screws removed previously (B). PN Series 31
-
 1
1 -
2
-
3
-
4
-
5
-
6
-
7
-
8
-
9
-
10
-
11
-
12
-
13
-
14
-
15
-
16
-
17
-
18
-
19
-
20
-
21
-
22
-
23
-
24
-
25
-
 26
26 -
 27
27 -
 28
28 -
 29
29 -
 30
30 -
 31
31 -
 32
32 -
 33
33 -
 34
34 -
 35
35 -
 36
36 -
37
-
38
-
39
-
40
-
41
-
42
-
43
-
44
-
45
-
46
 |
 |

PN Series
31
3.
Remove the four (4) screws from the bottom cover (A), then push the
bottom cover towards the left to remove the bottom cover (B).
Replacing the bottom cover
1.
Push the bottom cover from the left side towards the right side of
the Mini PC (A), then secure it using the four (4) screws removed
previously (B).