Asus P5QLD PRO P5QLD PRO user's manual - Page 135
The First Screen, The Express Gate Environment
 |
View all Asus P5QLD PRO manuals
Add to My Manuals
Save this manual to your list of manuals |
Page 135 highlights
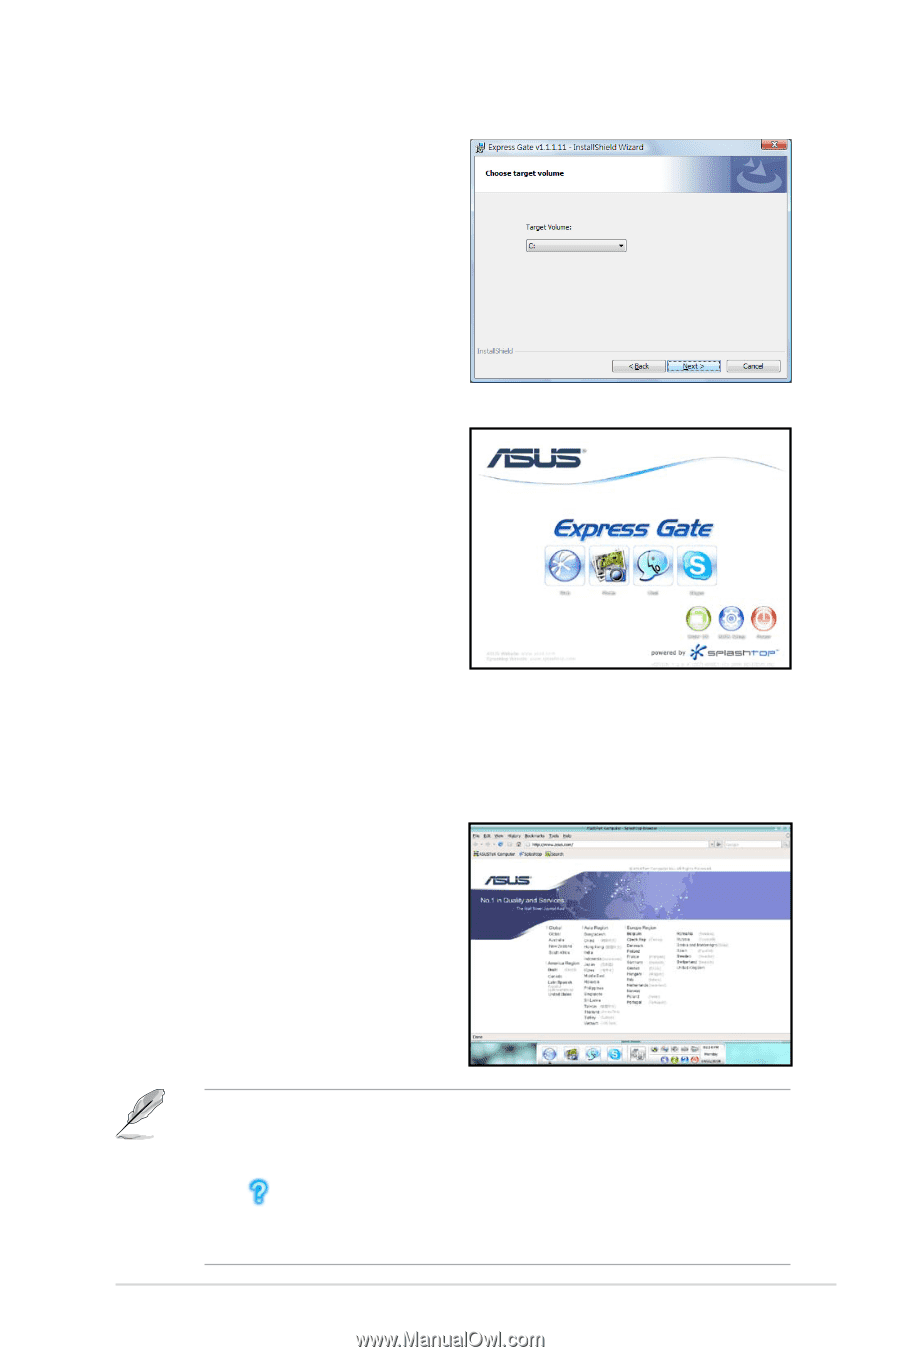
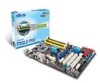
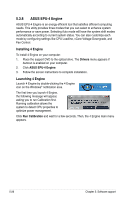
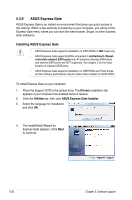
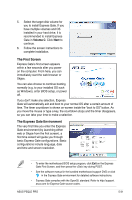
5. Select the target disk volume for you to install Express Gate. If you have multiple volumes and OS installed in your hard drive, it is recommended to install Express Gate in Volume C. Click Next to continue. 6. Follow the screen instructions to complete installation. The First Screen Express Gate's first screen appears within a few seconds after you power on the computer. From here, you can immediately start the web browser or Skype. You can also choose to continue booting normally (e.g. to your installed OS such as Windows), enter BIOS setup, or power off. If you don't make any selection, Express Gate will automatically exit and boot to your normal OS after a certain amount of time. The timer countdown is shown on-screen inside the "boot to OS" button. As you move the mouse or type a key, the countdown stops and the timer disappears, so you can take your time to make a selection. The Express Gate Environment The very first time you enter the Express Gate environment (by launching either web or Skype from the first screen), a first time wizard will guide you through basic Express Gate configurations. Basic configurations include language, date and time and screen resolution. • To enter the motherboard BIOS setup program, click Exit on the Express Gate First Screen, and then press the key during POST. • See the software manual in the bundled motherboard support DVD or click in the Express Gate environment for detailed software instructions. • Express Gate complies with the OpenGL standard. Refer to http://support. asus.com for Express Gate source codes. ASUS P5QLD PRO 5-31
-
 1
1 -
2
-
3
-
4
-
5
-
6
-
7
-
8
-
9
-
10
-
11
-
12
-
13
-
14
-
15
-
16
-
17
-
18
-
19
-
20
-
21
-
22
-
23
-
24
-
25
-
26
-
27
-
28
-
29
-
30
-
31
-
32
-
33
-
34
-
35
-
36
-
37
-
38
-
39
-
40
-
41
-
42
-
43
-
44
-
45
-
46
-
47
-
48
-
49
-
50
-
51
-
52
-
53
-
54
-
55
-
56
-
57
-
58
-
59
-
60
-
61
-
62
-
63
-
64
-
65
-
66
-
67
-
68
-
69
-
70
-
71
-
72
-
73
-
74
-
75
-
76
-
77
-
78
-
79
-
80
-
81
-
82
-
83
-
84
-
85
-
86
-
87
-
88
-
89
-
90
-
91
-
92
-
93
-
94
-
95
-
96
-
97
-
98
-
99
-
100
-
101
-
102
-
103
-
104
-
105
-
106
-
107
-
108
-
109
-
110
-
111
-
112
-
113
-
114
-
115
-
116
-
117
-
118
-
119
-
120
-
121
-
122
-
123
-
124
-
125
-
126
-
127
-
128
-
129
-
 130
130 -
 131
131 -
 132
132 -
 133
133 -
 134
134 -
 135
135 -
 136
136 -
 137
137 -
 138
138 -
 139
139 -
 140
140 -
141
-
142
-
143
-
144
-
145
-
146
-
147
-
148
 |
 |