Asus S1A S1A Notebook English Software installation Manual
Asus S1A Manual
 |
View all Asus S1A manuals
Add to My Manuals
Save this manual to your list of manuals |
Asus S1A manual content summary:
- Asus S1A | S1A Notebook English Software installation Manual - Page 1
Notebook PC Driver/Utility Setup and Reference Product Name: Notebook PC Support CD Manual Revision: 1.00 E892 Release Date: Dec 2001 - Asus S1A | S1A Notebook English Software installation Manual - Page 2
Table of Contents Support CD for Windows ME and XP 4 Autorun Screens for Windows ME and XP 4 Drivers for Windows ME and XP 5 Windows ME Operating System 8 Intel INF Update ...8 ATKACPI Driver ...9 VGA Driver ...10 Audio Driver ...12 DirectX 8.0 ...13 LAN Driver ...14 Modem Driver ...15 TouchPad - Asus S1A | S1A Notebook English Software installation Manual - Page 3
XP Operating System 33 Intel INF Update ...33 ATKACPI Driver ...34 VGA Driver ...35 Audio Driver ...37 LAN Driver ...38 TouchPad ...39 Fast IR Driver ...41 Hotkey Utility (Under ATKACPI Utility 44 Windows Flash Utility (Under ATKACPI Utility 45 ASUS PC Probe (Under ATKACPI Utility 46 Check Mail - Asus S1A | S1A Notebook English Software installation Manual - Page 4
be preloaded with an operating system. The support CD included with this Notebook PC provides all the necessary drivers and utilities in order for you to use your Notebook PC with Microsoft® Windows® 98/ME/XP (referred to as "Windows" in this User's Manual - Asus S1A | S1A Notebook English Software installation Manual - Page 5
are descriptions of each autorun menu item. Due to ongoing improvements in the support CD, there may be some differences between this User's Manual and your support CD. The names in quotations are the actual driver names displayed in the System Properties of MS Windows. Windows cannot contain all - Asus S1A | S1A Notebook English Software installation Manual - Page 6
Ethernet supports both 10 Base-T or 100 Base-TX networks at half or full duplex. Modem Driver (required-WinME) "HSP56" Driver Installs the necessary driver Notebook PC to protect your investment. As software become more and more a part of our daily lives, measures have to be taken to protect them. - Asus S1A | S1A Notebook English Software installation Manual - Page 7
run into problems and require technical assistance. Exit Closes the support CD autorun PC's BIOS without having to restart your Notebook PC in DOS mode. ASUS PC drivers when you want to remove the AiBox or eject a module device. Note: Ejecting a module device requires that you first stop the service - Asus S1A | S1A Notebook English Software installation Manual - Page 8
INF Update Installing the Intel INF Update for Windows ME Insert the support CD and click Intel INF Update on the autorun menu to start restart Windows later, it will ask for location of certain drivers. Choose Automatic and restart your computer when instructed to do so. You may not be able to see - Asus S1A | S1A Notebook English Software installation Manual - Page 9
ATKACPI Driver ATKACPI Driver Installing the ATKACPI Driver for Windows ME Insert the support CD and click ATKACPI Driver on the autorun menu to start the installation wizard. (1) Click Yes to begin installation. (2) Installation has finished. Click No so that you can install other items. 9 - Asus S1A | S1A Notebook English Software installation Manual - Page 10
ME After installing Windows, your screen area will appear smaller than the available display and with poor resolution. Insert the support CD and click VGA Driver on the autorun menu to start the installation wizard. (1) Click Next after reading the welcome message. (2) Click Yes after reading - Asus S1A | S1A Notebook English Software installation Manual - Page 11
for Windows ME (Cont') Using Display Properties VGA Driver (1) Right-click on the Windows desktop and click Properties. (2) Click the Settings tab (3) Set Colors to True Color and Screen area to 1024 by 768 - Asus S1A | S1A Notebook English Software installation Manual - Page 12
for Windows ME Insert the support CD and click Audio Driver on the autorun menu to start the installation wizard. Audio Driver (1) Click Next to install the driver. (2) Installation has finished. Select No and click Finish so that you can install other items and restart later. (3) After you - Asus S1A | S1A Notebook English Software installation Manual - Page 13
DirectX 8.0 Installing DirectX 8.0 for Windows ME Insert the support CD and click DirectX 8.0 on the autorun menu to start the installation wizard. DirectX 8.0 (1) Click Yes to continue and install DirectX. (2) Click Yes after reading - Asus S1A | S1A Notebook English Software installation Manual - Page 14
LAN Driver Installing the LAN Driver for Windows ME Insert the support CD and click LAN Driver on the autorun menu to start the installation wizard. (1) Click Yes to begin installing drivers. (2) Setup has finished. Click No so that you can install other items and restart later. LAN Driver 14 - Asus S1A | S1A Notebook English Software installation Manual - Page 15
Modem Driver Modem Driver Installing the Modem Driver for Windows ME Insert the support CD and follow the steps below to install the modem driver. There is no installation wizard for this process. (1) Right-click "My Computer" and select Properties. (2) Double-click PCI Communication Device. (3) - Asus S1A | S1A Notebook English Software installation Manual - Page 16
Modem Driver Modem Driver Installing the Modem Driver for Windows ME (Cont') (5) Select The updated driver and click Next. (6) Verify that the location of the driver is from the support CD. Click Next to install. (7) Installation is complete. Click Finish to exit. 16 - Asus S1A | S1A Notebook English Software installation Manual - Page 17
TouchPad Installing the TouchPad Driver for Windows ME Insert the support CD and click TouchPad on the autorun menu to start the installation wizard. (1) Select a language and click OK. TouchPad (2) Click Next after reading the Welcome - Asus S1A | S1A Notebook English Software installation Manual - Page 18
Fast IR Driver Fast IR Driver Setting the IR port for Windows ME Insert the support CD and click Fast IR Driver on the autorun menu to make the setting as shown by the dialog box. (1) Setting is complete. Click No so that you can install other drivers and retart your computer later. 18 - Asus S1A | S1A Notebook English Software installation Manual - Page 19
SpeedStep SpeedStep Installing SpeedStep for Windows ME Insert the support CD and click SPEEDSTEP on the autorun menu to start the installation wizard. (1) Click Next after reading the welcome message. (2) Click Yes after reading the - Asus S1A | S1A Notebook English Software installation Manual - Page 20
PC-cillin 2000 Installing PC-cillin 2000 for Windows ME Insert the support CD and click PC-cillin 2000 on the autorun menu to start the installation wizard. PC-cillin 2000 (1) Click Next to begin the installation wizard. (2) - Asus S1A | S1A Notebook English Software installation Manual - Page 21
PC-cillin 2000 Installing the PC-cillin 2000 for Windows ME (Cont') (3) Wait while your setup checks your system for viruses based on the included pattern file. (This is usually older than what is available on the Internet at "http://www.trend.com". You should rescan your hard drives after updating - Asus S1A | S1A Notebook English Software installation Manual - Page 22
PC-cillin 2000 Installing the PC-cillin 2000 for Windows ME (Cont') PC-cillin 2000 (8) Make proxy settings if necessary and click OK to continue. (9) Check the installation settings and click Next to continue. (+) The next step will require a floppy disk drive in order to create rescue disks. If - Asus S1A | S1A Notebook English Software installation Manual - Page 23
PC-cillin 2000 Installing the PC-cillin 2000 for Windows ME (Cont') PC-cillin 2000 (11)Select a target floppy disk drive and click Next. (13)You will be asked to repeat this step four times if you chose the "Complete Rescue Disk Set". (12)You will be asked to format - Asus S1A | S1A Notebook English Software installation Manual - Page 24
patient while your computer connects to the Internet and download necessary files. (19)You can answer No and Cancel so that you can install other drivers then restart your computer later. 24 - Asus S1A | S1A Notebook English Software installation Manual - Page 25
Hotkey Utility (Under ATKACPI Utility) Installing the Hotkey Utility for Windows ME Insert the support CD and click Hotkey Utility on the autorun menu to start the installation wizard. (1) Click Next after reading the welcome message. (2) Choose another destination folder - Asus S1A | S1A Notebook English Software installation Manual - Page 26
Flash Utility Windows Flash Utility (Under ATKACPI Utility) Installing the Windows Flash Utility for Windows ME Insert the support CD and click Windows Flash Utility on the autorun menu to start the installation wizard. (1) Click Next on the "Welcome" screen. (2) Choose another destination folder - Asus S1A | S1A Notebook English Software installation Manual - Page 27
ME Insert the support CD and click PC Probe on the autorun menu to start the installation wizard. NOTE: In order for PC Probe to run, Intel's LDCM and other hardware monitoring software cannot be installed. You must first uninstall other such software before installing PC Probe. ASUS PC Probe - Asus S1A | S1A Notebook English Software installation Manual - Page 28
Check Mail Utility (Under ATKACPI Utility) Installing Check Mail for Windows ME Insert the support CD and click Check Mail Utility on the autorun menu to start the installation wizard. Check Mail Utility (1) Click Next after reading the welcome message. (2) - Asus S1A | S1A Notebook English Software installation Manual - Page 29
IDESwap Utility (Under ATKACPI Utility) Installing IDE Swap for Windows ME Insert the support CD and click IDESwap Utility on the autorun menu to start the installation wizard. IDE Swap Utility (1) Click Next after reading the welcome message. (2) Choose - Asus S1A | S1A Notebook English Software installation Manual - Page 30
Power Gear Utility (Under ATKACPI Utility) Installing Power Gear for Windows ME Insert the support CD and click Power Gear Utility on the autorun menu to start the installation wizard. Power Gear Utility (1) Click Next after reading the welcome message. (2) - Asus S1A | S1A Notebook English Software installation Manual - Page 31
Screen Saver Utility Installing the Screen Saver Utility for Windows ME Insert the support CD and click Screen Saver Utility on the autorun menu to start the installation wizard. (1) Enter a different installation path or click Install to use the - Asus S1A | S1A Notebook English Software installation Manual - Page 32
32 Screen Saver - Asus S1A | S1A Notebook English Software installation Manual - Page 33
INF Update Windows XP Operating System Intel INF Update Installing the Intel INF Update for Windows XP Insert the support CD and click Intel INF Update on the autorun menu to start the installation wizard. (1) Click Next after reading the welcome message. (2) Click Yes after - Asus S1A | S1A Notebook English Software installation Manual - Page 34
ATKACPI ATKACPI Driver Installing the ATKACPI Driver for Windows XP Insert the support CD and click ATKACPI Driver on the autorun menu to start the installation wizard. (1) Click OK to install the driver. (2) Installation has finished. Select OK to restart your computer. 34 - Asus S1A | S1A Notebook English Software installation Manual - Page 35
appear smaller than the available display and with poor resolution. Insert the support CD and click VGA Driver on the autorun menu to start the installation wizard. VGA Driver (1) Click OK to install the driver. (2) Click Yes after reading the license agreement. (3) Click Continue Anyway because - Asus S1A | S1A Notebook English Software installation Manual - Page 36
for Windows XP (Cont') VGA Driver (5) Setup has finished. Click OK to restart your computer. (6) After restart, set the "Screen resolution" to 1024 by 768 pixels and "Color quality" to Highest. - Asus S1A | S1A Notebook English Software installation Manual - Page 37
Audio Driver Installing the Audio Driver for Windows XP Insert the support CD and click Audio Driver on the autorun menu to start the installation wizard. (1) Click Next to install the driver. (2) Installation has finished. Click Finish to exit the setup wizard. Audio Driver 37 - Asus S1A | S1A Notebook English Software installation Manual - Page 38
LAN Driver Installing the LAN Driver for Windows XP Insert the support CD and click LAN Driver on the autorun menu to start the installation wizard. (1) Click OK to begin installing drivers. (2) Setup has finished. Click OK to restart your computer. LAN Driver 38 - Asus S1A | S1A Notebook English Software installation Manual - Page 39
TouchPad Installing the TouchPad Driver for Windows XP Insert the support CD and click TouchPad on the autorun menu to start the installation wizard. (1) Choose a language and click OK. (2) Click Next after reading the Welcome message. - Asus S1A | S1A Notebook English Software installation Manual - Page 40
TouchPad Installing the TouchPad Driver for Windows XP (Cont') (5) Installation has finished. Select No and click Finish so that you can install other items and restart later. (6) After you restart, - Asus S1A | S1A Notebook English Software installation Manual - Page 41
IR Setting Fast IR Driver Setting the IR port for Windows XP Insert the support CD and click Fast IR Driver on the autorun menu to make the setting as shown by the dialog box. (1) Setup is complete. Click No so that you can install other drivers and restart your computer later. 41 - Asus S1A | S1A Notebook English Software installation Manual - Page 42
PC-cillin 2000 Installing PC-cillin 2000 for Windows XP Insert the support CD and click PC-cillin 2000 on the autorun menu to start the installation wizard. PC-cilllin (1) Click Next after reading the welcome message. (2) Click - Asus S1A | S1A Notebook English Software installation Manual - Page 43
PC-cillin 2000 Installing PC-cillin 2000 for Windows XP (Cont') PC-cilllin (5) Change the destination folder or click Next to install to the specified directory. (*) If you click "Change...", enter a complete path, not just a folder name. Click OK when done. (6) Click Install now or click Back - Asus S1A | S1A Notebook English Software installation Manual - Page 44
Hotkey Utility (Under ATKACPI Utility) Installing the Hotkey Utility for Windows XP Insert the support CD and click Hotkey Utility on the autorun menu to start the installation wizard. Hotkey Utility (1) Click Next after reading the welcome message. (2) Choose another - Asus S1A | S1A Notebook English Software installation Manual - Page 45
Windows Flash Utility (Under ATKACPI Utility) Installing the Windows Flash Utility for Windows XP Insert the support CD and click Windows Flash Utility on the autorun menu to start the installation wizard. Flash Utility (1) Click Next on the "Welcome" screen. (2) Choose another - Asus S1A | S1A Notebook English Software installation Manual - Page 46
ASUS PC Probe (Under ATKACPI Utility) Installing PC Probe for Windows XP Insert the support CD and click PC Probe on the autorun menu to start the installation wizard. NOTE: In order for PC Probe to run, Intel's LDCM and - Asus S1A | S1A Notebook English Software installation Manual - Page 47
Check Mail Utility (Under ATKACPI Utility) Installing Check Mail for Windows XP Insert the support CD and click Check Mail Utility on the autorun menu to start the installation wizard. (1) Click Next after reading the welcome message. (2) Choose another destination - Asus S1A | S1A Notebook English Software installation Manual - Page 48
Power Gear Power Gear Utility (Under ATKACPI Utility) Installing Power Gear for Windows XP Insert the support CD and click Power Gear Utility on the autorun menu to start the installation wizard. (1) Click Next after reading the welcome message. (2) Choose another destination - Asus S1A | S1A Notebook English Software installation Manual - Page 49
Screen Saver Screen Saver Utility Installing the Screen Saver Utility for Windows XP Insert the support CD and click Screen Saver Utility on the autorun menu to start the installation wizard. (1) Enter a different installation path or click Install to use the - Asus S1A | S1A Notebook English Software installation Manual - Page 50
50 Screen Saver - Asus S1A | S1A Notebook English Software installation Manual - Page 51
Notebook PC Software Reference Screens will vary depending on your operating system but the contents should be the same. - Asus S1A | S1A Notebook English Software installation Manual - Page 52
55 Display Settings for Windows XP 56 Display Properties ...56 LAN Driver 61 Joining a Domain or Workgroup (Windows ME 62 Viewing Your Network ...63 Joining a Domain or Workgroup (Windows XP 63 Viewing Your Network ...65 Synaptics TouchPad - Asus S1A | S1A Notebook English Software installation Manual - Page 53
Updating Your BIOS ...94 Resetting Your BIOS ...94 ASUS PC Probe 95 Welcome to ASUS PC Probe 96 Starting ASUS PC Probe 96 Using ASUS PC Probe Monitoring 97 ASUS PC Communication Regulations 109 FCC Regulations ...109 FCC Part 68 Requirements 109 Modem Declaration Of Conformity 110 Canadian Department - Asus S1A | S1A Notebook English Software installation Manual - Page 54
54 - Asus S1A | S1A Notebook English Software installation Manual - Page 55
VGA Driver VGA Driver Topics Covered: Display Properties and Settings Screens will vary depending on your operating system but the contents should be the same. 55 - Asus S1A | S1A Notebook English Software installation Manual - Page 56
, drivers, and technical support that should be used in place of Intel's because this Notebook PC's technical support works directly with Intel to provide you complete services for your Notebook PC. Find technical support and warranty information on the inside cover of the User's Manual or - Asus S1A | S1A Notebook English Software installation Manual - Page 57
Display Settings for Windows XP (Cont') VGA Driver Devices (Notebook) Color You can get to this screen by selecting Graphics Properties... from the taskbar icon or pressing the hot keys [ALT CTRL F12]. - Asus S1A | S1A Notebook English Software installation Manual - Page 58
Display Settings for Windows XP (Cont') VGA Driver Schemes Scheme Example: Increase brightness and launch Media Player. On the Schemes page, you can also save "Video Modes" (resolution and color) and launch an - Asus S1A | S1A Notebook English Software installation Manual - Page 59
can change or disable this function if it interferes with another software's hot keys. Accelerator: You can see the current graphics mode and all the supported graphics modes. Drivers: View information about the graphics drivers. Notebook: (see next page) View Report: (see next page) 59 - Asus S1A | S1A Notebook English Software installation Manual - Page 60
View Report The Notebook page shows you graphics features that are supported by this Notebook PC. The Report page allows you export information about your graphics driver to a text file so that you can include it in technical support requests or for your own information. Click the link to access - Asus S1A | S1A Notebook English Software installation Manual - Page 61
LAN Settings LAN Driver Topics Covered: Joining a Domain or Workgroup Screens will vary depending on your operating system but the contents should be the same. 61 - Asus S1A | S1A Notebook English Software installation Manual - Page 62
ME) Use the tabs for other network settings. Viewing Your Network Double click on the Network driver to make logon settings. Identification is necessary to use the network browser. Enter a workgroup as instructed by your network administrator or try using the name of your domain. All servers may - Asus S1A | S1A Notebook English Software installation Manual - Page 63
Configuring the Network Device Joining a Domain or Workgroup (Windows XP) LAN Settings (1) Click Start and My Computer. (2) Click View system information. (3) Your computer name, workgroup or domain information is shown here. Click Change to view options. You cannot use spaces or symbols in the - Asus S1A | S1A Notebook English Software installation Manual - Page 64
Configuring the Network Device Joining a Domain or Workgroup (Windows XP) (Cont') LAN Settings (4a) Domain: The primary server in the domain will perform routing functions and security verifications for your computer. Select Domain and enter an existing domain you wish to join. NOTE: After - Asus S1A | S1A Notebook English Software installation Manual - Page 65
LAN Settings Configuring the Network Device Joining a Domain or Workgroup (Windows XP) (Cont') (5) After you restart your computer, you should see some contents through Entire Network. Viewing Your Network (6) Clicking on "My Network Places" will display networks which you have installed - Asus S1A | S1A Notebook English Software installation Manual - Page 66
66 LAN Settings - Asus S1A | S1A Notebook English Software installation Manual - Page 67
TouchPad Synaptics TouchPad Topics Covered: Overview of the TouchPad Scrolling Properties Page Tap Zones Properties Page More Features Properties Page Button Actions Properties Page Touch Properties Page Edge Motion Properties Page Frequently Asked Questions Screens will vary depending on your - Asus S1A | S1A Notebook English Software installation Manual - Page 68
TouchPad Overview of Synaptics® TouchPad Features Your Synaptics TouchPad is much more powerful than an old-fashioned mouse. In addition to providing all the features of an ordinary mouse, your TouchPad allows you to: • Tap on the Pad Instead of Pressing the Buttons • Drag Icons, Windows and Other - Asus S1A | S1A Notebook English Software installation Manual - Page 69
that you can assign to the buttons and tap zones. The following actions are provided as built-in features with the Synaptics TouchPad device driver. Additional actions might be available if you have installed any third-party TouchPad Plug-In software. • Jump to the Start Button. This action causes - Asus S1A | S1A Notebook English Software installation Manual - Page 70
accidentally brushing the surface of the TouchPad with your palm or another part of your hand. The results of this contact can be observed Documents Note that zooming and panning only work in applications that support the Microsoft Intellimouse. With Intellimouse aware applications, you can zoom and - Asus S1A | S1A Notebook English Software installation Manual - Page 71
the presence and location of your finger. To get the most out of your TouchPad, be sure that the TouchPad driver software is installed. If the Synaptics TouchPad driver is properly installed, the Mouse Properties dialog will include several TouchPad tabs along the top in addition to the standard - Asus S1A | S1A Notebook English Software installation Manual - Page 72
description. You can adjust the size of each zone by dragging one of the black resize handles on the TouchPad map. If you are having trouble activating the Virtual Scrolling feature, you might want to try making the scroll zones wider. If you find that scrolling sometimes gets activated when you - Asus S1A | S1A Notebook English Software installation Manual - Page 73
The Synaptics TouchPad driver may also control other pointing devices attached to your system. If the Synaptics TouchPad driver is controlling more the text Enable Tap Zones. An unchecked box means that all taps on every part of the TouchPad surface will have left-click behavior. 2. To change an - Asus S1A | S1A Notebook English Software installation Manual - Page 74
TouchPad More Features Properties Page The More Features properties page allows you to control the following features of you Synaptics TouchPad: Stop Pointer at Window Borders This feature constrains the pointer to stay inside the active window. When you try to move the pointer outside the window, - Asus S1A | S1A Notebook English Software installation Manual - Page 75
TouchPad Button Actions Properties Page The Button Actions properties page allows you to customize the physical buttons of your TouchPad. Customizing Button Assignments You can customize the TouchPad buttons in the same way that you customize the tap zones. To Customize: Each button has a text box - Asus S1A | S1A Notebook English Software installation Manual - Page 76
TouchPad Touch Properties Page The Touch properties page allows you to customize the tap response and sensitivity of your TouchPad. Taps Check the appropriate boxes in the Taps section of the Touch Properties Page for the tapping capabilities that you prefer: • Tap to Click • Tap and Drag • Locking - Asus S1A | S1A Notebook English Software installation Manual - Page 77
description. You can adjust the size of each zone by dragging one of the black resize handles on the TouchPad map. If you are having trouble activating the Edge Motion feature, you might want to try making the edge zones wider. Customizing Edge Motion Speed During Edge Motion, the speed at - Asus S1A | S1A Notebook English Software installation Manual - Page 78
thumb is only "allowed" to come to rest at one or two positions along the scroll bar! In these cases, even if you were to manually drag the scroll thumb with the pointer, you would find that it would "jump" to a final location when you released it. Virtual Scrolling, unfortunately, cannot - Asus S1A | S1A Notebook English Software installation Manual - Page 79
TouchPad Q: When I press and hold the shift key or the control key (CTRL), the pointer movement is either very slow or restricted to move only horizontally or only vertically. What is happening? A: The shift keys and the control keys are special and are used for various things, such as selecting - Asus S1A | S1A Notebook English Software installation Manual - Page 80
80 - Asus S1A | S1A Notebook English Software installation Manual - Page 81
PC-cillin 2000 PC-cillin 2000 Topics Covered: PC-cillin 2000 Features What's New in PC-cillin 2000 Test Virus What is a Computer Virus? How Viruses Spread Virus Writers Screens will vary depending on your operating system but the contents should be the same. 81 - Asus S1A | S1A Notebook English Software installation Manual - Page 82
or above or Eudora Pro 4.0 or above email clients, scan your email message attachments as they are being downloaded from the POP3 email server. • Manually scan message attachments in your local Outlook folders No Limits Of course, if you're a person who likes to customize your software, there is no - Asus S1A | S1A Notebook English Software installation Manual - Page 83
types of drives in addition to conventional hard disk drives: CD-ROM, CD-R, CD-RW, PD, FDD, DVD, ZIP and LS120. • PCSCAN Command Line Scanner Supports Pattern Files Larger Than 1.44 MB: Due to the large number of known computer viruses that have been identified, the virus pattern file is now - Asus S1A | S1A Notebook English Software installation Manual - Page 84
, disk space, slowing network traffic and generally degrading performance. Besides, virus code is often buggy and can also be the source of mysterious system problems that take weeks to understand. So, whether it was written to be harmful or not, a virus on your system can lead to instability and - Asus S1A | S1A Notebook English Software installation Manual - Page 85
PC-cillin 2000 How Viruses Spread There are many ways for a virus to enter your system: • Email attachments • World Wide Web (WWW) sites • FTP traffic from the Internet (file downloads) • Shared network files & network traffic in general • Demonstration software • Pirated software • Shrink-wrapped, - Asus S1A | S1A Notebook English Software installation Manual - Page 86
86 - Asus S1A | S1A Notebook English Software installation Manual - Page 87
Hotkey Utility Topics Covered: Hotkey Utility Buttons Hotkey Actions Adding a Program to Run Screens will vary depending on your operating system but the contents should be the same. 87 Hotkey Utility - Asus S1A | S1A Notebook English Software installation Manual - Page 88
Hotkey Utility Buttons Add a Hotkey Delete a Hotkey Edit Hotkey Enable all Hotkeys The functions of the buttons located on the left side of the program window are labeled here. Disable all Hotkeys Delete all Hotkeys Delete a Hotkey Highlight a Hotkey and click this button to delete it from the - Asus S1A | S1A Notebook English Software installation Manual - Page 89
Hotkey Utility (Cont') Enable all Hotkeys Enables all Hotkeys by placing check marks in front of the Hotkeys in the current category. Hotkey Utility Disable all Hotkeys Disables all Hotkeys by removing check marks from the front of the Hotkeys in the current category. Hotkey Actions Actions - Asus S1A | S1A Notebook English Software installation Manual - Page 90
Actions Descriptions Examples (of action) Move Window To Below: Moves the active window down between 1-50 steps Extend Window From Left: Stretches the active window left between 1-50 steps Extend Window From Up: Stretches the active window up between 1-50 steps Extend Window From Right: - Asus S1A | S1A Notebook English Software installation Manual - Page 91
Actions Minimize Window: Maximize Window: Show Normal Size: Restore: Log Off: Shut Down: Reboot: Descriptions Examples (of action) Minimizes the active window Maximizes the active window Shows the active window in normal size (user adjustable) Restores a minimized window to its previous size. - Asus S1A | S1A Notebook English Software installation Manual - Page 92
Hotkey Utility (Cont') Adding a Program to Run To add a Hotkey to run a program follow the steps below. Add a Hotkey (1) Click Add a Hotkey button. (3) Choose Run Program in this pull down menu. (2) Type a key or key combination here. (4) Choose an executable file using explorer. Hotkey - Asus S1A | S1A Notebook English Software installation Manual - Page 93
Windows Flash Utility (WINFLASH) Topics Covered: Updating Your BIOS Resetting Your BIOS Screens will vary depending on your operating system but the contents should be the same. 93 WINFLASH - Asus S1A | S1A Notebook English Software installation Manual - Page 94
. Click Exit when done. You need to restart your Notebook PC and "reset your BIOS". See instructions below. Resetting Your BIOS If you ever hear "reset your BIOS", it entails pressing [F2] on bootup to enter BIOS setup and selecting Load Setup Defaults, and then Exit Saving Changes on the "Exit - Asus S1A | S1A Notebook English Software installation Manual - Page 95
PC Probe ASUS PC Probe Topics Covered: Starting ASUS PC Probe Using PC Probe Monitoring ASUS PC Probe Task Bar Icon Screens will vary depending on your operating system but the contents should be the same. 95 - Asus S1A | S1A Notebook English Software installation Manual - Page 96
computer, such as hard disk space, memory usage, and CPU type, CPU speed, and internal/external frequencies through the DMI Explorer. Starting ASUS PC Probe If the ASUS Probe icon (magnifying glass) is not shown on the taskbar (see below), click the Windows Start button, point to Programs, and then - Asus S1A | S1A Notebook English Software installation Manual - Page 97
PC Probe Using ASUS PC Probe Monitoring Monitoring Monitor Summary Shows a summary of the items being monitored. Temperature Monitor Shows the PC's temperature. Settings Lets you set threshold levels - Asus S1A | S1A Notebook English Software installation Manual - Page 98
Icon Right clicking the PC Probe icon will bring up a menu to open or exit ASUS PC Probe and pause or resume all system monitoring. When the ASUS PC Probe senses a problem with your PC, portions of the ASUS PC Probe icon changes to red and the PC speaker makes clicking noises. NOTE: PC - Asus S1A | S1A Notebook English Software installation Manual - Page 99
Check Mail Utility Check Mail Utility Topics Covered: Check Mail Quick Setup Check Mail Startup Screens will vary depending on your operating system but the contents should be the same. 99 - Asus S1A | S1A Notebook English Software installation Manual - Page 100
Check Mail Utility Check Mail Quick Setup The support CD provided with this Notebook PC allows you to install Check Mail Utility to monitor and notify you of incoming email messages waiting in your - Asus S1A | S1A Notebook English Software installation Manual - Page 101
IDE Swap Utility Topics Covered: IDE Swap Introduction Using the AiBox IDE Swap Utility Screens will vary depending on your operating system but the contents should be the same. 101 - Asus S1A | S1A Notebook English Software installation Manual - Page 102
. This utility is also used to disable the device drivers when you want to remove the AiBox or eject a module device. WARNING: If you remove the AiBox or module device without stopping the service, it can cause your Notebook PC to crash and/or lose data. Using the AiBox Action Attaching While - Asus S1A | S1A Notebook English Software installation Manual - Page 103
Stopping the AiBox Before Removing (Windows 2000) IDE Swap Utility When you double click on the icon on the taskbar, this screen will show. Click STOP before disconnecting the AiBox from the Notebook PC. Click OK to confirm. Instead of double clicking, you can left click once and then click the - Asus S1A | S1A Notebook English Software installation Manual - Page 104
104 IDE Swap Utility - Asus S1A | S1A Notebook English Software installation Manual - Page 105
Power Gear Topics Covered: Benefits of Power Gear Power Gear Interface Power Gear Configuration Power Gear Screens will vary depending on your operating system but the contents should be the same. 105 - Asus S1A | S1A Notebook English Software installation Manual - Page 106
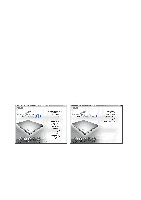
Power Gear Benefits of Power Gear Power Gear gives you control over power consumption items by allowing you to instantly "shift" from one power consumption scheme to another. The four preferences or "gears" are shown below. You can change or "shift" gears by using the Power Gear button or by using - Asus S1A | S1A Notebook English Software installation Manual - Page 107
Power Gear Configuration Double click an item to bring up a menu of selections and click on a value to change. To save, select "Save Configuration" form the "File" pull-down menu. If you did not save, you will be prompted to when you exit. Maximum Performance High Performance Power Gear Medium - Asus S1A | S1A Notebook English Software installation Manual - Page 108
Power Gear Configuration (Cont') System Standby Timer Display Panel Brightness Power Gear Display Panel Off Timer Hard Drive Off Timer 108 - Asus S1A | S1A Notebook English Software installation Manual - Page 109
statements carefully before installing your modem. FCC Part 68 Requirements This equipment complies with Part 68 of the FCC Rules. On the maintain uninterrupted service. If you experience trouble with this equipment, please contact the manufacturer at the address given in this manual. The telephone - Asus S1A | S1A Notebook English Software installation Manual - Page 110
for a Class B digital device, pursuant to Part 15 of the FCC Rules. These limits are installed and used in accordance with the instructions, may cause harmful interference to radio communications inside wiring associated with a single line individual service may be extended by means of a telephone
-
 1
1 -
 2
2 -
 3
3 -
 4
4 -
 5
5 -
 6
6 -
 7
7 -
8
-
9
-
10
-
11
-
12
-
13
-
14
-
15
-
16
-
17
-
18
-
19
-
20
-
21
-
22
-
23
-
24
-
25
-
26
-
27
-
28
-
29
-
30
-
31
-
32
-
33
-
34
-
35
-
36
-
37
-
38
-
39
-
40
-
41
-
42
-
43
-
44
-
45
-
46
-
47
-
48
-
49
-
50
-
51
-
52
-
53
-
54
-
55
-
56
-
57
-
58
-
59
-
60
-
61
-
62
-
63
-
64
-
65
-
66
-
67
-
68
-
69
-
70
-
71
-
72
-
73
-
74
-
75
-
76
-
77
-
78
-
79
-
80
-
81
-
82
-
83
-
84
-
85
-
86
-
87
-
88
-
89
-
90
-
91
-
92
-
93
-
94
-
95
-
96
-
97
-
98
-
99
-
100
-
101
-
102
-
103
-
104
-
105
-
106
-
107
-
108
-
109
-
110
 |
 |

Notebook PC
Driver/Utility Setup and Reference
Product Name:
Notebook PC Support CD
Manual Revision:
1.00 E892
Release Date:
Dec 2001