Asus S550CA User's Manual for English Edition - Page 92
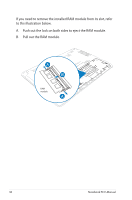
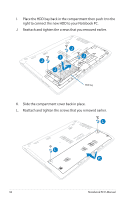
Pull the HDD bay to the left to disconnect the current HDD, from the Notebook PC
 |
View all Asus S550CA manuals
Add to My Manuals
Save this manual to your list of manuals |
Page 92 highlights
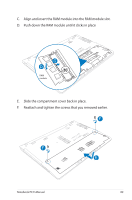
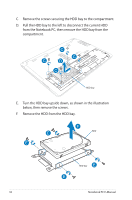
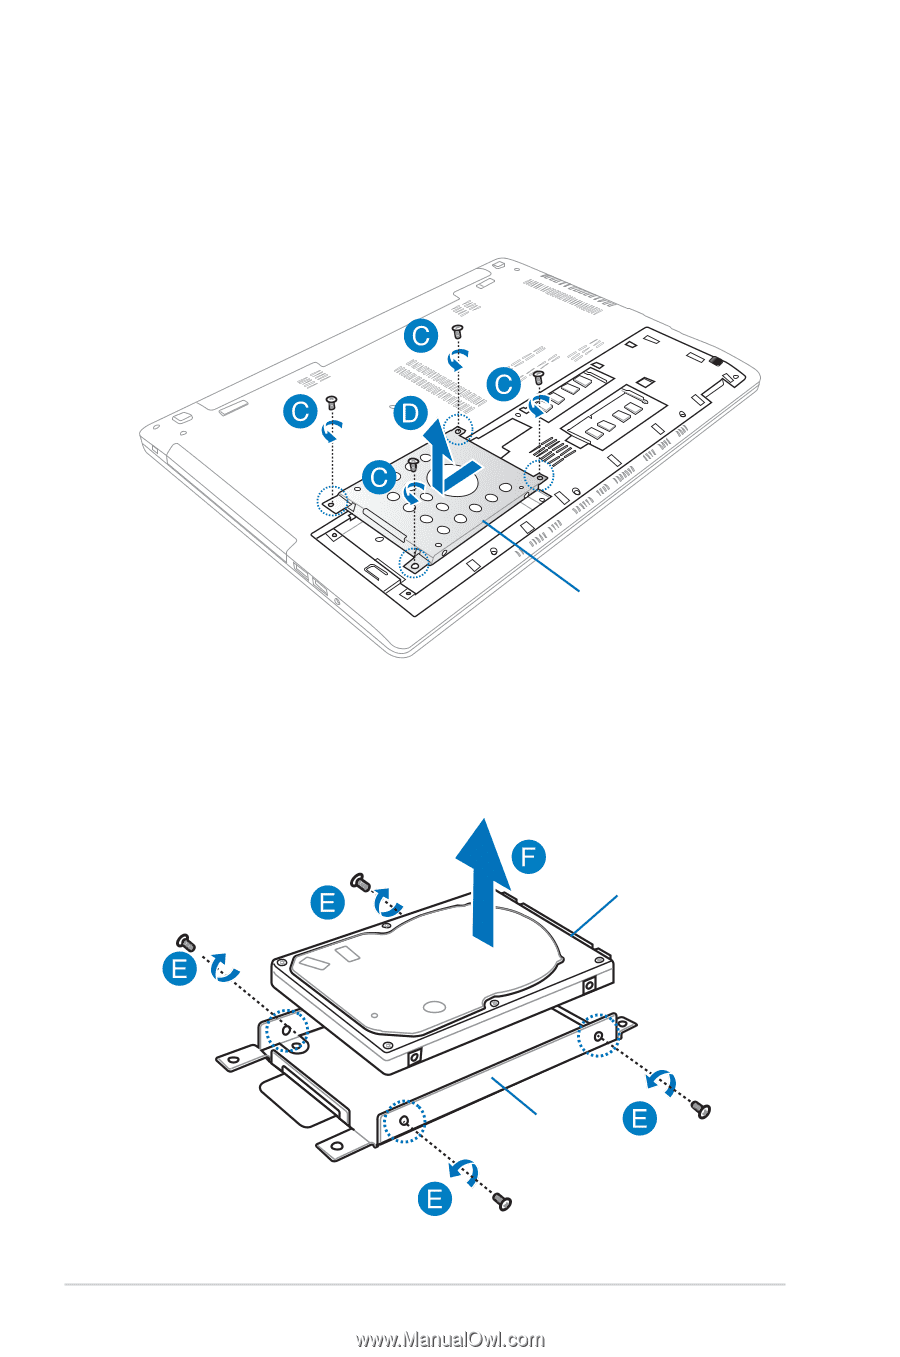
C. Remove the screws securing the HDD bay to the compartment. D. Pull the HDD bay to the left to disconnect the current HDD from the Notebook PC, then remove the HDD bay from the compartment. HDD bay E. Turn the HDD bay upside down, as shown in the illustration below, then remove the screws. F. Remove the HDD from the HDD bay. HDD HDD bay 92 Notebook PC E-Manual
-
 1
1 -
2
-
3
-
4
-
5
-
6
-
7
-
8
-
9
-
10
-
11
-
12
-
13
-
14
-
15
-
16
-
17
-
18
-
19
-
20
-
21
-
22
-
23
-
24
-
25
-
26
-
27
-
28
-
29
-
30
-
31
-
32
-
33
-
34
-
35
-
36
-
37
-
38
-
39
-
40
-
41
-
42
-
43
-
44
-
45
-
46
-
47
-
48
-
49
-
50
-
51
-
52
-
53
-
54
-
55
-
56
-
57
-
58
-
59
-
60
-
61
-
62
-
63
-
64
-
65
-
66
-
67
-
68
-
69
-
70
-
71
-
72
-
73
-
74
-
75
-
76
-
77
-
78
-
79
-
80
-
81
-
82
-
83
-
84
-
85
-
86
-
 87
87 -
 88
88 -
 89
89 -
 90
90 -
 91
91 -
 92
92 -
 93
93 -
 94
94 -
 95
95 -
 96
96 -
 97
97 -
98
-
99
-
100
-
101
-
102
-
103
-
104
-
105
-
106
-
107
-
108
-
109
-
110
-
111
-
112
-
113
-
114
-
115
-
116
-
117
-
118
 |
 |
9±
Notebook PC E-Manual
C.
Remove the screws securing the HDD bay to the compartment.
D.
Pull the HDD bay to the left to disconnect the current HDD
from the Notebook PC, then remove the HDD bay from the
compartment.
E.
Turn the HDD bay upside down, as shown in the illustration
below, then remove the screws.
F.
Remove the HDD from the HDD bay.
HDD bay
HDD bay
HDD