Asus V9-P8H67E User Manual - Page 14
Rear panel
 |
View all Asus V9-P8H67E manuals
Add to My Manuals
Save this manual to your list of manuals |
Page 14 highlights
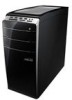
7. Power button. Press this button to turn the system on. 8. Optical disk drive eject button. Press this button to eject the optical disk drive tray. 9. Optical disk drive bay. There is an optical disk drive in this bay. 10. Optical disk drive bay (empty). Allows you to install an additional optical disk drive in this bay. 1.3 Rear panel The system rear panel includes the power connector and several I/O ports that allow convenient connection of devices. 1 20 2 19 3 SPDIF OUT 4 5 HDMI 18 DVI 6 17 7 16 4 15 8 9 10 14 11 12 13 Do NOT cover the rear vent , and the ambient temperature is limited up to 35oC to prevent the system from overheating. ASUS V-Series P8H67E 1-5
-
 1
1 -
2
-
3
-
4
-
5
-
6
-
7
-
8
-
 9
9 -
 10
10 -
 11
11 -
 12
12 -
 13
13 -
 14
14 -
 15
15 -
 16
16 -
 17
17 -
 18
18 -
 19
19 -
20
-
21
-
22
-
23
-
24
-
25
-
26
-
27
-
28
-
29
-
30
-
31
-
32
-
33
-
34
-
35
-
36
-
37
-
38
-
39
-
40
-
41
-
42
-
43
-
44
-
45
-
46
-
47
-
48
-
49
-
50
-
51
-
52
-
53
-
54
-
55
-
56
-
57
-
58
-
59
-
60
-
61
-
62
-
63
-
64
-
65
-
66
-
67
-
68
-
69
-
70
-
71
-
72
-
73
-
74
-
75
-
76
-
77
-
78
 |
 |

1-5
ASUS V-Series P8H67E
7.
Power button.
Press this button to turn the system on.
8.
Optical disk drive eject button.
Press this button to eject the optical disk drive tray.
9.
Optical disk drive bay.
There is an optical disk drive in this bay.
10.
Optical disk drive bay (empty).
Allows you to install an additional optical disk drive in
this bay.
1.3
Rear panel
The system rear panel includes the power connector and several I/O ports that allow
convenient connection of devices.
Do NOT cover the rear vent , and the ambient temperature is limited up to 35oC to prevent
the system from overheating.
SPDIF OUT
HDMI
DVI
1
2
3
4
5
6
4
9
10
8
13
12
11
14
15
16
17
18
19
20
7