Asus VS239N User Manual
Asus VS239N Manual
 |
View all Asus VS239N manuals
Add to My Manuals
Save this manual to your list of manuals |
Asus VS239N manual content summary:
- Asus VS239N | User Manual - Page 1
VS229D/N/NR/H/ HR/H-P VS239N/NR/H/HR/H-P LCD Monitor User Guide - Asus VS239N | User Manual - Page 2
3.3 Troubleshooting (FAQ 3-7 3.4 Supported Timing List 3-8 Copyright © 2012 ASUSTeK COMPUTER INC. All Rights Reserved. No part of this manual, purposes, without the express written permission of ASUSTeK COMPUTER INC. ("ASUS"). Product warranty or service will not be extended if: (1) the product - Asus VS239N | User Manual - Page 3
. This equipment generates, uses and can radiate radio frequency energy and, if not installed and used in accordance with manufacturer's instructions, may cause harmful interference to radio communications. However, there is no guarantee that interference will not occur in a particular installation - Asus VS239N | User Manual - Page 4
ensure satisfactory operation, in case use at a PC then it should use the monitor only with computers which have appropriate configured receptacles marked between 100-240V AC. • If you encounter technical problems with the monitor, contact a qualified service technician or your retailer. • The wall - Asus VS239N | User Manual - Page 5
hours. • When the screen becomes black or flashes, or cannot work anymore, contact your dealer or service center to fix it. Do not repair the screen by yourself! Conventions used in this guide WARNING: Information to prevent injury to yourself when trying to complete a task. CAUTION: Information to - Asus VS239N | User Manual - Page 6
sources for additional information and for product and software updates. 1. ASUS websites The ASUS websites worldwide provide updated information on ASUS hardware and software products. Refer to http://www.asus.com 2. Optional documentation Your product package may include optional documentation - Asus VS239N | User Manual - Page 7
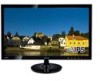
Series LCD monitor! The latest widescreen LCD monitor from ASUS provides a crisper, broader, and brighter display, plus your VS229/VS239 Series LCD monitor package for the following items: LCD monitor Monitor base Quick start guide 1 x Power cord 1 x VGA cable 1 x DVI cable (Only for some models) 1 - Asus VS239N | User Manual - Page 8
1.3 Assembling the monitor base To assemble the monitor base: 1. Attach the base to the arm and fix with the screw to join them tightly. You can easily tighten the screw by fingers. 2. Adjust the monitor to the angle that is most comfortable for you. We recommend that you cover the table surface - Asus VS239N | User Manual - Page 9
to decrease the value of the function selected or move to the next fuction. This is a hotkey to activate the QuickFit function designed for alignment. ASUS LCD Monitor VS229, VS239 1-3 - Asus VS239N | User Manual - Page 10
• The QuickFit function contains 7 pages of common grid patterns, paper sizes, and photo sizes. (Please refer to 1.5.3 QuickFit Function) 3. MENU Button: • Press this button to enter the OSD menu. • Press this button to enter/select the icon (function) highlighted while the OSD is activated. 4. • - Asus VS239N | User Manual - Page 11
for VESA Wall Mount 1 2 3 45 1. AC-In 2. HDMI-In (Available for model VS229H/HR/H-P,VS239H/HR/H-P only) 3. DVI-In (Available for model VS229N/NR/H/HR/H-P, VS239N/NR/H/HR/H-P only) 4. VGA-In 5. Earphone-Out (Available for model VS229H/HR/H-P,VS239H/HR/H-P only - Asus VS239N | User Manual - Page 12
1.5.3 QuickFit Function The QuickFit function contains three patterns: (1) Grid (2) Paper size (3) Photo size. 1. Grid patterns The grid patterns facilitate designers and users to organize content and layout on a page and achieve a consistent look and feel. Alignment Grid 2. Paper size(Available for - Asus VS239N | User Manual - Page 13
3. Photo size The various real photo sizes displayed in the QuickFit function provides photographers and other users to accurately view and edit their photos in real size on the screen. Photo 4x6, 3x5, 2x2 Photo 8x10, 5x7 ASUS LCD Monitor VS229, VS239 1-7 - Asus VS239N | User Manual - Page 14
UL Listed Wall Mount Bracket with minimum weight/ load according to the model listed in the specification table (Screw size: M4 x 10 mm). 2-1 Chapter 3: General Instruction - Asus VS239N | User Manual - Page 15
for you. • Hold the stand to prevent the monitor from falling while changing its angle. • You can adjust the monitor's angle from -5˚ to 20˚. -5 ~ 20 ASUS LCD Monitor VS229, VS239 2-2 - Asus VS239N | User Manual - Page 16
Mode Night View Mode sRGB Move Menu Exit • Scenery Mode: This is the best choice for scenery photo displaying with SPLENDID™ Video Enhancement. 3-1 Chapter 3: General Instruction - Asus VS239N | User Manual - Page 17
™ Video Enhancement. • sRGB: This is the best choice for viewing photos and graphics from PCs. In the Standard Mode, the Saturation, Skin Tone, Sharpness, and ASCR functions are not G (Green), and B (Blue) are userconfigurable; the adjusting range is from 0 ~ 100. ASUS LCD Monitor VS229, VS239 3-2 - Asus VS239N | User Manual - Page 18
input.) • ASCR: Select ON or OFF to enable or disable dynamic contrast ratio function. (ASCR: ASUS Smart Contrast Ratio. Disabled at "Standard Mode".) • Position: Adjust the horizontal postition (H-Position) and Select System Setup VGA DVI HDMI Move Menu Exit 3-3 Chapter 3: General Instruction - Asus VS239N | User Manual - Page 19
• DVI: Available for model VS229N/NR/H/HR/H-P, VS239N/NR/H/ HR/H-P only. • HDMI: Available for model VS229H/HR/H-P, VS239H/HR/H-P only. 5. System are English, French, German, Spanish, Italian, Dutch, Russian, Traditional Chinese, Simplified Chinese, and Japanese. ASUS LCD Monitor VS229, VS239 3-4 - Asus VS239N | User Manual - Page 20
• Information: Display the monitor information of Input Port, Resolution, H-freq., V-freq, and Model Name. • All Reset: Set to "Yes" to revert all settings to the factory default status. 3-5 Chapter 3: General Instruction - Asus VS239N | User Manual - Page 21
Phys. Dimension (WxHxD) Box Dimension (WxHxD) Net Weight (Esti.) Gross Weight (Esti.) Voltage Rating VS229D/N/H VS239N/H 21.5"W(54.6 cm) 23"W (58.4 cm) 1920 x 1080 (FHD) LED Backlight Technology 250cd/m2 1000:1 ≧178°(H) / ≧178°(V) 16.7 M 14ms VS229D/N: No VS229H: Yes VS229D/N: No - Asus VS239N | User Manual - Page 22
23"W (58.4 cm) 1920 x 1080 (FHD) LED Backlight Technology 250cd/m2 1000:1 ≧178°(H) / ≧178°(V) 16.7 M 5ms (G to Gσ) VS229NR:No VS229HR:Yes VS229NR:No VS229HR:Yes VS229NR:No VS229HR:Yes VS239NR:No VS239HR:Yes VS239NR:No VS239HR:Yes VS239NR:No VS239HR . 3-7 Chapter 3: General Instruction - Asus VS239N | User Manual - Page 23
Gross Weight (Esti.) Voltage Rating VS229H-P VS239H-P 21.5"W(54.6 cm) 23"W (58.4 cm) 1920 x 1080 (FHD) LED Backlight Technology 250cd/m2 1000:1 ≧178°(H) / ≧178°(V) 16.7 M 5ms kg AC 100~240V(Built-in) *Specifications subject to change without notice. ASUS LCD Monitor VS229, VS239 3-8 - Asus VS239N | User Manual - Page 24
3.3 Troubleshooting (FAQ) Problem Possible Solution Power LED is not ON • Press the button to check if the monitor is in the ON mode. • Check if the power cord is properly connected to the monitor and the power outlet. The power LED lights amber and • Check if the monitor and the computer are - Asus VS239N | User Manual - Page 25
/ IBM Modes Support Timing (D-SUB, 60Hz 67.5KHz 1920 x 1080 60Hz 66.587KHz HDMI 1.3 CEA-861 Formats Supported Timing (for HDMI input) Resolution Refresh Rate Horizontal Frequency 640 x 480P 59. be supported. For optimal resolution, we recommend that you choose a mode listed in the above
-
 1
1 -
 2
2 -
 3
3 -
 4
4 -
 5
5 -
 6
6 -
 7
7 -
8
-
9
-
10
-
11
-
12
-
13
-
14
-
15
-
16
-
17
-
18
-
19
-
20
-
21
-
22
-
23
-
24
-
25
 |
 |

VS229D/N/NR/H/
HR/H-P
VS239N/NR/H/HR/H-P
LCD Monitor
User Guide