Asus VW225TL User Guide
Asus VW225TL Manual
 |
View all Asus VW225TL manuals
Add to My Manuals
Save this manual to your list of manuals |
Asus VW225TL manual content summary:
- Asus VW225TL | User Guide - Page 1
VW195xL / VW202xL / VW225xL Series LCD Monitor User Guide MENU - Asus VW225TL | User Guide - Page 2
, without the express written permission of ASUSTeK COMPUTER INC. ("ASUS"). Product warranty or service will not be extended if: (1) the AS A COMMITMENT BY ASUS. ASUS ASSUMES NO RESPONSIBILITY OR LIABILITY FOR ANY ERRORS OR INACCURACIES THAT MAY APPEAR IN THIS MANUAL, INCLUDING THE PRODUCTS AND - Asus VW225TL | User Guide - Page 3
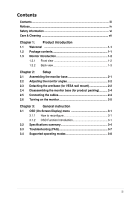
2.5 Connecting the cables 2-4 2.6 Turning on the monitor 2-5 Chapter 3: General instruction 3.1 OSD (On-Screen Display) menu 3-1 3.1.1 How to reconfigure 3-1 3.1.2 OSD Function Introduction 3-1 3.2 Specifications summary 3-4 3.3 Troubleshooting (FAQ 3-7 3.4 Supported operating modes 3-8 iii - Asus VW225TL | User Guide - Page 4
, if not installed and used in accordance with manufacturer's instructions, may cause harmful interference to radio communications. However, there technician for help. The use of shielded cables for connection of the monitor to the graphics card is required to assure compliance with FCC regulations. - Asus VW225TL | User Guide - Page 5
ergonomics and image quality in order to improve the working environment for the user and to reduce sight and strain problems. Important parameters are luminance, contrast, resolution, reflectance, colour rendition and image stability. Energy • Energy-saving mode after a certain time - beneficial - Asus VW225TL | User Guide - Page 6
cabinet. • To ensure satisfactory operation, use the monitor only with UL listed computers which have appropriate configured receptacles marked between 100-240V AC. • If you encounter technical problems with the monitor, contact a qualified service technician or your retailer. This symbol of the - Asus VW225TL | User Guide - Page 7
hours. • When the screen becomes black or flashes, or cannot work anymore, contact your dealer or service center to fix it. Do not repair the screen by yourself! Conventions used in this guide To make sure that you perform certain tasks properly, take note of the following symbols used throughout - Asus VW225TL | User Guide - Page 8
sources for additional information and for product and software updates. 1. ASUS websites The ASUS websites worldwide provide updated information on ASUS hardware and software products. Refer to http://www.asus.com 2. Optional documentation Your product package may include optional documentation - Asus VW225TL | User Guide - Page 9
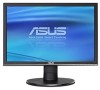
for purchasing the ASUS® VW195xL/VW202xL/VW225xL Series LCD monitor! The latest widescreen LCD monitor from ASUS provides a crisper contents Check your VW195xL/VW202xL/VW225xL Series LCD monitor package for the following items: • LCD monitor • Monitor base • Quick start guide • 1 x Power cord • 1 - Asus VW225TL | User Guide - Page 10
1.3 Monitor introduction 1.3.1 Front view MENU Base 1 2 3 4 5 1. Button: • Use this hotkey to switch from five video preset modes (Game Mode, Night View Mode, Scenery Mode, Standard Mode, - Asus VW225TL | User Guide - Page 11
from the bundled power cord. 3. DVI port. This 24-pin port is for PC (Personal Computer) DVI-D digital signal connection. 4. VGA port. This 15-pin port is for PC VGA connection. The VESA wall mount kit (100 mm x 100 mm) is purchased separately. ASUS VW195xL/VW202xL/VW225xL Series LCD Monitor 1-3 - Asus VW225TL | User Guide - Page 12
1-4 Chapter 1: Product introduction - Asus VW225TL | User Guide - Page 13
. A click sound shows that the base has been connected successfully. 3. Remove the monitor height adjustment lock. 2 3 1 The monitor height adjustment lock should NEVER be removed BEFORE you place the monitor VERTICALLY on a flat surface. ASUS VW195xL/VW202xL/VW225xL Series LCD Monitor 2-1 - Asus VW225TL | User Guide - Page 14
20º, swivel from left-to-right for 45º, and lift the monitor's height for about 70mm. -3º~20º 70mm 45º 45º 0º 2.3 Detaching the arm/base (for VESA wall mount) The detachable arm / base of the VW195xL/VW202xL/VW225xL Series LCD monitor is specially designed for VESA wall mount. To detach the arm - Asus VW225TL | User Guide - Page 15
Figure 1 Figure 2 Rubbers in the screw holes Two screws Arm/base Figure 3 We recommend that you cover the table surface with soft cloth to prevent damage to the monitor. ASUS VW195xL/VW202xL/VW225xL Series LCD Monitor 2-3 - Asus VW225TL | User Guide - Page 16
instructions: • To connect the audio cable: connect one end of the audio cable to the monitor's Audio-in port, the other end to the computer's Plug the VGA/DVI connector to the LCD monitor's VGA/DVI port. b. Connect the other end of the VGA/ DVI cable to your computer's VGA/ DVI port. c. Tighten - Asus VW225TL | User Guide - Page 17
or DVI mode from the Input Select item of the OSD functions. 2. Gather all the cables with the cable hook. Cable hook 2.6 Turning on the monitor Gently press the power button . See page 1-2 for the location of the power button. The power indicator lights up in blue to show that the - Asus VW225TL | User Guide - Page 18
2-6 Chapter 2: Setup - Asus VW225TL | User Guide - Page 19
™ Video Enhancement. • In the Standard Mode, the Satuation and Sharpness functions are not userconfigurable. • In the other modes, the sRGB function is not user-configurable. ASUS VW195xL/VW202xL/VW225xL Series LCD Monitor 3-1 - Asus VW225TL | User Guide - Page 20
function. • Contrast: the adjusting range is from 0 to 100. • ASCR: turns on/off the ASCR(ASUS Smart Contrast Ratio) function. • Sharpness: the adjusting range is from 0 to 100. • Saturation: the adjusting ) are userconfigurable; the adjusting range is from 0-100. 3-2 Chapter 3: General Instruction - Asus VW225TL | User Guide - Page 21
Dutch, Spanish, Russian, Traditional Chinese, Simplified Chinese, and Japanese. • Aspect Control: adjusts the aspect ratio to "Full" or "4:3". • Information: shows the monitor information. • Reset: "Yes" allows you to restore the default setting. ASUS VW195xL/VW202xL/VW225xL Series LCD Monitor 3-3 - Asus VW225TL | User Guide - Page 22
Panel Type TFT LCD Panel size Max. VESA wall mount Tilt Swivel Height adjustment Kensington lock Voltage rating Power consumption 19" (16:10) wide screen WXGA+ 1440 x 900 0.285mm 250cd cable, DVI cable, audio cable, power cord, quick start guide, warranty card Energy Star®, CB, CE, Gost-R, CCC, UL - Asus VW225TL | User Guide - Page 23
input Analog input USB 2.0 PC input Audio-in port Tilt Swivel Height adjustment Kensington lock Voltage rating Power consumption TFT LCD 20.1" wide screen WSXGA+ 1680 x 1050 0.258mm 250cd/ cable, USB cable (VW202BL only), power cord, quick start guide, warranty card Energy Star®, CB, CE, Gost-R, CCC - Asus VW225TL | User Guide - Page 24
(W x H x D) Weight (Esti.) Multi-languages Accessories Regulation approvals TFT LCD 22.0" (16:10) wide screen WSXGA+ 1680 x 1050 0.282mm 250cd/m2 Chinese, Japanese) VGA cable, DVI cable, audio cable, power cord, quick start guide, warranty card Energy Star®, CB, CE, Gost-R, CCC, UL, FCC, C-Tick - Asus VW225TL | User Guide - Page 25
is low • Ensure that the audio cable is properly connected to the monitor and the computer • Adjust the volume settings of both your monitor and computer. • Ensure that the computer sound card driver is properly installed and activated. ASUS VW195xL/VW202xL/VW225xL Series LCD Monitor 3-7 - Asus VW225TL | User Guide - Page 26
3.4 Supported operating modes Standard DOS VGA SVGA XGA SXGA VESA UXGA VESA Resolution Horizontal Frequency 00MHz 146.25MHz * Modes not listed in the table may not be supported. For optimal resolution, we recommend that you choose a mode listed in the table above. 3-8 Chapter 3: General
-
 1
1 -
 2
2 -
 3
3 -
 4
4 -
 5
5 -
 6
6 -
 7
7 -
8
-
9
-
10
-
11
-
12
-
13
-
14
-
15
-
16
-
17
-
18
-
19
-
20
-
21
-
22
-
23
-
24
-
25
-
26
 |
 |
VW195xL /
VW202xL /
VW225xL Series
LCD Monitor
User Guide
MENU