Asus W2Vc W2 User''s Manual for English Edition (E1965) - Page 44
Optical Drive slot-type on selected models
 |
View all Asus W2Vc manuals
Add to My Manuals
Save this manual to your list of manuals |
Page 44 highlights
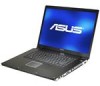
4 Using the Notebook PC Optical Drive (slot-type on selected models) Inserting an optical disc Optical disc slot Emergency eject Electronic eject Slot-type optical disc drive is shown here. Removing an optical disc 1 1. While the Notebook PC's power is ON, insert a disc slowly and the drive will receive the disc and bring it in. 2 3 1. While the Notebook PC's power is ON, push the electronic eject button (or use eject from Windows operating system). 2. Gently grab the disc by the edges and pull straight out. 44
-
 1
1 -
2
-
3
-
4
-
5
-
6
-
7
-
8
-
9
-
10
-
11
-
12
-
13
-
14
-
15
-
16
-
17
-
18
-
19
-
20
-
21
-
22
-
23
-
24
-
25
-
26
-
27
-
28
-
29
-
30
-
31
-
32
-
33
-
34
-
35
-
36
-
37
-
38
-
 39
39 -
 40
40 -
 41
41 -
 42
42 -
 43
43 -
 44
44 -
 45
45 -
 46
46 -
 47
47 -
 48
48 -
 49
49 -
50
-
51
-
52
-
53
-
54
-
55
-
56
-
57
-
58
-
59
-
60
-
61
-
62
-
63
-
64
-
65
-
66
-
67
-
68
-
69
-
70
-
71
-
72
 |
 |

44
4
Using the Notebook PC
Optical Drive (slot-type on selected models)
Inserting an optical disc
2.
Gently grab the disc by the edges and pull
straight out.
3
1.
While the Notebook PC’s power is ON, push
the electronic eject button (or use eject from
Windows operating system).
2
1.
While the Notebook PC’s power is ON, in-
sert a disc slowly and the drive will receive
the disc and bring it in.
1
Removing an optical disc
Slot-type optical disc drive is shown here.
Optical disc slot
Emergency eject
Electronic eject